Page 200 of 400

200 Controls in detailSliding/pop-up roof*�
Turn the SmartKey in the starter switch
to position1 or2.
Opening and closing the sliding/pop-up
roof
�
To open, close, raise or lower the
sliding/pop-up roof, move the switch
to resistance point in the required
direction1 to4.
Release the switch when the roof has
reached the desired position.Fully opening (Express-open) and
closing (Express-close) the
sliding/pop-up roof
�
To open, close, raise or lower the
sliding/pop-up roof, move the switch
past the resistance point in the
required direction1 to4 and
release.
The sliding/pop-up roof opens or
closes completely.
Stopping the sliding/pop-up roof
�
Move the switch in any direction.Opening and closing the sliding/pop-up
roof with the SmartKey
The power windows (
�page 198) will also
be opened or closed when you operate the
sliding/pop-up roof with the SmartKey .
�
Aim transmitter eye at the driver’s door
handle.
iYou can also open or close the
sliding/pop-up roof using the:�
SmartKey (summer opening/con-
venience feature) (
�page 200)
�
buttonO in the control panel of
the climate control (
�page 151) or
the automatic climate control*
(
�page 159)
�
buttone in the control panel of
the automatic climate control*
(�page 159)
iIf the movement of the sliding/pop-up
roof is blocked during the closing
procedure, the roof will stop and
reopen slightly.
Warning!
G
Never operate the windows or
sliding/pop-up roof if there is the possibility
of anyone being harmed by the opening or
closing procedure.
In the event that the procedure causes
potential danger, the procedure can be
immediately halted by releasing the
transmit button on the SmartKey. To reverse
direction of movement, press buttonŒ
for opening or‹ for closing.
Page 201 of 400
�
Press and hold buttonΠafter
unlocking the vehicle.
The windows and the sliding/pop-up
roof begin to open after approxi")
201 Controls in detail
Sliding/pop-up roof*
Opening (Summer opening feature)�
Press and hold buttonΠafter
unlocking the vehicle.
The windows and the sliding/pop-up
roof begin to open after approximately
one second.
�
Release theΠbutton to stop
procedure.Closing (Convenience feature)
�
Press and hold button‹ after
locking the vehicle.
The windows and the sliding/pop-up
roof begin to close after approximately
one second.
�
Release the‹ button to stop
procedure.
Make sure all side windows and the
sliding/pop-up roof are properly closed
before leaving the vehicle.
Synchronizing the sliding/pop-up roof
The power sliding/pop-up roof must be
resynchronized each time�
after the battery has been
disconnected.
�
after the sliding/pop-up roof has been
closed manually.
�
if the sliding/pop-up roof does not
open smoothly.
�
after a malfunction.
Synchronizing
�
Switch on ignition.
�
Press and hold the switch in
direction1 until the sliding/pop-up
roof is fully raised at the rear.
Hold the switch for approximately one
second.
The sliding/pop-up roof is adjusted.
Page 209 of 400

209 Controls in detail
Loading
Storage compartment under cargo compartment floor
To open cargo compartment floor�
Press handle1 on the recess.
�
Lift compartment cover.To close cargo compartment floor
�
Lower the cover and lock by applying
light pressure to handle1.
Retractable luggage cover and
partition net
The twin-reel roller blind comprises a lug-
gage cover and a partition net. It is mount-
ed on the backrest of the rear seat and can
also be used with backrest folded down.Partition net
Partition net with rear seats folded up
1Tab
2Eyelets on roof
�
Pull out upper blind (safety net) by
tabs1.
�
Engage it into eyelets on the roof2.
iThe compartment can be used to store
small, light or flat objects.
Warning!
G
If items are stored in the compartment,
make sure compartment is securely closed.
In an accident, during hard braking or sud-
den maneuvers, they could be thrown
around inside the vehicle, and cause injury
to vehicle occupants.
Warning!
G
To help avoid personal injury during a colli-
sion or sudden maneuver, always use parti-
tion net when transporting cargo.
Page 210 of 400
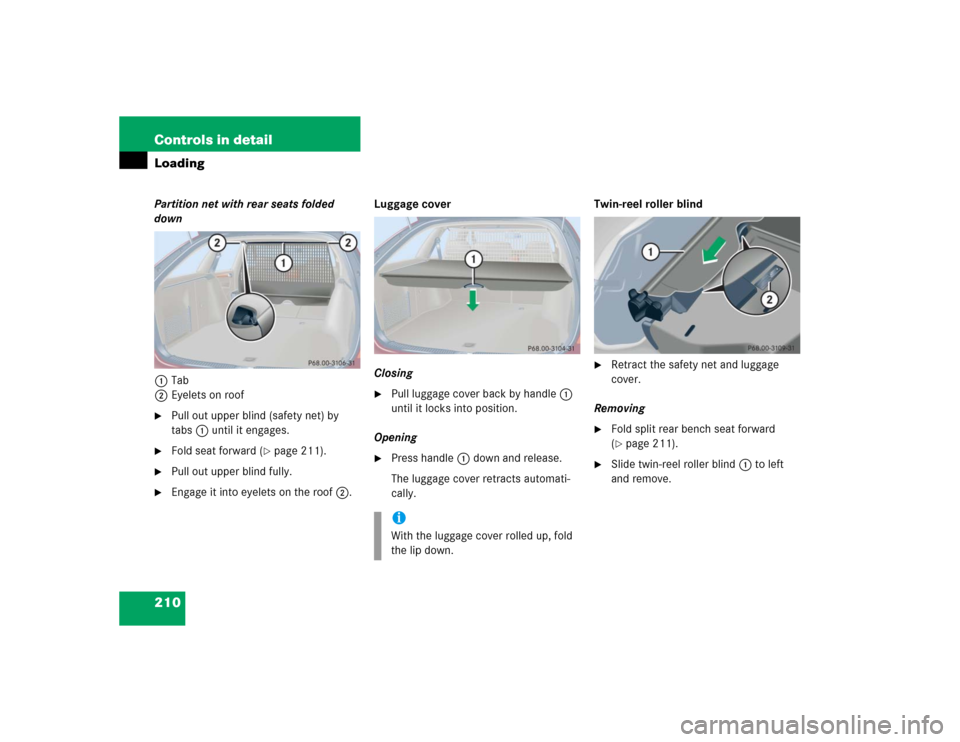
210 Controls in detailLoadingPartition net with rear seats folded
down
1Tab
2Eyelets on roof�
Pull out upper blind (safety net) by
tabs1 until it engages.
�
Fold seat forward (
�page 211).
�
Pull out upper blind fully.
�
Engage it into eyelets on the roof2.Luggage cover
Closing
�
Pull luggage cover back by handle1
until it locks into position.
Opening
�
Press handle1 down and release.
The luggage cover retracts automati-
cally.Twin-reel roller blind
�
Retract the safety net and luggage
cover.
Removing
�
Fold split rear bench seat forward
(�page 211).
�
Slide twin-reel roller blind1 to left
and remove.
iWith the luggage cover rolled up, fold
the lip down.
Page 211 of 400
211 Controls in detail
Loading
Installing�
Fold split rear bench seat forward.
�
Place twin-reel roller blind1 into right
and left guide rails2.
�
Slide towards right to the end stop.
Split rear bench seat
To expand the cargo compartment, you
can fold down the left and right rear seat
backrests.
The two sections can be folded down
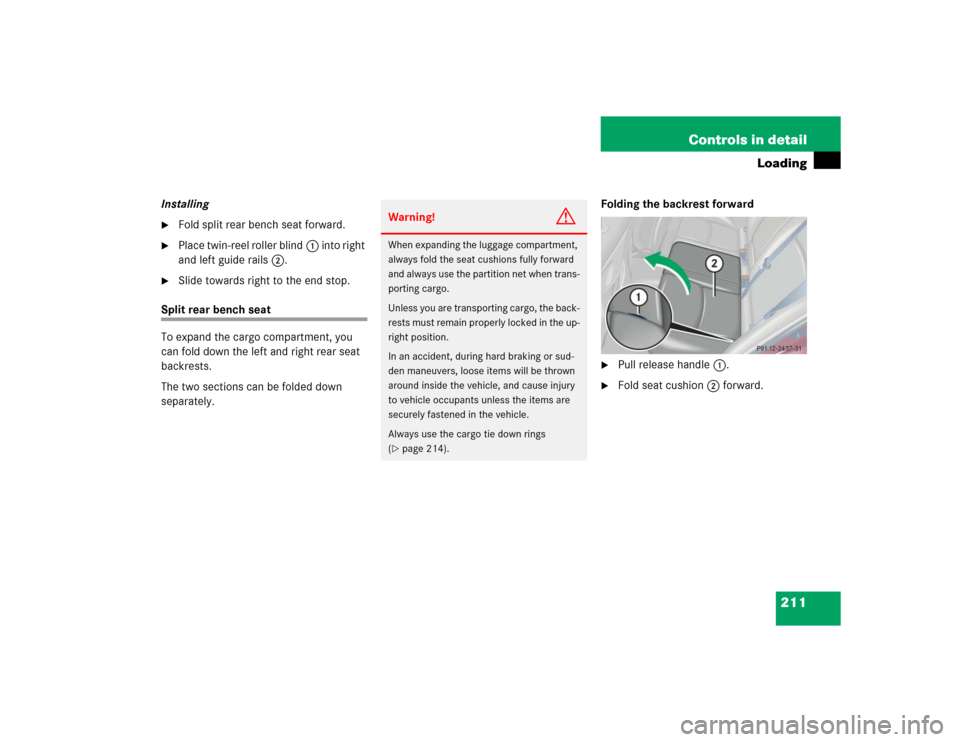
separately.Folding the backrest forward
�
Pull release handle1.
�
Fold seat cushion2 forward.
Warning!
G
When expanding the luggage compartment,
always fold the seat cushions fully forward
and always use the partition net when trans-
porting cargo.
Unless you are transporting cargo, the back-
rests must remain properly locked in the up-
right position.
In an accident, during hard braking or sud-
den maneuvers, loose items will be thrown
around inside the vehicle, and cause injury
to vehicle occupants unless the items are
securely fastened in the vehicle.
Always use the cargo tie down rings
(�page 214).
Page 212 of 400
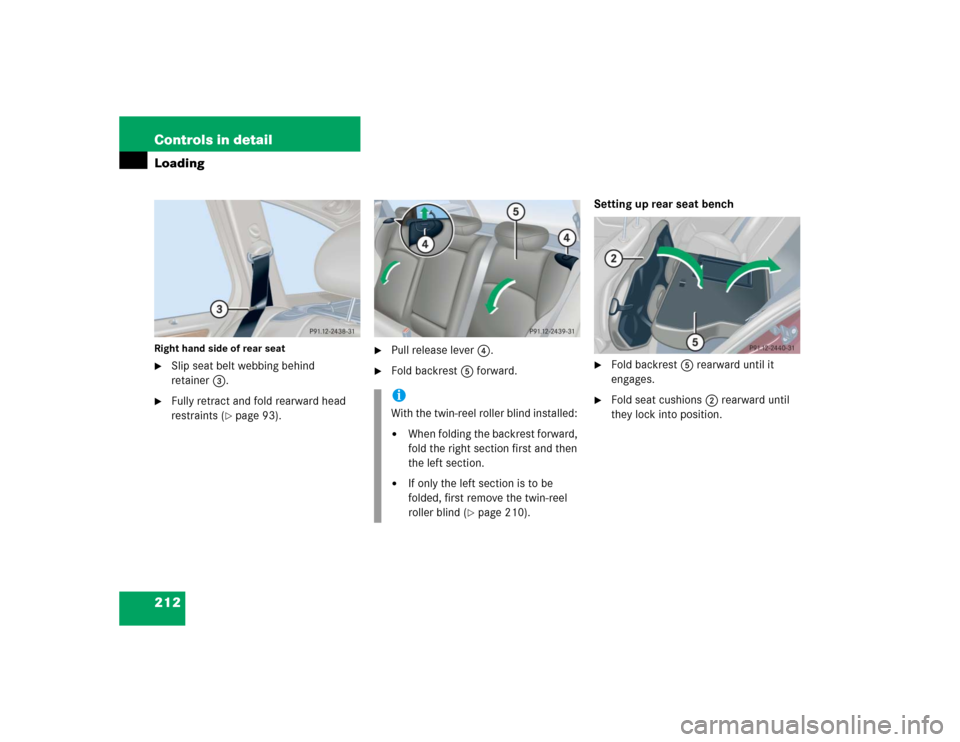
212 Controls in detailLoadingRight hand side of rear seat�
Slip seat belt webbing behind
retainer3.
�
Fully retract and fold rearward head
restraints (
�page 93).
�
Pull release lever4.
�
Fold backrest5 forward.Setting up rear seat bench
�
Fold backrest5 rearward until it
engages.
�
Fold seat cushions2 rearward until
they lock into position.
iWith the twin-reel roller blind installed: �
When folding the backrest forward,
fold the right section first and then
the left section.
�
If only the left section is to be
folded, first remove the twin-reel
roller blind (
�page 210).
Page 213 of 400

213 Controls in detail
Loading
If the backrest is not locked into position,
a red indicator6 will be visible.�
Check for secure locking by pushing
and pulling on the backrest.
Loading instructions
The total load weight including vehicle oc-
cupants and luggage/cargo should not ex-
ceed the vehicle capacity weight indicated
on the certification tag which can be found
on the left door pillar.
Warning!
G
If a red indicator is visible with the backrest
up, then the backrest is not properly locked
into position.
Always lock backrest in its upright position
when rear seat bench is occupied, or the ex-
tended cargo compartment is not in use.
Check for secure locking by pushing and
pulling on the backrest.
In an accident, during hard braking or sud-
den maneuvers, loose items will be thrown
around inside the vehicle, and cause injury
to vehicle occupants unless the items are
securely fastened in the vehicle.
To help avoid personal injury during a colli-
sion or sudden maneuver, exercise care
when transporting cargo.
Page 215 of 400

215 Controls in detail
Useful features
�Useful features
Interior storage spaces Glove box
1Glove box lid release
2Glove box
Opening the glove box
�
Pull lid release1.
The glove box lid opens downward.
Closing the glove box
�
Push lid up to close.Locking the glove box
�
Insert mechanical key (
�page 305)
into the glove box lock and turn it to
position2.
Unlocking the glove box
�
Turn mechanical key (
�page 305) in
the glove box lock to position1.
Warning!
G
To help avoid personal injury during a colli-
sion or sudden maneuver, exercise care
when stowing objects in the vehicle. Put lug-
gage or cargo in the cargo compartment if
possible. Do not pile luggage or cargo higher
than the seat backs.
Always use partition net when transporting
cargo. Partition net cannot secure hard or
heavy objects.
Parcel nets cannot secure hard or heavy ob-
jects.
Keep compartment lids closed. This will help
to prevent stored objects from being thrown
about and injuring vehicle occupants during
an accident.
iPrior to closing the glove box, close the
compartment for glasses first.