Page 163 of 243
156 NavigationDestination input�
Turn the right-hand rotary/push-button
v to highlight 1 or 2 and press to
confirm.
The list “Select Category” will appear.
�
Turn the right-hand rotary/push-button
v to highlight the desired category
and press to confirm.
A corresponding list will appear.
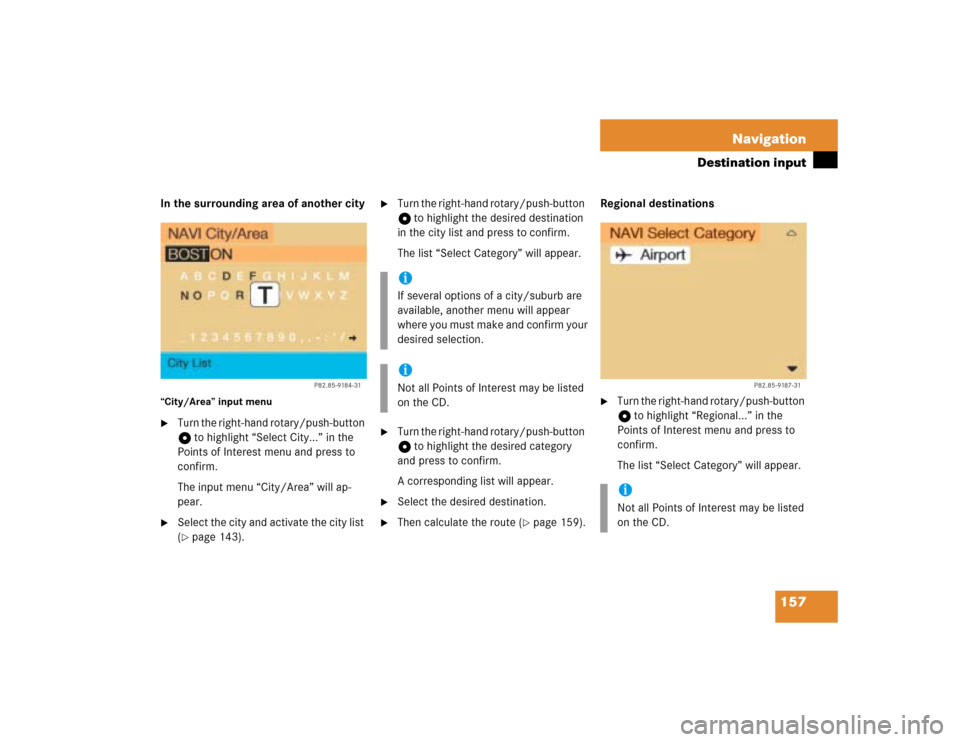
7Point of Interest entry with distance to
destination in miles (as the crow flies)
8Symbol for long entry
9Complete entry in a windowDisplay the entry in full in a window 9
�
Press u.
�
Press u again to remove 9.
Selecting the desired destination
�
Turn the right-hand rotary/push-button
v to highlight the entry in the selec-
tion list and press to confirm.
�
Then calculate the route (
�page 159).
iNot all Points of Interest may be listed
on the CD.
P82.85-9183-31
7
8
9
Page 164 of 243

157 Navigation
Destination input
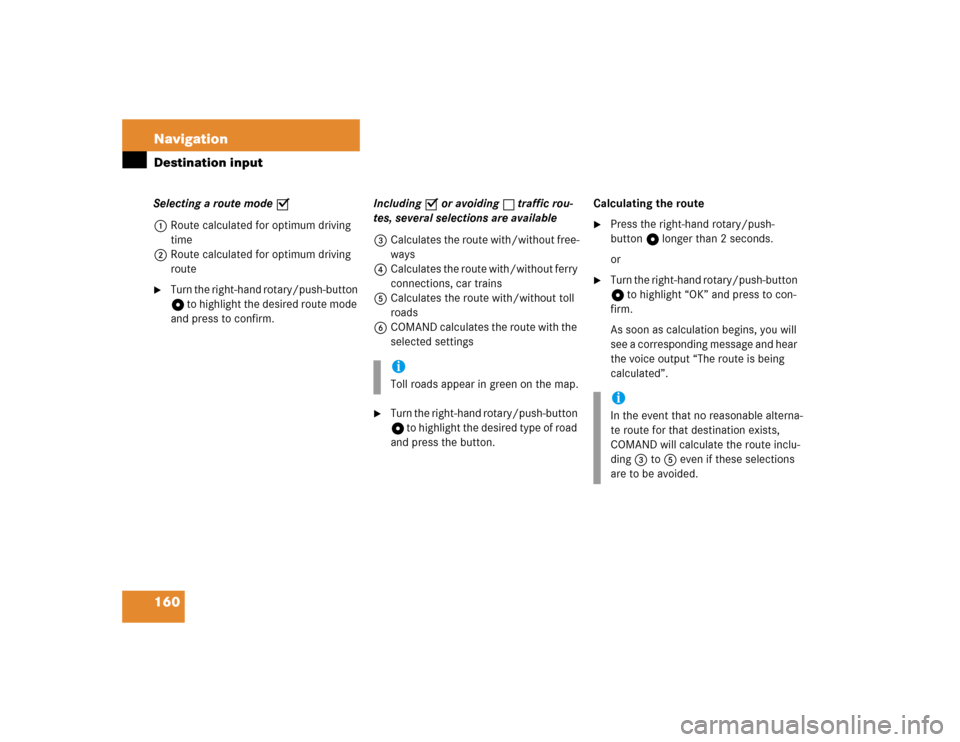
In the surrounding area of another city“City/Area” input menu�
Turn the right-hand rotary/push-button
v to highlight “Select City...” in the
Points of Interest menu and press to
confirm.
The input menu “City/Area” will ap-
pear.
�
Select the city and activate the city list
(�page 143).
�
Turn the right-hand rotary/push-button
v to highlight the desired destination
in the city list and press to confirm.
The list “Select Category” will appear.
�
Turn the right-hand rotary/push-button
v to highlight the desired category
and press to confirm.
A corresponding list will appear.
�
Select the desired destination.
�
Then calculate the route (
�page 159).Regional destinations
�
Turn the right-hand rotary/push-button
v to highlight “Regional...” in the
Points of Interest menu and press to
confirm.
The list “Select Category” will appear.
P82.85-9184-31
iIf several options of a city/suburb are
available, another menu will appear
where you must make and confirm your
desired selection.iNot all Points of Interest may be listed
on the CD.
iNot all Points of Interest may be listed
on the CD.
P82.85-9187-31
Page 165 of 243
158 NavigationDestination input�
Turn the right-hand rotary/push-button
v to highlight the desired category
and press to confirm.
An input menu, e.g. “Airport” will ap-
pear.
�
Select an entry (
�page 142) and then
activate the list.Activating the list
�
Press the right-hand rotary/push-
button v longer than 2 seconds.
or
�
Turn the right-hand rotary/push-button
v to highlight “List” and press to con-
firm.
The list will appear.
�
Turn the right-hand rotary/push-button
v to highlight the desired entry and
press to confirm.
�
Then calculate the route (
�page 159).
P82.85-9189-31
Page 166 of 243
159 Navigation
Destination input
This function allows you to display up to 12
destinations you last selected.
1Destination selected last
�
Turn the right-hand rotary/push-button
v to highlight “Last destinations...” in
the main destination input menu and
press to confirm.
The list “Last destinations...” will ap-
pear.
�
Turn the right-hand rotary/push-button
v to highlight the desired destination
and press to confirm.
�
Then calculate the route.First select the calculation mode and then
calculate your route.
Selecting calculation mode
COMAND calculates the route either as
the Fast Route 1 or Short Route 2 whe-
reby traffic routes 3, 4 and 5 can be in-
cluded or avoided (with several
selections).
Selecting the last destinations
P82.85-9190-31
1
Calculating a route
Page 167 of 243

160 NavigationDestination inputSelecting a route mode P
1Route calculated for optimum driving
time
2Route calculated for optimum driving
route�
Turn the right-hand rotary/push-button
v to highlight the desired route mode
and press to confirm.Including P or avoiding Q traffic rou-
tes, several selections are available
3Calculates the route with/without free-
ways
4Calculates the route with/without ferry
connections, car trains
5Calculates the route with/without toll
roads
6COMAND calculates the route with the
selected settings
�
Turn the right-hand rotary/push-button
v to highlight the desired type of road
and press the button.Calculating the route
�
Press the right-hand rotary/push-
button v longer than 2 seconds.
or
�
Turn the right-hand rotary/push-button
v to highlight “OK” and press to con-
firm.
As soon as calculation begins, you will
see a corresponding message and hear
the voice output “The route is being
calculated”.
iToll roads appear in green on the map.
iIn the event that no reasonable alterna-
te route for that destination exists,
COMAND will calculate the route inclu-
ding 3 to 5 even if these selections
are to be avoided.
Page 168 of 243
161 Navigation
Destination input
7Calculation method
8Destination
Cancel route calculation�
Turn the right-hand rotary/push-button
v to highlight “Cancel” and press to
confirm.
The main destination input menu will
appear.During the calculation, the symbol display
will appear after a few seconds.
9Calculation of route
aArrow indicating the direction to the
destination (as the crow flies)
bDistance to the destination (as the
crow flies)The route will be calculated. COMAND
identifies the road you are travelling on.
Position c now indicates the driving di-
rection.
You will e.g. hear the voice output “Please,
make the next right turn”.
P82.85-9192-31
78
P82.85-9194-31P82.85-9194-31
12
Page 174 of 243
167 Navigation
Route guidance
Activating the location map
If route guidance is active�
Turn the right-hand rotary/push-button
v in the selection menu “Destination
Info” to highlight “Location map” and
press to confirm.
The location map faces north (North-
up).
1Geographic longitude and latitude for
your current location
2Number of satellites received
3Scale used the last time the location
map was activated
4Current vehicle location in the center of
the screen
5Name of the street the vehicle is
currently travelling onAltering the map scale (
�page 176).
Switching back to the symbol or map dis-
play
�
Press * twice.
If route guidance is switched off
�
Press l.
The location map will appear.
�
Press l again to activate the main
destination input menu.iIf the location map appears after
COMAND has been switched on,
pressb to activate the main destina-
tion input menu.
Page 185 of 243
178 NavigationRoute guidanceYou can store a way point during route
guidance.
1Activate “Way Point” menu�
Turn the right-hand rotary/push-button
v to highlight 1 and press to con-
firm.
The “Way Point” menu will appear.
“Way Point” menu2Select a category
3Activates the main address menu
(
�page 141)
4Activates the “Points of Interest” selec-
tion menu (
�page 155)
5Activates the main destination memory
menu (
�page 192)
6Activates the “Coordinate Destination”
input menu (
�page 153)
�
Turn the right-hand rotary/push-button
v to highlight 2 to 6 and press to
confirm.
�
Select the desired way point.
�
Start route guidance.
Marking a way point