Page 64 of 243
57 Audio
CD operation
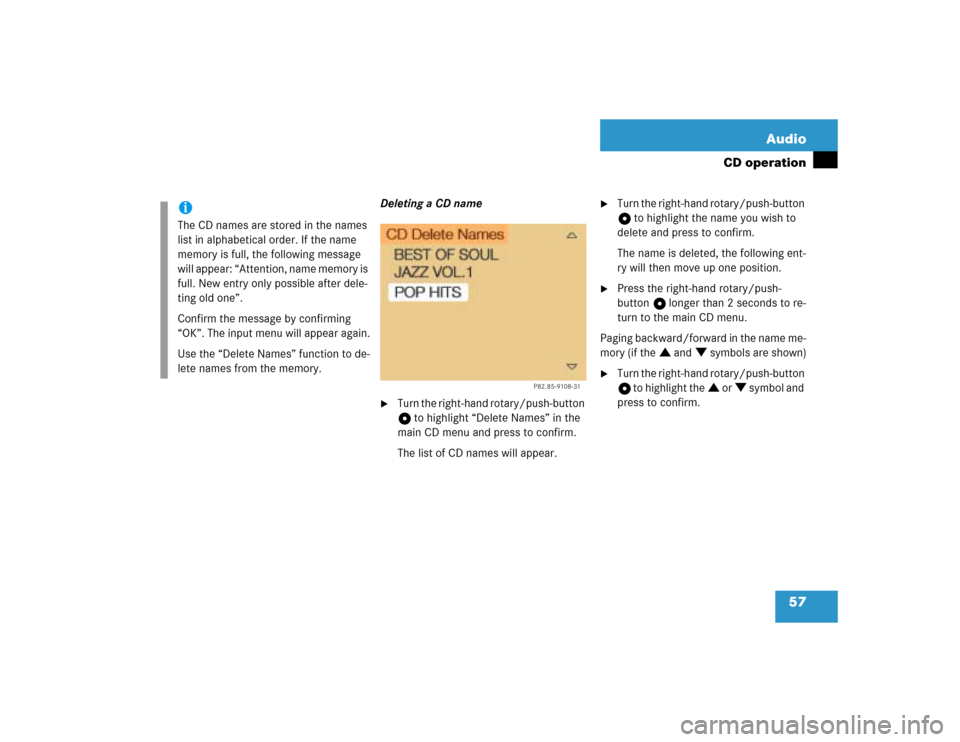
Deleting a CD name�
Turn the right-hand rotary/push-button
v to highlight “Delete Names” in the
main CD menu and press to confirm.
The list of CD names will appear.
�
Turn the right-hand rotary/push-button
v to highlight the name you wish to
delete and press to confirm.
The name is deleted, the following ent-
ry will then move up one position.
�
Press the right-hand rotary/push-
button v longer than 2 seconds to re-
turn to the main CD menu.
Paging backward/forward in the name me-
mory (if the : and ; symbols are shown)
�
Turn the right-hand rotary/push-button
v to highlight the : or ; symbol and
press to confirm.
iThe CD names are stored in the names
list in alphabetical order. If the name
memory is full, the following message
will appear: “Attention, name memory is
full. New entry only possible after dele-
ting old one”.
Confirm the message by confirming
“OK”. The input menu will appear again.
Use the “Delete Names” function to de-
lete names from the memory.
P82.85-9108-31
Page 71 of 243
64 AudioSound settings�
Turn the right-hand rotary/push-button
v to highlight “Sound“ in the main
menu for radio or CD operation and
press to confirm.
The main sound menu will appear dis-
playing the actual settings.For service sources
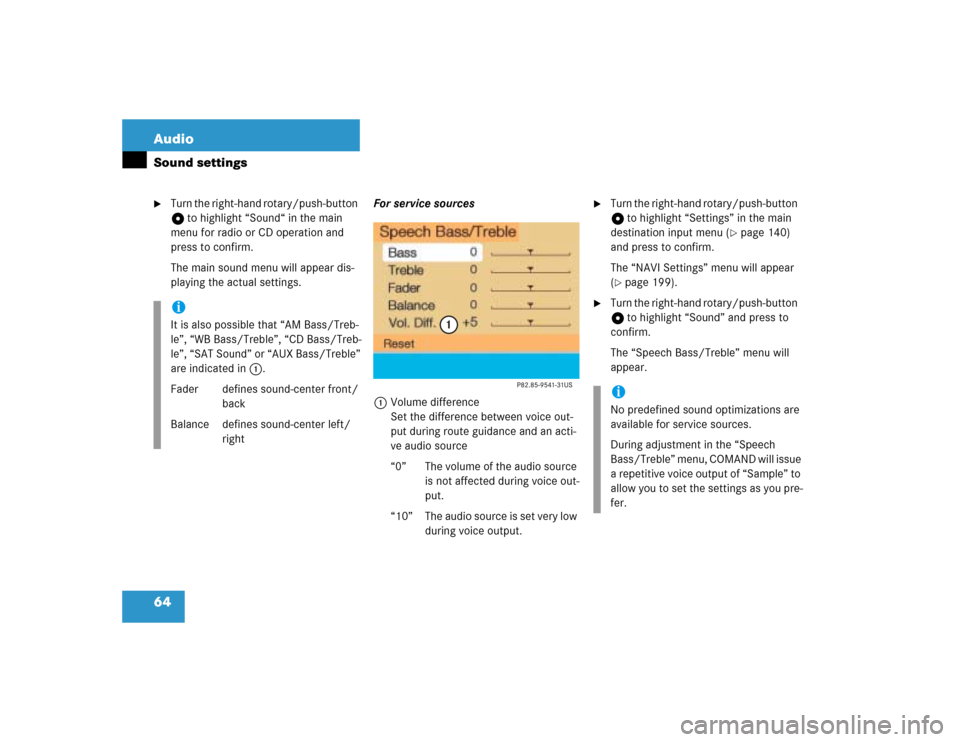
1Volume difference
Set the difference between voice out-
put during route guidance and an acti-
ve audio source
“0” The volume of the audio source
is not affected during voice out-
put.
“10” The audio source is set very low
during voice output.
�
Turn the right-hand rotary/push-button
v to highlight “Settings” in the main
destination input menu (
�page 140)
and press to confirm.
The “NAVI Settings” menu will appear
(
�page 199).
�
Turn the right-hand rotary/push-button
v to highlight “Sound” and press to
confirm.
The “Speech Bass/Treble” menu will
appear.
iIt is also possible that “AM Bass/Treb-
le”, “WB Bass/Treble”, “CD Bass/Treb-
le”, “SAT Sound” or “AUX Bass/Treble”
are indicated in 1.
Fader defines sound-center front/
back
Balance defines sound-center left/
right
iNo predefined sound optimizations are
available for service sources.
During adjustment in the “Speech
Bass/Treble” menu, COMAND will issue
a repetitive voice output of “Sample” to
allow you to set the settings as you pre-
fer.
Page 78 of 243
71 Satellite radio*
Satellite radio operation
Function
Page
1
Switching COMAND on
and off
12
2
Muting the satellite radio
audio (muting on/off)
75
3
Selecting a station via di-
rect channel entry�
in the main satellite
radio menu
�
in the satellite me-
mory preset
Ending scan function and
play a station
78
81
78
4
Activating the input
mode for channel num-
ber�
in the main satellite
radio menu
�
in the satellite me-
mory preset
78
81
5
Changing between sta-
tion name and channel
number
74
6
Return to previous menu
7
Turn to highlight a func-
tion or a menu field
Press to perform a func-
tion or access a subme-
nu
8
Adjusting the volume
14
9
Automatic tuning ascen-
ding/descending
Selecting a category in
alphabetical order as-
cending/descending
77
75
a
Switching to satellte ra-
dio operation
74
b
Color screen with main
radio menu
Function
Page
Page 85 of 243
78 Satellite radio*Satellite radio operationSelecting another station (within 8 se-
conds)�
Turn the right-hand rotary/push-
button v to highlight the desired stati-
on name and press to confirm.
Returning to the main satellite radio menu
or category list
�
Press *.
or
automatically after 8 seconds.Automatic station scan
The stations in the selected category can
be scanned in alphabetical order for 8 se-
conds each.
�
In the main satellite radio menu, press
the right-hand rotary/push-button v
to confirm “Scan”.
The scan function will begin, “Scan”
will appear in red lettering.
Ending scan function and playing a
station
�
Press the right-hand rotary/push-
button v again if you hear the desired
station.
The station selected will appear with
the station name. “Scan” will appear in
black lettering again.Station selection via direct channel
entry
1Input line
�
Press t.
Input line 1 will appear.
Page 86 of 243
79 Satellite radio*
Satellite radio operation
�
Enter the number of the channel you
wish to select, e.g. 76.
The channel you have selected will be-
gin to play. The corresponding station
name will appear, if name is available.
You can use the following functions:
�
Saving stations manually
�
Selecting a station from the Satellite
preset memory (
�page 80)
�
Selecting a station by entering the
channel number (
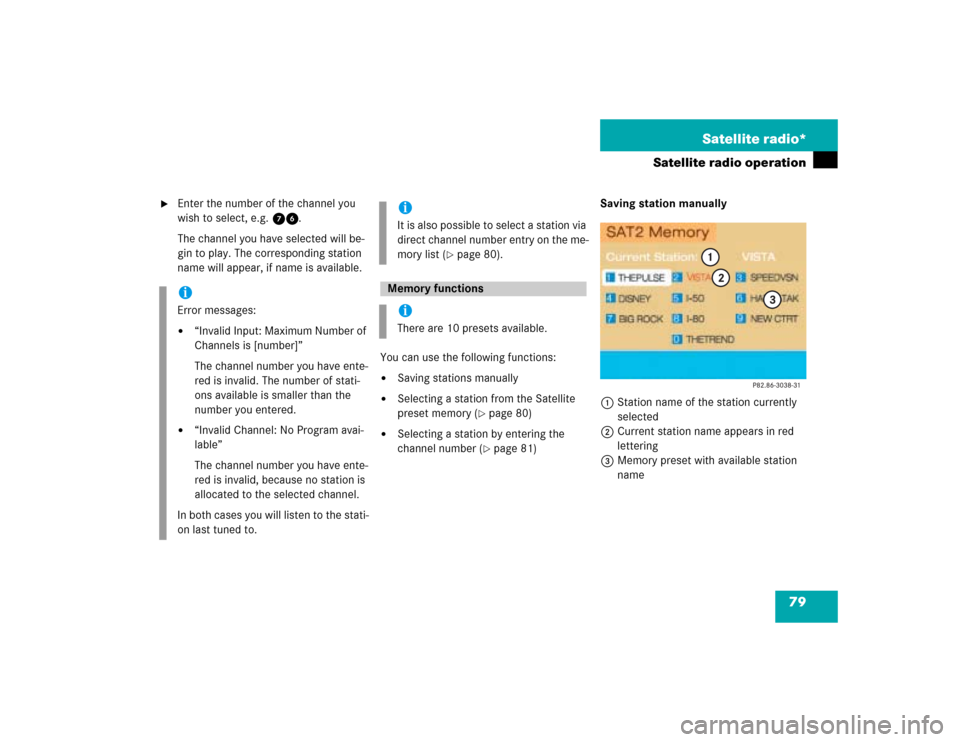
�page 81)Saving station manually
1Station name of the station currently
selected
2Current station name appears in red
lettering
3Memory preset with available station
name
iError messages:�
“Invalid Input: Maximum Number of
Channels is [number]”
The channel number you have ente-
red is invalid. The number of stati-
ons available is smaller than the
number you entered.
�
“Invalid Channel: No Program avai-
lable”
The channel number you have ente-
red is invalid, because no station is
allocated to the selected channel.
In both cases you will listen to the stati-
on last tuned to.
iIt is also possible to select a station via
direct channel number entry on the me-
mory list (
�page 80).
Memory functionsiThere are 10 presets available.
Page 87 of 243
80 Satellite radio*Satellite radio operation�
In the main satellite radio menu, turn
the right-hand rotary/push-button v
to highlight “SAT Presets” and press to
confirm.
The SAT preset memory will appear.
�
Turn the right-hand rotary/push-button
v to highlight the desired memory
preset.
�
Press the right-hand rotary/push-
button v longer than 2 seconds.
The satellite radio saves the current
station at the memory preset selected.
You will hear a confirmation beep if the
beep tones option was activated in the
system settings (
�page 197).The memory preset selected will ap-
pear in the status line, e.g. “SAT2”.
You will see the main satellite radio menu
�
automatically after 8 seconds
�
if you press *.Selecting a station on the memory list
�
Turn the right-hand rotary/push-button
v to highlight the desired memory
preset.
�
Press the right-hand rotary/push-
button v.
You will see the main satellite radio menu
�
automatically after 8 seconds
�
if you press *.
iAn existing entry is overwritten in the
memory list when a new input is given.
Page 102 of 243
95 Telephone*
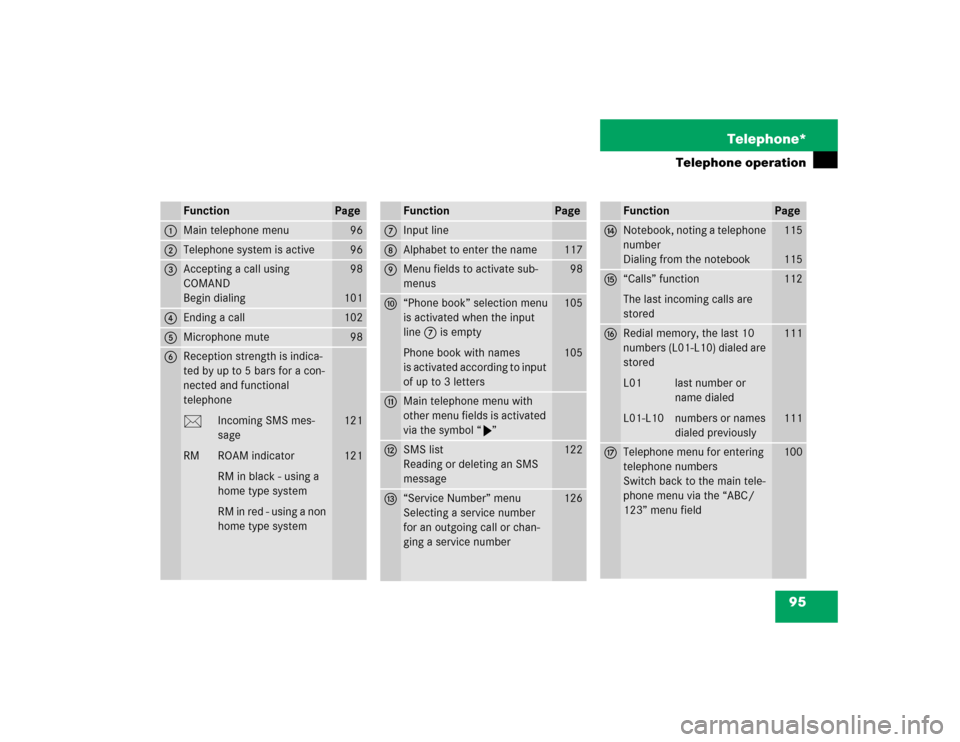
Telephone operation
Function
Page
1
Main telephone menu
96
2
Telephone system is active
96
3
Accepting a call using
COMAND
Begin dialing
98
101
4
Ending a call
102
5
Microphone mute
98
6
Reception strength is indica-
ted by up to 5 bars for a con-
nected and functional
telephone
M Incoming SMS mes-
sage
RM ROAM indicator
RM in black - using a
home type system
RM in red - using a non
home type system
121
121
Function
Page
7
Input line
8
Alphabet to enter the name
117
9
Menu fields to activate sub-
menus
98
a
“Phone book” selection menu
is activated when the input
line 7 is empty
Phone book with names
is activated according to input
of up to 3 letters
105
105
b
Main telephone menu with
other menu fields is activated
via the symbol “V”
c
SMS list
Reading or deleting an SMS
message
122
d
“Service Number” menu
Selecting a service number
for an outgoing call or chan-
ging a service number
126
Function
Page
e
Notebook, noting a telephone
number
Dialing from the notebook
115
115
f
“Calls” function
The last incoming calls are
stored
112
g
Redial memory, the last 10
numbers (L01-L10) dialed are
stored
L01 last number or
name dialed
L01-L10 numbers or names
dialed previously
111
111
h
Telephone menu for entering
telephone numbers
Switch back to the main tele-
phone menu via the “ABC/
123” menu field
100
Page 103 of 243
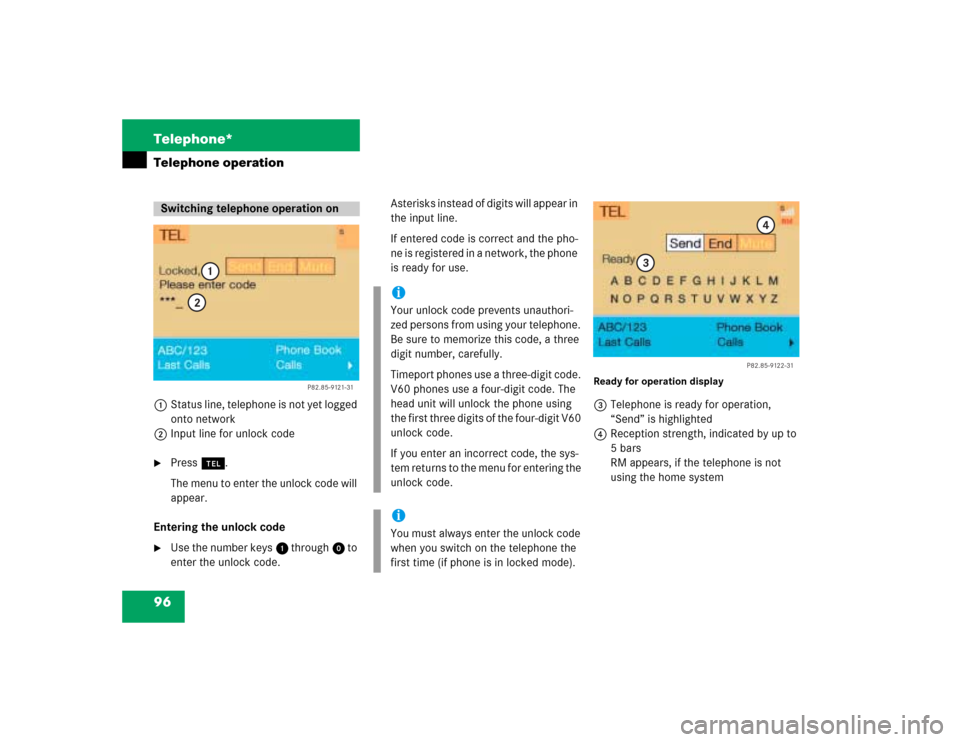
96 Telephone*Telephone operation1Status line, telephone is not yet logged
onto network
2Input line for unlock code�
Press a.
The menu to enter the unlock code will
appear.
Entering the unlock code
�
Use the number keys 1 through 0 to
enter the unlock code.Asterisks instead of digits will appear in
the input line.
If entered code is correct and the pho-
ne is registered in a network, the phone
is ready for use.
Ready for operation display3Telephone is ready for operation,
“Send” is highlighted
4Reception strength, indicated by up to
5 bars
RM appears, if the telephone is not
using the home system
Switching telephone operation on
P82.85-9121-31
1
2
iYour unlock code prevents unauthori-
zed persons from using your telephone.
Be sure to memorize this code, a three
digit number, carefully.
Timeport phones use a three-digit code.
V60 phones use a four-digit code. The
head unit will unlock the phone using
the first three digits of the four-digit V60
unlock code.
If you enter an incorrect code, the sys-
tem returns to the menu for entering the
unlock code.iYou must always enter the unlock code
when you switch on the telephone the
first time (if phone is in locked mode).
P82.85-9122-31
3
4