Page 4163 of 4264

ON-VEHICLE SERVICE (JR405E) 7A3-11
10. Remove the grooved pin.
11. Remove the lever assembly by pressing the rod
down (lever in N position).
12. If lamp replacement is required, remove the lamp
assembly from the lamp socket (align the socke
t
grooved portion and the lamp assembly protruding
portion).
Install or Connect
NOTE
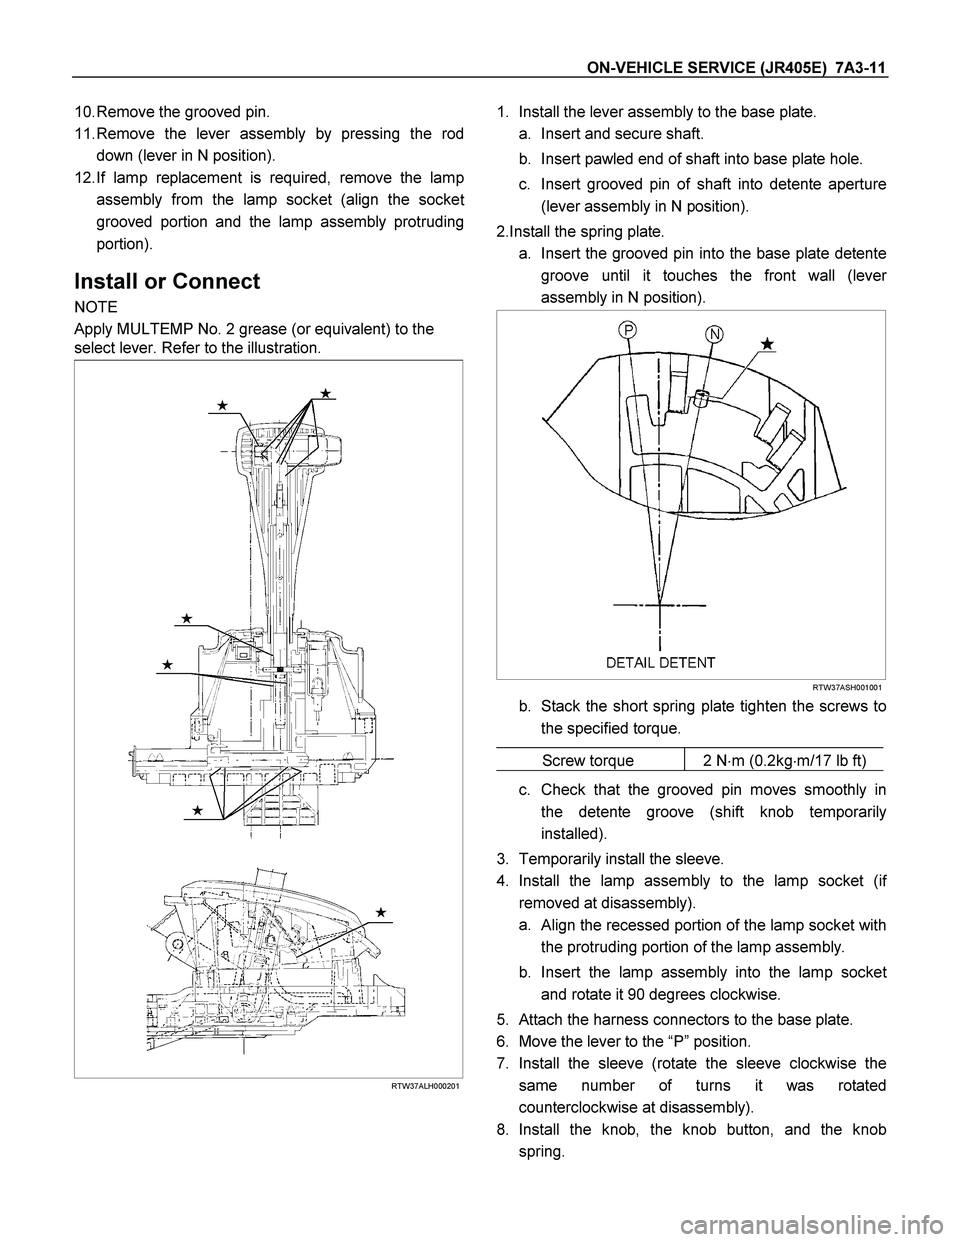
Apply MULTEMP No. 2 grease (or equivalent) to the
select lever. Refer to the illustration.
RTW37ALH000201
1. Install the lever assembly to the base plate.
a. Insert and secure shaft.
b. Insert pawled end of shaft into base plate hole.
c. Insert grooved pin of shaft into detente aperture
(lever assembly in N position).
2.Install the spring plate.
a. Insert the grooved pin into the base plate detente
groove until it touches the front wall (leve
r
assembly in N position).
RTW37ASH001001
b. Stack the short spring plate tighten the screws to
the specified torque.
Screw torque 2 N�m (0.2kg�m/17 lb ft)
c. Check that the grooved pin moves smoothly in
the detente groove (shift knob temporarily
installed).
3. Temporarily install the sleeve.
4. Install the lamp assembly to the lamp socket (i
f
removed at disassembly).
a.
Align the recessed portion of the lamp socket with
the protruding portion of the lamp assembly.
b. Insert the lamp assembly into the lamp socke
t
and rotate it 90 degrees clockwise.
5. Attach the harness connectors to the base plate.
6. Move the lever to the “P” position.
7. Install the sleeve (rotate the sleeve clockwise the
same number of turns it was rotated
counterclockwise at disassembly).
8. Install the knob, the knob button, and the knob
spring.
Page 4164 of 4264
7A3-12 ON-VEHICLE SERVICE (JR405E)
9. Adjust the clearance (2) between the detente plate
and the pin by moving the select lever knob sleeve
(1).
Detente plate and pin clearance mm(in
)
0.2 - 1.0 (0.01 - 0.04)
255R300002
10. Install the 2 screws securing the knob and tighten
them to the specified torque.
Screw torque: 2 N�m (0.2kg�m/17 lb in)
11. Install the upper housing. Make sure that the 4
latched fasteners are securely closed.
Page 4166 of 4264

7A3-14 ON-VEHICLE SERVICE (JR405E)
Install or Connect
1. Install the shift cable toward the inside of the cabin
from the bottom of the vehicle.
2. Push the shift cable into the select lever base.
3. Connect the shift cable to the select lever.
4. Fix the shift cable to the bracket.
Install the clip on the marking of shift cable.
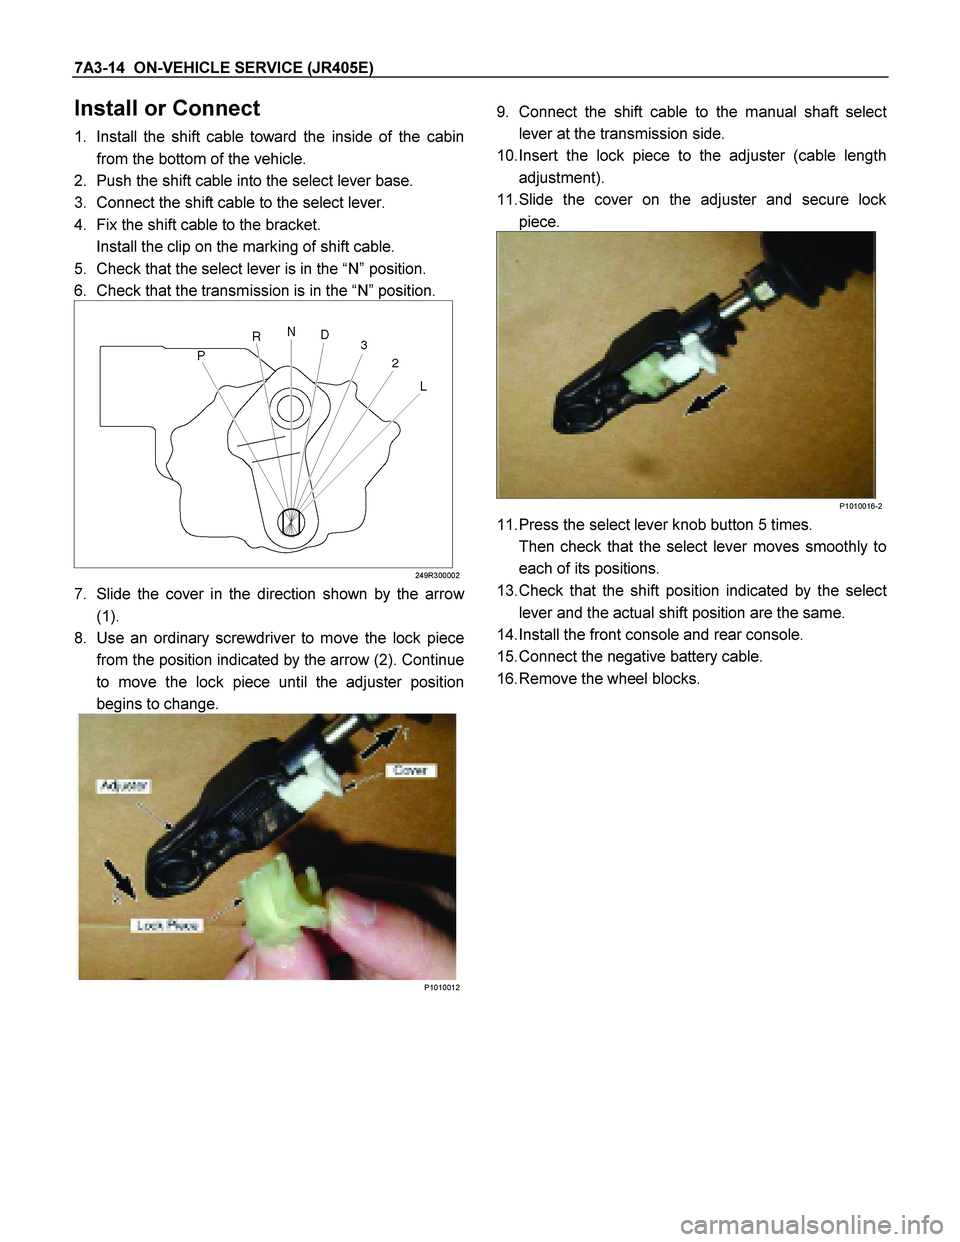
5. Check that the select lever is in the “N” position.
6. Check that the transmission is in the “N” position.
249R300002
7. Slide the cover in the direction shown by the arrow
(1).
8. Use an ordinary screwdriver to move the lock piece
from the position indicated by the arrow (2). Continue
to move the lock piece until the adjuster position
begins to change.
P1010012
9. Connect the shift cable to the manual shaft selec
t
lever at the transmission side.
10. Insert the lock piece to the adjuster (cable length
adjustment).
11. Slide the cover on the adjuster and secure lock
piece.
P1010016-2
11. Press the select lever knob button 5 times.
Then check that the select lever moves smoothly to
each of its positions.
13. Check that the shift position indicated by the selec
t
lever and the actual shift position are the same.
14. Install the front console and rear console.
15. Connect the negative battery cable.
16. Remove the wheel blocks.
Page 4173 of 4264

ON-VEHICLE SERVICE (JR405E) 7A3-21
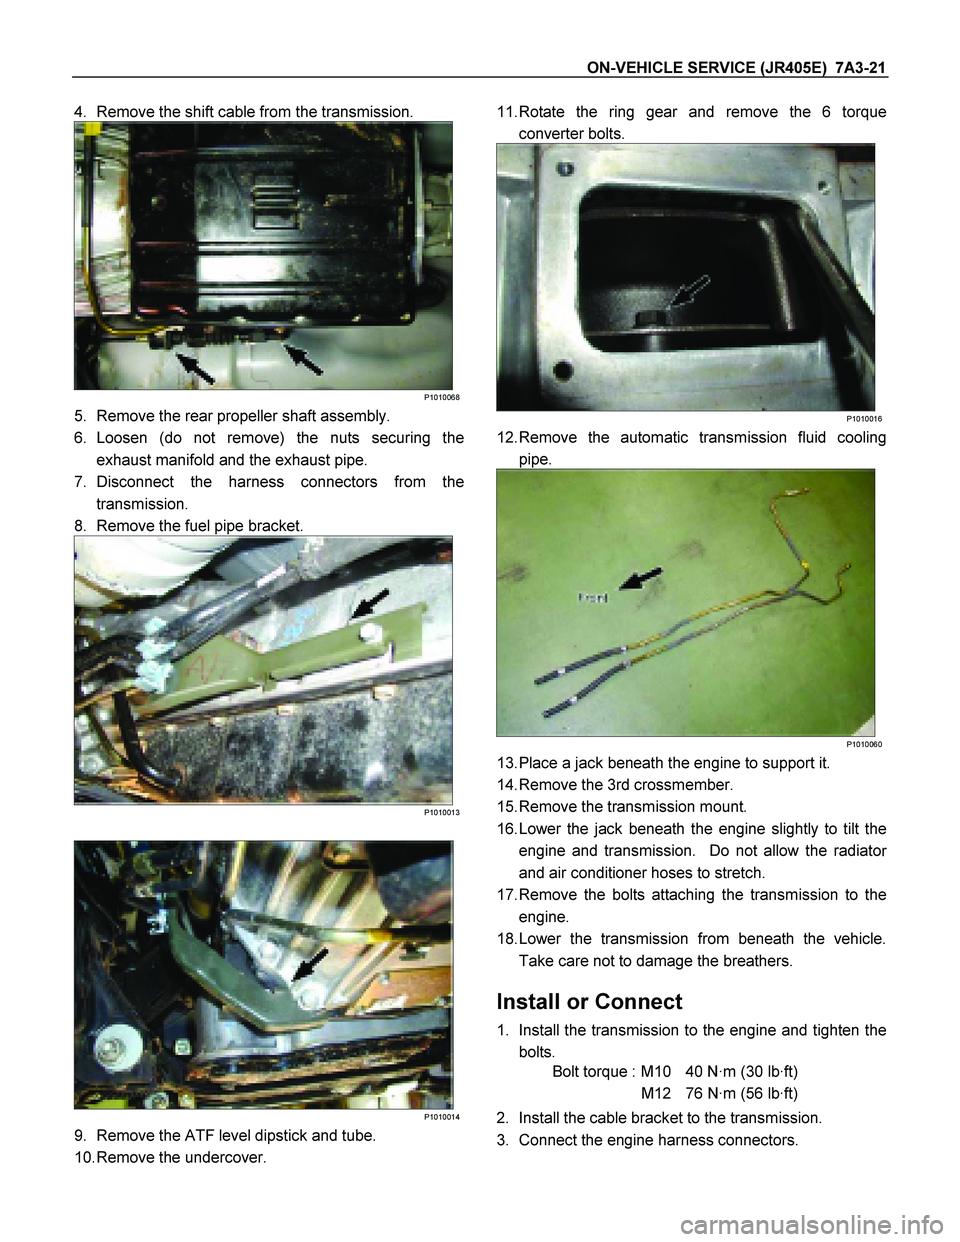
4. Remove the shift cable from the transmission.
P1010068
5. Remove the rear propeller shaft assembly.
6. Loosen (do not remove) the nuts securing the
exhaust manifold and the exhaust pipe.
7. Disconnect the harness connectors from the
transmission.
8. Remove the fuel pipe bracket.
P1010013
P1010014
9. Remove the ATF level dipstick and tube.
10. Remove the undercover.
11. Rotate the ring gear and remove the 6 torque
converter bolts.
P1010016
12. Remove the automatic transmission fluid cooling
pipe.
P1010060
13. Place a jack beneath the engine to support it.
14. Remove the 3rd crossmember.
15. Remove the transmission mount.
16. Lower the jack beneath the engine slightly to tilt the
engine and transmission. Do not allow the radiato
r
and air conditioner hoses to stretch.
17. Remove the bolts attaching the transmission to the
engine.
18. Lower the transmission from beneath the vehicle.
Take care not to damage the breathers.
Install or Connect
1. Install the transmission to the engine and tighten the
bolts.
Bolt torque : M10 40 N·m (30 lb·ft)
M12 76 N·m (56 lb·ft)
2. Install the cable bracket to the transmission.
3. Connect the engine harness connectors.
Page 4174 of 4264
7A3-22 ON-VEHICLE SERVICE (JR405E)
4. Install the 3rd crossmember.
Bolt and Nut torque : 67 N·m (49 lb·ft)
Bolt torque : 50 N·m (37 lb·ft)
5. Install the automatic transmission fluid cooling pipe.
6. Install the torque converter bolts.
Bolt torque : 29 N·m (22 lb·ft)
7. Install the undercover.
Bolt torque : 9 N·m (78 lb·in)
8. Install the ATF level dipstick and tube.
9. Install the fuel hose bracket.
Bolt torque : 6 N·m (52 lb·in)
10. Tighten the nuts securing the exhaust manifold and
the exhaust pipe.
Bolt torque : 43 N·m (32 lb·ft)
11. Install the rear propeller shaft assembly.
Flange bolt torque : 63 N·m (46 lb·ft)
Center bearing bracket bolt torque :
69 N·m (51 lb·ft)
12. Install the shift cable.
13. Connect the negative battery cable.
14. Remove the safety stands.
15. Remove the wheels blocks.
Torque Specifications
RTW37ALF001501
Page 4183 of 4264
UNIT REPAIR (JR405E) 7A4-9
29ASSY091
17.Output shaft
� Pull the output shaft from the transmission case.
30ASSY089
�
Remove the bearing (with bearing race) from the
transmission case.
31ASSY124
18.Parking pawl, shaft, spring, and spacer
Remove the parking pawl, shaft, spring and spacer from the
transmission case.
36ASSY075
19.Actuator support
Remove the actuator support from the transmission case.
37ASSY074
20.Low one-way clutch inner race and bearing
� Loosen the 7 bolts securing the low one-way clutch inne
r
race.
NOTE:
Loosen the bolts a little at a time as uniformly as possible
to prevent the inner race from tilting and becoming
jammed.
� Remove the 6 bolts. Support the low one-way clutch
inner race with your hand and remove the final bolt.
Page 4186 of 4264
7A4-12 UNIT REPAIR (JR405E)
06CV19
5. Solenoid
6. Oil pressure switch Remove the 6 solenoids together and the 3 oil pressure
switchs.
07CV17
7. Control valve upper body
8. Control valve lower body
9. Separation plate � Remove the 17 bolts securing the control valve uppe
r
body, the control valve lower body, and the separation
plate.
08CV16
�
Separate the upper body, the lower body, and the
separation plate.
NOTE:
Take care not to drop or lose the parts at the inside of the
control valve.
Inspection
�
Inspect the separation plate for wear and other damage.
Page 4256 of 4264
7A4-82 UNIT REPAIR (JR405E)
244L300001
21.Oil pan
� Install a new gasket and the oil pan.
� Tighten the bolts to the specified torque.
Torque: 8 N �
��
�
m (69 Ib �
��
�
in)
47INH-SW01
22.Inhibitor switch
� Secure the inhibitor switch (1) by hand-tightening the 2
bolts.
� Use the inhibitor switch set plate to align the neutral
holes (manual shaft and inhibitor switch).
Turn the inhibitor switch to adjust it.
Inhibitor switch set plate: 5-8840-2763-0
NOTE:
Inhibitor switch adjustment is very important.
If the inhibitor switch is not correctly adjusted, the
automatic transmission will not function normally.
� Tighten the 2 inhibitor switch bolts to the specified
torque.