Page 1133 of 3371
DI-30
COMPASS AND THERMOMETER
Revision: August 20072004 QX56
INITIAL CORRECTION PROCEDURE FOR COMPASS
1. Pushing the Mode switch for about 10 seconds will enter the initial correction mode. The compass display
will begin to flash.
2. Turn the vehicle slowly in an open, safe place. The initial correction is completed in approximately one
and a half turns.
NOTE:
In places where the terrestrial magnetism is extremely disturbed, the initial correction may start automatically.
Page 1154 of 3371

WARNING CHIME
DI-51
C
D
E
F
G
H
I
J
L
MA
B
DI
Revision: August 20072004 QX56
CONSULT-II Function (BCM)EKS007EM
CONSULT-II can display each diagnostic item using the diagnostic test modes shown following.
CONSULT-II BASIC OPERATION PROCEDURE
CAUTION:
If CONSULT-II is used with no connection of CONSULT-II CONVERTER, malfunctions might be
detected in self-diagnosis depending on control unit which carries out CAN communication.
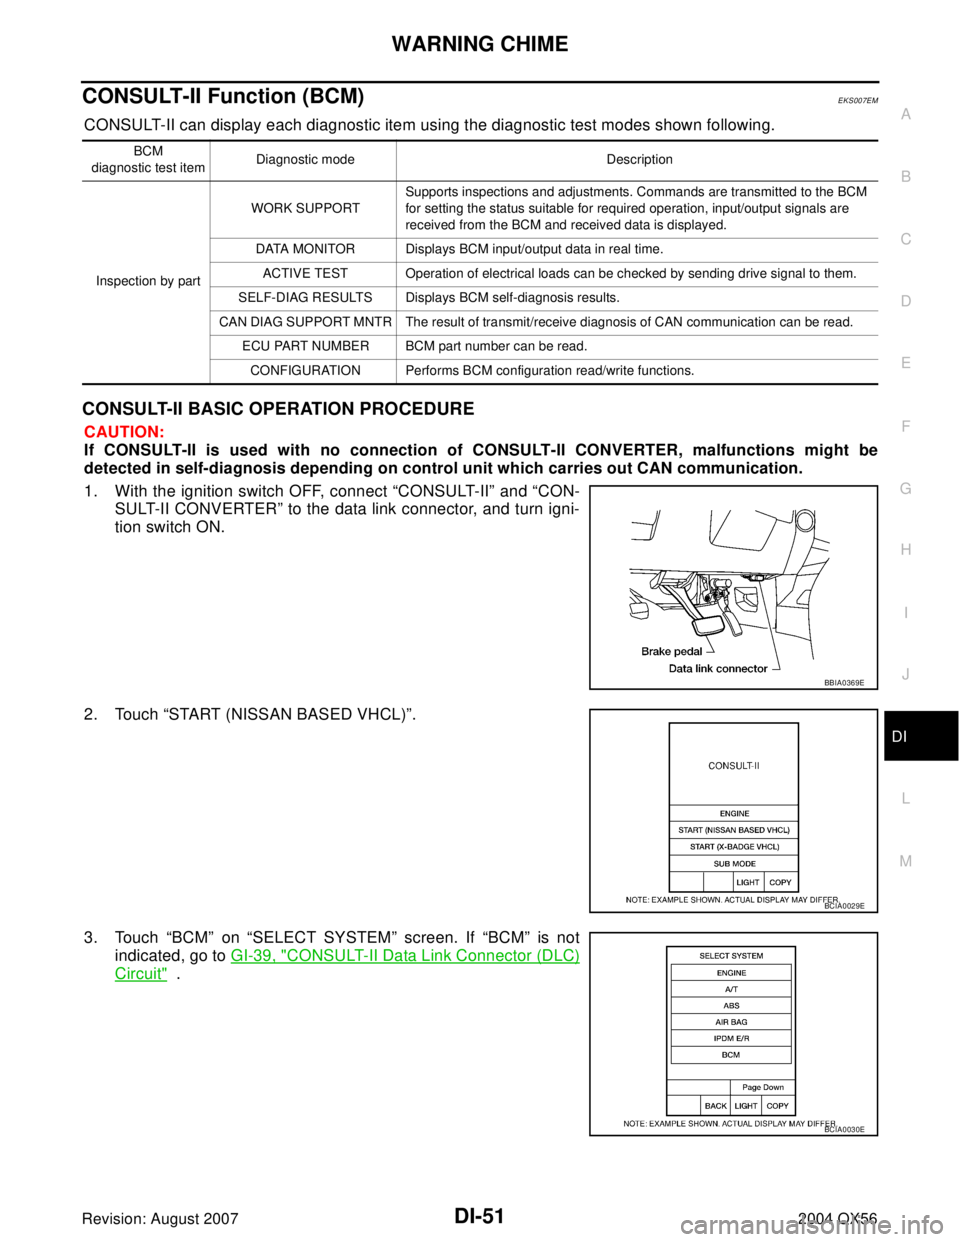
1. With the ignition switch OFF, connect “CONSULT-II” and “CON-
SULT-II CONVERTER” to the data link connector, and turn igni-
tion switch ON.
2. Touch “START (NISSAN BASED VHCL)”.
3. Touch “BCM” on “SELECT SYSTEM” screen. If “BCM” is not
indicated, go to GI-39, "
CONSULT-II Data Link Connector (DLC)
Circuit" .
BCM
diagnostic test itemDiagnostic mode Description
Inspection by partWORK SUPPORTSupports inspections and adjustments. Commands are transmitted to the BCM
for setting the status suitable for required operation, input/output signals are
received from the BCM and received data is displayed.
DATA MONITOR Displays BCM input/output data in real time.
ACTIVE TEST Operation of electrical loads can be checked by sending drive signal to them.
SELF-DIAG RESULTS Displays BCM self-diagnosis results.
CAN DIAG SUPPORT MNTR The result of transmit/receive diagnosis of CAN communication can be read.
ECU PART NUMBER BCM part number can be read.
CONFIGURATION Performs BCM configuration read/write functions.
BBIA0369E
BCIA0029E
BCIA0030E
Page 1155 of 3371

DI-52
WARNING CHIME
Revision: August 20072004 QX56
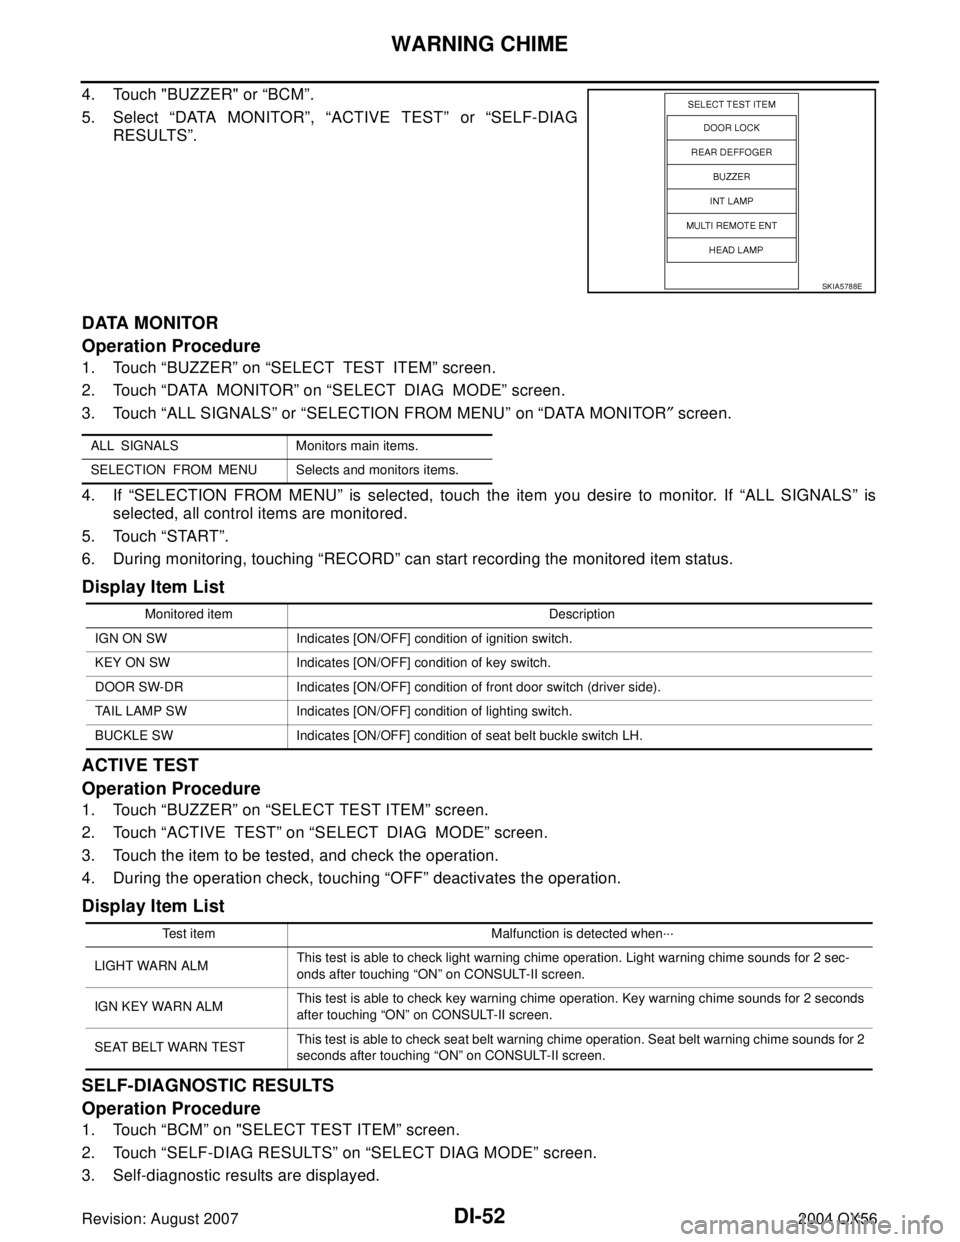
4. Touch "BUZZER" or “BCM”.
5. Select “DATA MONITOR”, “ACTIVE TEST” or “SELF-DIAG
RESULTS”.
DATA MONITOR
Operation Procedure
1. Touch “BUZZER” on “SELECT TEST ITEM” screen.
2. Touch “DATA MONITOR” on “SELECT DIAG MODE” screen.
3. Touch “ALL SIGNALS” or “SELECTION FROM MENU” on “DATA MONITOR″ screen.
4. If “SELECTION FROM MENU” is selected, touch the item you desire to monitor. If “ALL SIGNALS” is
selected, all control items are monitored.
5. Touch “START”.
6. During monitoring, touching “RECORD” can start recording the monitored item status.
Display Item List
ACTIVE TEST
Operation Procedure
1. Touch “BUZZER” on “SELECT TEST ITEM” screen.
2. Touch “ACTIVE TEST” on “SELECT DIAG MODE” screen.
3. Touch the item to be tested, and check the operation.
4. During the operation check, touching “OFF” deactivates the operation.
Display Item List
SELF-DIAGNOSTIC RESULTS
Operation Procedure
1. Touch “BCM” on "SELECT TEST ITEM” screen.
2. Touch “SELF-DIAG RESULTS” on “SELECT DIAG MODE” screen.
3. Self-diagnostic results are displayed.
SKIA5788E
ALL SIGNALS Monitors main items.
SELECTION FROM MENU Selects and monitors items.
Monitored item Description
IGN ON SW Indicates [ON/OFF] condition of ignition switch.
KEY ON SW Indicates [ON/OFF] condition of key switch.
DOOR SW-DR Indicates [ON/OFF] condition of front door switch (driver side).
TAIL LAMP SW Indicates [ON/OFF] condition of lighting switch.
BUCKLE SW Indicates [ON/OFF] condition of seat belt buckle switch LH.
Test item Malfunction is detected when···
LIGHT WARN ALMThis test is able to check light warning chime operation. Light warning chime sounds for 2 sec-
onds after touching “ON” on CONSULT-II screen.
IGN KEY WARN ALMThis test is able to check key warning chime operation. Key warning chime sounds for 2 seconds
after touching “ON” on CONSULT-II screen.
SEAT BELT WARN TESTThis test is able to check seat belt warning chime operation. Seat belt warning chime sounds for 2
seconds after touching “ON” on CONSULT-II screen.
Page 1156 of 3371

WARNING CHIME
DI-53
C
D
E
F
G
H
I
J
L
MA
B
DI
Revision: August 20072004 QX56
Display Item List
All Warning Chimes Do Not OperateEKS007EN
1. CHECK BCM CHIME OPERATION
Select “BUZZER” on CONSULT-II, and perform “LIGHT WARN
ALM”, "IGN KEY WARN ALM", OR "SEAT BELT WARN" active test.
Does chime sound?
YES >> Replace the BCM. Refer to BCS-19, "Removal and
Installation of BCM" .
NO >> Replace the combination meter. Refer to DI-25,
"Removal and Installation of Combination Meter" .
Key Warning Chime and Light Warning Chime Do Not Operate (Seat Belt Warn-
ing Chime Does Operate)
EKS007EO
1. CHECK BCM INPUT SIGNAL
With CONSULT-II
1. Select "BCM" on CONSULT-II.
2. With "DATA MONITOR" of "BUZZER", confirm "DOOR SW-DR"
changes with the status of front door LH.
Without CONSULT-II
Check voltage between BCM harness connector M19 terminal 47
(SB) and ground.
OK or NG
OK >> Replace the BCM. Refer to BCS-19, "Removal and
Installation of BCM" .
NG >> GO TO 2.
Monitored Item CONSULT-II display Description
CAN communication CAN communication [U1000] Malfunction is detected in CAN communication.
CAN communication system CAN communication system 1 to 6 [U1000] Malfunction is detected in CAN system.
SKIA6331E
When front door LH is
opened: DOOR SW-DR ON
When front door LH is
closed: DOOR SW-DR OFF
LKIA0335E
When front door LH is
opened: Approx. 0V
When front door LH is
closed: Approx. 5V
WKIA1515E
Page 1175 of 3371

DI-72
REAR VIEW MONITOR
Revision: August 20072004 QX56
REAR VIEW MONITORPFP:28260
System DescriptionEKS007R4
�When the A/T selector is in the reverse position, the display shows view to the rear of the vehicle.
�Lines which indicate the vehicle clearance and distances are displayed on the monitor.
POWER SUPPLY AND GROUND
Power is supplied at all times
�through 20A fuse [No. 31, located in the fuse and fusible link box]
�to rear view camera control unit terminal 1.
When ignition switch is in ACC or ON position, power is supplied
�through 10A fuse [No. 4, located in the fuse block (J/B)]
�to rear view camera control unit terminal 2.
Ground is supplied
�to rear view camera control unit terminal 3 and
�to rear view camera terminal 2
�through grounds B7 and B19.
AV COMMUNICATION LINE
Rear view camera control unit is connected to the following units with AV communication line. Each unit trans-
mits/receives data with AV communication line.
�NAVI control unit
�Display unit
�Display control unit
�AV switch
REAR VIEW CAMERA OPERATION
When ignition switch is in ON or START position, power is supplied
�through 10A fuse (No. 51, located in the IPDM E/R)
�to back-up lamp relay terminals 1 and 3.
When A/T selector lever is in reverse position, power is supplied
�through back-up lamp relay terminal 2
�to TCM terminal 7.
Then, when back-up lamp relay is energized,
�from back-up lamp relay terminal 5
�to rear view camera control unit terminal 4.
Then, rear view camera control unit is sent camera ON signal
�through rear view camera control unit terminal 8
�to rear view camera terminal 1.
An image taken by rear view camera is sent
�through rear view camera terminals 3 and 4
�to rear view camera control unit terminals 10 and 9.
Then an image is sent
�through rear view camera control unit terminals 11 and 12
�to the display unit terminals 4 and 15.
An image of rear view will be projected on the display.
Side Distance Guideline
When A/T selector lever is in reverse position, rear view camera control unit is sent rear view camera guideline
image
�through rear view camera control unit terminals 11 and 12
�to the display unit terminals 4 and 15.
Page 1176 of 3371
REAR VIEW MONITOR
DI-73
C
D
E
F
G
H
I
J
L
MA
B
DI
Revision: August 20072004 QX56
Rear view camera guideline will be projected on the display.
Display shows image from rear view camera image and rear view camera guideline.
Component Parts and Harness Connector LocationEKS007R5
WKIA3565E
Page 1182 of 3371

REAR VIEW MONITOR
DI-79
C
D
E
F
G
H
I
J
L
MA
B
DI
Revision: August 20072004 QX56
CONSULT-II Function (REARVIEW CAMERA)EKS007R9
CONSULT-II can display each diagnostic item using the diagnostic test modes shown following.
CONSULT-II BASIC OPERATION
CAUTION:
If CONSULT-II is used with no connection of CONSULT-II CONVERTER, malfunctions might be
detected in self-diagnosis depending on control unit which carries out CAN communication.
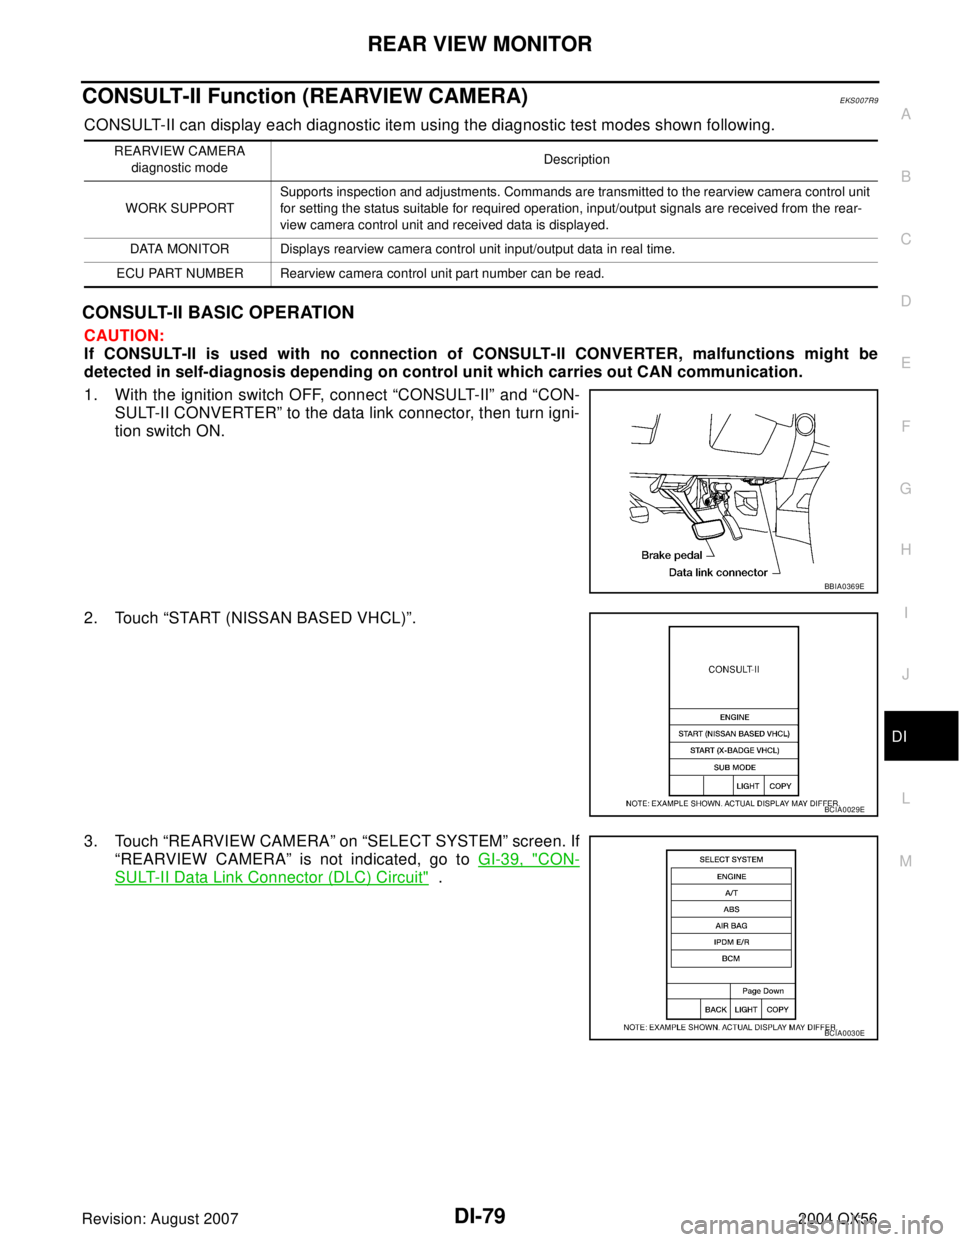
1. With the ignition switch OFF, connect “CONSULT-II” and “CON-
SULT-II CONVERTER” to the data link connector, then turn igni-
tion switch ON.
2. Touch “START (NISSAN BASED VHCL)”.
3. Touch “REARVIEW CAMERA” on “SELECT SYSTEM” screen. If
“REARVIEW CAMERA” is not indicated, go to GI-39, "
CON-
SULT-II Data Link Connector (DLC) Circuit" .
REARVIEW CAMERA
diagnostic modeDescription
WORK SUPPORTSupports inspection and adjustments. Commands are transmitted to the rearview camera control unit
for setting the status suitable for required operation, input/output signals are received from the rear-
view camera control unit and received data is displayed.
DATA MONITOR Displays rearview camera control unit input/output data in real time.
ECU PART NUMBER Rearview camera control unit part number can be read.
BBIA0369E
BCIA0029E
BCIA0030E
Page 1183 of 3371

DI-80
REAR VIEW MONITOR
Revision: August 20072004 QX56
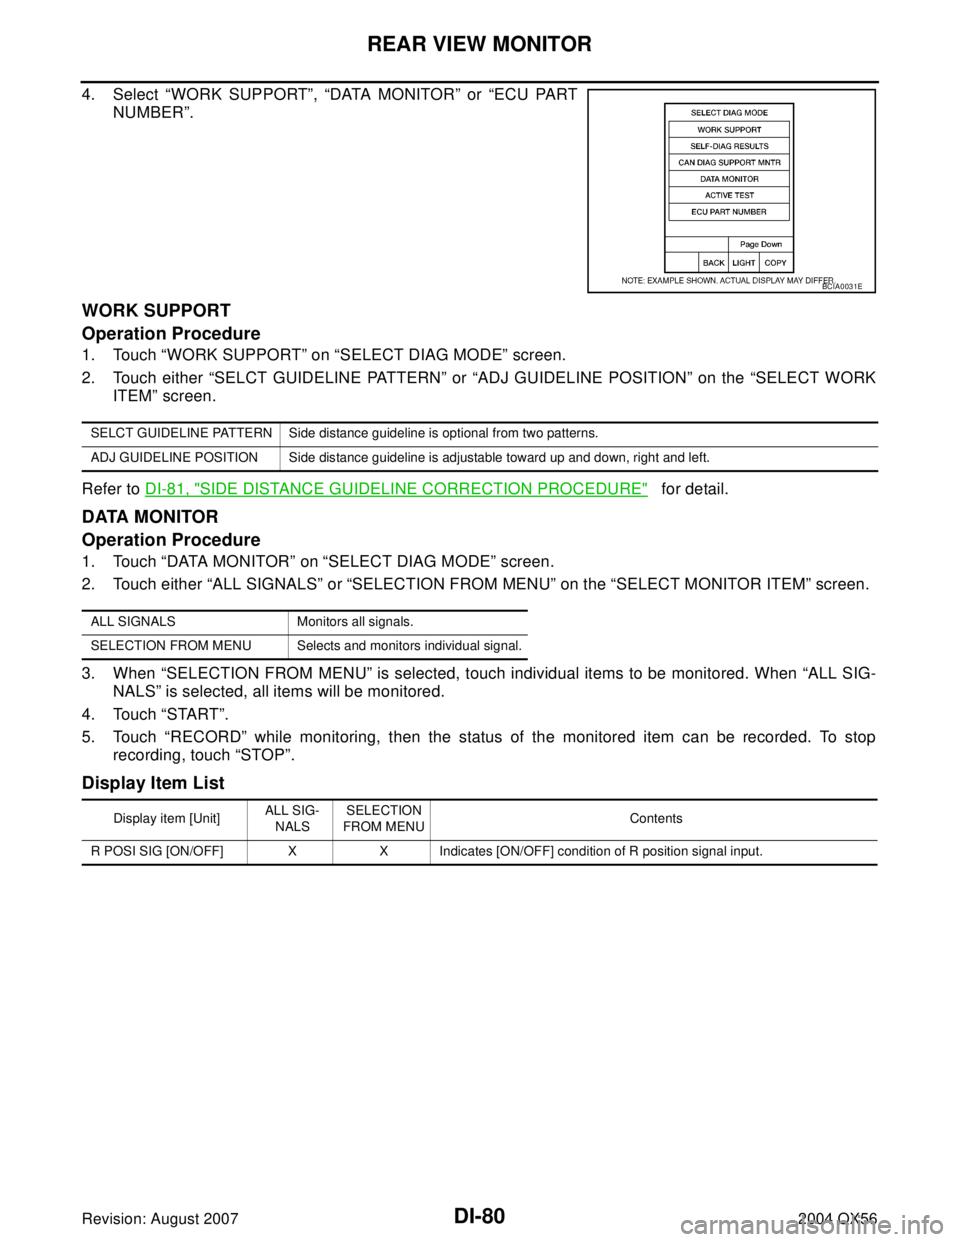
4. Select “WORK SUPPORT”, “DATA MONITOR” or “ECU PART
NUMBER”.
WORK SUPPORT
Operation Procedure
1. Touch “WORK SUPPORT” on “SELECT DIAG MODE” screen.
2. Touch either “SELCT GUIDELINE PATTERN” or “ADJ GUIDELINE POSITION” on the “SELECT WORK
ITEM” screen.
Refer to DI-81, "
SIDE DISTANCE GUIDELINE CORRECTION PROCEDURE" for detail.
DATA MONITOR
Operation Procedure
1. Touch “DATA MONITOR” on “SELECT DIAG MODE” screen.
2. Touch either “ALL SIGNALS” or “SELECTION FROM MENU” on the “SELECT MONITOR ITEM” screen.
3. When “SELECTION FROM MENU” is selected, touch individual items to be monitored. When “ALL SIG-
NALS” is selected, all items will be monitored.
4. Touch “START”.
5. Touch “RECORD” while monitoring, then the status of the monitored item can be recorded. To stop
recording, touch “STOP”.
Display Item List
BCIA0031E
SELCT GUIDELINE PATTERN Side distance guideline is optional from two patterns.
ADJ GUIDELINE POSITION Side distance guideline is adjustable toward up and down, right and left.
ALL SIGNALS Monitors all signals.
SELECTION FROM MENU Selects and monitors individual signal.
Display item [Unit]ALL SIG-
NALSSELECTION
FROM MENUContents
R POSI SIG [ON/OFF] X X Indicates [ON/OFF] condition of R position signal input.