Page 147 of 166

CONNECT Nav+
146
If the function is enabled, pressing the
“SOS” key 1-fig. 1, automatically
opens the screen with the “Automat-
ic medical advice” function already
highlighted: if the user does not move
the cursor within 15 seconds using the
encoder 14-fig. 1and call is not can-
celled for other 10 seconds, the re-
quest for medical assistance will be
forwarded automatically. If not, the call
will not be sent and to activate it at a
later time, the user will have to select
again the “Medical advice” function
and press “ENTER” to confirm 15-
fig. 1.
“OK” icon key
To confirm settings, select “OK”
with the encoder 14-fig. 1and press
“ENTER” to confirm 15-fig. 1.CALLS FOR MEDICAL
ADVICE OR ROADSIDE
ASSISTANCE
During the forwarding of a call for as-
sistance to the operating centre, any
other operations activated are inter-
rupted and the volume of any audio
sources (except the phone) is muted.
These conditions will be maintained as
long as the call for assistance is active,
with the corresponding screen on the
display.
If a phone call is received while for-
warding a request for assistance, the
corresponding alert will not be shown
on the display but the ringer will ring.
If the user decides to accept the call
and briefly presses the
ß8-fig. 1key,
the assistance call screen goes off the
display.
IMPORTANTThe call for assis-
tance is always forwarded; however, if
you accept the incoming call, the
Targasysoperator might have diffi-
culty in contacting you since the num-
ber could be busy. When the call has been sent, the dis-
play shows the corresponding call for-
warded message for about 4 seconds.
If for any reason the call for assis-
tance cannot be sent, the display
shows a warning message and the user
is then asked if he/she wants to acti-
vate a phone call in any case (*) to the
operating centre to avail of the service
required, even if in this case the op-
erating centre will no longer be able
to locate the car.
(*) The call is normally made using the toll-
free number, while it is at the user’s expense
if it is made in roaming conditions.
Page 148 of 166

CONNECT Nav+
147
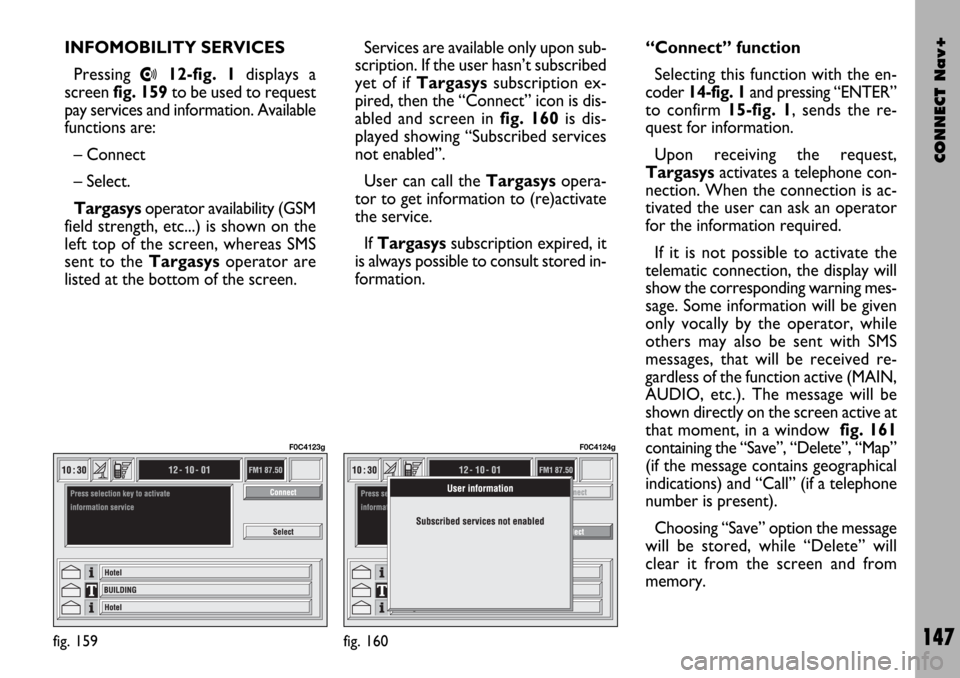
INFOMOBILITY SERVICES
Pressing
•12-fig. 1displays a
screen fig. 159to be used to request
pay services and information. Available
functions are:
– Connect
– Select.
Targasysoperator availability (GSM
field strength, etc...) is shown on the
left top of the screen, whereas SMS
sent to the Targasysoperator are
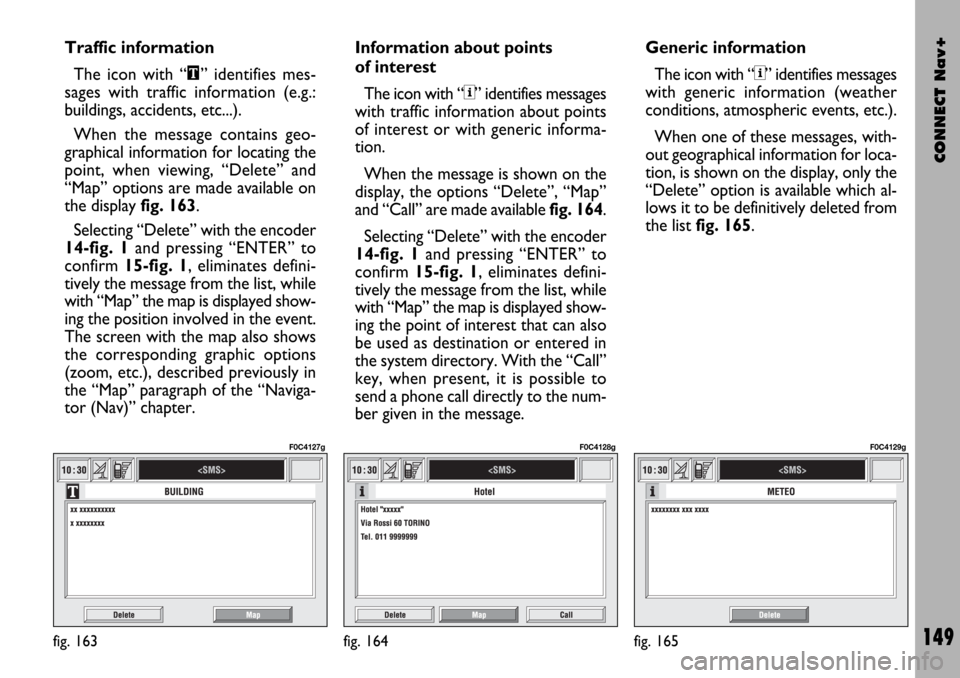
listed at the bottom of the screen.Services are available only upon sub-
scription. If the user hasn’t subscribed
yet of if Targasyssubscription ex-
pired, then the “Connect” icon is dis-
abled and screen in fig. 160 is dis-
played showing “Subscribed services
not enabled”.
User can call the Targasys opera-
tor to get information to (re)activate
the service.
If Targasyssubscription expired, it
is always possible to consult stored in-
formation.“Connect” function
Selecting this function with the en-
coder 14-fig. 1and pressing “ENTER”
to confirm 15-fig. 1, sends the re-
quest for information.
Upon receiving the request,
Targasysactivates a telephone con-
nection. When the connection is ac-
tivated the user can ask an operator
for the information required.
If it is not possible to activate the
telematic connection, the display will
show the corresponding warning mes-
sage. Some information will be given
only vocally by the operator, while
others may also be sent with SMS
messages, that will be received re-
gardless of the function active (MAIN,
AUDIO, etc.). The message will be
shown directly on the screen active at
that moment, in a window fig. 161
containing the “Save”, “Delete”, “Map”
(if the message contains geographical
indications) and “Call” (if a telephone
number is present).
Choosing “Save” option the message
will be stored, while “Delete” will
clear it from the screen and from
memory.
fig. 159
F0C4123g
fig. 160
F0C4124g
Page 150 of 166

CONNECT Nav+
149
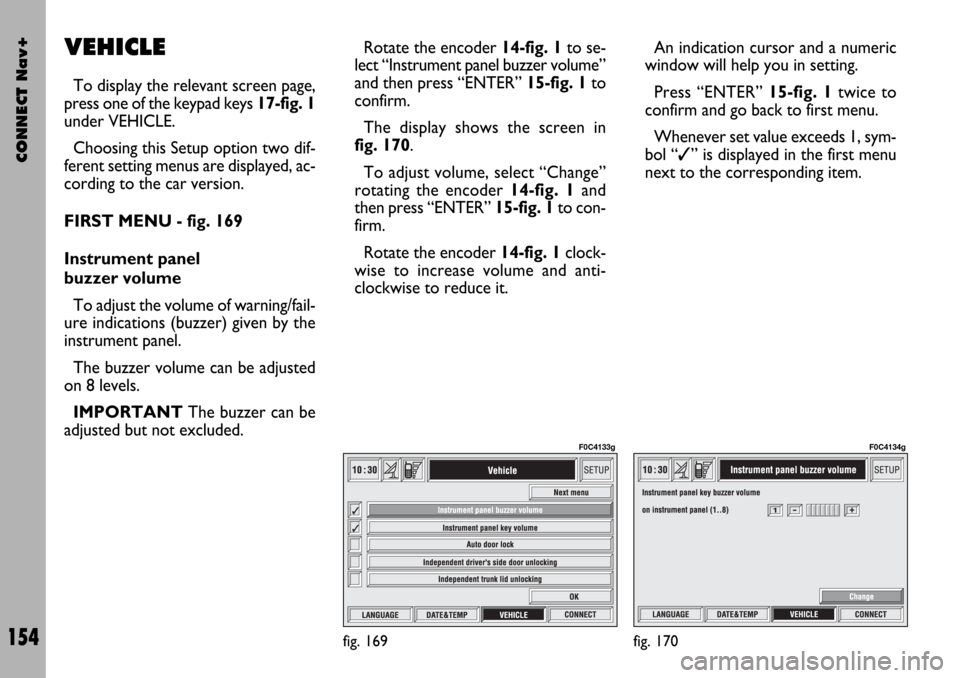
Traffic information
The icon with “\” identifies mes-
sages with traffic information (e.g.:
buildings, accidents, etc...).
When the message contains geo-
graphical information for locating the
point, when viewing, “Delete” and
“Map” options are made available on
the display fig. 163.
Selecting “Delete” with the encoder
14-fig. 1and pressing “ENTER” to
confirm 15-fig. 1, eliminates defini-
tively the message from the list, while
with “Map” the map is displayed show-
ing the position involved in the event.
The screen with the map also shows
the corresponding graphic options
(zoom, etc.), described previously in
the “Map” paragraph of the “Naviga-
tor (Nav)” chapter.Information about points
of interest
The icon with “<” identifies messages
with traffic information about points
of interest or with generic informa-
tion.
When the message is shown on the
display, the options “Delete”, “Map”
and “Call” are made available fig. 164.
Selecting “Delete” with the encoder
14-fig. 1and pressing “ENTER” to
confirm 15-fig. 1, eliminates defini-
tively the message from the list, while
with “Map” the map is displayed show-
ing the point of interest that can also
be used as destination or entered in
the system directory. With the “Call”
key, when present, it is possible to
send a phone call directly to the num-
ber given in the message.Generic information
The icon with “<” identifies messages
with generic information (weather
conditions, atmospheric events, etc.).
When one of these messages, with-
out geographical information for loca-
tion, is shown on the display, only the
“Delete” option is available which al-
lows it to be definitively deleted from
the list fig. 165.
fig. 163
F0C4127g
fig. 164
F0C4128g
fig. 165
F0C4129g
Page 155 of 166

CONNECT Nav+
154
VEHICLE
To display the relevant screen page,
press one of the keypad keys 17-fig. 1
under VEHICLE.
Choosing this Setup option two dif-
ferent setting menus are displayed, ac-
cording to the car version.
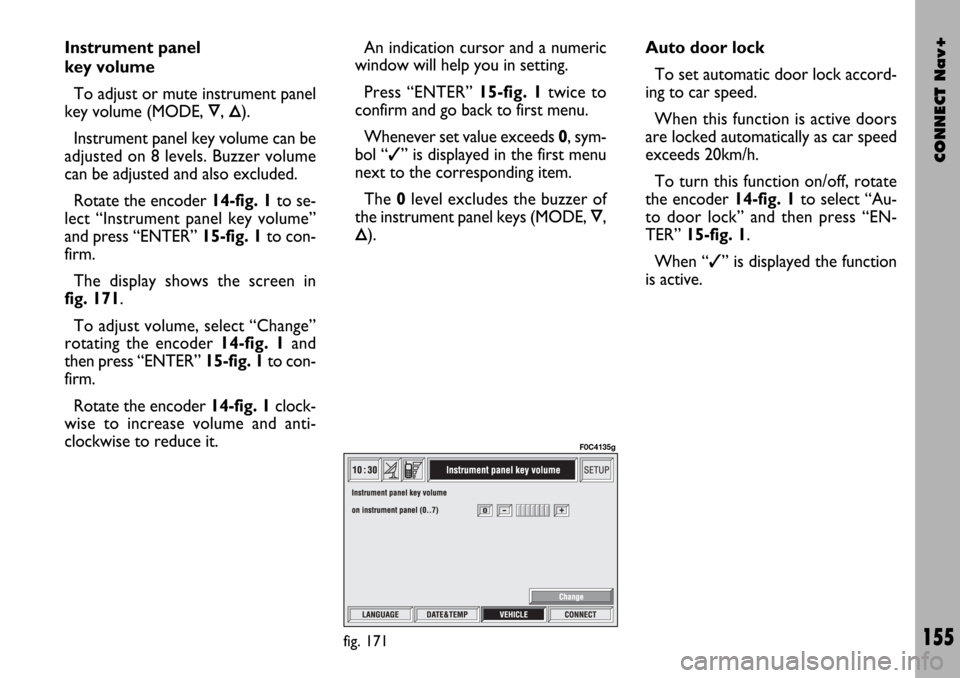
FIRST MENU - fig. 169
Instrument panel
buzzer volume
To adjust the volume of warning/fail-
ure indications (buzzer) given by the
instrument panel.
The buzzer volume can be adjusted
on 8 levels.
IMPORTANT The buzzer can be
adjusted but not excluded.Rotate the encoder 14-fig. 1to se-
lect “Instrument panel buzzer volume”
and then press “ENTER” 15-fig. 1to
confirm.
The display shows the screen in
fig. 170.
To adjust volume, select “Change”
rotating the encoder 14-fig. 1and
then press “ENTER” 15-fig. 1to con-
firm.
Rotate the encoder 14-fig. 1clock-
wise to increase volume and anti-
clockwise to reduce it.An indication cursor and a numeric
window will help you in setting.
Press “ENTER” 15-fig. 1twice to
confirm and go back to first menu.
Whenever set value exceeds 1, sym-
bol “✓” is displayed in the first menu
next to the corresponding item.
fig. 169
F0C4133g
fig. 170
F0C4134g
Page 156 of 166

CONNECT Nav+
155
Instrument panel
key volume
To adjust or mute instrument panel
key volume (MODE,
Ô, Õ).
Instrument panel key volume can be
adjusted on 8 levels. Buzzer volume
can be adjusted and also excluded.
Rotate the encoder 14-fig. 1to se-
lect “Instrument panel key volume”
and press “ENTER” 15-fig. 1to con-
firm.
The display shows the screen in
fig. 171.
To adjust volume, select “Change”
rotating the encoder 14-fig. 1and
then press “ENTER” 15-fig. 1to con-
firm.
Rotate the encoder 14-fig. 1clock-
wise to increase volume and anti-
clockwise to reduce it.An indication cursor and a numeric
window will help you in setting.
Press “ENTER” 15-fig. 1twice to
confirm and go back to first menu.
Whenever set value exceeds 0, sym-
bol “✓” is displayed in the first menu
next to the corresponding item.
The 0level excludes the buzzer of
the instrument panel keys (MODE,
Ô,
Õ).Auto door lock
To set automatic door lock accord-
ing to car speed.
When this function is active doors
are locked automatically as car speed
exceeds 20km/h.
To turn this function on/off, rotate
the encoder 14-fig. 1to select “Au-
to door lock” and then press “EN-
TER” 15-fig. 1.
When “✓” is displayed the function
is active.
fig. 171
F0C4135g