2004 FIAT MULTIPLA navigation
[x] Cancel search: navigationPage 60 of 202
59
CONNECT NAV
NAVIGATOR
3) confirm the selection by pressing
the knob/button (11).
Press ESC (9) to end the function
and return to the main navigation
menu.
Storing the position
Proceed as follows to store the cur-
rent position:
1) press the MEN button (10) to
open the navigation setup menu
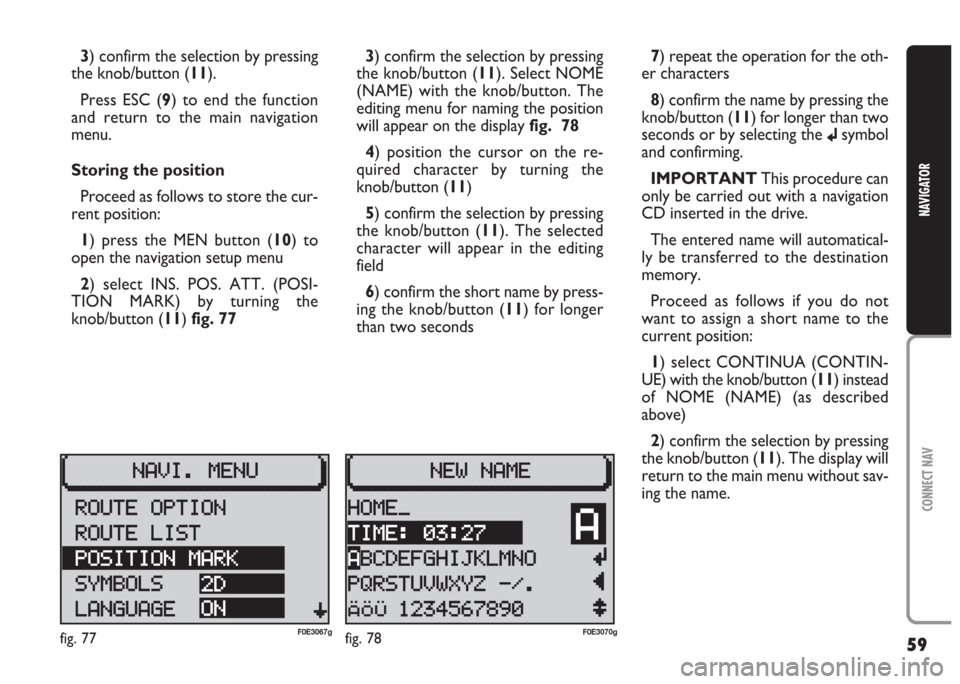
2) select INS. POS. ATT. (POSI-
TION MARK) by turning the
knob/button (11) fig. 773) confirm the selection by pressing
the knob/button (11). Select NOME
(NAME) with the knob/button. The
editing menu for naming the position
will appear on the display fig. 78
4) position the cursor on the re-
quired character by turning the
knob/button (11)
5) confirm the selection by pressing
the knob/button (11). The selected
character will appear in the editing
field
6) confirm the short name by press-
ing the knob/button (11) for longer
than two seconds7) repeat the operation for the oth-
er characters
8) confirm the name by pressing the
knob/button (11) for longer than two
seconds or by selecting the
jsymbol
and confirming.
IMPORTANT This procedure can
only be carried out with a navigation
CD inserted in the drive.
The entered name will automatical-
ly be transferred to the destination
memory.
Proceed as follows if you do not
want to assign a short name to the
current position:
1) select CONTINUA (CONTIN-
UE) with the knob/button (11) instead
of NOME (NAME) (as described
above)
2) confirm the selection by pressing
the knob/button (11). The display will
return to the main menu without sav-
ing the name.
fig. 77F0E3067gfig. 78F0E3070g
Page 61 of 202
60
CONNECT NAV
NAVIGATOR
RECEIVING TRAFFIC
ANNOUNCEMENTS DURING
NAVIGATION
You can listen to traffic announce-
ments during navigation. This option
can be switched on and off regardless
of the sound source.
Press the TA button (4) to switch
the function on and off.SWITCHING VOICE
MESSAGES ON AND OFF
Route guidance consists of voice
messages. The voice messages provide
information on the distances to be
travelled before turning.
The voice messages can be switched
on and off:
1) press the MEN button (10) to
open the navigation setup menu
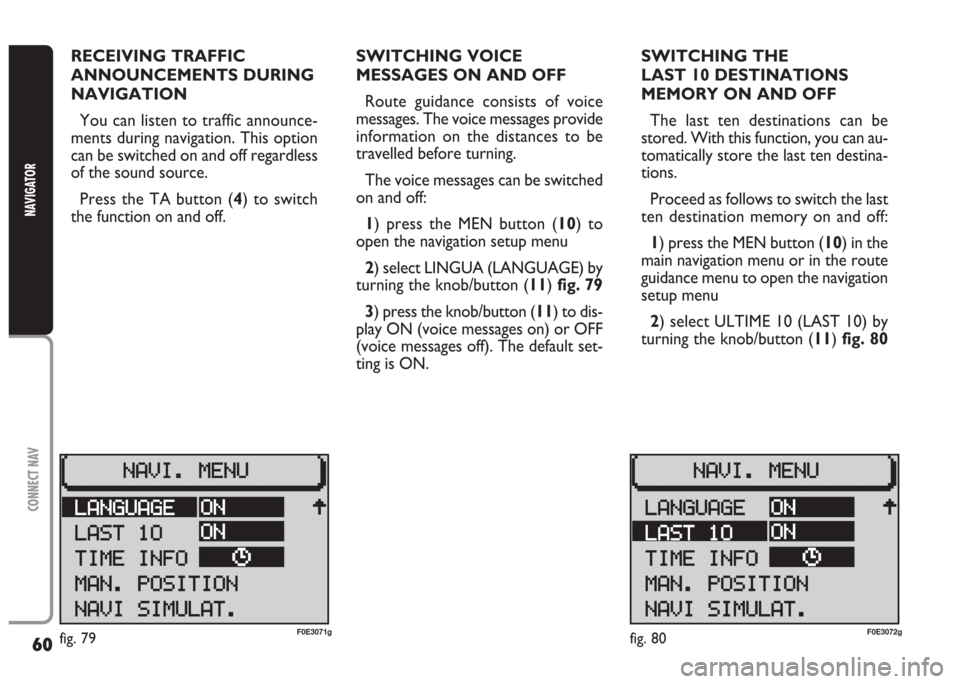
2) select LINGUA (LANGUAGE) by
turning the knob/button (11) fig. 79
3) press the knob/button (11) to dis-
play ON (voice messages on) or OFF
(voice messages off). The default set-
ting is ON.SWITCHING THE
LAST 10 DESTINATIONS
MEMORY ON AND OFF
The last ten destinations can be
stored. With this function, you can au-
tomatically store the last ten destina-
tions.
Proceed as follows to switch the last
ten destination memory on and off:
1) press the MEN button (10) in the
main navigation menu or in the route
guidance menu to open the navigation
setup menu
2) select ULTIME 10 (LAST 10) by
turning the knob/button (11) fig. 80
fig. 80F0E3072gfig. 79F0E3071g
Page 62 of 202
61
CONNECT NAV
NAVIGATOR
3) press the knob/button (11) to dis-
play ON or OFF. The default setting
is ON.
SWITCHING ROUTE TIME
INFORMATION ON AND OFF
The time required to reach the des-
tinations can be displayed.
Proceed as follows to switch the
route time information on and off:1) press the MEN button (10) in the
main navigation menu or in the route
guidance menu to open the navigation
setup menu
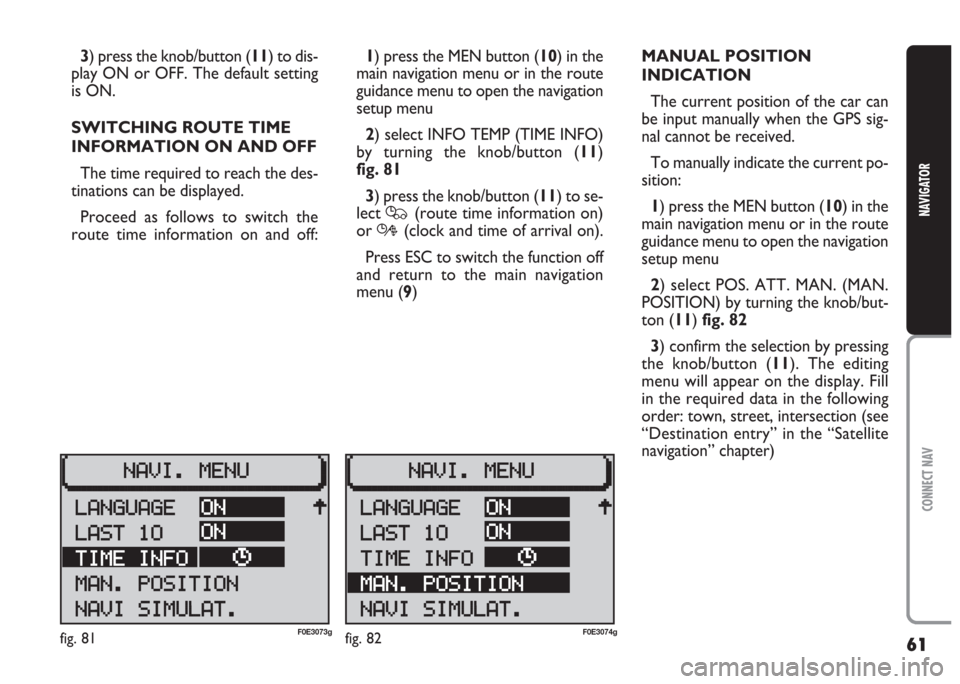
2) select INFO TEMP (TIME INFO)
by turning the knob/button (11)
fig. 81
3) press the knob/button (11) to se-
lect
Q(route time information on)
or
R(clock and time of arrival on).
Press ESC to switch the function off
and return to the main navigation
menu (9)MANUAL POSITION
INDICATION
The current position of the car can
be input manually when the GPS sig-
nal cannot be received.
To manually indicate the current po-
sition:
1) press the MEN button (10) in the
main navigation menu or in the route
guidance menu to open the navigation
setup menu
2) select POS. ATT. MAN. (MAN.
POSITION) by turning the knob/but-
ton (11) fig. 82
3) confirm the selection by pressing
the knob/button (11). The editing
menu will appear on the display. Fill
in the required data in the following
order: town, street, intersection (see
“Destination entry” in the “Satellite
navigation” chapter)
fig. 81F0E3073gfig. 82F0E3074g
Page 63 of 202
62
CONNECT NAV
NAVIGATOR
4) when you have finished defining
the position, press the knob/button
(11) for longer than two seconds to
confirm or select the (
j) symbol and
confirm. The main navigation menu
will appear on the display.
IMPORTANT Certain road inter-
sections (e.g. straight road intersection
with loop road) are not suitable for in-
dicating the car position. NAVIGATION SIMULATION
The sound/navigation system can
simulate a trip. The device simulates
navigation by providing realistic visual
instructions, voice messages and
acoustic signals.
Proceed as follows to start a simu-
lation:
1) enter a destination (see “Destina-
tion entry” in the “Satellite navigation”
chapter)
2) press the MEN button (10) in the
main navigation menu or in the route
guidance menu to open the navigation
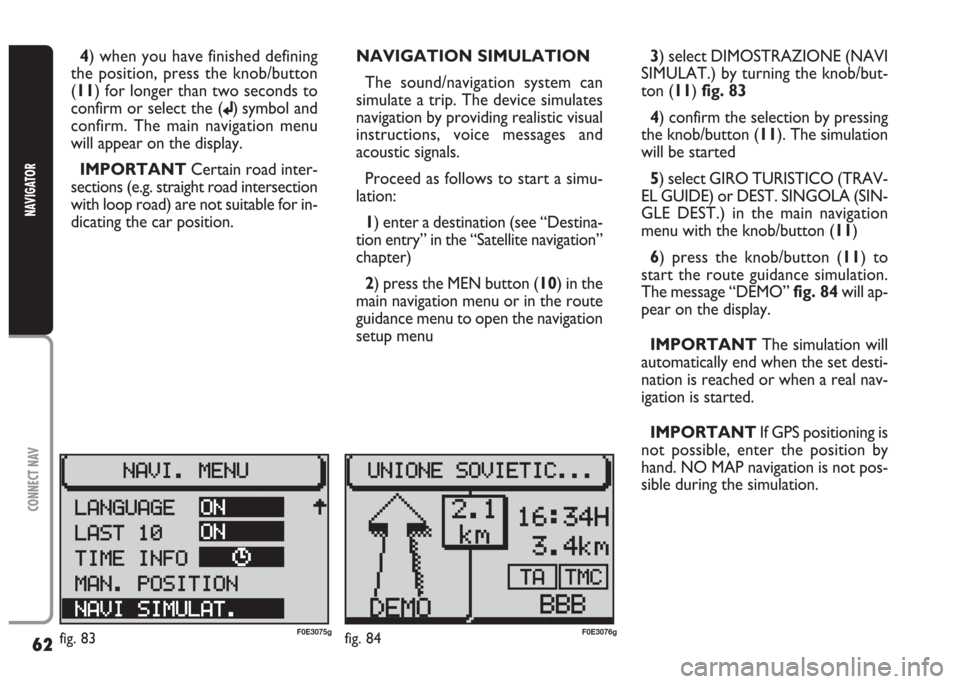
setup menu 3) select DIMOSTRAZIONE (NAVI
SIMULAT.) by turning the knob/but-
ton (11) fig. 83
4) confirm the selection by pressing
the knob/button (11). The simulation
will be started
5) select GIRO TURISTICO (TRAV-
EL GUIDE) or DEST. SINGOLA (SIN-
GLE DEST.) in the main navigation
menu with the knob/button (11)
6) press the knob/button (11) to
start the route guidance simulation.
The message “DEMO” fig. 84will ap-
pear on the display.
IMPORTANT The simulation will
automatically end when the set desti-
nation is reached or when a real nav-
igation is started.
IMPORTANT If GPS positioning is
not possible, enter the position by
hand. NO MAP navigation is not pos-
sible during the simulation.
fig. 83F0E3075gfig. 84F0E3076g
Page 64 of 202
63
CONNECT NAV
NAVIGATOR
B B
A A
S S
I I
C C
S S
E E
T T
T T
I I
N N
G G
S S
( (
S S
E E
T T
U U
P P
) )
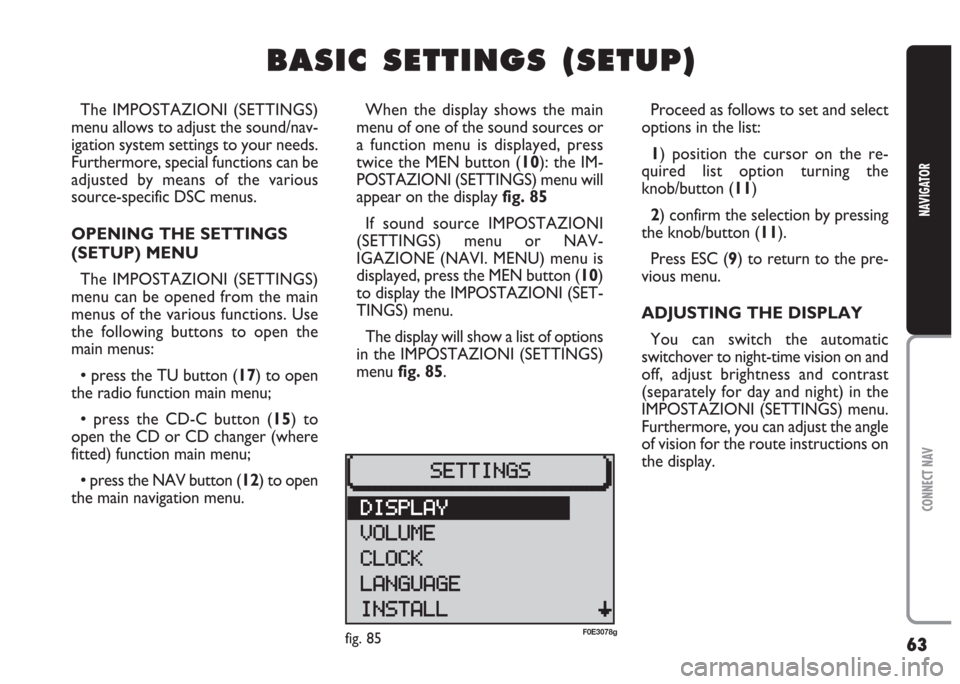
The IMPOSTAZIONI (SETTINGS)
menu allows to adjust the sound/nav-
igation system settings to your needs.
Furthermore, special functions can be
adjusted by means of the various
source-specific DSC menus.
OPENING THE SETTINGS
(SETUP) MENU
The IMPOSTAZIONI (SETTINGS)
menu can be opened from the main
menus of the various functions. Use
the following buttons to open the
main menus:
•press the TU button (17) to open
the radio function main menu;
•press the CD-C button (15) to
open the CD or CD changer (where
fitted) function main menu;
•press the NAV button (12) to open
the main navigation menu.When the display shows the main
menu of one of the sound sources or
a function menu is displayed, press
twice the MEN button (10): the IM-
POSTAZIONI (SETTINGS) menu will
appear on the display fig. 85
If sound source IMPOSTAZIONI
(SETTINGS) menu or NAV-
IGAZIONE (NAVI. MENU) menu is
displayed, press the MEN button (10)
to display the IMPOSTAZIONI (SET-
TINGS) menu.
The display will show a list of options
in the IMPOSTAZIONI (SETTINGS)
menu fig. 85.Proceed as follows to set and select
options in the list:
1) position the cursor on the re-
quired list option turning the
knob/button (11)
2) confirm the selection by pressing
the knob/button (11).
Press ESC (9) to return to the pre-
vious menu.
ADJUSTING THE DISPLAY
You can switch the automatic
switchover to night-time vision on and
off, adjust brightness and contrast
(separately for day and night) in the
IMPOSTAZIONI (SETTINGS) menu.
Furthermore, you can adjust the angle
of vision for the route instructions on
the display.
fig. 85F0E3078g
Page 67 of 202
66
CONNECT NAV
NAVIGATOR
IMPORTANT The minimum vol-
ume is a form of limitation. If the vol-
ume was lower than the minimum set-
up volume when the system was
switched off this will override the IM-
POSTAZIONI (SETTINGS) volume. If
on the other hand the volume was
higher, the minimum volume will be
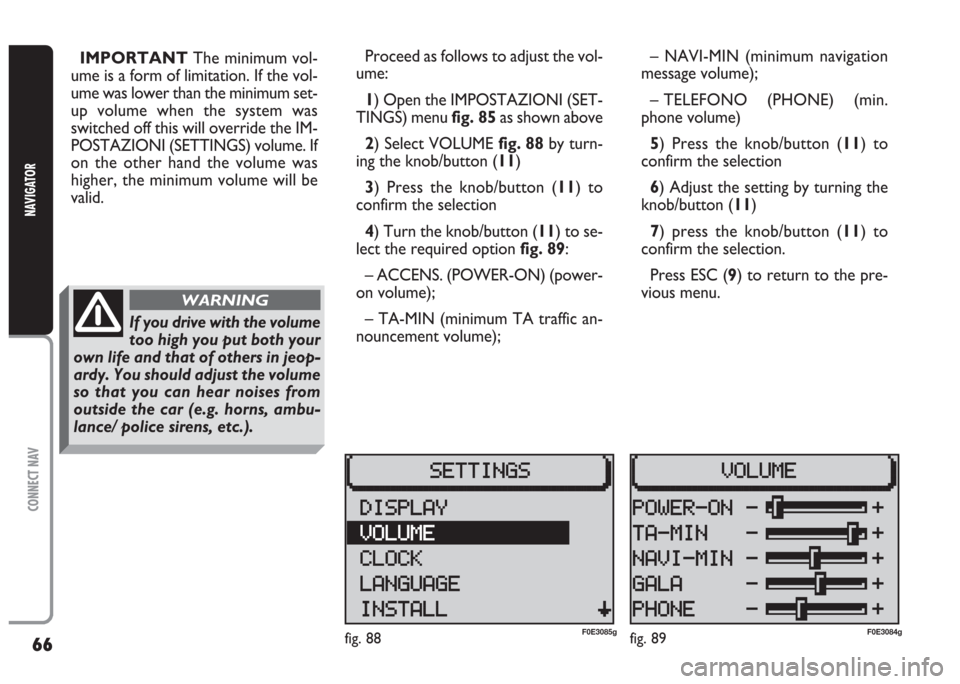
valid.Proceed as follows to adjust the vol-
ume:
1) Open the IMPOSTAZIONI (SET-
TINGS) menu fig. 85as shown above
2) Select VOLUME fig. 88 by turn-
ing the knob/button (11)
3) Press the knob/button (11) to
confirm the selection
4) Turn the knob/button (11) to se-
lect the required option fig. 89:
– ACCENS. (POWER-ON) (power-
on volume);
– TA-MIN (minimum TA traffic an-
nouncement volume);– NAVI-MIN (minimum navigation
message volume);
– TELEFONO (PHONE) (min.
phone volume)
5) Press the knob/button (11) to
confirm the selection
6) Adjust the setting by turning the
knob/button (11)
7) press the knob/button (11) to
confirm the selection.
Press ESC (9) to return to the pre-
vious menu.
fig. 89F0E3084gfig. 88F0E3085g
If you drive with the volume
too high you put both your
own life and that of others in jeop-
ardy. You should adjust the volume
so that you can hear noises from
outside the car (e.g. horns, ambu-
lance/ police sirens, etc.).
WARNING
Page 68 of 202

67
CONNECT NAV
NAVIGATOR
SETTING THE CLOCK
The IMPOSTAZIONI (SETTINGS)
menu can be used to switch the sum-
mer time on and off, adjust the clock
format (12 hours/24 hours) and set
the time zone referred to Central Eu-
ropean Time (MEZ). These settings
are required by the sound/navigation
system to calculate the discrepancy
between system time and GPS trans-
mitted time and, consequently, calcu-
late the actual navigation time.Selecting the time format
Proceed as follows to select the time
format (12 or 24 hour clock):
1) open the IMPOSTAZIONI (SET-
TINGS) menu fig. 85as shown above
2) select OROLOGIO (CLOCK) by
turning the knob/button (11)
3) press the knob/button (11) to
confirm the selection
4) select IMPOSTAZIONI (SET-
TINGS) menu by turning the
knob/button (11)
5) select FORMATO ORA (TIME
FORMA) by turning the knob/button
(11) fig. 906) press the knob/button (11) to
confirm the selection
7) select the format (12 or 24 hours)
by pressing the knob/button (11)
8) press the knob/button (11) for
longer than two seconds to confirm
the selection.
Press ESC (9) to return to the pre-
vious menu.
fig. 90F0E3087g
Page 70 of 202

69
CONNECT NAV
NAVIGATOR
Switching the time status
on and off
Proceed as follows to switch the
time status function on and off:
1) open the IMPOSTAZIONI (SET-
TINGS) menu fig. 85as shown above
2) select OROLOGIO (CLOCK) by
turning the knob/button (11)
3) press the knob/button (11) to
confirm the selection
4) select VISUALIZZA (DISPLAY) by
turning the knob/button (11)
5) press the knob/button (11) to se-
lect ON or OFF
Setting the exact time
manually
Proceed as follows to set manually
the exact time (e.g.: when no GPS
satellite signal is received):1) open the IMPOSTAZIONI (SET-
TINGS) menu fig. 85as shown above
2) select OROLOGIO (CLOCK) by
turning the knob/button (11)
3) press the knob/button (11) to
confirm the selection
4) select IMPOSTAZIONI (SET-
TINGS) by turning the knob/button
(11)
5) select ORA SISTEM. (SYS. TIME)
by turning the knob/button (11)
6) press the knob/button (11) to
confirm the selection: hours are dis-
played with reverse writing
7) turn the knob/button (11) to set
hours
8) press the knob/button (11) to
confirm the selection: minutes are dis-
played with reverse writing
9) turn the knob/button (11) to set
minutes
10) press the knob/button (11) to
confirm the selectionSELECTING THE LANGUAGE
You can select the language for mes-
sages on the display. “Metric” (dis-
tances in kilometres) and “imperial”
(distances in miles) versions are of-
fered for English
1) open the IMPOSTAZIONI (SET-
TINGS) menu fig. 85as shown above
2) select LINGUA (LANGUAGE) by
turning the knob/button (11)
3) press the knob/button (11) to
confirm the selection. A list of avail-
able languages will be displayed
IMPORTANT For certain coun-
tries (e.g. Denmark, Sweden and Por-
tugal), the voice messages related to
Navigation are in English whereas dis-
played messages are written in the lan-
guage of each country.