Page 1765 of 2643
AISIN AUTOMATIC TRANSAXLE 5A2 – 175
DAEWOO V–121 BL4
Assembly Procedure
1. Install the 2 seal rings to the input shaft.
Notice : Do not expand the ring ends excessively.
2. Coat a new O–ring with ATF and install the O–ring
to the input shaft.
3. Coat a new O–ring with ATF and install the O–ring
to the direct clutch piston.
4. Coat the direct clutch piston with ATF, install it to
the direct clutch drum.
Notice : Be careful not to damage the lip seal of direct
clutch piston.
Page 1766 of 2643
5A2 – 176IAISIN AUTOMATIC TRANSAXLE
DAEWOO V–121 BL4
5. Install the direct clutch return spring.
6. Place brake/clutch spring compressor DW240–020
and direct clutch adapter DW240–040 on the return
spring and compress.
7. Using a snap ring expander, install the snap ring.
Notice : Stop the press when the piston return spring is
lowered to the place 1–2 mm (0.039–0.078 in.) from the
snap ring groove, preventing the piston return spring from
being deformed.
Notice : Do not expand the snap ring excessively.
8. Install the 2 plates, 2 discs and flange.
S Before installing the discs, coat them with
ATF.Install in order: P � D � P � D – F
(P = Plate, D = Disc, F = Flange)
9. Using a screwdriver, remove the snap ring.
10. Check that end gap of the snap ring is not aligned
with one of the cutouts.
Page 1767 of 2643
AISIN AUTOMATIC TRANSAXLE 5A2 – 177
DAEWOO V–121 BL4
11. Install the direct clutch on the oil pump.
WARNING : USE CAUTION WHEN CHECKING COM-
PONENTS WITH COMPRESSED AIR OR PERSONAL
INJURY MAY RESULT.
12. Using a dial indicator, measure the direct clutch
piston stroke while applying and releasing 392 kPa
(57 psi) .of compressed air .
Piston stroke: 0.4 � 0.8 mm (0.016 � 0.031 in.)
S If the piston stroke is less than the limit of piston
stroke, parts may have been assembled incor-
rectly, so check and reassemble again.
S If the stroke is non–standard, select another
flange.
S There are 3 flanges in different thickness.
S Flange Thickness: mm (in.)
No
ThicknessNoThickness
13.0 (0.118)33.4 (0.134)
23.2 (0.126)
Page 1770 of 2643
5A2 – 180IAISIN AUTOMATIC TRANSAXLE
DAEWOO V–121 BL4
ONE–WAY CLUTCH
1. Snap Ring
2. One–Way Clutch3. 2nd Brake Hub
4. Retainer
Page 1771 of 2643
AISIN AUTOMATIC TRANSAXLE 5A2 – 181
DAEWOO V–121 BL4
Disassembly Procedure
1. Install the one–way clutch and thrust washer to the
rear planetary sun gear.
2. Hold the rear planetary sun gear and turn the one–
way clutch. The one–way clutch should turn freely
clockwise and should lock counterclockwise.
3. Using a screwdriver, remove the snap ring from the
2nd brake hub.
4. Remove the one–way clutch from the 2nd brake
hub.
5. Using a small screwdriver, remove the retainer from
the 2nd brake hub.
Page 1772 of 2643
5A2 – 182IAISIN AUTOMATIC TRANSAXLE
DAEWOO V–121 BL4
Assembly Procedure
1. Install the retainer to the 2nd brake hub.
2. Install the one–way clutch.
3. Using a screwdriver, install the snap ring.
4. Install the one–way clutch and thrust washer to the
rear planetary sun gear.
5. Hold the rear planetary sun gear and turn the one–
way clutch. The one–way clutch should turn freely
clockwise and should lock counterclockwise.
Page 1773 of 2643
AISIN AUTOMATIC TRANSAXLE 5A2 – 183
DAEWOO V–121 BL4
FORWARD AND REVERSE CLUTCH
1. Seal Ring
2. Flange
3. Disc
4. Plate
5. Flange
6. Snap Ring
7. Flange
8. Disc
9. Plate10. Snap Ring
11. Clutch Balancer
12. Forward Clutch Retrun Spring
13. Forward Clutch Piston
14. O–Ring
15. Forward Clutch Drum
16. O–Ring
17. Intermediate Shaft Sub–assembly
Page 1774 of 2643

5A2 – 184IAISIN AUTOMATIC TRANSAXLE
DAEWOO V–121 BL4
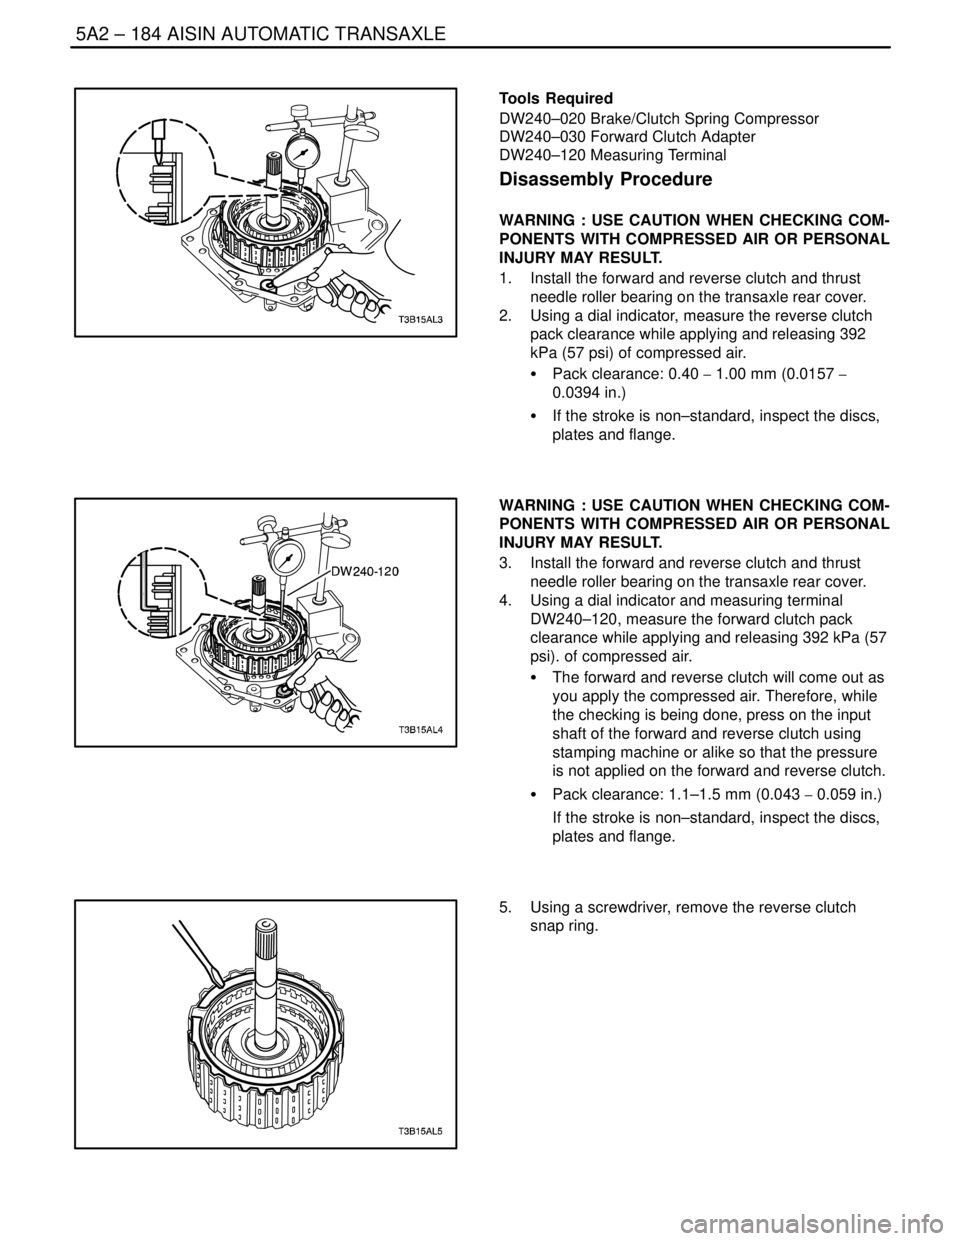
Tools Required
DW240–020 Brake/Clutch Spring Compressor
DW240–030 Forward Clutch Adapter
DW240–120 Measuring Terminal
Disassembly Procedure
WARNING : USE CAUTION WHEN CHECKING COM-
PONENTS WITH COMPRESSED AIR OR PERSONAL
INJURY MAY RESULT.
1. Install the forward and reverse clutch and thrust
needle roller bearing on the transaxle rear cover.
2. Using a dial indicator, measure the reverse clutch
pack clearance while applying and releasing 392
kPa (57 psi) of compressed air.
S Pack clearance: 0.40 � 1.00 mm (0.0157 �
0.0394 in.)
S If the stroke is non–standard, inspect the discs,
plates and flange.
WARNING : USE CAUTION WHEN CHECKING COM-
PONENTS WITH COMPRESSED AIR OR PERSONAL
INJURY MAY RESULT.
3. Install the forward and reverse clutch and thrust
needle roller bearing on the transaxle rear cover.
4. Using a dial indicator and measuring terminal
DW240–120, measure the forward clutch pack
clearance while applying and releasing 392 kPa (57
psi). of compressed air.
S The forward and reverse clutch will come out as
you apply the compressed air. Therefore, while
the checking is being done, press on the input
shaft of the forward and reverse clutch using
stamping machine or alike so that the pressure
is not applied on the forward and reverse clutch.
S Pack clearance: 1.1–1.5 mm (0.043 � 0.059 in.)
If the stroke is non–standard, inspect the discs,
plates and flange.
5. Using a screwdriver, remove the reverse clutch
snap ring.