2004 DAEWOO LACETTI seats
[x] Cancel search: seatsPage 2101 of 2643
8A – 6ISEAT BELTS
DAEWOO V–121 BL4
Installation Procedure
Notice : Dissimilar metals in direct contact with each other
may corrode rapidly. Make sure to use the correct fasten-
ers to prevent premature corrosion.
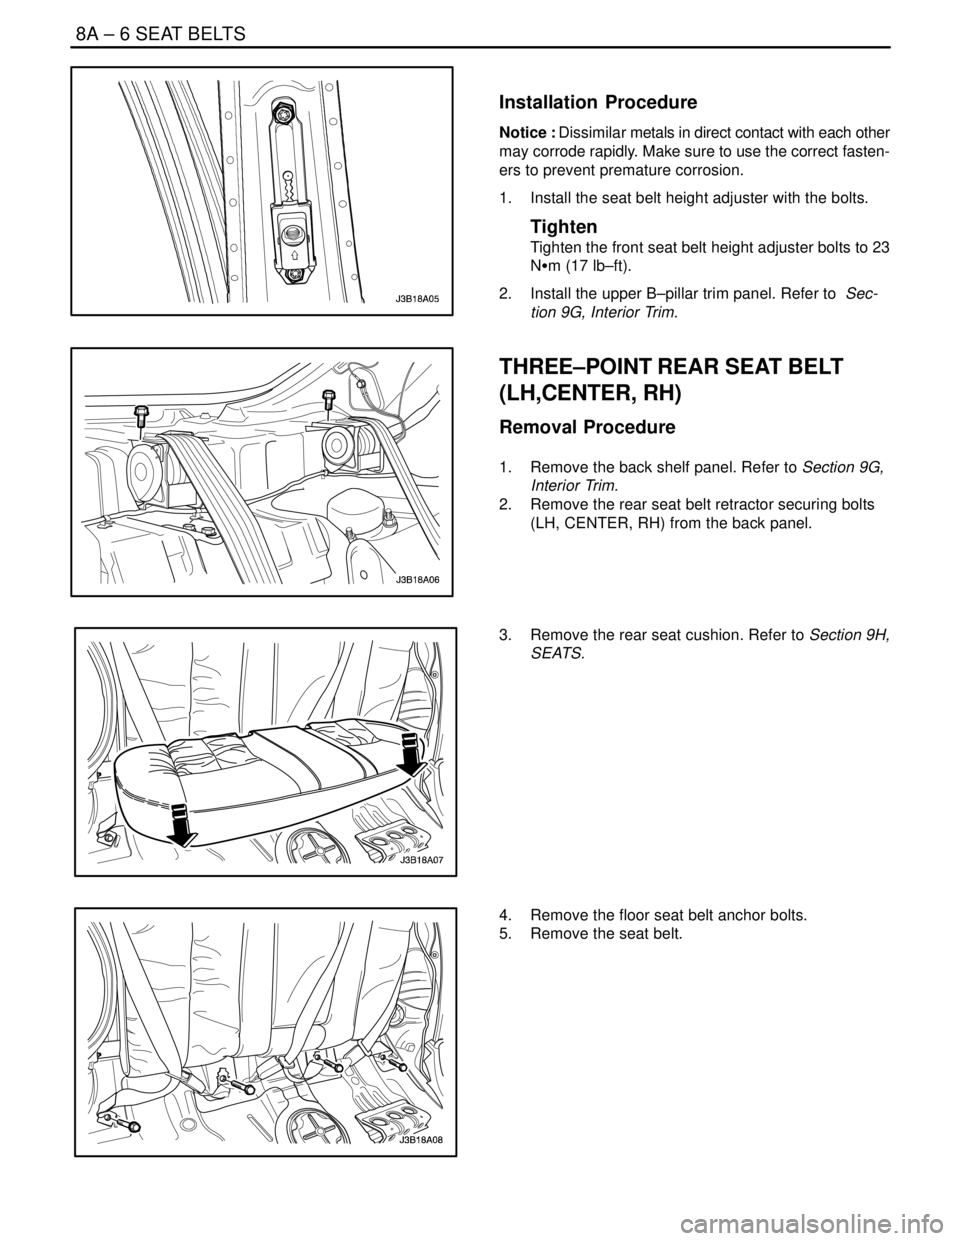
1. Install the seat belt height adjuster with the bolts.
Tighten
Tighten the front seat belt height adjuster bolts to 23
NSm (17 lb–ft).
2. Install the upper B–pillar trim panel. Refer to Sec-
tion 9G, Interior Trim.
THREE–POINT REAR SEAT BELT
(LH,CENTER, RH)
Removal Procedure
1. Remove the back shelf panel. Refer to Section 9G,
Interior Trim.
2. Remove the rear seat belt retractor securing bolts
(LH, CENTER, RH) from the back panel.
3. Remove the rear seat cushion. Refer to Section 9H,
SEATS.
4. Remove the floor seat belt anchor bolts.
5. Remove the seat belt.
Page 2102 of 2643
SEAT BELTS 8A – 7
DAEWOO V–121 BL4
Installation Procedure
Notice : Dissimilar metals in direct contact with each other
may corrode rapidly. Make sure to use the correct fasten-
ers to prevent premature corrosion.
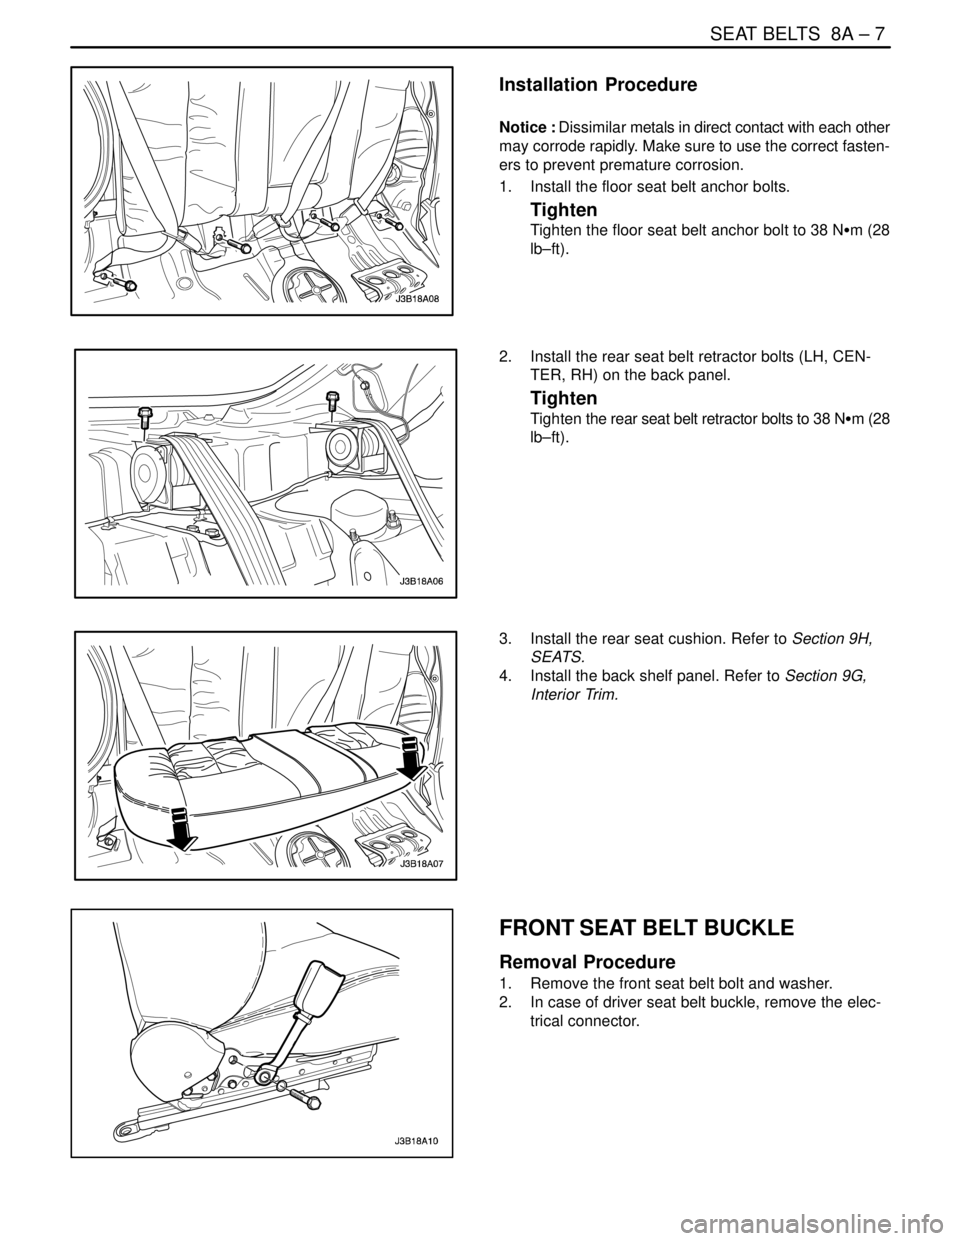
1. Install the floor seat belt anchor bolts.
Tighten
Tighten the floor seat belt anchor bolt to 38 NSm (28
lb–ft).
2. Install the rear seat belt retractor bolts (LH, CEN-
TER, RH) on the back panel.
Tighten
Tighten the rear seat belt retractor bolts to 38 NSm (28
lb–ft).
3. Install the rear seat cushion. Refer to Section 9H,
SEATS.
4. Install the back shelf panel. Refer to Section 9G,
Interior Trim.
FRONT SEAT BELT BUCKLE
Removal Procedure
1. Remove the front seat belt bolt and washer.
2. In case of driver seat belt buckle, remove the elec-
trical connector.
Page 2204 of 2643
8B – 100ISUPPLEMENTAL INFLATABLE RESTRAINTS (SIR)
DAEWOO V–121 BL4
GENERAL DESCRIPTION
AND SYSTEM OPERATION
SUPPLEMENTAL INFLATABLE
RESTRAINTS(SIR)
The supplemental inflatable restraints(SIR) is a safety de-
vice used in conjunction with the seat belt. The air bag
does not replace the fuction of the seatbelt. The driver and
the passengers must always fasten their seat belts and
adjust them for a proper fit.
The SIR is designed to protect the driver and the front seat
passenger in the event of a significant frontal impact to the
vehicle. The airbags deploy if the force is applied from a
direction within 30 degrees of the vehicle’s center line.
The SIR system consists of a
S Driver airbag module
S Driver side airbag module
S Passenger airbag module
S Passenger side airbag module
S Driver’s and front passenger’s seat belt pretension-
ers(and load limiter for some model).
S Sensing and diagnostic module(SDM)
S Clock spring.
S Wire harness and connectors.
S AIRBAG indicator on the instrument cluster.
S Side airbag sensor
AIRBAG MODULES
Driver Airbag Module
CAUTION : Tempering with driver airbag module
creates the risk of an injury from unexpected deploy-
ments. Therefore, the driver airbag module should
never be disassembled.
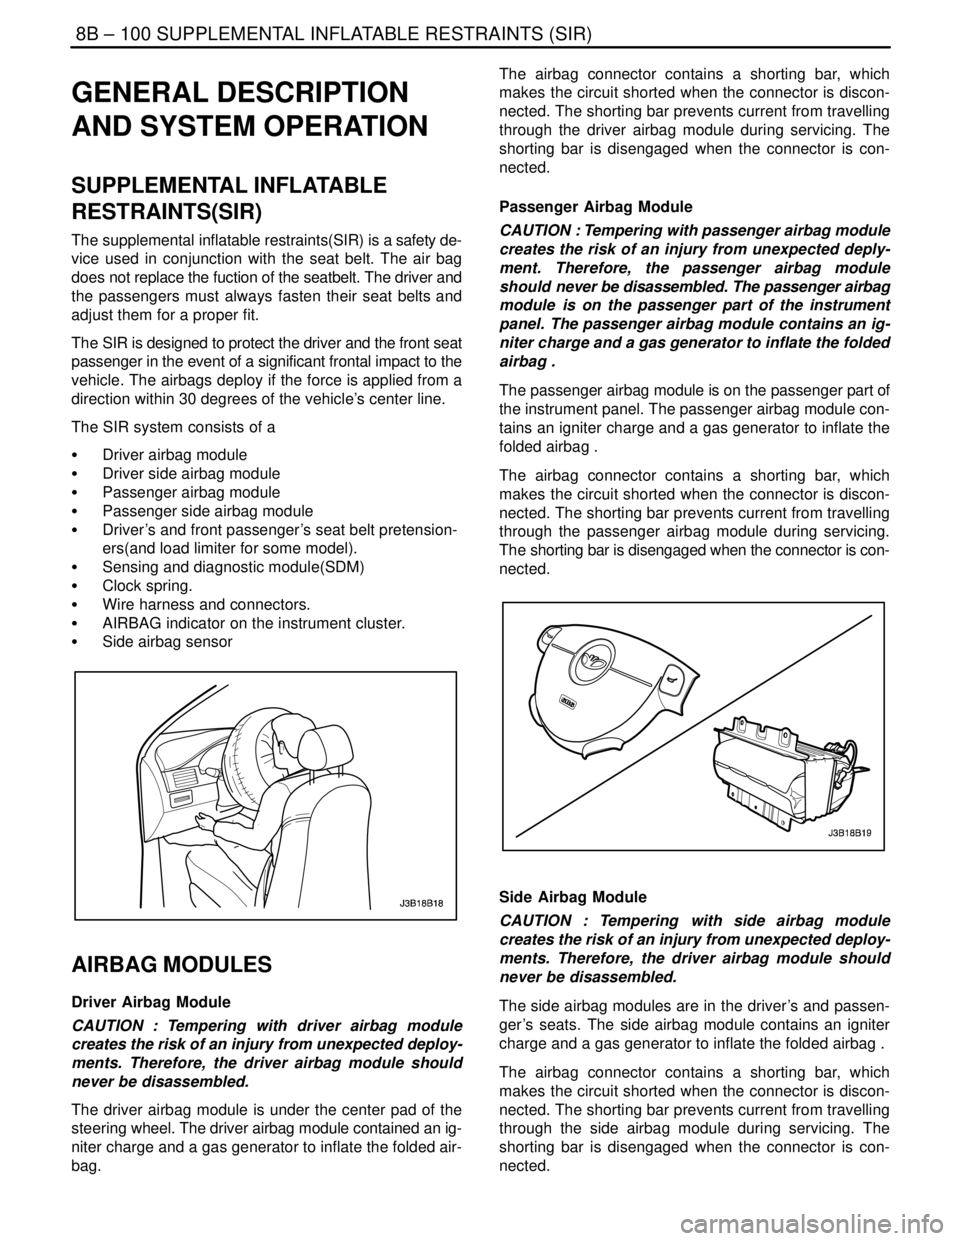
The driver airbag module is under the center pad of the
steering wheel. The driver airbag module contained an ig-
niter charge and a gas generator to inflate the folded air-
bag.The airbag connector contains a shorting bar, which
makes the circuit shorted when the connector is discon-
nected. The shorting bar prevents current from travelling
through the driver airbag module during servicing. The
shorting bar is disengaged when the connector is con-
nected.
Passenger Airbag Module
CAUTION : Tempering with passenger airbag module
creates the risk of an injury from unexpected deply-
ment. Therefore, the passenger airbag module
should never be disassembled. The passenger airbag
module is on the passenger part of the instrument
panel. The passenger airbag module contains an ig-
niter charge and a gas generator to inflate the folded
airbag .
The passenger airbag module is on the passenger part of
the instrument panel. The passenger airbag module con-
tains an igniter charge and a gas generator to inflate the
folded airbag .
The airbag connector contains a shorting bar, which
makes the circuit shorted when the connector is discon-
nected. The shorting bar prevents current from travelling
through the passenger airbag module during servicing.
The shorting bar is disengaged when the connector is con-
nected.
Side Airbag Module
CAUTION : Tempering with side airbag module
creates the risk of an injury from unexpected deploy-
ments. Therefore, the driver airbag module should
never be disassembled.
The side airbag modules are in the driver’s and passen-
ger’s seats. The side airbag module contains an igniter
charge and a gas generator to inflate the folded airbag .
The airbag connector contains a shorting bar, which
makes the circuit shorted when the connector is discon-
nected. The shorting bar prevents current from travelling
through the side airbag module during servicing. The
shorting bar is disengaged when the connector is con-
nected.
Page 2272 of 2643

9B – 46ILITHING SYSTEMS
DAEWOO V–121 BL4
GENERAL DESCRIPTION
AND SYSTEM OPERATION
HEADLAMPS–ON REMINDER CHIME
When the headlamp switch is in the headlamps–on or
parking lamps–on position, voltage is applied to the chime
module. When the ignition is in ON, ACC or START, volt-
age is applied through the fuse block to the module. These
two voltages are sensed, and the chime module is not
sounded.
When the ignition is not in ON, ACC or START, the module
loses voltage. The chime module senses change. If the
voltage is still available, it is applied to sound the chime.
The chime can be turned off by turning the headlamp
switch off. The module no longer senses voltage from the
headlamp switch, so the chime module does not sound.
HEADLAMPS
The headlamps are controlled by the multifunction lever
located on the left side of the steering column. They will
come on with the ignition switch in any position. Turning
the headlamp switch to the first position turns on the park-
ing lamps, the license plate lamps and the instrument pan-
el illumination. Turning the switch to the second position
turns on all of the previous lamps and the headlamps.
Turning the switch to the OFF position turns off all the
lamps.
Headlamp high beams and low beams are also controlled
by this lever. When the headlamps are on, pushing the le-
ver away from the driver until the switch clicks changes the
lamp from low beam to high beam. An indicator lamp on
the instrument cluster assembly will come on when the
high beam headlamps are on. To return the headlamps to
low beam, pull the lever toward the driver.
The headlamps must be aimed for proper illumination of
the road. Headlamp aim should be checked whenever a
new headlamp assembly is installed, or whenever service
repairs to the front end area may have disturbed the head-
lamp assembly or its mountings.
DAYTIME RUNNING LAMPS
The Daytime Running Lamps (DRL) will come on when:
S The ignition is ON.
S The light is OFF.
S The parking brake is released.
When the exterior lights are on, the DRL will turn off. To
turn the DRL off when idling, apply the parking brake.
PARKING AND TURN SIGNAL LAMPS
The parking lamps can be turned on by turning the lighting
switch to the first position. The parking lamps can be
turned off by turning the switch to the OFF position.When the turn signals are activated, the front and rear turn
signal lamps flash to signal a turn. The turn signals work
only when the ignition is ON.
The turn signals are controlled by the light switch on the
left side of the steering column. Moving the lever all the
way up or down (past the detent) will turn on the front and
rear turn signals. When the turn is completed, the lever will
return to horizontal and the turn signals will stop flashing.
For changing lanes, or for shallow turns in which the steer-
ing wheel does not turn far enough to cancel the signal,
move the signal lever only to the first detent and hold it
there. When the lever is released, it will return to horizontal
and the turn signals will cancel.
FOG LAMPS
The fog lamp switch is on the instrument panel to the right
of the steering column. To use the fog lamps, first turn on
the headlamps or the parking lamps. Then push the fog
lamp switch. The indicator light in the switch will illuminate
to indicate that the fog lamps are on. Push the switch again
to turn off the fog lamps. The indicator light will then go off.
The fog lamps should not be used as a substitute for the
headlamps.
The fog lamps must be aimed for proper illumination of the
road. Fog lamp aim should be checked when a new bulb
is installed or if service or repairs in the front end area may
have disturbed the fog lamp mountings.
REAR COMBINATION LAMPS
The taillamps, stoplamps, turn signal lamps and backup
lamp are one assembly.
Turning on either the headlamps or the parking lamps will
also turn on the taillamps. When the brake pedal is
pushed, the taillamps will glow brighter to serve as sto-
plamps.
The center high–mounted stoplamp is located in the rear
window and will come on when the brake pedal is pressed.
LICENSE PLATE LAMP
The license plate lamps will come on when the headlamps
or the parking lamps are on. The license plate lamps are
mounted above the license plate.
INTERIOR COURTESY LAMP
The courtesy lamp is located on the headliner just behind
the front seats. The lamp switch has three positions. If the
switch is left in the center position, the lamp will go on
whenever a door is opened and go off when it is closed.
In the ON position, the lamp will stay on until it is turned off.
In the OFF position, the lamp will not come on, even when
a door is opened.
LUGGAGE COMPARTMENT LAMP
The luggage compartment lamp is located under the deck
lid sill plate on the notchback. The lamp is located on the
left–side wheelhouse trim panel on the hatchback. It will
come on whenever the luggage compartment is opened.
Page 2347 of 2643
INTERIOR TRIM 9G – 7
DAEWOO V–121 BL4
Installation Procedure
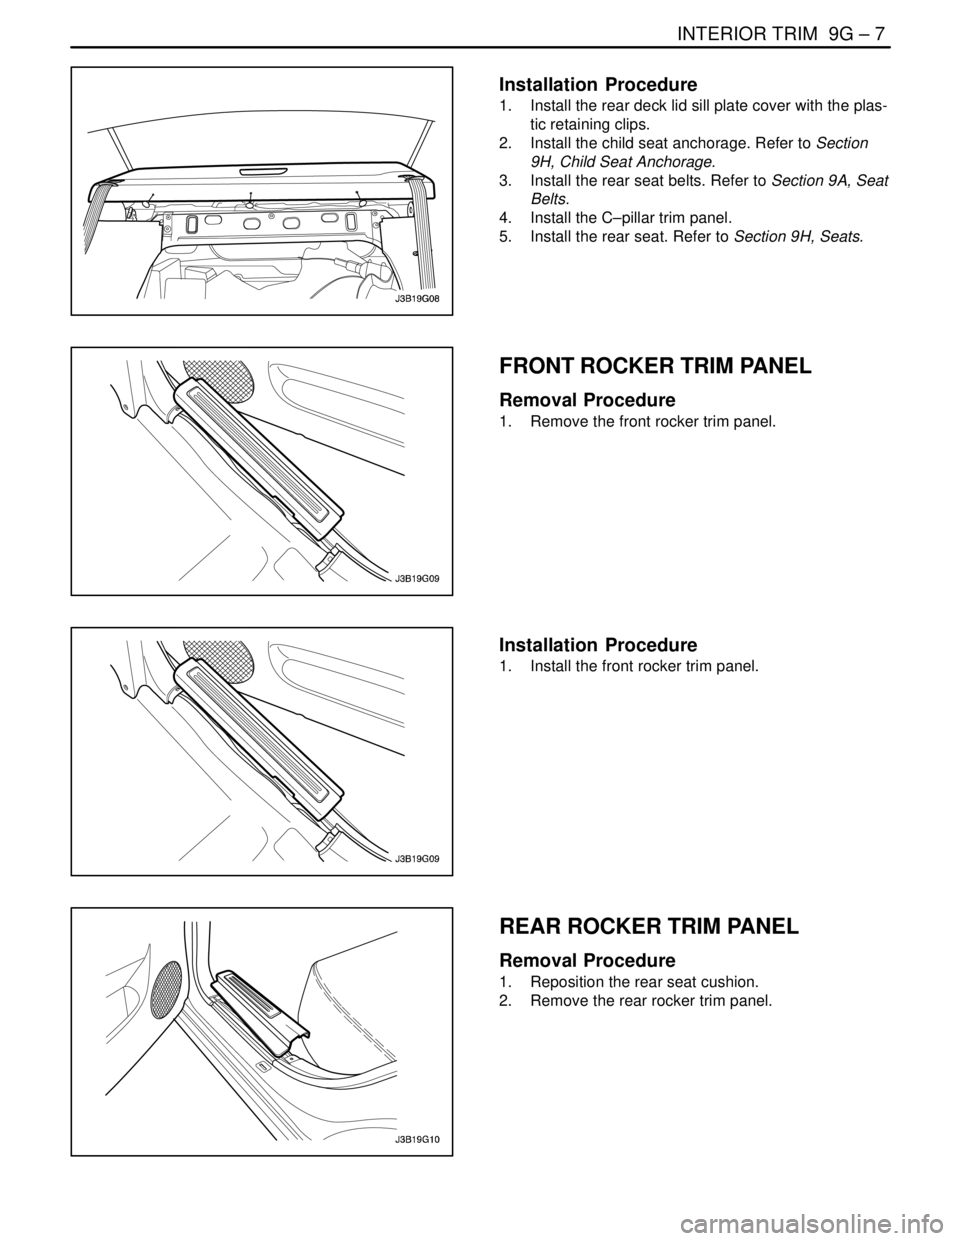
1. Install the rear deck lid sill plate cover with the plas-
tic retaining clips.
2. Install the child seat anchorage. Refer to Section
9H, Child Seat Anchorage.
3. Install the rear seat belts. Refer to Section 9A, Seat
Belts.
4. Install the C–pillar trim panel.
5. Install the rear seat. Refer to Section 9H, Seats.
FRONT ROCKER TRIM PANEL
Removal Procedure
1. Remove the front rocker trim panel.
Installation Procedure
1. Install the front rocker trim panel.
REAR ROCKER TRIM PANEL
Removal Procedure
1. Reposition the rear seat cushion.
2. Remove the rear rocker trim panel.
Page 2348 of 2643
9G – 8IINTERIOR TRIM
DAEWOO V–121 BL4
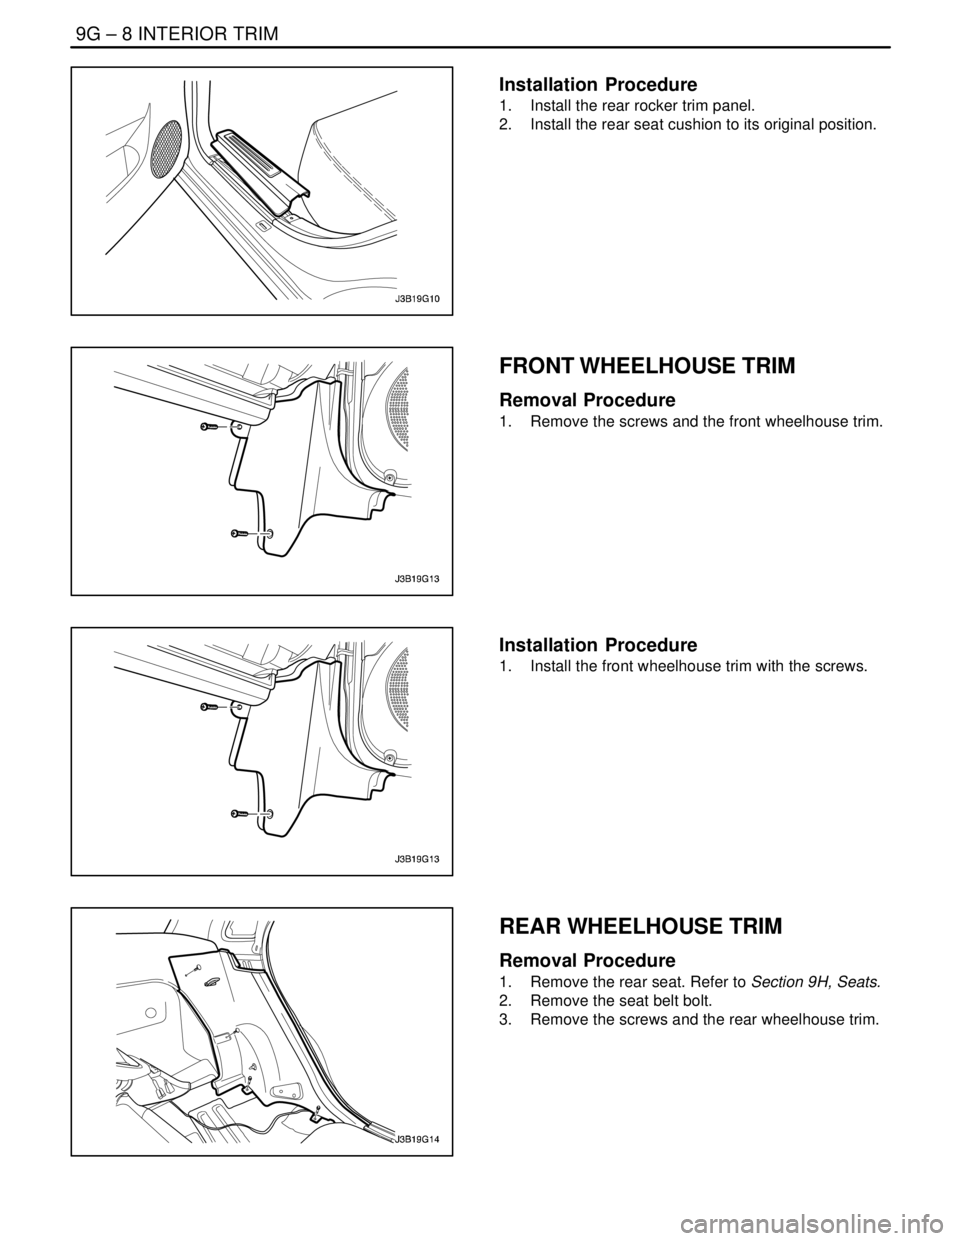
Installation Procedure
1. Install the rear rocker trim panel.
2. Install the rear seat cushion to its original position.
FRONT WHEELHOUSE TRIM
Removal Procedure
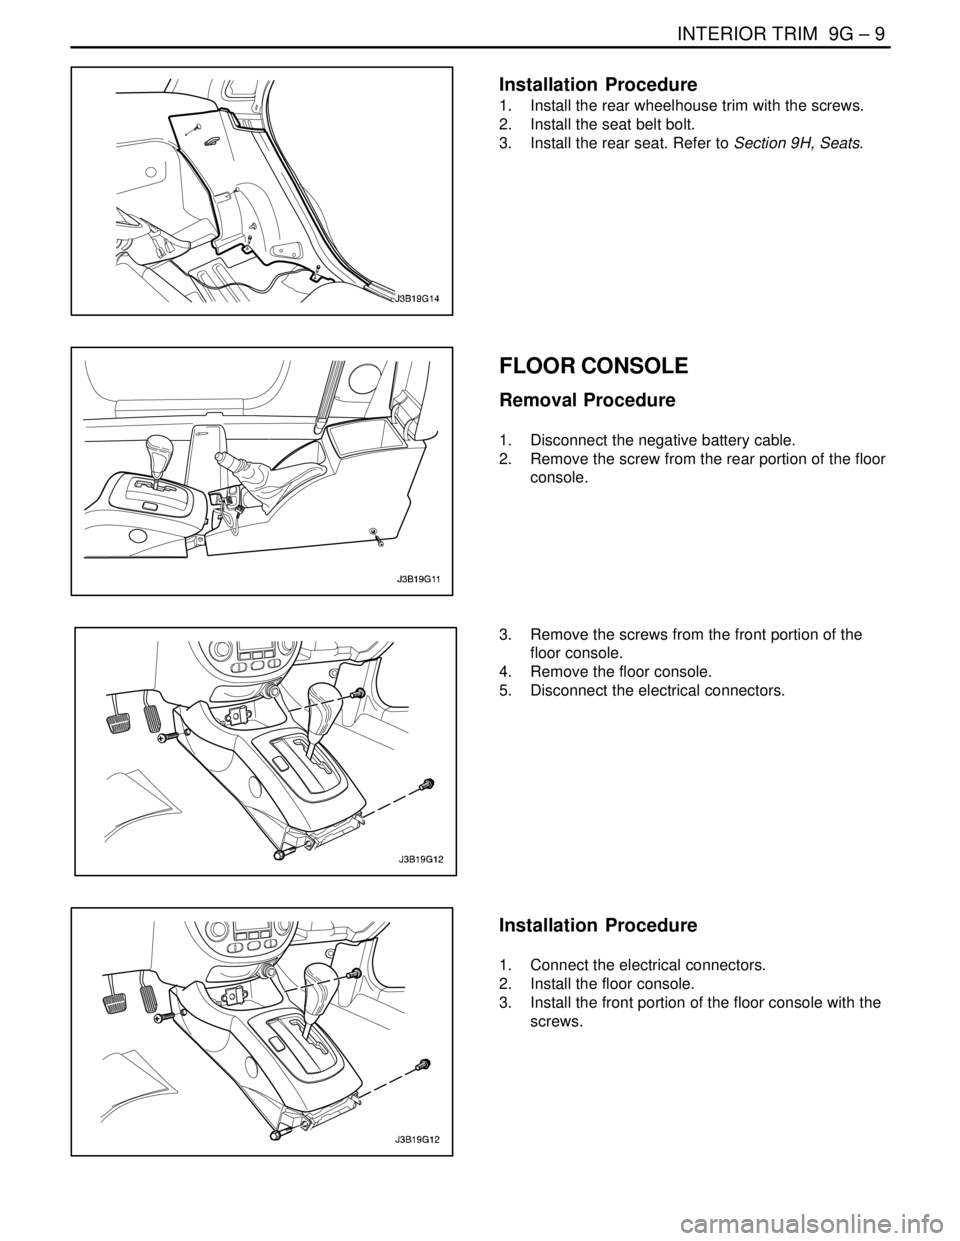
1. Remove the screws and the front wheelhouse trim.
Installation Procedure
1. Install the front wheelhouse trim with the screws.
REAR WHEELHOUSE TRIM
Removal Procedure
1. Remove the rear seat. Refer to Section 9H, Seats.
2. Remove the seat belt bolt.
3. Remove the screws and the rear wheelhouse trim.
Page 2349 of 2643
INTERIOR TRIM 9G – 9
DAEWOO V–121 BL4
Installation Procedure
1. Install the rear wheelhouse trim with the screws.
2. Install the seat belt bolt.
3. Install the rear seat. Refer to Section 9H, Seats.
FLOOR CONSOLE
Removal Procedure
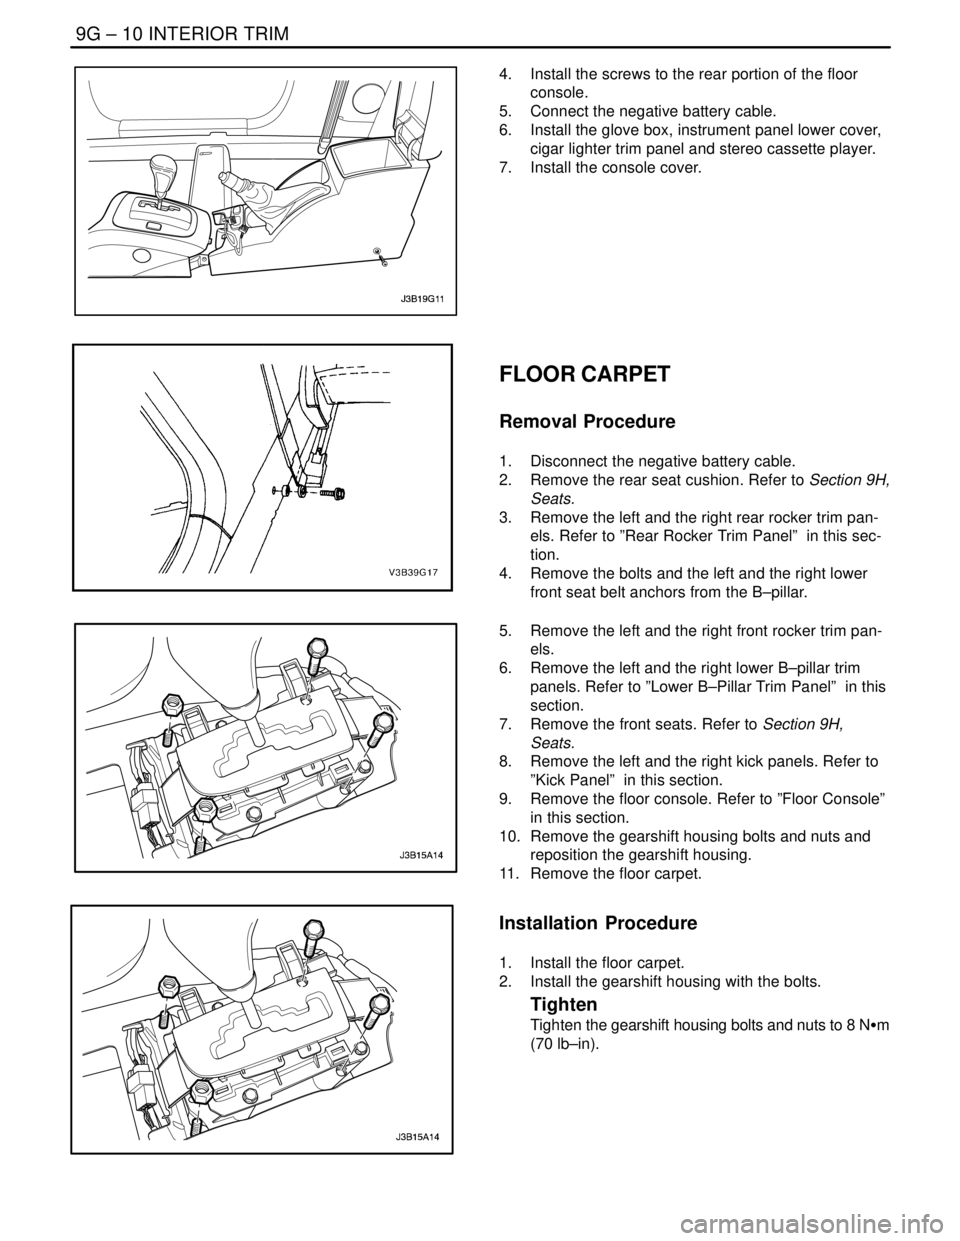
1. Disconnect the negative battery cable.
2. Remove the screw from the rear portion of the floor
console.
3. Remove the screws from the front portion of the
floor console.
4. Remove the floor console.
5. Disconnect the electrical connectors.
Installation Procedure
1. Connect the electrical connectors.
2. Install the floor console.
3. Install the front portion of the floor console with the
screws.
Page 2350 of 2643
9G – 10IINTERIOR TRIM
DAEWOO V–121 BL4
4. Install the screws to the rear portion of the floor
console.
5. Connect the negative battery cable.
6. Install the glove box, instrument panel lower cover,
cigar lighter trim panel and stereo cassette player.
7. Install the console cover.
FLOOR CARPET
Removal Procedure
1. Disconnect the negative battery cable.
2. Remove the rear seat cushion. Refer to Section 9H,
Seats.
3. Remove the left and the right rear rocker trim pan-
els. Refer to ”Rear Rocker Trim Panel” in this sec-
tion.
4. Remove the bolts and the left and the right lower
front seat belt anchors from the B–pillar.
5. Remove the left and the right front rocker trim pan-
els.
6. Remove the left and the right lower B–pillar trim
panels. Refer to ”Lower B–Pillar Trim Panel” in this
section.
7. Remove the front seats. Refer to Section 9H,
Seats.
8. Remove the left and the right kick panels. Refer to
”Kick Panel” in this section.
9. Remove the floor console. Refer to ”Floor Console”
in this section.
10. Remove the gearshift housing bolts and nuts and
reposition the gearshift housing.
11. Remove the floor carpet.
Installation Procedure
1. Install the floor carpet.
2. Install the gearshift housing with the bolts.
Tighten
Tighten the gearshift housing bolts and nuts to 8 NSm
(70 lb–in).