2004 BMW 525I SEDAN tow
[x] Cancel search: towPage 34 of 220
Opening and closing
32
Emergency release
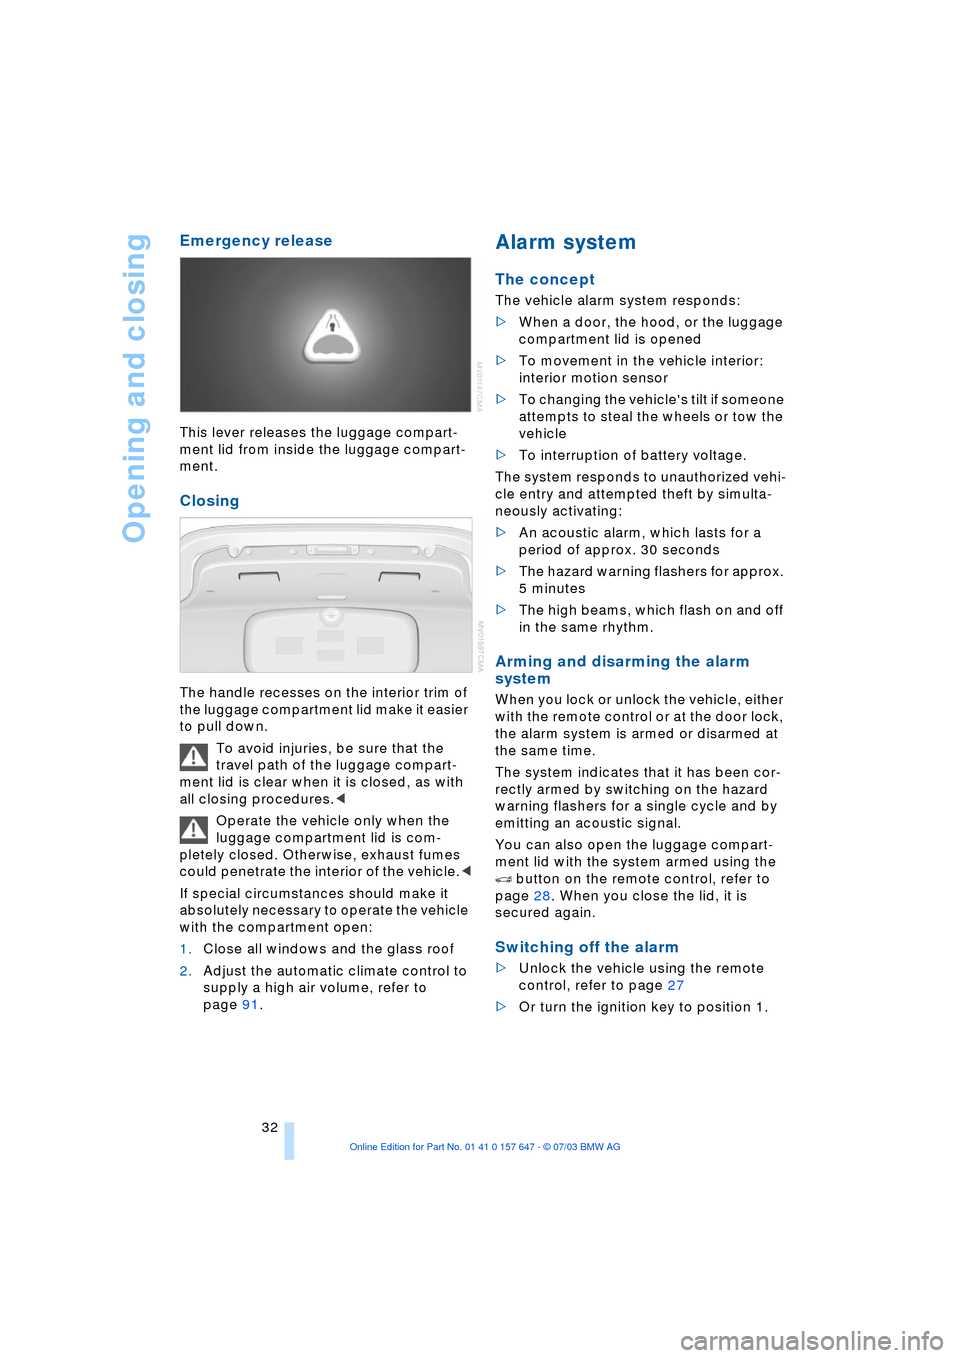
This lever releases the luggage compart-
ment lid from inside the luggage compart-
ment.
Closing
The handle recesses on the interior trim of
the luggage compartment lid make it easier
to pull down.
To avoid injuries, be sure that the
travel path of the luggage compart-
ment lid is clear when it is closed, as with
all closing procedures.<
Operate the vehicle only when the
luggage compartment lid is com-
pletely closed. Otherwise, exhaust fumes
could penetrate the interior of the vehicle.<
If special circumstances should make it
absolutely necessary to operate the vehicle
with the compartment open:
1.Close all windows and the glass roof
2.Adjust the automatic climate control to
supply a high air volume, refer to
page 91.
Alarm system
The concept
The vehicle alarm system responds:
>When a door, the hood, or the luggage
compartment lid is opened
>To movement in the vehicle interior:
interior motion sensor
>To changing the vehicle's tilt if someone
attempts to steal the wheels or tow the
vehicle
>To interruption of battery voltage.
The system responds to unauthorized vehi-
cle entry and attempted theft by simulta-
neously activating:
>An acoustic alarm, which lasts for a
period of approx. 30 seconds
>The hazard warning flashers for approx.
5 minutes
>The high beams, which flash on and off
in the same rhythm.
Arming and disarming the alarm
system
When you lock or unlock the vehicle, either
with the remote control or at the door lock,
the alarm system is armed or disarmed at
the same time.
The system indicates that it has been cor-
rectly armed by switching on the hazard
warning flashers for a single cycle and by
emitting an acoustic signal.
You can also open the luggage compart-
ment lid with the system armed using the
button on the remote control, refer to
page 28. When you close the lid, it is
secured again.
Switching off the alarm
>Unlock the vehicle using the remote
control, refer to page 27
>Or turn the ignition key to position 1.
Page 37 of 220
Controls
35Reference
At a glance
Driving tips
Communications
Navigation
Entertainment
Mobility
The headliner insert slides back somewhat
when you raise the glass roof. When the
glass roof is opened the headliner retracts
with it.
Do not use force to close the head-
liner insert with the glass roof in its
raised position, as damage to the mecha-
nism could result.<
For information on using the convenience
operation mode at the door lock or with the
remote control, refer to page 28 or 29.
Automatic* opening and closing
Briefly press the switch past the resistance
point and then release it.
In addition, the following movements are
also automatic:
>With the glass roof open, move the
switch towards 'Raise': the glass roof
moves to the end position of 'Raise'
>With the glass roof raised, move the
switch towards 'Open': the glass roof
moves to the end position of 'Open'.
Press the switch again in any direction to
stop the glass roof.
Safety feature
If the glass roof encounters resistance
when closing from roughly the center of the
roof opening or when closing from the
raised position, the closing action is inter-
rupted and the glass roof reopens a little.
Despite this safety feature, you
should always inspect the glass roof's
travel range prior to closing it, as the safety
feature might fail to detect certain kinds of
obstructions, such as very thin objects, and
the glass roof would continue closing.
Pressing the switch beyond the resistance
point and holding it limits the response of
the safety feature. The glass roof only
opens a short distance.
If you again press the switch past the resis-
tance point and hold it in position within a
period of roughly 2 seconds, the safety fea-
ture is deactivated.<
When you close the glass roof, it will
slow down as it approaches the end of its travel path; this is to allow the safety
feature to respond more precisely to any
obstructions encountered in this critical
area.<
Following interruptions in electrical
power supply
Following interruptions in electrical power
supply, for instance, when the battery is
disconnected, it is possible that the glass
roof will extend to its raised position, but
fail to respond to other commands. Should
this occur, please have the glass roof rein-
itialized at your BMW center.
Manual operation
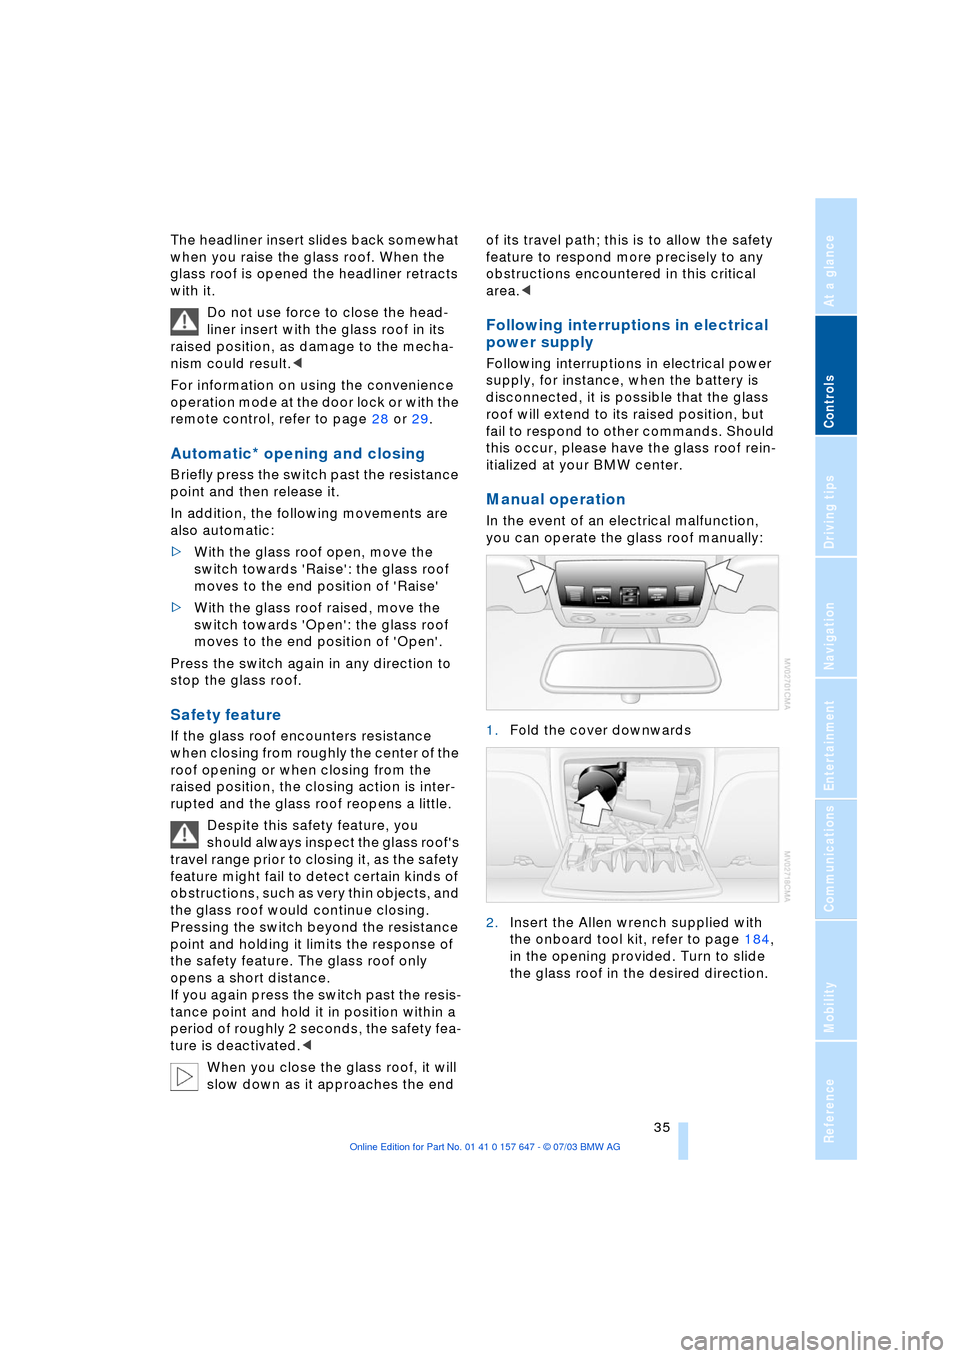
In the event of an electrical malfunction,
you can operate the glass roof manually:
1.Fold the cover downwards
2.Insert the Allen wrench supplied with
the onboard tool kit, refer to page 184,
in the opening provided. Turn to slide
the glass roof in the desired direction.
Page 39 of 220
Controls
37Reference
At a glance
Driving tips
Communications
Navigation
Entertainment
Mobility
ment, and the ensuing loss of vehicle con-
trol could lead to an accident.
On the front passenger side as well, do not
tilt the backrest too far toward the rear
while driving. Failure to observe this pre-
caution can prevent the belt from providing
effective protection against injury, as the
passenger could slide under the belt in an
accident.
Make sure that the footwell behind the
driver's and front passenger's seat is empty
and unobstructed. If you fail to do so, any
persons or objects behind the seat could
be injured or damaged by a rearward
movement of the seat.<
Please observe the information on damage
to safety belts provided on page 41 and the
information on the active head restraints on
page 40.
Seat adjustment
To ensure that the safety systems
continue to provide optimized protec-
tion, please observe the adjustment
instructions on page 36.<
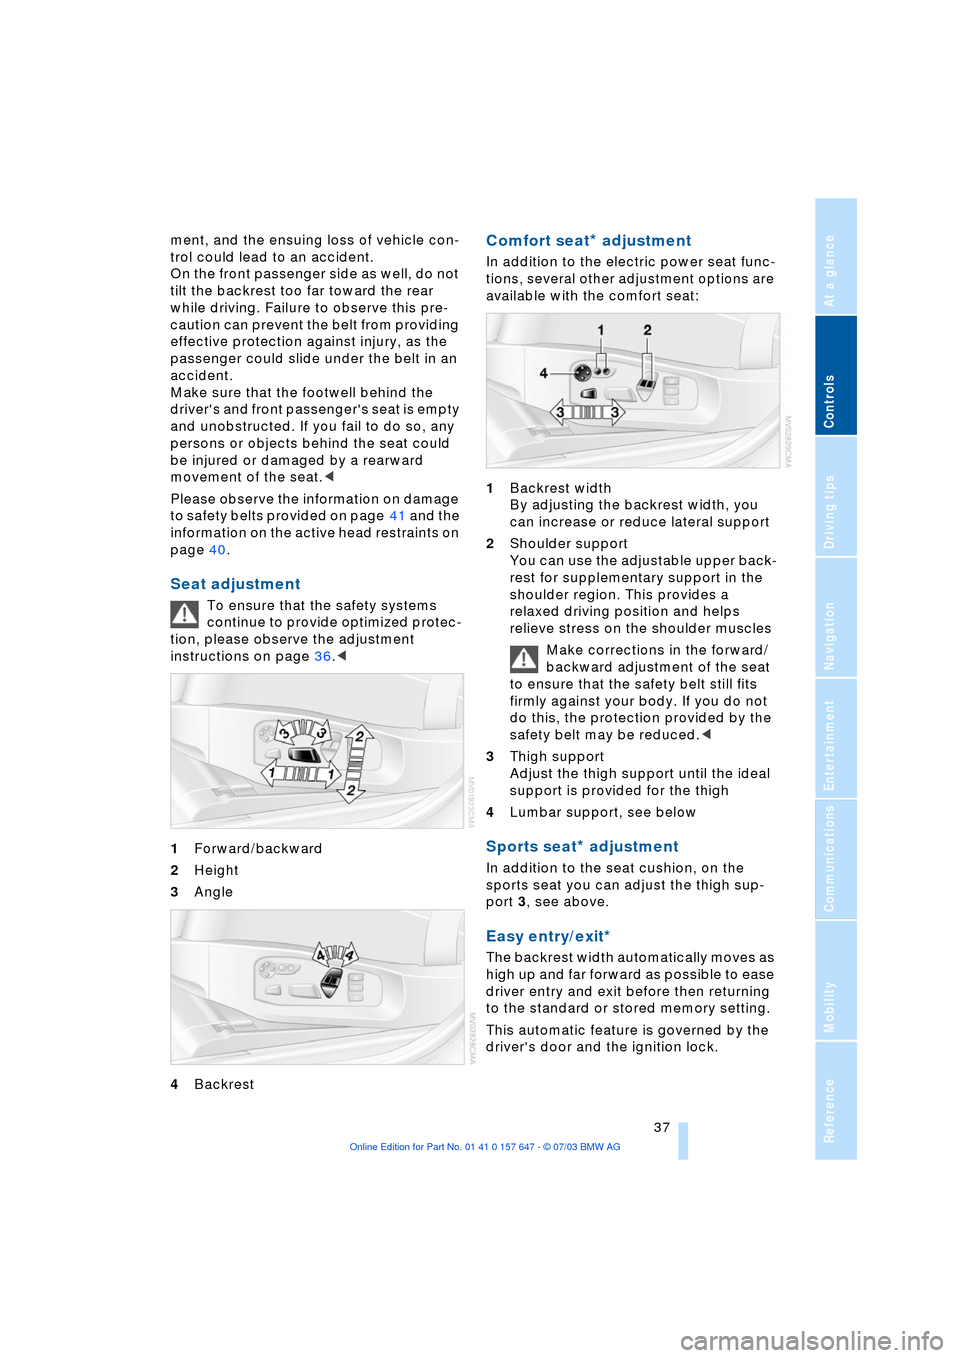
1Forward/backward
2Height
3Angle
4Backrest
Comfort seat* adjustment
In addition to the electric power seat func-
tions, several other adjustment options are
available with the comfort seat:
1Backrest width
By adjusting the backrest width, you
can increase or reduce lateral support
2Shoulder support
You can use the adjustable upper back-
rest for supplementary support in the
shoulder region. This provides a
relaxed driving position and helps
relieve stress on the shoulder muscles
Make corrections in the forward/
backward adjustment of the seat
to ensure that the safety belt still fits
firmly against your body. If you do not
do this, the protection provided by the
safety belt may be reduced.<
3Thigh support
Adjust the thigh support until the ideal
support is provided for the thigh
4Lumbar support, see below
Sports seat* adjustment
In addition to the seat cushion, on the
sports seat you can adjust the thigh sup-
port 3, see above.
Easy entry/exit*
The backrest width automatically moves as
high up and far forward as possible to ease
driver entry and exit before then returning
to the standard or stored memory setting.
This automatic feature is governed by the
driver's door and the ignition lock.
Page 50 of 220
Transporting children safely
48 1.Engage the center safety belt into the
belt buckle
2.Pull the belt away from the area of the
child-restraint fixing.
On journeys
If side airbags are fitted in the rear,
make sure that children do not lean
out of the child's seat towards the door
panels. Otherwise severe injuries can be
caused if the side airbags are triggered.<
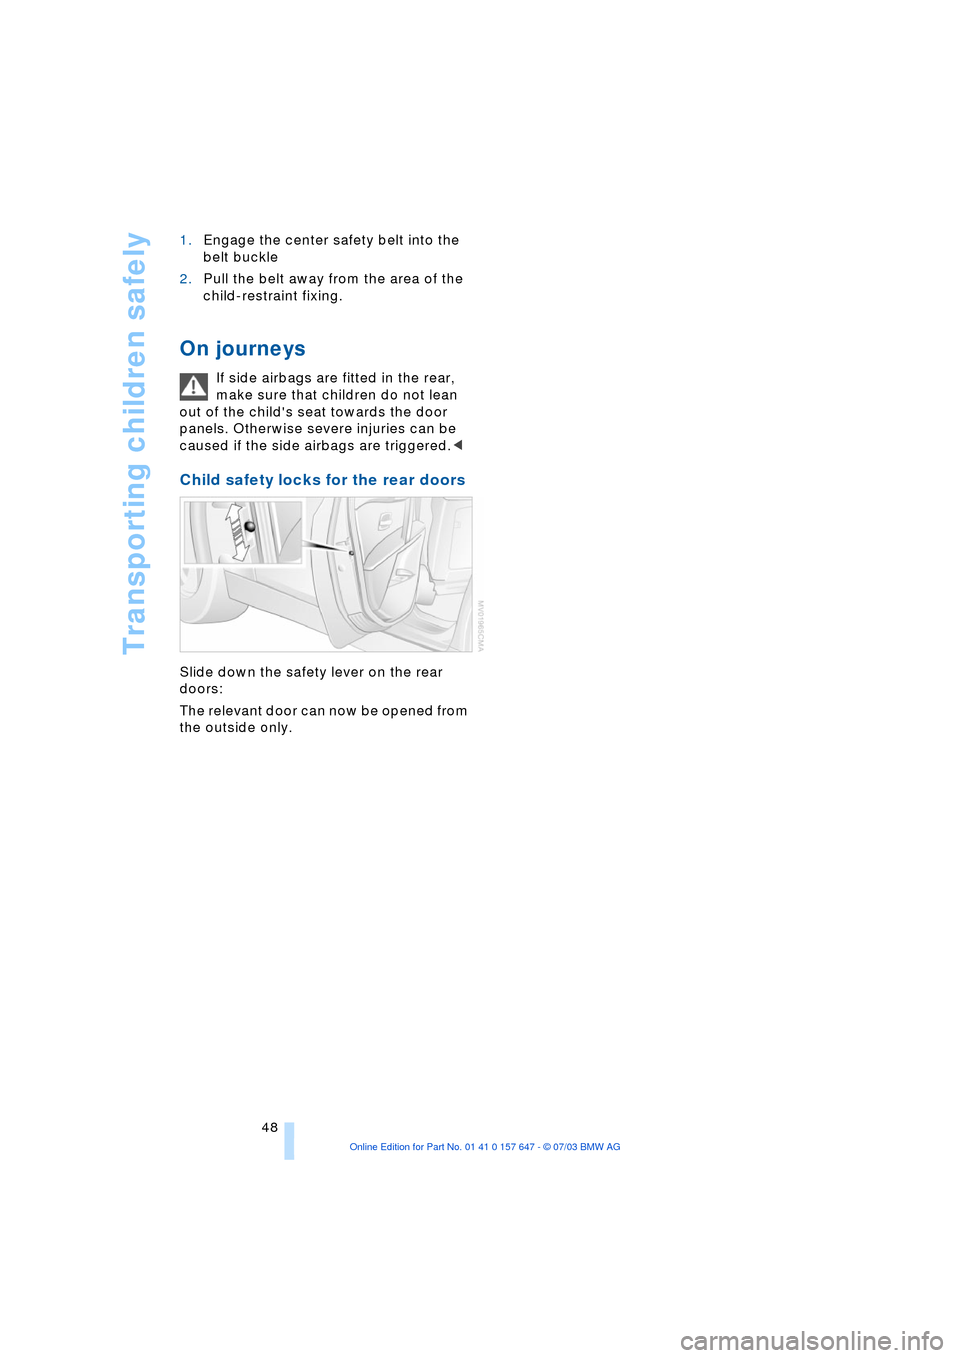
Child safety locks for the rear doors
Slide down the safety lever on the rear
doors:
The relevant door can now be opened from
the outside only.
Page 54 of 220
Driving
52 >Automatic upshifts and downshifts in
the Drive mode
>Automatic downshifts with minimum
engine speed
>Kickdown function in the Drive mode
>Acceleration assistant, refer to
page 54.
Selector-lever positions
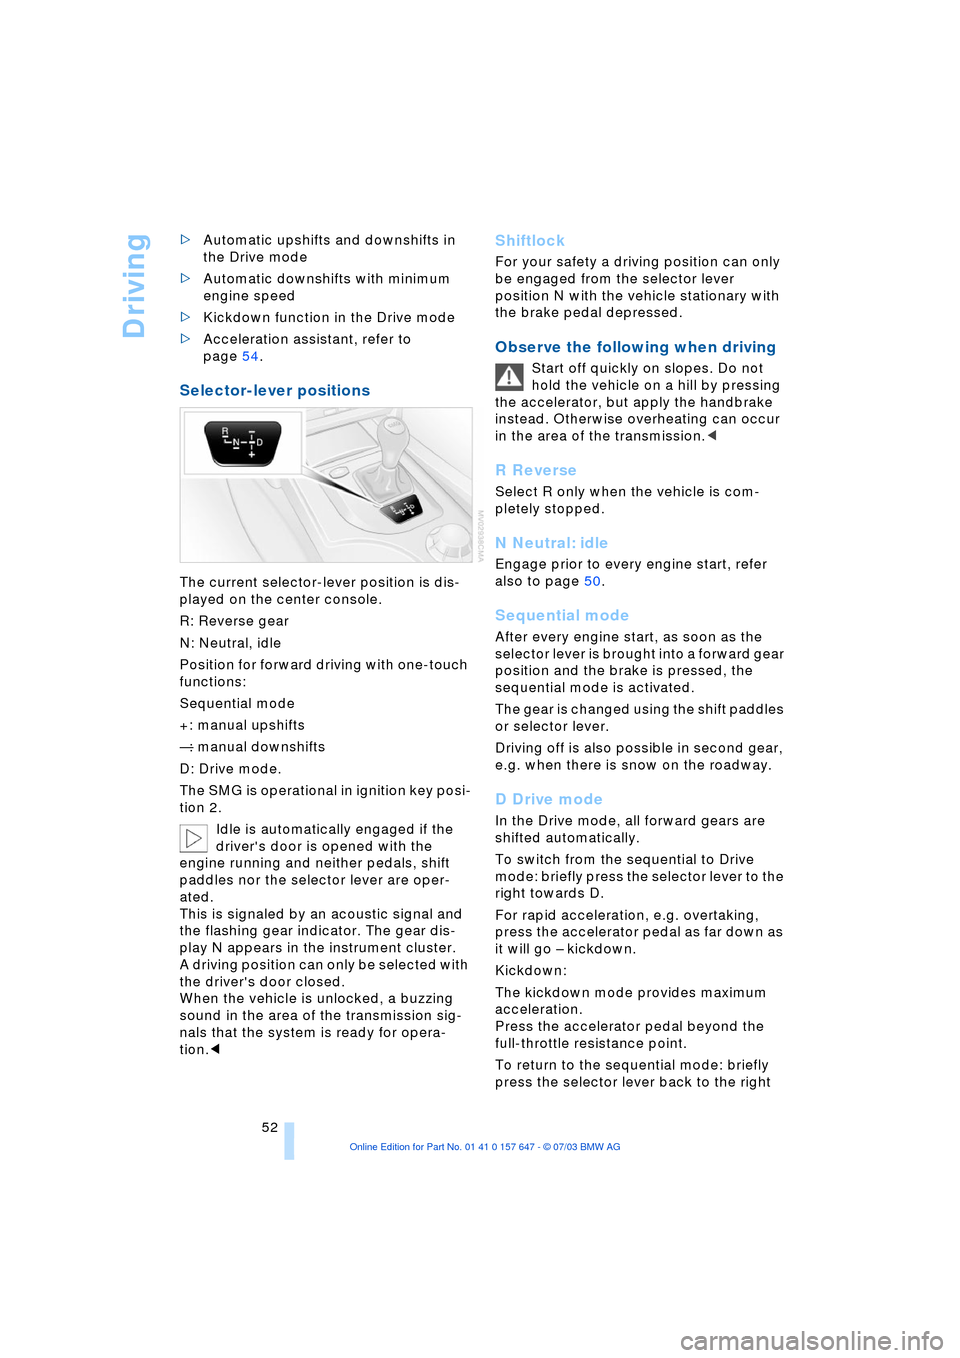
The current selector-lever position is dis-
played on the center console.
R: Reverse gear
N: Neutral, idle
Position for forward driving with one-touch
functions:
Sequential mode
+: manual upshifts
Ñ: manual downshifts
D: Drive mode.
The SMG is operational in ignition key posi-
tion 2.
Idle is automatically engaged if the
driver's door is opened with the
engine running and neither pedals, shift
paddles nor the selector lever are oper-
ated.
This is signaled by an acoustic signal and
the flashing gear indicator. The gear dis-
play N appears in the instrument cluster.
A driving position can only be selected with
the driver's door closed.
When the vehicle is unlocked, a buzzing
sound in the area of the transmission sig-
nals that the system is ready for opera-
tion.<
Shiftlock
For your safety a driving position can only
be engaged from the selector lever
position N with the vehicle stationary with
the brake pedal depressed.
Observe the following when driving
Start off quickly on slopes. Do not
hold the vehicle on a hill by pressing
the accelerator, but apply the handbrake
instead. Otherwise overheating can occur
in the area of the transmission.<
R Reverse
Select R only when the vehicle is com-
pletely stopped.
N Neutral: idle
Engage prior to every engine start, refer
also to page 50.
Sequential mode
After every engine start, as soon as the
selector lever is brought into a forward gear
position and the brake is pressed, the
sequential mode is activated.
The gear is changed using the shift paddles
or selector lever.
Driving off is also possible in second gear,
e.g. when there is snow on the roadway.
D Drive mode
In the Drive mode, all forward gears are
shifted automatically.
To switch from the sequential to Drive
mode: briefly press the selector lever to the
right towards D.
For rapid acceleration, e.g. overtaking,
press the accelerator pedal as far down as
it will go Ð kickdown.
Kickdown:
The kickdown mode provides maximum
acceleration.
Press the accelerator pedal beyond the
full-throttle resistance point.
To return to the sequential mode: briefly
press the selector lever back to the right
Page 55 of 220
Controls
53Reference
At a glance
Driving tips
Communications
Navigation
Entertainment
Mobility
towards D or change the current gear using
the shift paddles or selector lever.
Gear changes
Using selector lever
>To shift up, briefly press the selector
lever towards +
>To shift down, briefly press towards Ñ.
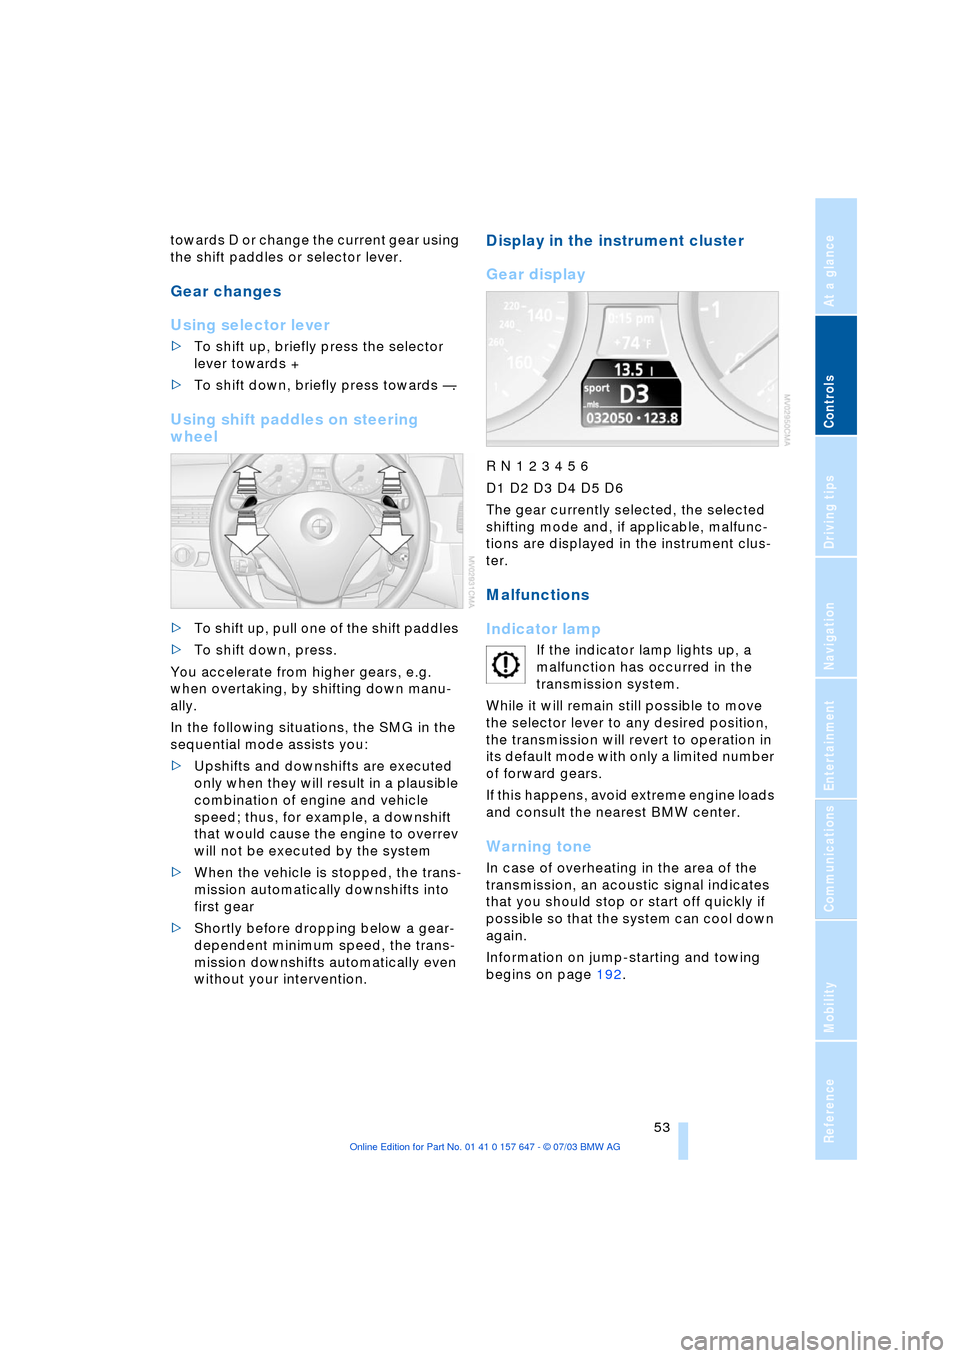
Using shift paddles on steering
wheel
>To shift up, pull one of the shift paddles
>To shift down, press.
You accelerate from higher gears, e.g.
when overtaking, by shifting down manu-
ally.
In the following situations, the SMG in the
sequential mode assists you:
>Upshifts and downshifts are executed
only when they will result in a plausible
combination of engine and vehicle
speed; thus, for example, a downshift
that would cause the engine to overrev
will not be executed by the system
>When the vehicle is stopped, the trans-
mission automatically downshifts into
first gear
>Shortly before dropping below a gear-
dependent minimum speed, the trans-
mission downshifts automatically even
without your intervention.
Display in the instrument cluster
Gear display
R N 1 2 3 4 5 6
D1 D2 D3 D4 D5 D6
The gear currently selected, the selected
shifting mode and, if applicable, malfunc-
tions are displayed in the instrument clus-
ter.
Malfunctions
Indicator lamp
If the indicator lamp lights up, a
malfunction has occurred in the
transmission system.
While it will remain still possible to move
the selector lever to any desired position,
the transmission will revert to operation in
its default mode with only a limited number
of forward gears.
If this happens, avoid extreme engine loads
and consult the nearest BMW center.
Warning tone
In case of overheating in the area of the
transmission, an acoustic signal indicates
that you should stop or start off quickly if
possible so that the system can cool down
again.
Information on jump-starting and towing
begins on page 192.
Page 56 of 220
Driving
54
Dynamic Driving Control
With Dynamic Driving Control, you can
choose between a standard and a sport
program.
Sport program
>The engine responds more spontane-
ously to accelerator pedal movements
>The steering becomes more direct and
provides even better road contact.
In addition, with SMG and an automatic
transmission:
>The shifting times are shorter
>The engine speed range is used opti-
mally in the Drive mode.
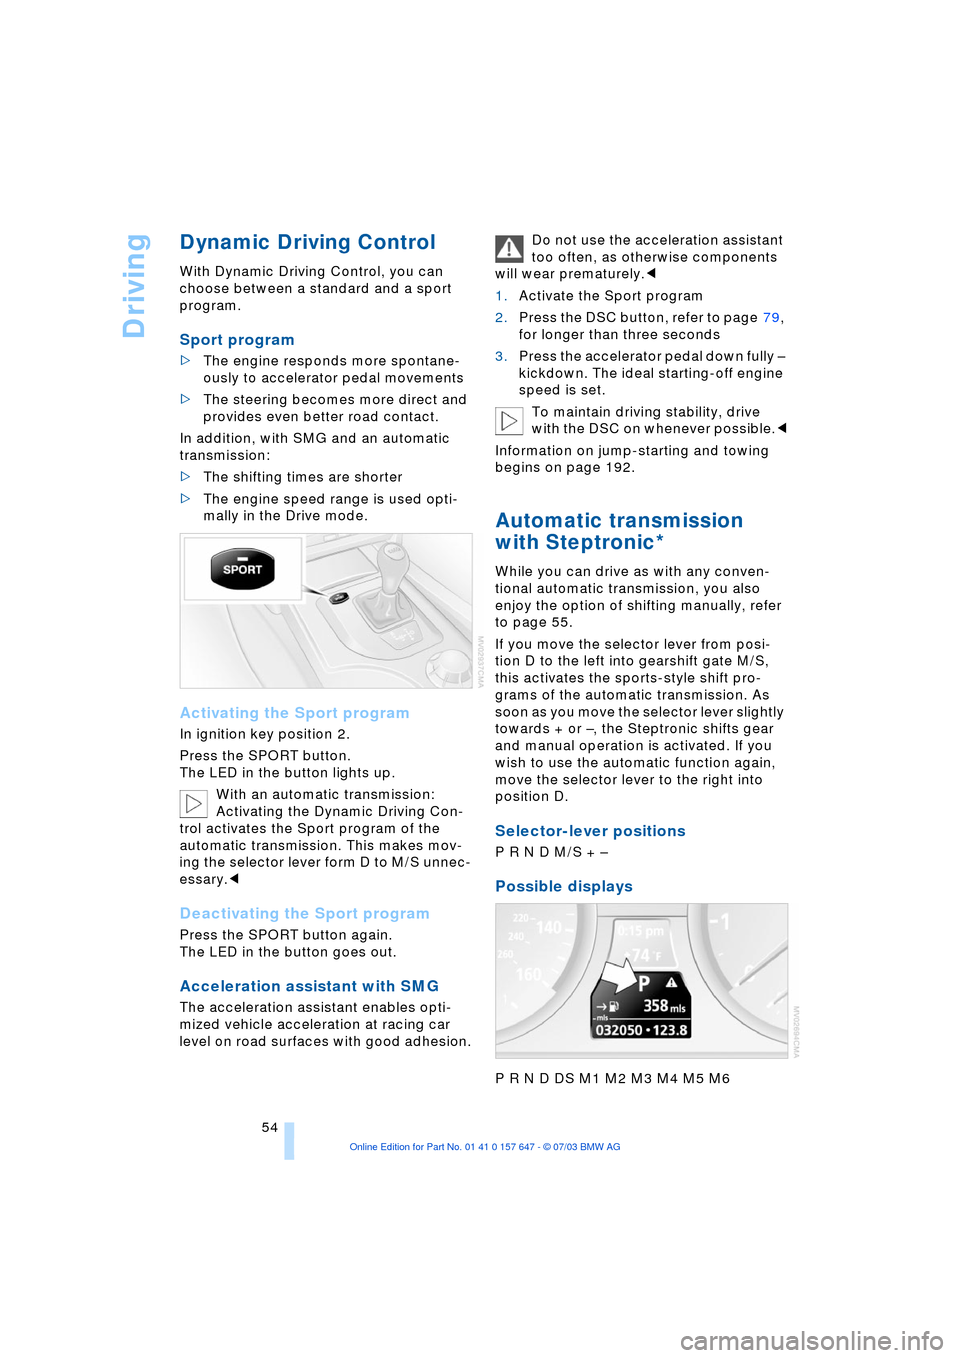
Activating the Sport program
In ignition key position 2.
Press the SPORT button.
The LED in the button lights up.
With an automatic transmission:
Activating the Dynamic Driving Con-
trol activates the Sport program of the
automatic transmission. This makes mov-
ing the selector lever form D to M/S unnec-
essary.<
Deactivating the Sport program
Press the SPORT button again.
The LED in the button goes out.
Acceleration assistant with SMG
The acceleration assistant enables opti-
mized vehicle acceleration at racing car
level on road surfaces with good adhesion.Do not use the acceleration assistant
too often, as otherwise components
will wear prematurely.<
1.Activate the Sport program
2.Press the DSC button, refer to page 79,
for longer than three seconds
3.Press the accelerator pedal down fully Ð
kickdown. The ideal starting-off engine
speed is set.
To maintain driving stability, drive
with the DSC on whenever possible.<
Information on jump-starting and towing
begins on page 192.
Automatic transmission
with Steptronic*
While you can drive as with any conven-
tional automatic transmission, you also
enjoy the option of shifting manually, refer
to page 55.
If you move the selector lever from posi-
tion D to the left into gearshift gate M/S,
this activates the sports-style shift pro-
grams of the automatic transmission. As
soon as you move the selector lever slightly
towards + or Ð, the Steptronic shifts gear
and manual operation is activated. If you
wish to use the automatic function again,
move the selector lever to the right into
position D.
Selector-lever positions
P R N D M/S + Ð
Possible displays
P R N D DS M1 M2 M3 M4 M5 M6
Page 57 of 220
Controls
55Reference
At a glance
Driving tips
Communications
Navigation
Entertainment
Mobility
Changing the selector-lever
positions
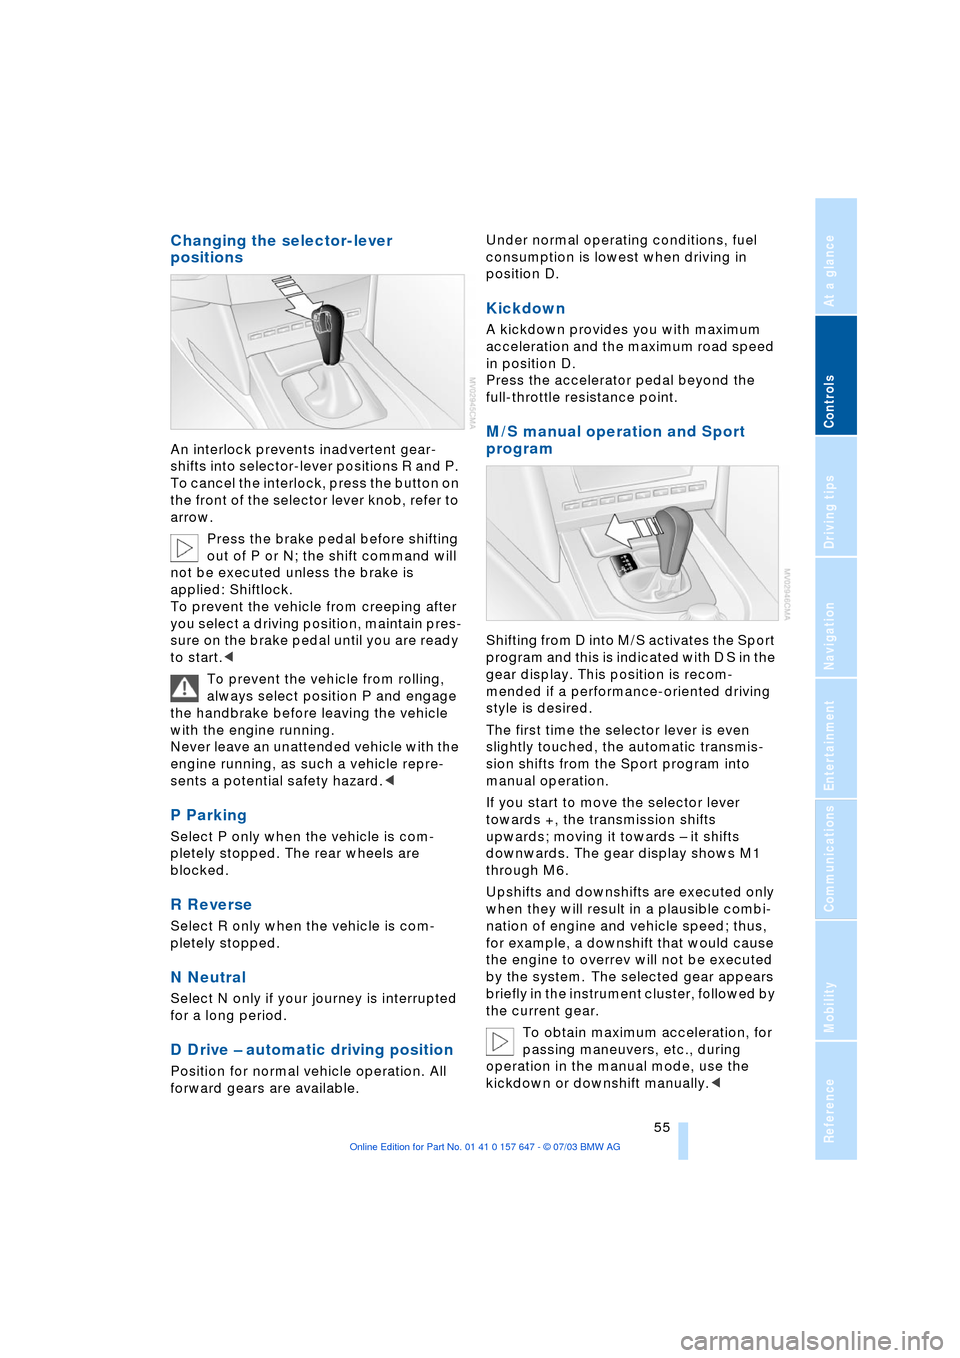
An interlock prevents inadvertent gear-
shifts into selector-lever positions R and P.
To cancel the interlock, press the button on
the front of the selector lever knob, refer to
arrow.
Press the brake pedal before shifting
out of P or N; the shift command will
not be executed unless the brake is
applied: Shiftlock.
To prevent the vehicle from creeping after
you select a driving position, maintain pres-
sure on the brake pedal until you are ready
to start.<
To prevent the vehicle from rolling,
always select position P and engage
the handbrake before leaving the vehicle
with the engine running.
Never leave an unattended vehicle with the
engine running, as such a vehicle repre-
sents a potential safety hazard.<
P Parking
Select P only when the vehicle is com-
pletely stopped. The rear wheels are
blocked.
R Reverse
Select R only when the vehicle is com-
pletely stopped.
N Neutral
Select N only if your journey is interrupted
for a long period.
D Drive Ð automatic driving position
Position for normal vehicle operation. All
forward gears are available.Under normal operating conditions, fuel
consumption is lowest when driving in
position D.
Kickdown
A kickdown provides you with maximum
acceleration and the maximum road speed
in position D.
Press the accelerator pedal beyond the
full-throttle resistance point.
M/S manual operation and Sport
program
Shifting from D into M/S activates the Sport
program and this is indicated with D S in the
gear display. This position is recom-
mended if a performance-oriented driving
style is desired.
The first time the selector lever is even
slightly touched, the automatic transmis-
sion shifts from the Sport program into
manual operation.
If you start to move the selector lever
towards +, the transmission shifts
upwards; moving it towards Ð it shifts
downwards. The gear display shows M1
through M6.
Upshifts and downshifts are executed only
when they will result in a plausible combi-
nation of engine and vehicle speed; thus,
for example, a downshift that would cause
the engine to overrev will not be executed
by the system. The selected gear appears
briefly in the instrument cluster, followed by
the current gear.
To obtain maximum acceleration, for
passing maneuvers, etc., during
operation in the manual mode, use the
kickdown or downshift manually.<