Page 1838 of 2234
760WZ±01
B70684
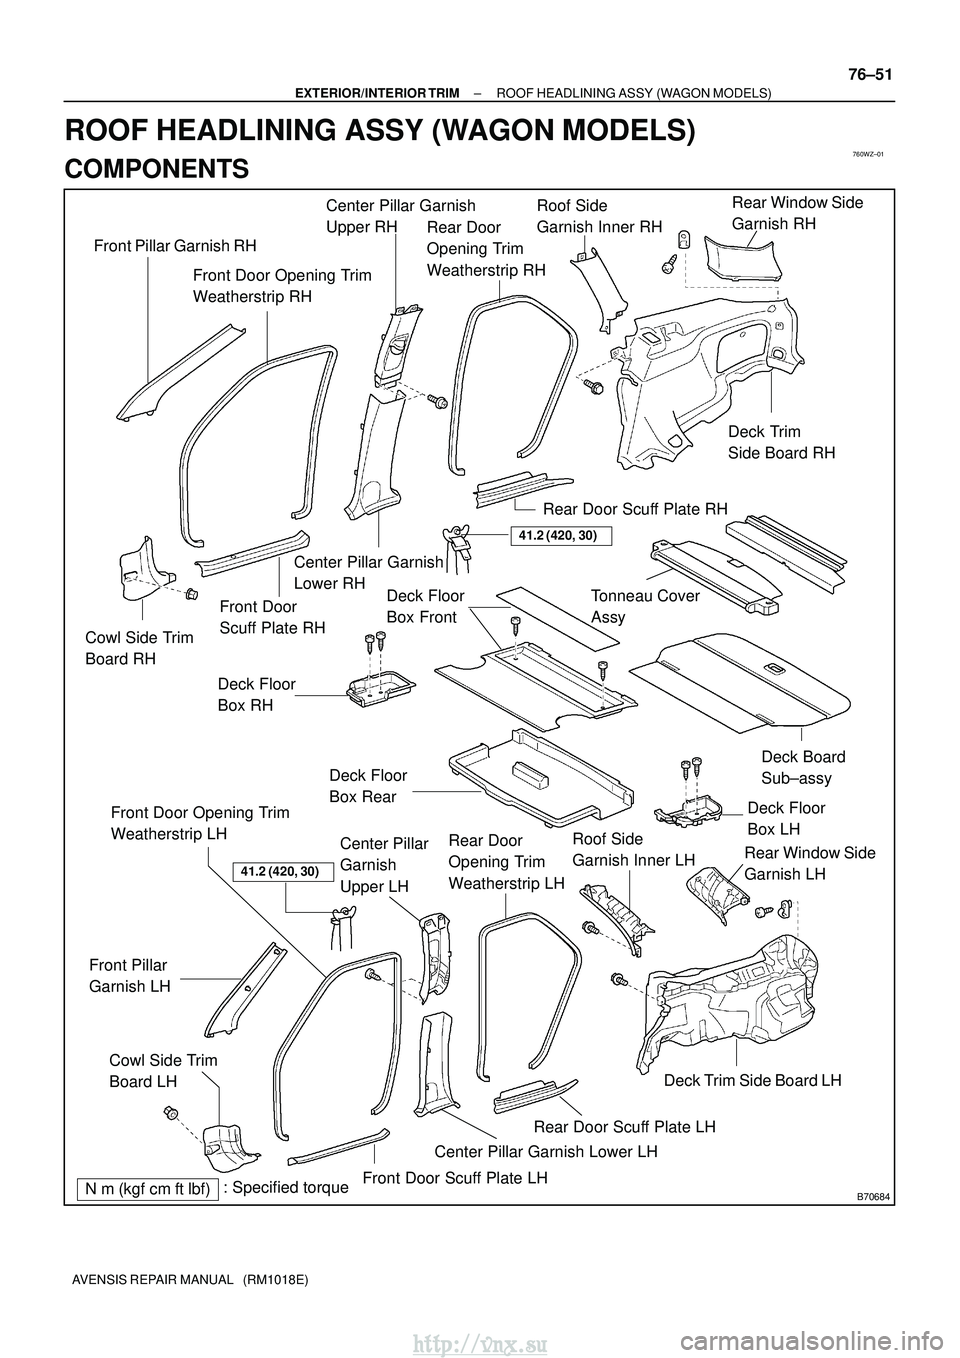
Front Pillar Garnish RH
Cowl Side Trim
Board RH
Front Door Opening Trim
Weatherstrip RH
Front Door
Scuff Plate RH
Center Pillar Garnish
Lower RH
Center Pillar Garnish
Upper RH
Rear Door
Opening Trim
Weatherstrip RH
Rear Door Scuff Plate RH
Front Door Scuff Plate LH
Rear Door Scuff Plate LH
Cowl Side Trim
Board LHFront Door Opening Trim
Weatherstrip LH
Rear Door
Opening Trim
Weatherstrip LH
Center Pillar Garnish Lower LH
Deck Floor
Box Rear
Tonneau Cover
Assy
Deck Board
Sub±assy
Deck Floor
Box Front
Deck Floor
Box RH
Deck Floor
Box LH
Deck Trim
Side Board RH
Deck Trim Side Board LH
Roof Side
Garnish Inner RH
Roof Side
Garnish Inner LH Rear Window Side
Garnish RH
Rear Window Side
Garnish LH
Center Pillar
Garnish
Upper LH
Front Pillar
Garnish LH
N
�m (kgf� cm ft�lbf): Specified torque
41.2 (420, 30)
41.2 (420, 30)
±
EXTERIOR/INTERIOR TRIM ROOF HEADLINING ASSY (WAGON MODELS)
76±51
AVENSIS REPAIR MANUAL (RM1018E)
ROOF HEADLINING ASSY (WAGON MODELS)
COMPONENTS
http://vnx.su
Page 1841 of 2234
760X0±01
B66532
Clip
Claw
B66531
Clip
Claw
B66533
Clip
Claw
76±54
±
EXTERIOR/INTERIOR TRIM ROOF HEADLINING ASSY (WAGON MODELS)
AVENSIS REPAIR MANUAL (RM1018E)
REPLACEMENT
HINT:
The installation is in the reverse order of the removal. However, when there is a special point concerning
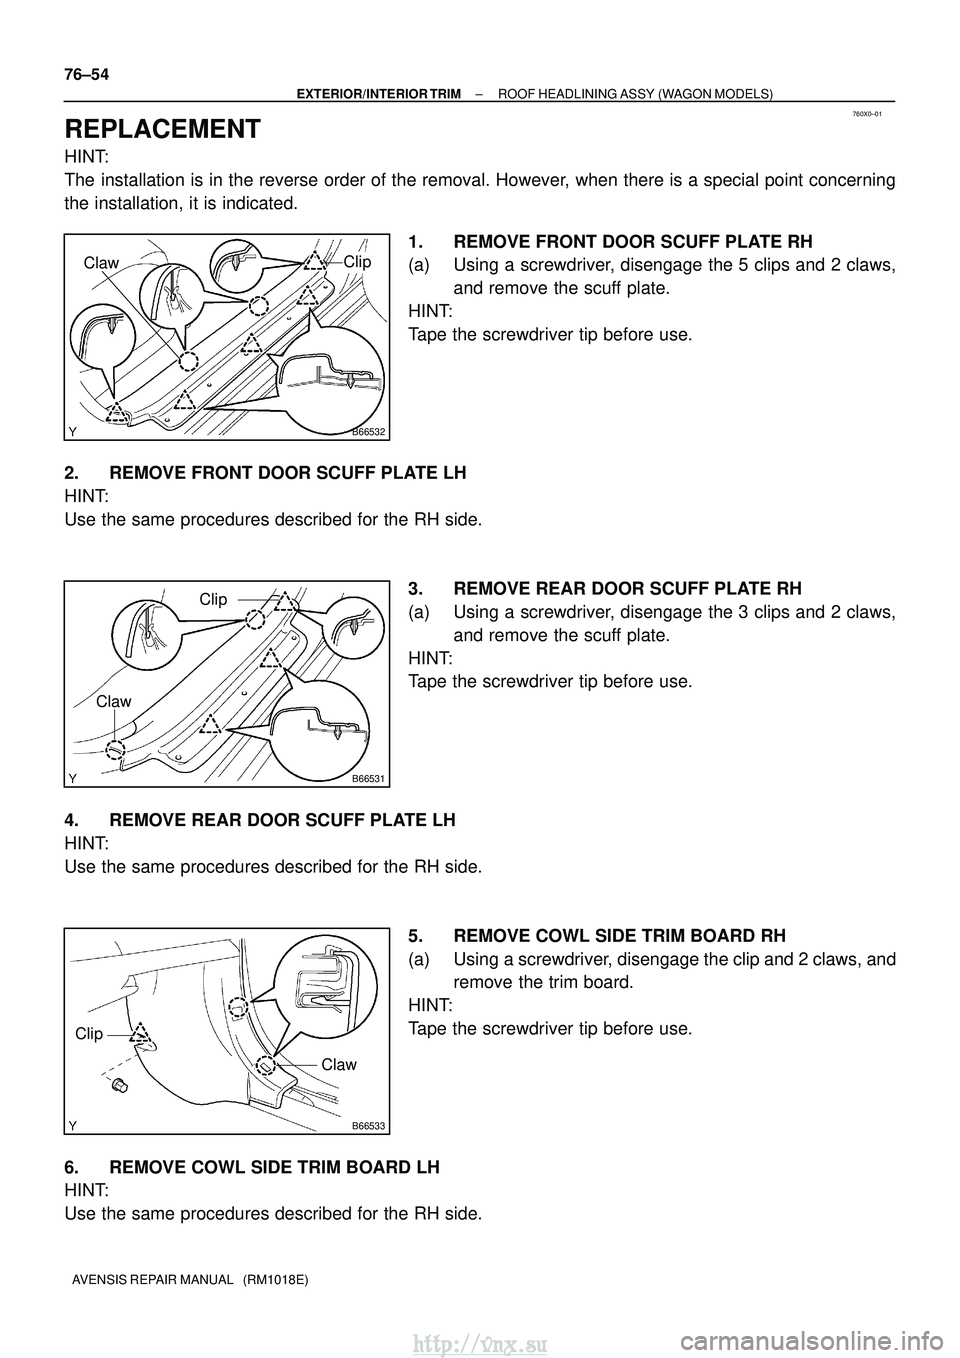
the installation, it is indicated. 1. REMOVE FRONT DOOR SCUFF PLATE RH
(a) Using a screwdriver, disengage the 5 clips and 2 claws,and remove the scuff plate.
HINT:
Tape the screwdriver tip before use.
2. REMOVE FRONT DOOR SCUFF PLATE LH
HINT:
Use the same procedures described for the RH side. 3. REMOVE REAR DOOR SCUFF PLATE RH
(a) Using a screwdriver, disengage the 3 clips and 2 claws,and remove the scuff plate.
HINT:
Tape the screwdriver tip before use.
4. REMOVE REAR DOOR SCUFF PLATE LH
HINT:
Use the same procedures described for the RH side. 5. REMOVE COWL SIDE TRIM BOARD RH
(a) Using a screwdriver, disengage the clip and 2 claws, andremove the trim board.
HINT:
Tape the screwdriver tip before use.
6. REMOVE COWL SIDE TRIM BOARD LH
HINT:
Use the same procedures described for the RH side.
http://vnx.su
Page 1843 of 2234
B66545
B66544
Clip
B66543
B66542
Clip
76±56
±
EXTERIOR/INTERIOR TRIM ROOF HEADLINING ASSY (WAGON MODELS)
AVENSIS REPAIR MANUAL (RM1018E)
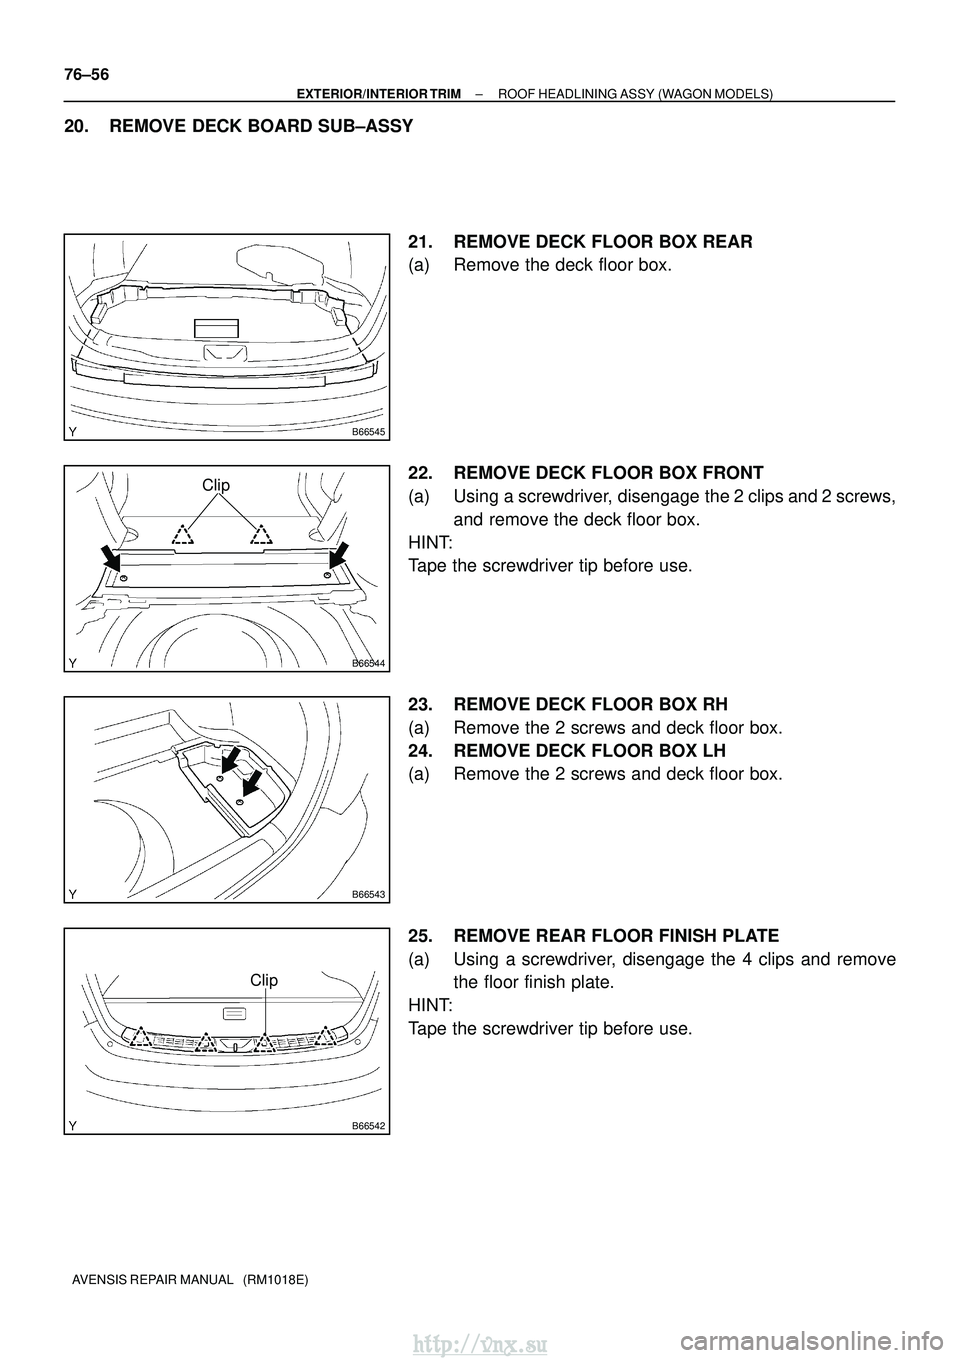
20. REMOVE DECK BOARD SUB±ASSY 21. REMOVE DECK FLOOR BOX REAR
(a) Remove the deck floor box.
22. REMOVE DECK FLOOR BOX FRONT
(a) Using a screwdriver, disengage the 2 clips and 2 screws,and remove the deck floor box.
HINT:
Tape the screwdriver tip before use.
23. REMOVE DECK FLOOR BOX RH
(a) Remove the 2 screws and deck floor box.
24. REMOVE DECK FLOOR BOX LH
(a) Remove the 2 screws and deck floor box.
25. REMOVE REAR FLOOR FINISH PLATE
(a) Using a screwdriver, disengage the 4 clips and remove the floor finish plate.
HINT:
Tape the screwdriver tip before use.
http://vnx.su