Page 931 of 1574

5A-72 AUTOMATIC TRANSMISSION
Action
Drain and fill with specified ATF.
Check that S5 is fitted correctly, or replace S5.
Inspect band apply and clutch apply regulator
springs. Refit or replace as necessary.
Inspect the ball. Refit or replace as necessary.
Inspect C4 clutch. Replace or repair as neces-
sary.
Check the alignment. ]Realign as necessary.
Inspect wave plate. Replace as necessary.
Inspect S5 and replace as necessary.
Inspect the damper spring and replace as nec-
essary.
Replace spring as necessary.
Check the clearance and adjust as necessary.
Inspect C4. Repair or replace as necessary.
Inspect piston. Repair or replace as necessary.
Inspect and adjust band as necessary. Replace the plug. Replace the spring.Replace the spring/plug.Refit the ball.
Inspect the clutch. Repair the clutch as neces-
sary. Inspect and clean C1 feed.Replace the piston.
Inspect and replace the sealing rings and/or
shaft as necessary. Inspect and replace the ball.
Inspect and replace the sealing rings and/or
shaft as necessary.
Inspect and repair the C1 clutch as necessary.Refit the valve. Replace the ball.
Possible Cause
Incorrect auto transmission fluid (ATF).
S5 faulty won, or incorrectly fitted.Band apply and clutch apply regulatorsprings misplaced. Over-run clutch (OC)/Low-1st ball misplaced.C4 clutch worn or burnt. C4 wave plate not lined up with the holes in the piston. C4 wave plate failed.S5 worn.S5 damper spring broken. Front servo belleville spring broken. Incorrect C4 pack clearance.Damaged C4 clutch.Cracked C2 piston (leaking into C4).Incorrect band adjustment Front servo plastic plug missing B1R spring broken.B1R spring/plug left out.C1/B1R ball misplaced.C1 clutch damaged. Restriction in C1 feed. C1 piston check ball jammed.
Overdrive or input shaft sealing rings dam-aged. C1/B1R ball misplaced.
Overdrive or input shaft sealing rings dam-aged.C1 clutch damaged.4-3 sequence valve in backwards. Low-1st check ball misplaced.Symptom
All Shifts Firm Manual 4-3-2-1 is soft delayed or
missing Firm 1-2 Hot
4th Tied up
Tied up on 2-3Flare on 2-3 Slips in 4th Flare on 4-3, Flare on 3-2Firm Manual low
shift-high line press.
Page 933 of 1574

5A-74 AUTOMATIC TRANSMISSION
Action
Inspect, repair C2 and adjust the linkage as neces-
sary. Repair C2. Inspect, repair or replace S6 as neces-
sary.Repair C2. Inspect, replace the sealing rings and/
or shaft as necessary. Repair C2. Inspect, repair or replace the C2 piston
as necessary.
Inspect C4 and repair as necessary.Inspect and adjust the C4 pack clearance as nec-
essary. Repair C4. Inspect and replace the wave plate as
necessary.Repair C4. Inspect and realign the wave plate as
necessary.Repair C4. Inspect and realign the sealing rings
and/or shaft as necessary. Repair C4. Inspect and refit the OWC as neces-
sary.Repair C4. Inspect and replace the C2 piston as
necessary.
Repair C4. Inspect and refit the ball as necessary.Inspect and repair B1 and replace the spring as
necessary.Replace sealing ring.
Repair B1. Refit the ball as necessary. Inspect and repair C1 and replace the spring.Repair C1. Inspect and replace the sealing tongs
and/or shaft as necessary.Repair C1. Inspect and replace the C1 piston as
necessary. Repair C1. Inspect and refit the capsule as neces-
sary.Repair C1. Inspect and refit the valve as neces-
sary. Repair C1. Inspect and replace the ball as neces-
sary.
Inspect and adjust the band as necessary.
Inspect and refit the ball as necessary.Inspect and replace the ‘O’ ring as necessary.
Inspect and refit the valve as necessary.Inspect and replace the ‘O’ ring as necessary.
Inspect and refit the valve as necessary.
Possible Cause
T-bar linkage out of adjustment.
56 foiled - stuck low. Overdrive/output shaft sealing rings damaged. C2 piston cracked. Incorrect C4 pack clearance. C4 wave plate broken.
C4 wave plate not lined up properly.Overdrive or output shaft sealing rings dam- aged. 3-4 one way clutch (OWC) in backwards. C2 piston cracked. Over-run clutch (OC)/low-1st ball misplaced. B1R spring broken. Input shaft sealing ring cut. C1/B1R ball misplaced. B1R spring left out.Overdrive or input shaft sealing rings damaged. C1 piston cracked. Ball capsule jammed. 4-3 sequence valve in backwards. Clutch apply feed (CAF)/B1R ball left out. Rear band incorrectly adjusted or damaged. Reverse-low/first ball misplaced.Input shaft ‘O’ ring missing or damaged.
Converter clutch regulator valve in backwards.Input shaft ‘O’ ring missing or damaged.
C1 bias valve in backwards.
Symptom
C2 burnt C4 burnt B1 burnt C1 burnt Slips in reverse - no manual 1st Firm converter
lock or unlockNo lock up at lightthrottle
Table 6.2.4 - After Teardown Faults
Page 942 of 1574
AUTOMATIC TRANSMISSION 5A-83
Tightening Torque 70 - 80 Nm
11. Remove the two pipes for oil cooler. Installation Notice
Tightening Torque 24.5 - 34.3 Nm
12. Remove the service hall cover on torque converter.
13. Put the alignment mark for installation, and unscrew the six mounting bolts for torque converter from drive plate through the service hole (arrow) by rotating the engine
and remove the torque converter. Installation Notice
Tightening Torque 42 Nm
7. Remove the rear propeller shaft.
Installation Notice
8. Unscrew the five bolts and remove the transfer case.
9. Disconnect the 10-Pins Plug connector from transmission.
10. Separate the locking clip on shift lever and remove the shift rod.Notice Removal and installation performed when the shift procedure should be lever is in “D” range.
Screw the six bolts mounting the torque converter through the service hole by using a mirror and rotating the engine.
Page 945 of 1574

5A-86 AUTOMATIC TRANSMISSION
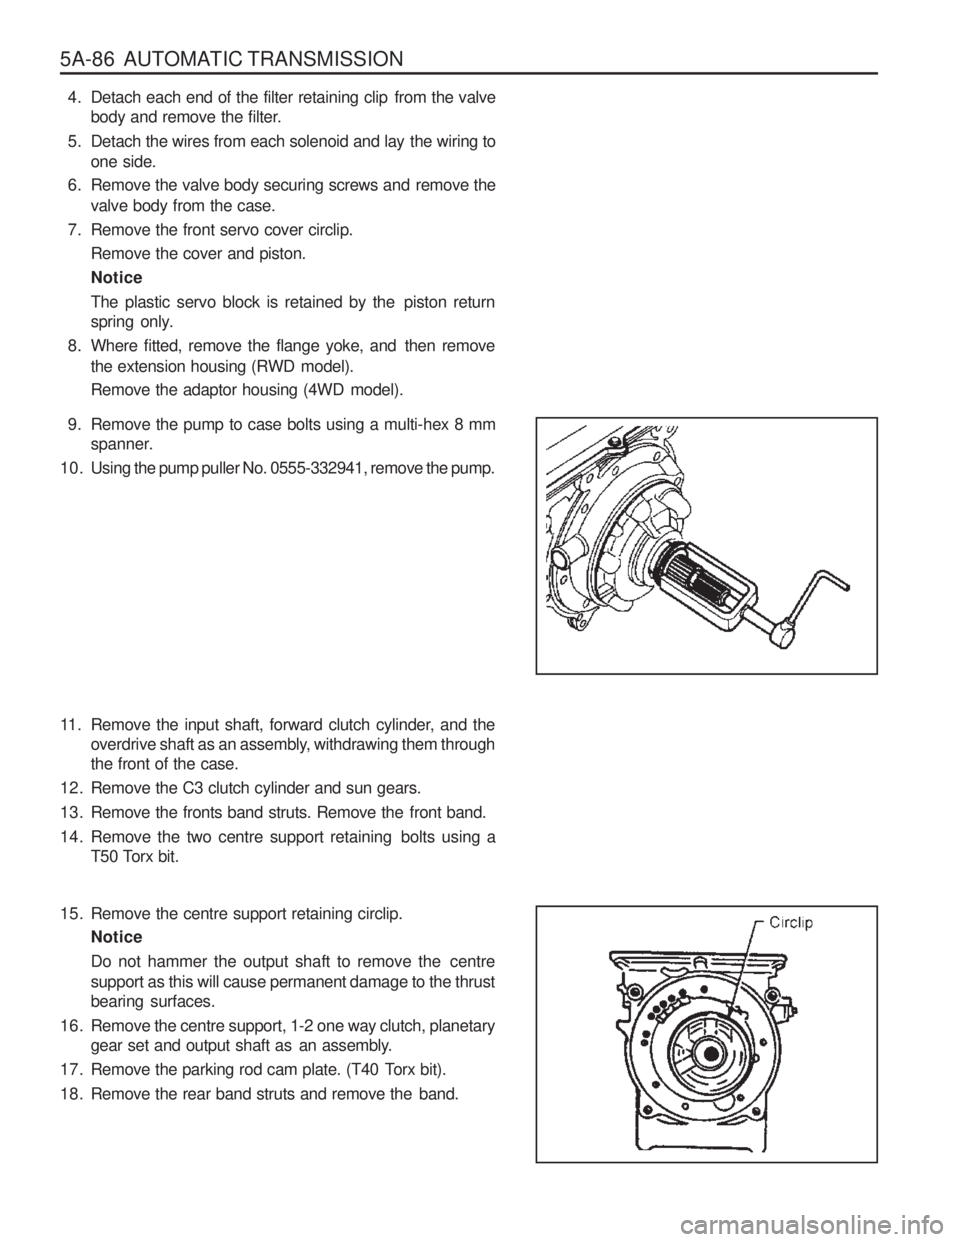
9. Remove the pump to case bolts using a multi-hex 8 mmspanner.
10. Using the pump puller No. 0555-332941, remove the pump.
11. Remove the input shaft, forward clutch cylinder, and the overdrive shaft as an assembly, withdrawing them through the front of the case.
12. Remove the C3 clutch cylinder and sun gears.
13. Remove the fronts band struts. Remove the front band.
14. Remove the two centre support retaining bolts using a T50 Torx bit.
15. Remove the centre support retaining circlip. Notice
Do not hammer the output shaft to remove the centre
support as this will cause permanent damage to the thrust bearing surfaces.
16. Remove the centre support, 1-2 one way clutch, planetary gear set and output shaft as an assembly.
17. Remove the parking rod cam plate. (T40 Torx bit).
18. Remove the rear band struts and remove the band. 4. Detach each end of the filter retaining clip from the valve
body and remove the filter.
5. Detach the wires from each solenoid and lay the wiring to one side.
6. Remove the valve body securing screws and remove the valve body from the case.
7. Remove the front servo cover circlip. Remove the cover and piston.Notice
The plastic servo block is retained by the piston return
spring only.
8. Where fitted, remove the flange yoke, and then remove the extension housing (RWD model).
Remove the adaptor housing (4WD model).
Page 946 of 1574
AUTOMATIC TRANSMISSION 5A-87
Transmission Case
To teardown the transmission case, proceed as follows:
1. Remove the pin from the cross shaft inhibitor switch side(4WD models) using tool No.0555-332942.
2. Remove the inhibitor switch from the case.
Remove the cross shaft seals with special tool No.0555- 331893.
3. Remove the circlip from the cross-shaft. Pull the shaft to release the drive pin from the selector quadrant.
4. Using tool No. 0555-331897, press the pin from the cross- shaft and withdraw the shaft from the case. Retrieve the spring and pin
5. Remove the manual valve lever and the park rod.
6. Remove the 10 pin plug from the wiring loom bracket adjacent to the inhibitor switch(RWD models),
7. Depress the tangs and withdraw the 10 pin connector from the case. Remove the loom assembly.
Page 947 of 1574
5A-88 AUTOMATIC TRANSMISSION
8. Detach the No.7 solenoid wire from the front of the case.
9. Remove the parking pawl pivot pin and the pawl and springfrom the case.
10. Remove the shaft and the rear servo lever.
11. Remove the rear servo cover and piston assembly.
12. Remove the B1R circlip, valve and spring.
13. Remove both band adjustment shims.
14. Inspect the output shaft bushing in the case and replace if necessary.
15. Inspect cooler line fittings and replace as necessary.
16. Inspect the case for damage.
17. To remove the park rod lever: Remove the circlip from the inner end of the pivot shaft and tap the outer end of the
shaft until it moves free from the case, then using a wide
shallow tapered drift as a wedge, drive the pin out fromthe inside of the case and remove the lever and spring. NoticeDo not remove the park rod lever unless absolutely
necessary.
Page 948 of 1574

AUTOMATIC TRANSMISSION 5A-89
Forward Clutch Cylinder
To remove the forward clutch cylinder, refer to figure 8.4,
proceed as follows.
1. Place the assembly in a horizontal position.
2. Remove the thrust bearing and adjustment shims from the input shaft.
3. Remove the circlip from the front of the clutch cylinder and remove the input shaft.
4. Remove the overdrive shaft and the C1 clutch hub assembly from the clutch cylinder.
5. Remove the C1 clutch plates from the cylinder.
6. Remove the circlip retaining the C3 clutch hub in the rear of the clutch cylinder and remove the hub.
7. Remove the C2/C4 clutch hub assembly and remove the thrust bearing from the C4 hub.
8. Remove the C2 clutch plates.
9. Invert the clutch cylinder and remove the C4 clutch sleeve, clutch plates and the two wave washers. The 3-4 one way
clutch is located between the C2 and C4 clutch hubs, andthe hubs may be separated by rotating one hub clockwise
and withdrawing it from the other.
Figure 8.4 - Forward Clutch Cylinder Assembly
Page 955 of 1574

5A-96 AUTOMATIC TRANSMISSION9. Check that the cam collar slides freely on the rod.
10. Insert the cross shaft into the case, from the side opposite to the inhibitor switch, then install the anti-rattle spring on the shaft.
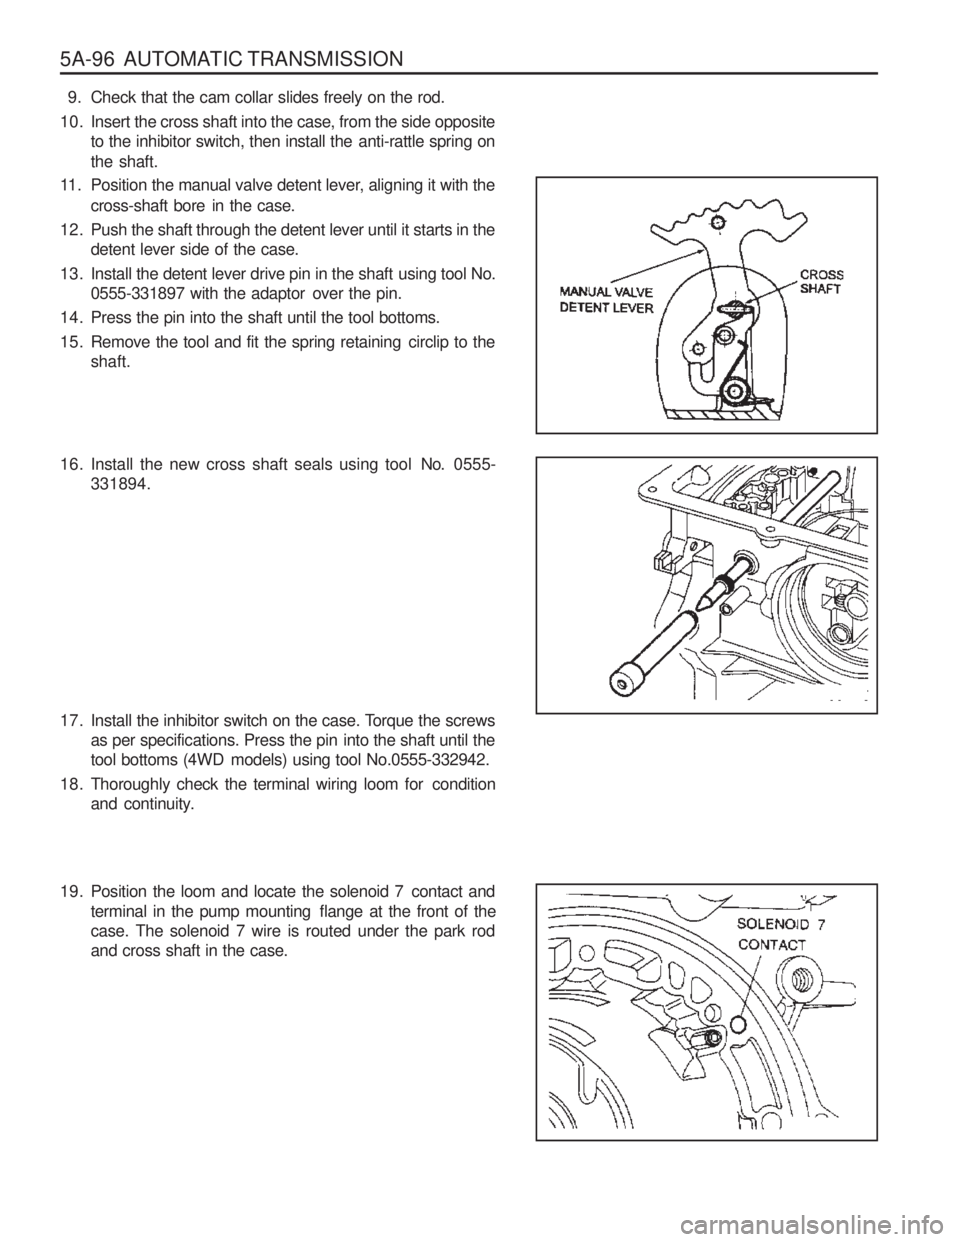
11. Position the manual valve detent lever, aligning it with the cross-shaft bore in the case.
12. Push the shaft through the detent lever until it starts in the detent lever side of the case.
13. Install the detent lever drive pin in the shaft using tool No. 0555-331897 with the adaptor over the pin.
14. Press the pin into the shaft until the tool bottoms.
15. Remove the tool and fit the spring retaining circlip to the shaft.
16. Install the new cross shaft seals using tool No. 0555-
331894.
17. Install the inhibitor switch on the case. Torque the screws as per specifications. Press the pin into the shaft until the
tool bottoms (4WD models) using tool No.0555-332942.
18. Thoroughly check the terminal wiring loom for condition and continuity.
19. Position the loom and locate the solenoid 7 contact andterminal in the pump mounting flange at the front of the case. The solenoid 7 wire is routed under the park rodand cross shaft in the case.