2003 PONTIAC GRAND PRIX tow
[x] Cancel search: towPage 250 of 378
How to Check and Add Oil
Park the vehicle on a level surface. Check oil only when
the engine is cold. Allow the engine to cool two to
three hours after running.
I
If you remove the supercharger oil fill plug
while the engine
is hot, pressure may cause
hot oil to blow out of the oil fill hole. You may
be burned. Do not remove the plug until the
engine
cools.
1. Clean the area around the oil fill plug before
removing it.
2. Remove the oil
fill plug.
3. The oil level is correct when it just reaches the
bottom of the threads of the inspection hole.
4. Replace the oil plug with the O-ring in place.
Tighten to
88 Ib-in (10 Nom ).
Engine Air Cleaner/Filter
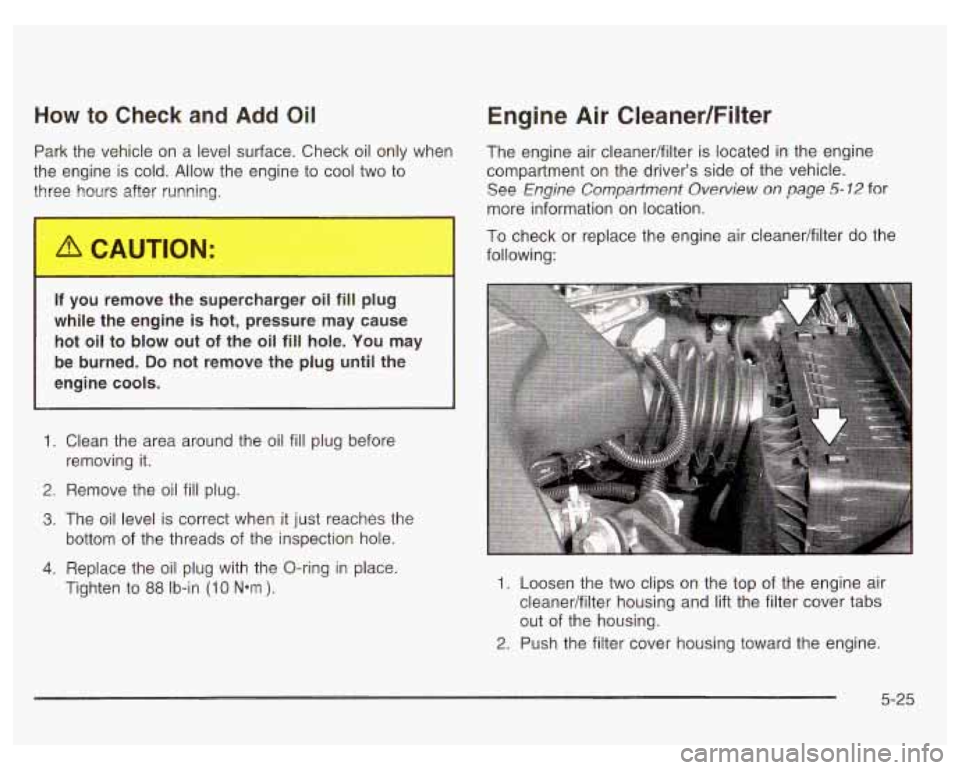
The engine air cleanedfilter is located in the engine
compartment on the driver’s side of the vehicle.
See Engine Compartment Oven/iew on page 5-12 for
more information on location.
To check or replace the engine air cleanedfilter do the
following:
1. Loosen the two clips on the top of the engine air
cleaner/filter housing and lift the filter cover tabs
out of the housing.
2. Push the filter cover housing toward the engine.
5-25
Page 252 of 378
Automatic Transaxle Fluid
When to Check and Change
A good time to check your automatic transaxle fluid
level is when the engine oil is changed.
Change both the fluid and filter every 50,000 miles
(83
000 km) if the vehicle is mainly driven under one or
more of these conditions:
In heavy city traffic where the outside temperature
0 In hilly or mountainous terrain.
0 When doing frequent trailer towing.
0 Uses such as found in taxi, police or delivery service.
regularly reaches
90°F (32°C)
or higher.
If you do not use your vehicle under any of these
conditions, change the fluid and filter at
100,000 miles (166 000 km).
See Part
A: Scheduled Maintenance Services on
page
6-4.
How to Cheek
Because this operation can be a little difficult, you may
choose to have this done at the dealership service
department.
If you do it yourself, be sure to follow all the instructions
here, or you could get a false reading on the dipstick.
Nofice: Too much or too little fluid can damage
your transaxle.
Too much can mean that some of the
fluid could come out and fall on hot engine or
exhaust system parts, starting a fire.
Too little fluid
could cause the transaxle to overheat. Be sure
to get an accurate reading
if you check your
transaxle fluid.
Wait at least 30 minutes before checking the transaxle
fluid level
if you have been driving:
When outside temperatures are above
90°F (32°C).
At high speed for quite a while.
In heavy traffic
- especially in hot weather.
While pulling a trailer.
5-27
Page 253 of 378
To get the right reading, the fluid should be at normal
operating temperature, which is 180°F to 200°F
(82°C to 93°C).
Get the vehicle warmed up by driving about
15 miles
(24 km) when outside temperatures are above
50°F (1 0°C). If it's colder than 50°F (IO'C), you may
have to drive longer.
Checking the Fluid Level
Prepare your vehicle as follows:
Park your vehicle on a level place. Keep the engine
running.
With the parking brake applied, place the shift lever in
PARK (P).
With your foot on the brake pedal, move the shift
lever through each gear range, pausing for about
three seconds in each range. Then, position the shift
lever in PARK (P).
Let the engine run at idle for three to five minutes. Then,
without shutting
off the engine, follow these steps:
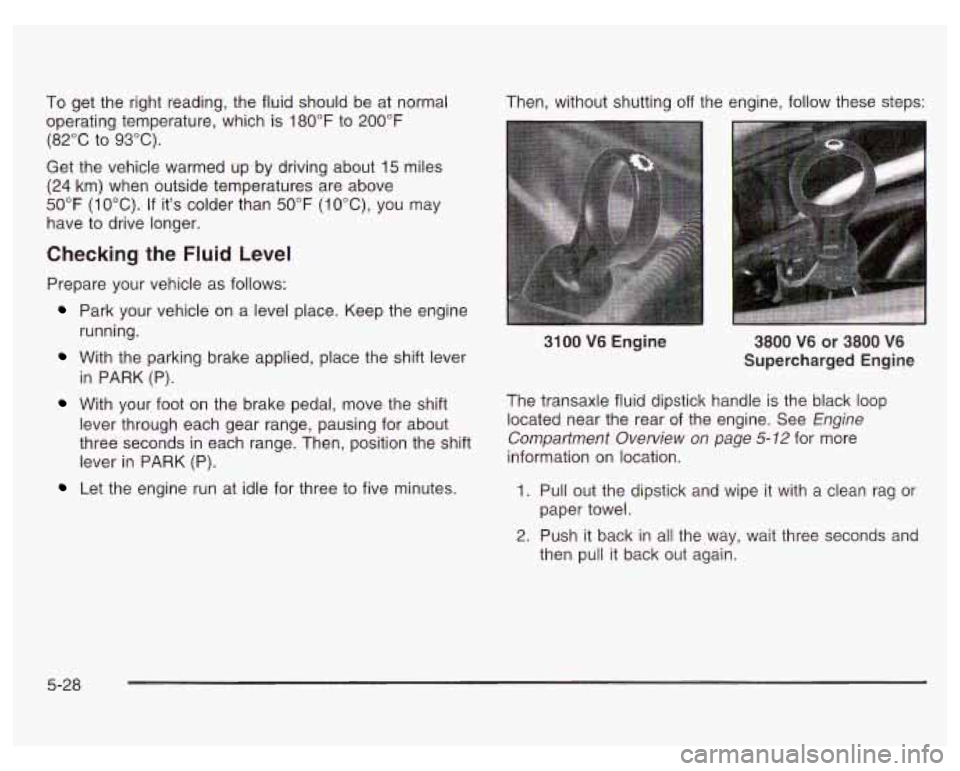
3100 V6 Engine 3800 V6 or 3800 V6
Supercharged Engine
The transaxle fluid dipstick handle is the black loop
located near the rear of the engine. See Engine
Comparfment Overview
on page 5-12 for more
information on location.
1. Pull out the dipstick and wipe it with a clean rag or
2. Push it back in all the way, wait three seconds and
paper
towel.
then pull it back out again.
5-28
Page 256 of 378
Checking Coolant
coo It n ture. water or e
wrongmixture, your engine could get too hot
but you wouldn’t get the overheat warning.
Your engine could catch fire and you or others
could be burned. Use a
50/50 mixture of clean,
drinkable water and
DEX-COOL@ coolant.
Notice: If you use an improper coolant mixture,
your engine could overheat and be badly damaged.
The repair cost wouldn’t be covered by your
warranty.
Too much water in the mixture can freeze
and crack the engine, radiator, heater core and
other parts.
If you have to add coolant more than four times a year,
have your dealer check your cooling system.
Notice: If you use the proper coolant, you don’t
have to add extra inhibitors or additives which claim
to improve the system. These can be harmful. The
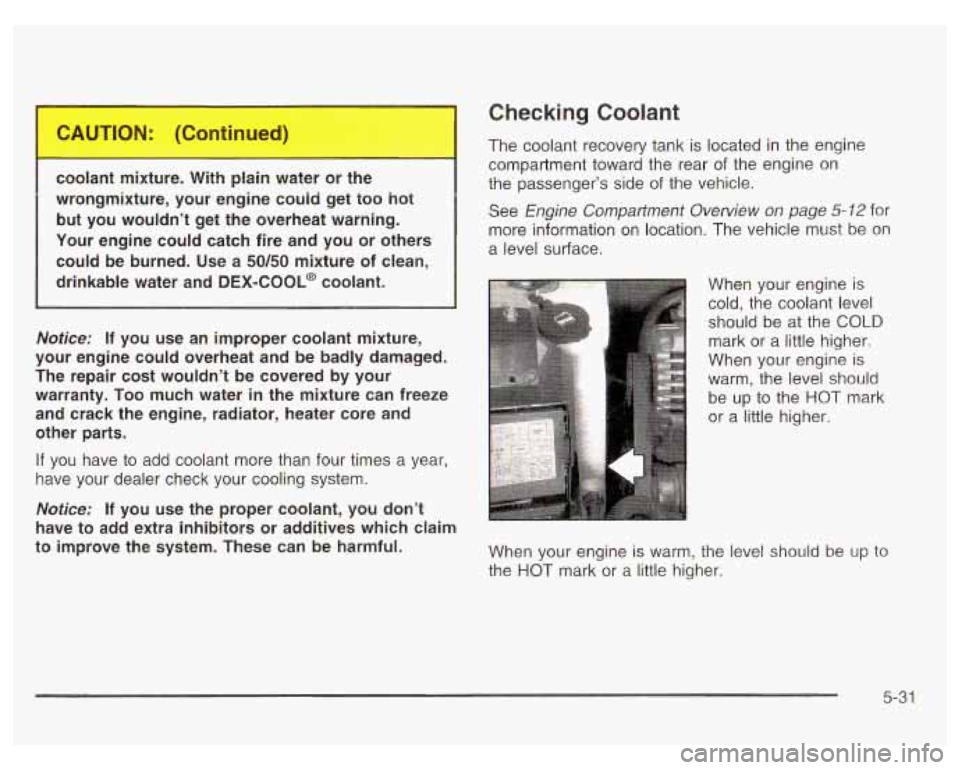
coolant recovery tank is located in the engine
compartment toward the rear of the engine
on
the passenger’s side of the vehicle.
See Engine Compartment Overview on page
5-12 for
more information on location. The vehicle must be on
a level surface.
When your engine is
cold, the coolant level
should be
at the COLD
mark or a little higher.
When your engine is
warm, the level should
be up to the HOT mark
or a little higher.
When your engine is warm, the level should be up to
the HOT mark or a little higher.
5-31
Page 258 of 378
Radiator Pressure Cap
Notice: Your radiator cap is a pressure-type cap
and must be tightly installed to prevent coolant
loss
and possible engine damage from overheating.
Be sure the arrows on the cap line up with the
overflow tube
on the radiator filler neck.
The radiator pressure cap is located in the front of the
engine compartment on the passenger’s side, near
the diagonal cross brace. See Engine Compartment
Overview on page
5-12 for more information on location.
Engine Overheating
You will find a coolant temperature gage and a warning
light concerning an overheated engine condition on
the instrument panel cluster. See Engine Coolant
Temperature Gage
on page 3-31 and Engine Coolant
Temperature Warning Light
on page 3-31.
Overheated Engine Protection
Operating Mode
This emergency operating mode allows your vehicle to
be driven tu
a safe place in an emergency situation.
If an overheated engine condition exists, an overheat
protection mode which alternates firing groups of
cylinders helps prevent engine damage. In this mode,
you will notice a significant
loss in power and engine
performance. The engine coolant temperature gage will
indicate an overheat condition exists. Driving extended
miles (km) and/or towing a trailer in the overheat
protection mode should be avoided.
Nofice: After driving in the overheated engine
protection operating mode, to avoid engine damage,
allow the engine to cool before attempting any
repair. The engine oil will be severely degraded.
Repair the cause of coolant
loss, change the oil
and reset the oil life system. See “Engine Oil”
ir
the Index.
5-33
Page 260 of 378
If No Steam is Coming From Your
Engine
An overheat warning can indicate a serious problem.
If you get an engine overheat warning, but see or hear
no steam, the problem may not be too serious.
Sometimes the engine can get a little too hot when you:
Climb a long hill on
a hot day.
Stop after high-speed driving.
Idle for long periods in traffic.
Tow a trailer.
If you get the overheat warning with no sign
of steam,
try this for a minute or
so:
1. In heavy traffic let the engine idle in NEUTRAL (N)
while stopped.
If it’s safe to do so, pull off the rozd,
shift to PARK
(P) or NEUTRAL (N) and let the
engine idle.
If you no longer have the overheat warning, you can
drive. Just to be safe, drive slower for about
10 minutes.
If the warning doesn’t come back on, you can drive
normally.
If the warning continues, and you have not stopped,
pull over, stop, and park your vehicle right away.
If there’s still no sign of steam, you can idle the engine
for three minutes while you’re parked. If you still
have the warning, turn off the engine and get everyone
out of the vehicle until it cools down. Also, see
“Overheated Engine Protection Operating Mode” listed
previously in this section.
You may decide not to lift the hood but to get service
help right away.
2. Turn on your heater to full hot at the highest fan
speed and open the windows as necessary.
5-35
Page 292 of 378
Windshield Wiper Blade Replacement
Windshield wiper blades should be inspected at least
twice a year for wear or cracking. See “Wiper Blade
Check” under
At Least Twice a Year on page 6-10 for
more information.
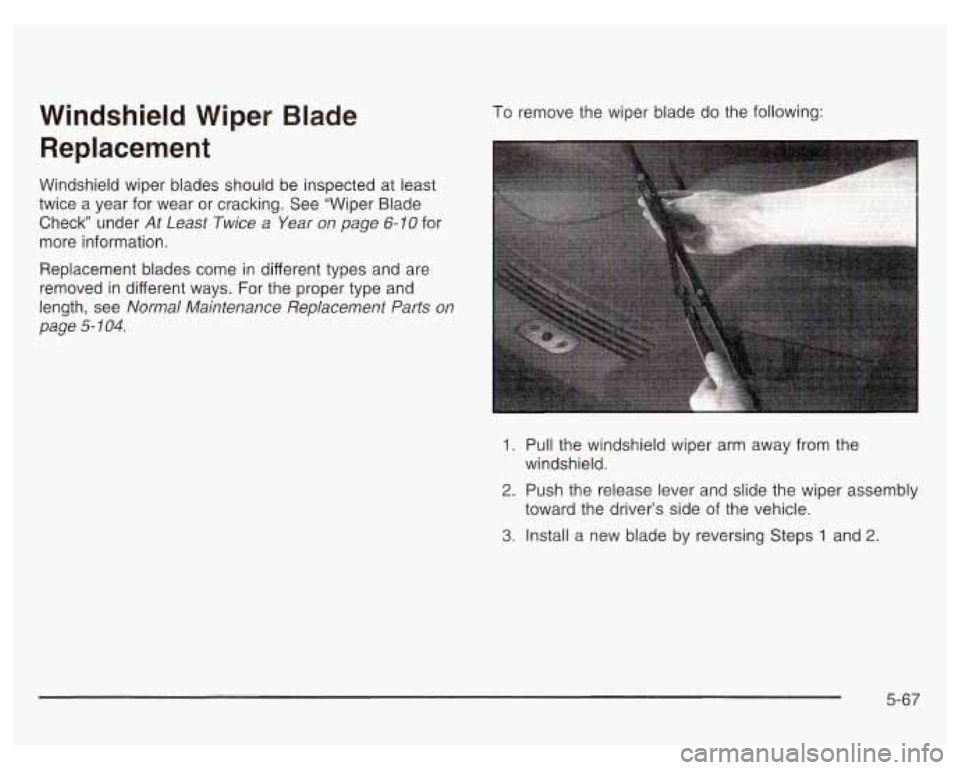
To remove the wiper blade do the following:
Replacement blades come in different types and are
removed in different ways. For the proper type and
length, see Normal Maintenance Replacement Parts on
page
5- 104.
1. Pull the windshield wiper arm away from the
2. Push the release lever and slide the wiper assembly
3. Install a new blade by reversing Steps 1 and 2.
windshield.
toward the driver’s side of the vehicle.
5-67
Page 295 of 378
Don’t include the compact spare tire in your tire rotation.
After the tires have been rotated, adjust the front and
rear inflation pressures as shown on the Tire-Loading
Information label. Make certain that all wheel nuts
are properly tightened. See “Wheel Nut Torque” under
Capacities and Snncifjcations
on page 5- 102.
Rust or dirt on a wheel, or on ,,le parts to
which it is fastened, can make wheel nuts
become loose after a time. The wheel could
come
off and cause an accident. When you
change a wheel, remove any rust or dirt from
places where the wheel attaches to the vehicle.
In an emergency, you can use a cloth or a
paper towel to do this; but be sure to use a
scraper or wire brush later, if you need to, to
get all the rust or
dirt off. See “Changing a Flat
Tire”
in the Index.
When It Is Time for New Tires
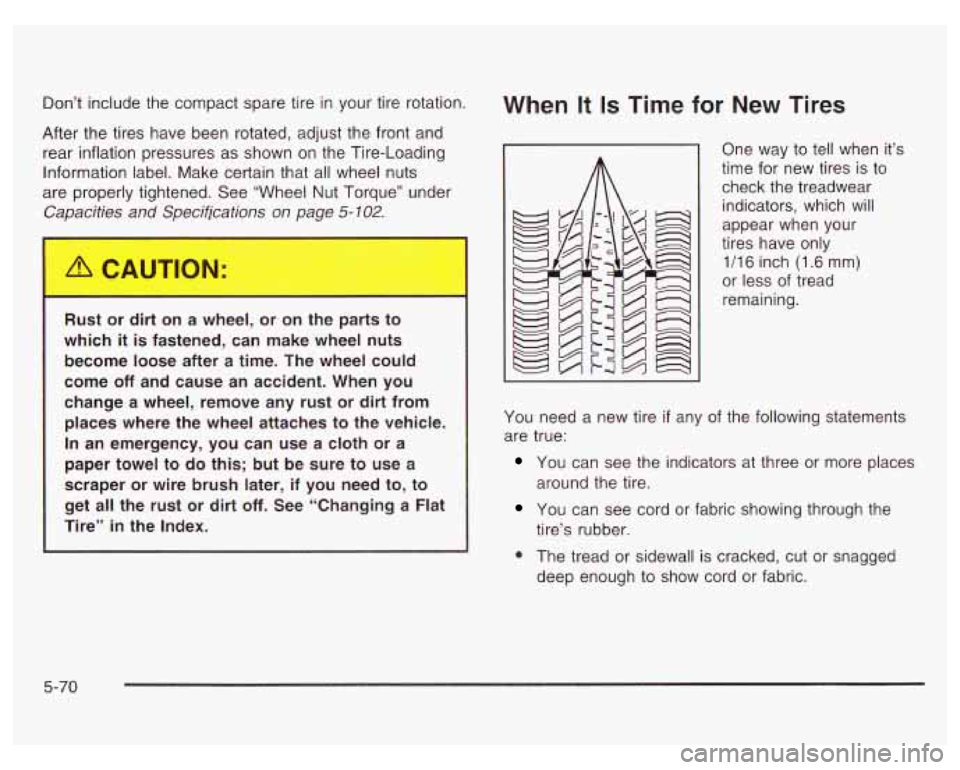
One way to tell when it’s
time for new tires is to
check the treadwear
indicators, which will
appear when your
tires have only
1/16 inch (1.6 mm)
or less of tread
remaining.
You need a new tire
if any of the following statements
are true:
You can see the indicators at three or more places
around the tire.
You can see cord or fabric showing through the
0 The tread or sidewall is cracked, cut or snagged
tire’s rubber.
deep enough to show cord or fabric.
5-70