2003 PONTIAC GRAND PRIX tow
[x] Cancel search: towPage 92 of 378

Make sure the shift lever is fully in PARK (P) before
starting the engine. The vehicle has an automatic
transaxle shift lock control system. You must fully apply
the regular brakes and press the shift control button
located on the front of the shift lever, before you
can shift from PARK (P) when the ignition is in RUN.
If you cannot shift out of PARK (P), ease pressure
on the shift lever by pushing
it all the way into PARK (P)
while keeping the brake pedal pushed down. Release
the shift lever button. Then move the shift lever out
of PARK (P), being sure to press the shift lever button.
See Shifting
Out of Park (P) on page 2-30.
REVERSE (R): Use this gear to back up.
Notice: Shifting to REVERSE (R) while your vehicle
is moving forward could damage your transaxle.
Shift to REVERSE (R) only after your vehicle
is stopped.
To rock the vehicle back and forth to get out of snow,
ice or sand without damaging the transaxle, see If
You Are Stuck: In Sand, Mud, ice or Snow on
page
4-32.
NEUTRAL (N): In this position, the engine doesn’t
connect with the wheels. To restart when you’re already
moving, use NEUTRAL (N) only. Also, use
NEUTRAL
(N) when the vehicle is being towed.
ini a d ‘e gea your enc_ e is
“racing” (running at high speed) is dangerous.
Unless your foot
is firmly on the brake pedal,
your vehicle could move very rapidly. You
could lose control and
hit people or objects.
Don’t shift into a drive gear while your engine
is racing.
Notice: Damage to your transaxle caused by
shifting into a drive gear with the engine racing
isn’t
covered by your warranty.
AUTOMATIC OVERDRIVE
(a): This position is for
normal driving. If you need more power
for passing, and
you’re:
Going less than 35 mph (55 km/h), push your
Going about 35 mph (55 km/h) or more, push the
accelerator pedal about halfway
down.
accelerator pedal all the way down.
2-25
Page 93 of 378

You’ll shift down to the next gear and have more power.
Notice: If your vehicle seems to start up rather
slowly, or if
it seems not to shift gears as you go
faster, something may be wrong with a transaxle system sensor.
If you drive very far that way, your
vehicle can be damaged. So, if
this happens,
have your vehicle serviced right away. Until then,
you can use SECOND
(2) when you are driving
less than
35 mph (55 km/h) and AUTOMATIC
OVERDRIVE (D) for higher speeds.
THIRD
(3): This position is also used for normal driving,
but
it offers more power and lower fuel economy than
AUTOMATIC OVERDRIVE
(@ ).
Here are some times you might choose THIRD (3)
instead of AUTOMATIC OVERDRIVE (a):
When driving on hilly, winding roads.
When towing a trailer, so there is less shifting
between gears.
When going down a steep hill.
When driving in non-highway scenarios
(i.e. city streets, etc.). SECOND
(2): This
position gives you more power but
lower fuel economy than THIRD
(3). You can use
SECOND (2) on hills. It can help control your speed as
you go down steep mountain roads, but then you
would also want to use your brakes
off and on.
Notice: Don’t drive in SECOND (2) for more than
25 miles (40 km), or at speeds over 55 mph
(90 km/h), or you can damage your transaxle.
Use THIRD
(3) or AUTOMATIC OVERDRIVE (D) as
much as possible. Don’t shift into SECOND
(2)
unless you are going slower than 65 mph (105 km/h)
or you can damage your engine.
FIRST
(1): This position gives you even more power
but lower fuel economy than SECOND (2). You can use
it on very steep hills, or in deep snow or mud. If the
shift lever is in
FIRST (I), the transaxle won’t shift into
first gear until the vehicle is going slowly enough.
Notice: If your front wheels won’t turn, don’t try to
drive. This might happen if you were stuck in
very deep sand or mud or were up against a solid
object. You could damage your transaxle. Also,
if you stop when going uphill, don’t hold your
vehicle there with only the accelerator pedal. This
could overheat and damage the transaxle. Use your
brakes to hold your vehicle in position on
a hill.
2-26
Page 94 of 378

Parking Brake
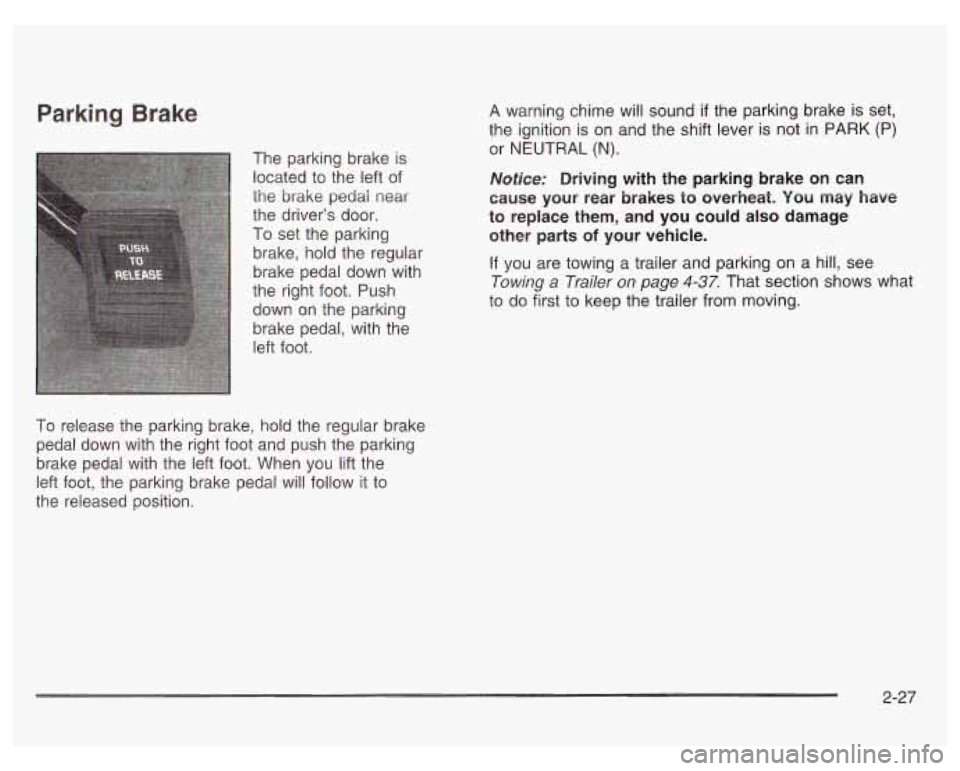
The parking brake is
located to the left of
the
brake pedai near
the driver’s door.
To set the parking
brake, hold the regular
brake pedal down with
the right foot. Push
down on the parking
brake pedal, with the
left foot.
To release the parking brake, hold the regular brake
pedal down with the right foot and push the parking
brake pedal with the left foot. When
you lift the
left foot, the parking brake pedal will follow it to
the released position. A
warning chime will sound
if the parking brake is set,
the ignition is on and the shift lever is not
in PARK (P)
or NEUTRAL (N).
Notice: Driving with the parking brake on can
cause your rear brakes
to overheat. You may have
to replace them, and you could also damage
other parts
of your vehicle.
If you are towing a trailer and parking on a hill, see
Towing a Trailer
on page 4-37. That section shows what
to do first to keep the trailer from moving.
2-27
Page 95 of 378

Shifting Into Park (P)
It can be dangerous to get out of your vehicle
if the shift lever
is not fully in PARK (P) with
the parking brake firmly set. Your vehicle can
roll. If you have left the engine running, the
vehicle can move suddenly. You or others
could be injured. To be sure your vehicle won’t move, even when you’re on fairly level ground,
use the steps that follow.
If you’re pulling a
trailer, see “Towing
a Trailer” in the Index.
1. Hold the brake pedal down with your right foot and
set the parking brake.
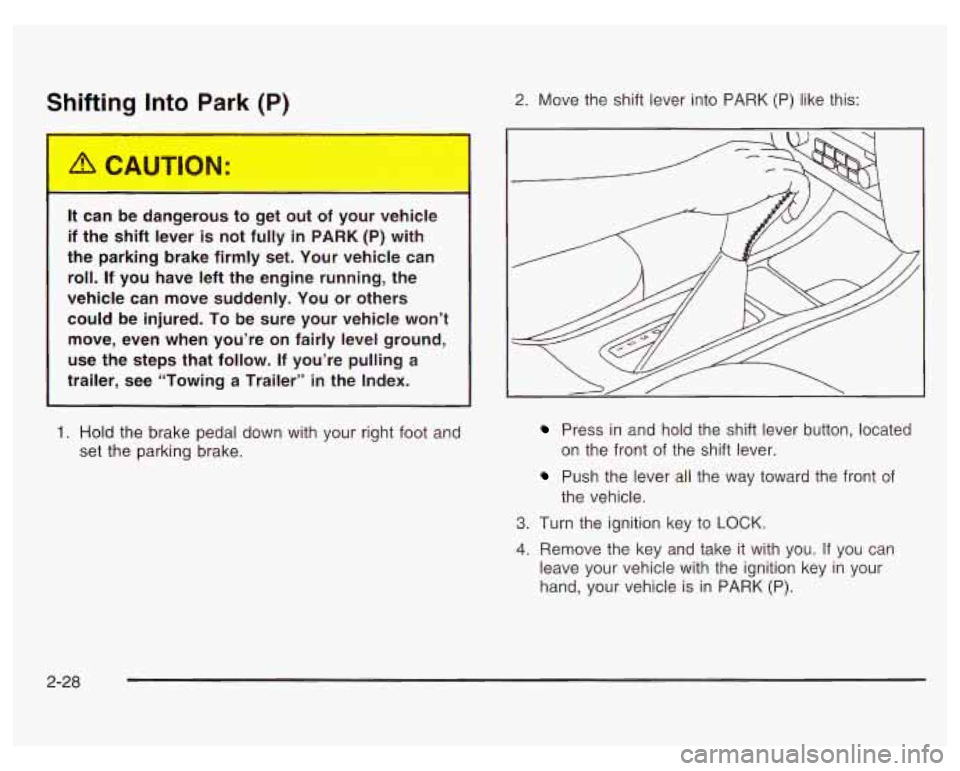
2. Move the shift lever into PARK (P) like this:
Press in and hold the shift lever button, located
on the front of the shift lever.
Push the lever all the way toward the front of
the vehicle.
3. Turn the ignition key to LOCK.
4. Remove the key and take it with you. If you can
leave your vehicle with the ignition key in your
hand, your vehicle is in PARK (P).
2-28
Page 99 of 378

Running Your Engine While You
Are Parked
It’s better not to park with the engine running. But if you
ever ha.-- to, here are som- ‘hings to know.
Idling the engine with the climate control
system
off could allow dangerous exhaust into
your vehicle. See the earlier Caution under
“Engine Exhaust.”
Also, idling
in a closed-in place can let deadly
carbon monoxide (CO) into your vehicle even
if the fan
is at the highest setting. One place
this can happen is a garage. Exhaust - with
CO - can come in easily. NEVER park in a
garage with the engine running.
Another closed-in place can be a blizzard. See “Winter Driving” in the Index.
It can be dangerous to get out of your vehicle
if the
shift lever is not fully in PARK (P) with
the parking brake firmly set. Your vehicle can
roll. Don’t leave your vehicle when the engine
is running unless you have to.
If you’ve left the
engine running, the vehicle can move
suddenly. You or others could be injured.
To
be sure your vehicle won’t move, even when
you’re on fairly level ground, always set your parking brake and move the shift lever to
PARK
(P).
Follow the proper steps to be sure your vehicle won’t
move. See Shifting
Into Park (P) on page 2-28.
If you are parking on a hill and if you’re pulling a trailer,
also see Towing a Trailer
on page 4-37.
2-32
Page 100 of 378

Mirrors
Manual Rearview Mirror
To reduce glare from lamps behind you, pull the lever
located in the center of the bottom of the mirror
toward you to the night position. To return the mirror
back
to the day position, push the lever away from you. The mirror also has an eight-point compass and
temperature display in the
upper right corner on the
mirror face and a three-button Onstar@ system.
When the automatic dimming feature is turned on,
the mirror automatically changes
to reduce glare from
headlamps behind you. A photocell
on the mirror senses
when it is becoming dark outside. Another photocell
built into the mirror face senses when headlamps
are behind you.
Automatic Dimming Rearview
Mirror with Onstar@, Compass and
a few seconds. The mirror will return to its clear,
Temperature Display
At night, when the glare is too bright, the mirror will
gradually darken to reduce glare. This change may take
daytime state when the glare is reduced.
Mirror Operation
(On/Off): The button with this symbol is the on/off
button for the mirror functions such as automatic
dimming and temperature display. It is the far left button
located on the lower part of the mirror face.
A light on the mirror will be lit while the feature is
turned on.
Your vehicle may have an automatic-dimming rearview
mirror with a compass and temperature display and
the Onstar@ system.
2-33
Page 127 of 378

As you signal a turn or a lane change, if the arrow
flashes faster than normal, a signal bulb may be burned
out and other drivers won’t see your turn signal.
If a bulb is burned out, replace it to help avoid an
accident.
If the arrows don’t go on at all when you signal
a turn, check for burned-out bulbs and then check the
fuse. See Fuses and Circuit Breakers
on page 5-97.
A chime will sound if you leave the turn signal on
for more than
3/4 mile (1.2 km).
Headlamp High/Low-Beam Changer
To change the headlamps from low-beam to high-beam,
or high to low, pull the multifunction lever
all the way
toward you. Then release it.
When the high beams are
on, this light on the
instrument panel cluster
will appear. While the high-beam headlamps are
on, the fog lamps will
not illuminate.
If your vehicle is equipped with the Head-Up-Display
(HUD), an arrow will appear in the display area to
indicate that the high beams are on. See Head-Up
Display
(HUD) on page 3-75 for more information.
Flash-to-Pass
This feature lets you use the high-beam headlamps to
signal a driver in front of you that you want to pass.
It works even
if your headlamps are in the automatic or
off position.
To use it, pull the turn signal lever toward you, then
release it.
If the headlamps are in the automatic position or on
low-beam, the high-beam headlamps will turn on and the
high-beam indicator on the instrument panel cluster
will come on. They will stay on as long as you hold the
lever toward you. Release the lever to return to the
initial position.
If your vehicle is equipped with the Head-Up-Display
(HUD), an arrow will appear in the display area to
indicate that the high beams are on.
3-6
Page 141 of 378

Climate Controls
Dual Climate Control System
f;' (Vent): This mode directs air to the instrument
panel outlets.
+2 (Bi-Level): This mode directs half of the air to the
instrument panel outlets, and then directs the
With this system you can control the heating, cooling
and ventilation for your vehicle. remaining air
to the floor outlets. Some air may be
directed toward the windshield. Cooler air is directed to
the upper outlets and warmer air to the floor outlets.
(Floor): This mode directs most of the air to
the floor outlets with some air directed toward the
outboard outlets (for the side windows) and a little air
directed to the windshield.
The mode knob can also be used to select defog or
defrost mode. Information on defogging and defrosting,
see "Defogging and Defrosting" later in this section.
3f (Fan): Turn the knob located on the left of
the climate control panel clockwise or counterclockwise
Use the mode knob located on the right side of the to increase or decrease the fan speed.
climate control panel to select the following modes:
Driver or Passenger (Temperature Levers): Slide the
2 MAX (Maximum): This mode recirculates much of
the air inside your vehicle and sends it through the
instrument panel outlets. The air conditioning
compressor will run automatically in this setting unless
the temperature is at or below freezing. lever(s)
up or down to increase or decrease the
temperature.
3-20