2003 PONTIAC GRAND PRIX start stop button
[x] Cancel search: start stop buttonPage 87 of 378

Notice: If your key seems stuck in LOCK and you
can’t turn it, be sure you are using the correct key;
if
so, is it all the way in? Turn the key only with
your hand. Using a tool to force it could break the
key or the ignition switch. If none
of these works,
then your vehicle needs service.
B (LOCK): This position locks the ignition, steering
wheel and transaxle. It’s a theft-deterrent feature. It’s also
the only position from which you can remove the key.
C (OFF): This position lets you turn off the engine but
still turn the steering wheel. It doesn’t lock the
steering wheel like LOCK. Use
OFF if you must have
the vehicle pushed or towed.
D (RUN): This position is where the key returns to after
you start the vehicle. With the engine
off, you can use
RUN to display some of the warning and indicator lights.
E (START): This position starts the engine.
A warning chime will sound
if you open the driver’s door
while the ignition is in
OFF, LOCK or ACCESSORY
and the key is in the ignition.
Retained Accessory Power (RAP)
With Retained Accessory Power, (RAP), the power
windows, audio system and sunroof will continue to work
up to
10 minutes after the ignition key is turned to
OFF and none of the doors are opened.
Starting Your Engine
Move your shift lever to PARK (P) or NEUTRAL (N).
Your engine won’t start in any other position - that’s a
safety feature. To restart while you’re already moving,
use NEUTRAL
(N) only.
Nofice: Don’t try to shift to PARK (P) if your
vehicle is moving.
If you do, you could damage the
transaxle. Shift to
PARK (P) only when your
vehicle is stopped.
Shift Lock Release
This vehicle is equipped with an electric shift lock
release system. The shift lock release is designed to
do the following:
Prevent ignition key removal unless the shift lever is
in PARK (P) with the shift lever button fully released.
Prevent movement of the shift lever out of PARK (P)
unless the ignition is in a position other than
OFF or
LOCK. The shift lock release is always functional
except in the case
of a dead or low voltage
(less than
9 V) battery.
2-20
Page 92 of 378

Make sure the shift lever is fully in PARK (P) before
starting the engine. The vehicle has an automatic
transaxle shift lock control system. You must fully apply
the regular brakes and press the shift control button
located on the front of the shift lever, before you
can shift from PARK (P) when the ignition is in RUN.
If you cannot shift out of PARK (P), ease pressure
on the shift lever by pushing
it all the way into PARK (P)
while keeping the brake pedal pushed down. Release
the shift lever button. Then move the shift lever out
of PARK (P), being sure to press the shift lever button.
See Shifting
Out of Park (P) on page 2-30.
REVERSE (R): Use this gear to back up.
Notice: Shifting to REVERSE (R) while your vehicle
is moving forward could damage your transaxle.
Shift to REVERSE (R) only after your vehicle
is stopped.
To rock the vehicle back and forth to get out of snow,
ice or sand without damaging the transaxle, see If
You Are Stuck: In Sand, Mud, ice or Snow on
page
4-32.
NEUTRAL (N): In this position, the engine doesn’t
connect with the wheels. To restart when you’re already
moving, use NEUTRAL (N) only. Also, use
NEUTRAL
(N) when the vehicle is being towed.
ini a d ‘e gea your enc_ e is
“racing” (running at high speed) is dangerous.
Unless your foot
is firmly on the brake pedal,
your vehicle could move very rapidly. You
could lose control and
hit people or objects.
Don’t shift into a drive gear while your engine
is racing.
Notice: Damage to your transaxle caused by
shifting into a drive gear with the engine racing
isn’t
covered by your warranty.
AUTOMATIC OVERDRIVE
(a): This position is for
normal driving. If you need more power
for passing, and
you’re:
Going less than 35 mph (55 km/h), push your
Going about 35 mph (55 km/h) or more, push the
accelerator pedal about halfway
down.
accelerator pedal all the way down.
2-25
Page 150 of 378
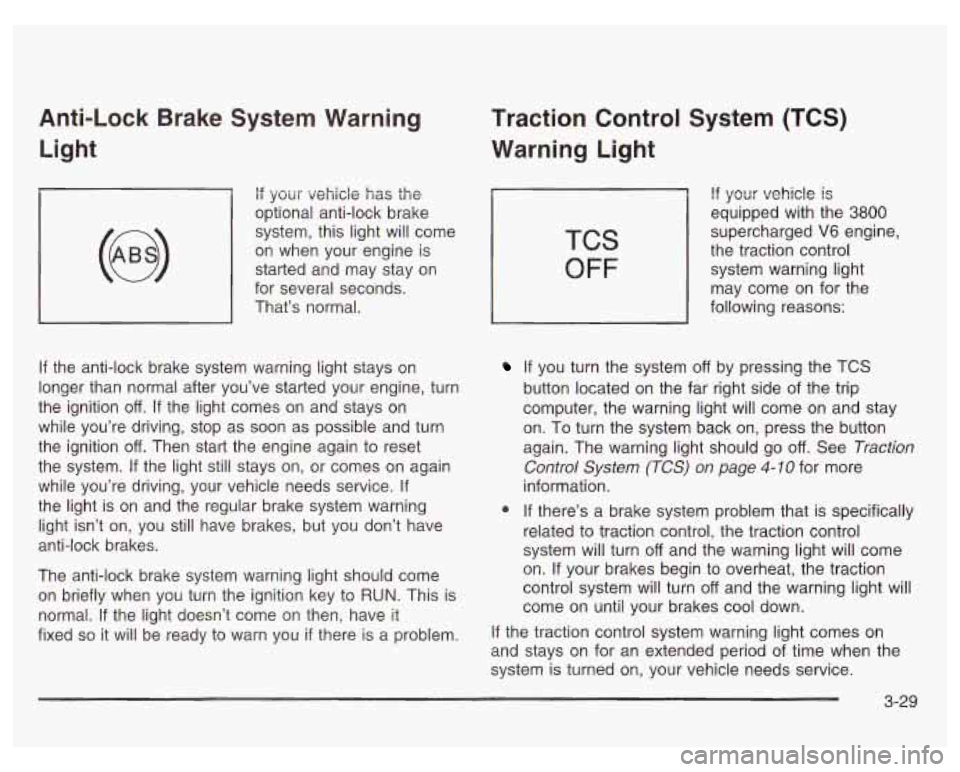
Anti-Lock Brake System Warning Light
if your vehicle has the
optional anti-lock brake
system, this light will come
on when your engine is
started and may stay on
for several seconds.
That’s normal.
If the anti-lock brake system warning light stays on
longer than normal after you’ve started your engine, turn
the ignition
off. If the light comes on and stays on
while you’re driving, stop as soon as possible and turn
the ignition
off. Then start the engine again to reset
the system.
If the light still stays on, or comes on again
while you’re driving, your vehicle needs service.
If
the light is on and the regular brake system warning
light isn’t on, you still have brakes, but you don’t have
anti-lock brakes.
The anti-lock brake system warning light should come
on briefly when you turn the ignition key to
RUN. This is
normal.
If the light doesn’t come on then, have it
fixed
so it will be ready to warn you if there is a problem.
Traction Control System (TCS)
Warning Light
TCS
OFF
If your vehicle is
equipped with the 3800
supercharged V6 engine,
the traction control
system warning light
may come on for the
following reasons:
If you turn the system off by pressing the TCS
button located on the far right side of the trip
computer, the warning light will come on and stay
on. To turn the system back on, press the button
again. The warning light should go
off. See Traction
Control System (TCS) on page
4-10 for more
information.
@ If there’s a brake system problem that is specifically
related to traction control, the traction control
system will turn
off and the warning light will come
on. If your brakes begin to overheat, the traction
control system will turn
off and the warning light will
come on until your brakes cool down.
If the traction control system warning light comes on
and stays on for an extended period of time when the
system
is turned on, your vehicle needs service.
3-29
Page 171 of 378
Playing a Compact Disc
Insert a disc partway into the slot, label side up.
The player will pull it in. The compact disc symbol will
appear on the display. If the ignition and the radio
are on, the disc will begin playing. CD will appear on
the display next to the compact disc symbol.
If you want
to insert a disc when the ignition is
off, first press the
EJECT button.
The integral CD player can play the smaller
8 cm single
discs with an adapter ring. Full-size compact discs
and the smaller discs are loaded in the same manner.
If an error appears on the display, see “Compact
Disc Messages” later in this section.
1 PREV (Previous): Press this pushbutton to go to the
start
of the current track if more than eight seconds
have played.
If you hold the pushbutton or press it more
than once, the player will continue moving back
through the disc.
2 NEXT: Press this pushbutton to go to the start of
the next track.
If you hold the pushbutton or press
it more than once, the player will continue moving
forward through the disc.
3 RDM (Random): Press this pushbutton to hear the
tracks in random, rather than sequential, order. The
display will show RDM. Press RDM again to turn
off random play.
5 REV (Reverse): Press and hold this pushbutton to
quickly reverse within a track. You will hear sound at a
reduced volume. The display will show elapsed time.
6 FWD (Forward): Press and hold this pushbutton to
quickly advance within a track. You wiil hear sound at a
reduced volume. The display will show elapsed time.
A SEEK v: Press the up or the down arrow to go to
the next or to the previous selection on the tape.
RECALL: Press this button to see what track is
currently playing. Press it again within five seconds
to
see how long the track has been playing. When a
new track starts
to play, the track number will also
appear. Press it
a third time and the time of day will be
displayed.
AM/FM: Press this button to listen to the radio when
a CD is playing. The CD will stop but remain in the
player.
CD/PLAY: Press this button to play a CD when
listening
to the radio.
4 EJECT: Press this button to stop a CD when it is
playing or
to remove a CD when it is not playing.
The EJECT button will work with the radio
off.
3-50
Page 174 of 378
Playing a Compact Disc
Insert a disc partway into the slot, label side up. The
player will pull it in. The compact disc symbol will appear
on the display. If the ignition and the radio are on, the disc
will begin playing. CD will appear on the display next to
the compact disc symbol. If you want to insert a disc
when the ignition is
off, first press the EJECT button.
The integral CD player can play the smaller
8 cm single
discs. Full-size compact discs and the smaller discs
are loaded in the same manner.
If an error appears on the display, see “Compact Disc
Messages” later in this section.
1 PREV (Previous): Press this pushbutton to go to the
start of the current track
if more than eight seconds
have played. If you hold the pushbutton or press it more
than once, the player will continue moving back
through the disc.
2 NEXT: Press this pushbutton to go to the start of
the next track.
If you hold the pushbutton or press
it more than once, the player will continue moving
forward through the disc.
3 RDM (Random): Press this pushbutton to hear the
tracks in random, rather than sequential, order. The
display will show RDM. Press RDM again to turn
off random play.
5 REV (Reversej: Press and hoid this pushbutton to
quickly reverse within a track. You will hear sound at a
reduced volume. The display will show elapsed time.
6 FWD (Forward): Press and hold this pushbutton
to quickly advance forward within a track. You will hear
sound at a reduced volume. The display will show
elapsed time.
A SEEK : Press the up or the down arrow to go to
the next or to the previous track.
RECALL: Press this button to see what track is
currently playing. Press it again within five seconds to
see how long the track has been playing. When
a
new track starts to play, the track number will also
appear. Press it a third time and the time of day will be
displayed.
AM/FM: Press this button to listen to the radio when a
disc is playing. The disc will stop but remain in the
player.
3-53
Page 175 of 378
CD/PLAY: Press this button to play a CD when
listening to the radio.
EJECT: Press this button to stop a CD when it is
playing or to remove a CD when it is not playing.
The EJECT button will work with the radio
off.
Compact Disc Messages
E (Error): If this message and a number appears on
the radio display or
if the disc comes out, it could be for
one of the following reasons:
You’re driving on a very rough road. When the road
becomes smoother, the disc should play.
It’s very hot. When the temperature returns to
normal, the disc should play.
The disc is dirty, scratched, wet or upside down.
The air is very humid. If so, wait about an hour and
try again.
If the CD is not playing correctly, for any other reason,
try a known good
CD.
If any error occurs repeatedly or if an error can’t be
corrected, contact your dealer.
If your radio displays an
error number, write it down and provide it to your
dealer when reporting the problem.
Theft-Deterrent Feature
THEFTLOCK@ is designed to discourage theft of your
radio. It works by using a secret code to disable all radio
functions whenever battery power is interrupted.
The THEFTLOCK feature for the radio may be used or
ignored.
If ignored, the system plays normally and
the radio is not protected by the feature. If THEFTLOCK
is activated, your radio will not operate
if stolen.
When THEFTLOCK is activated, the radio will display
LOC to indicate a locked condition anytime battery
power is removed. If your battery loses power for any
reason, you must unlock the radio with the secret
code before it will operate.
Activating the Theft-Deterrent Feature
The instructions which follow explain how to enter
your secret code to activate the THEFTLOCK system.
Read through all nine steps before starting the
procedure.
If you allow more than 15 seconds to elapse between
any steps, the radio automatically reverts to time
and you must start the procedure over at Step 4.
1. Write down any three or four-digit number from 000
to 1999 and keep it in a safe place separate from
the vehicle.
3-54
Page 178 of 378
AM FM: Press this button to select AM, FMI or FM2.
The band you select will be displayed. The frequency
will also be displayed and,
if the station is in stereo, the
stereo indicator will also be displayed.
If a cassette
tape or compact disc is playing, it will stop and the radio
will play.
SEEK A : Press the up or the down arrow to go to
the next or to the previous radio station and stay there.
If a cassette tape is playing, press the up or the down
arrow to search for the next or the previous selection on
the tape. Your tape must have at least three seconds of
silence between each selection for
SEEK to work. If a
compact disc is playing, press the up arrow to go to the
start of the next track. Press the down arrow to
go to the
start of the current track
if more than eight seconds have
played.
If less than eight seconds have played, press the
down arrow to go to the previous track.
A VOL (Volume) v: Press the up or the down arrow
to increase or to decrease volume.
PLAY: Press this button to play a cassette tape or
compact disc when listening to the radio.
MUTE: Press this button to silence the system. Press it
again, or any other radio button, to turn on the sound.
Understanding Radio Reception
AM
The range for most AM stations is greater than for FM,
especially at night. The longer range, however, can
cause stations to interfere with each other. AM can pick
up noise from things like storms and power lines. Try
reducing the treble to reduce this noise
if you ever get it.
FM stereo will give you the best sound, but
FM signals
will reach only about
10 to 40 miles (1 6 to 65 km).
Tall buildings or hills can interfere with FM signals,
causing the sound to come and go.
3-57
Page 248 of 378
When to Change Engine Oil (GM Oil
Life SystemTM)
Your vehicle has a computer system that lets you know
when to change the engine
oil and filter. This is
based on engine revolutions and engine temperature,
and not on mileage. Based on driving conditions,
the mileage at which an oil change will be indicated
can vary considerably. For the oil life system to
work properly, you must reset the system every time
the oil is changed.
When the system has calculated that oil life has been
diminished, it will indicate that an oil change is
necessary.
A CHANGE OIL SOON light will come on.
Change your
oil as soon as possible within the next two
times you stop for fuel.
It is possible that, if you are
driving under the best conditions, the oil life system may
not indicate that an oil change is necessary for over a
year. However, your engine oil and filter must be
changed at least once a year and at this time the system
must be reset. It is also important to check your oil
regularly and keep it at the proper level.
If the system is ever reset accidentally, you must
change your oil at
3,000 miles (5 000 km) since your
last oil change. Remember
to reset the oil life system
whenever the oil is changed.
How to Reset the GM Oil Life System
The GM Oil Life SystemTM calculates when to change
your engine oil and filter based on vehicle use. Anytime
your oil is changed, reset the system
so it can calculate
when the next oil change is required.
If a situation occurs
where you change your oil prior to a CHANGE
OIL SOON
light being turned on, reset the system.
To reset the GM Oil Life SystemTM after the oil has
been changed, use one of the following two procedures:
Using the Driver Information Center (DIC)
1.
2.
3.
With the ignition key in RUN but the engine off, fully
push and release the accelerator pedal slowly three
times within five seconds.
If the CHANGE OIL SOON light flashes, the system
is resetting.
Turn the key to OFF after the light stops flashing,
then start the vehicle.
If the CHANGE OIL SOON light comes back on, the
engine oil life monitor has not reset. Repeat the
procedure.
Using the Trip Computer (If Equipped)
1. Press the MODE button until the light appears lit
2. Press and hold the RESET button for three seconds.
next to
OIL LIFE.
The
oil life percentage should change to 100%.
5-23