2003 PONTIAC BONNEVILLE ignition
[x] Cancel search: ignitionPage 11 of 418
Power Lumbar
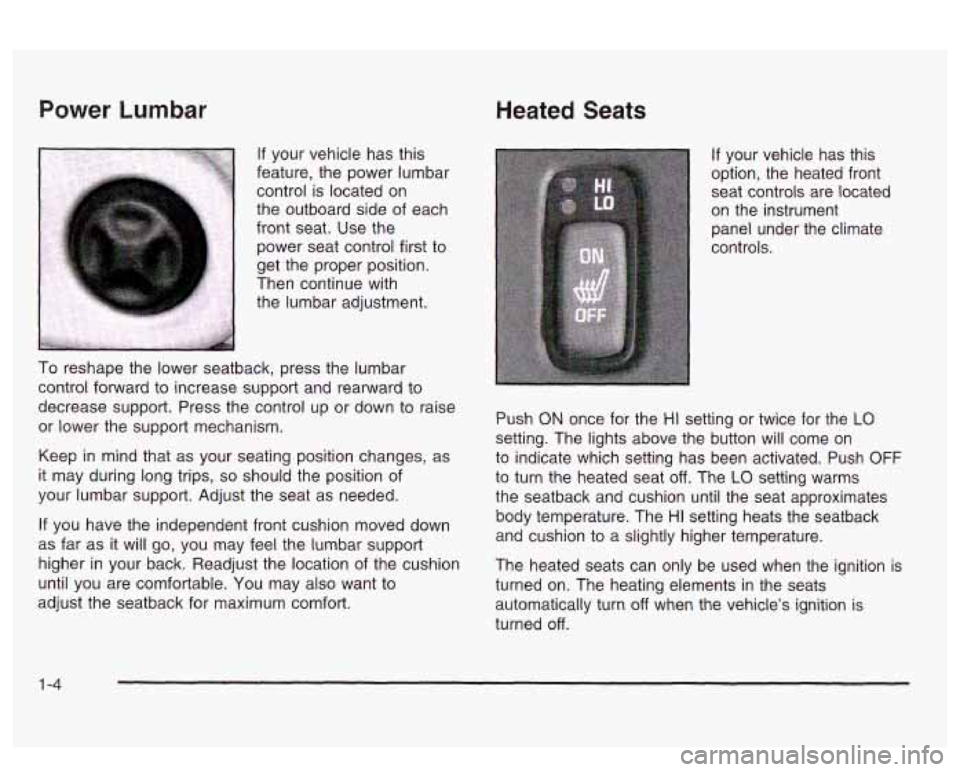
If your vehicle has this
feature, the power lumbar
control is located on
the outboard side of each
front seat.
Use the
power seat control first to
get the proper position.
Then continue with the lumbar adjustment.
To reshape the lower seatback, press the lumbar
control forward to increase support and rearward to
decrease support. Press the control up or down to raise
or lower the support mechanism.
Keep in mind that as your seating position changes, as
it may during long trips,
so should the position of
your lumbar support. Adjust the seat as needed.
If you have the independent front cushion moved down
as
far as it will go, you may feel the lumbar support
higher in your back. Readjust the location of the cushion
until you are comfortable. You may also want to
adjust the seatback for maximum comfort.
Heated Seats
If your vehicle has this
option, the heated front
seat controls are located
on the instrument panel under the climate
controls.
Push
ON once for the HI setting or twice for the LO
setting. The lights above the button will come on
to indicate which setting has been activated. Push
OFF
to turn the heated seat off. The LO setting warms
the seatback and cushion until the seat approximates
body temperature. The
HI setting heats the seatback
and cushion to a slightly higher temperature.
The heated seats can only be used when the ignition is
turned on. The heating elements in the seats
automatically turn
off when the vehicle’s ignition is
turned
off.
1 -4
Page 62 of 418
Servicing Your Air Bag-Equipped
Vehicle
Air bags affect how your vehicle should be serviced.
There are parts
of the air bag systems in several places
around your vehicle. Your dealer and the service
manual have information about servicing your vehicle
and the air bag systems. To purchase a service manual,
see
Service Publications Ordering lnformation on
page
7-9.
For up to 10 seconds after the ignition key is
turned
off and the battery is disconnected, an
air bag can still inflate during improper service. You can be injured if you are close to
an air bag when it inflates. Avoid yellow
connectors. They are probably part of the air
bag system. Be sure to follow proper service
procedures, and make sure
the person
performing work for you is qualified to do
so.
The air bag systems do not need regular maintenance.
1-55
Page 66 of 418
Section 2 Features and Controls
Keys ............................................................... 2.3
Remote Keyless Entry System
......................... 2.5
Remote Keyless Entry System Operation
........... 2.6
Doors and Locks ............................................ 2.10
Door Locks
.................................................. 2.10
Central Door Unlocking System
...................... 2-1 1
Power Door Locks ........................................ 2-11
Programmable Automatic
Delayed Locking
........................................... 2-12
Door Locks
................................. ....... 2-13
Rear Door Security Locks
.............................. 2-15
Lockout Protection
........................................ 2-15
Leaving Your Vehicle
.................................... 2-16
Trunk
.......................................................... 2-16
Windows ........................................................ 2-19
Power Windows
............................................ 2-20
Sun Visors
.......... .............................. 2.20
Theft-Deterrent Systems .................. .... 2.21
Universal Theft-Deterrent
............................... 2.21
Content Theft-Deterrent
................................. 2.22
PASS-Key@
I I I Operation ............................... 2-23
Starting and Operating Your Vehicle ................ 2-25
New Vehicle Break-In
................................... -2-25
Ignition Positions
.......................................... 2-25
Starting Your Engine
.................. ............ 2-26
Engine Coolant Heater
........... ........... -2-27
Automatic Transaxle Operation
....................... 2-28
Parking Brake
.............................................. 2-31
Shifting Into Park (P)
..................................... 2-32
Engine Exhaust
............................................ 2-36
Running Your Engine While You Are Parked
.... 2-36
PASS-Key@
Ill .............................................. 2-22
Shifting Out
of Park (P) ................................. 2-35
Parking Over Things That Burn
....................... 2-35
2-
1
Page 68 of 418
Keys
I
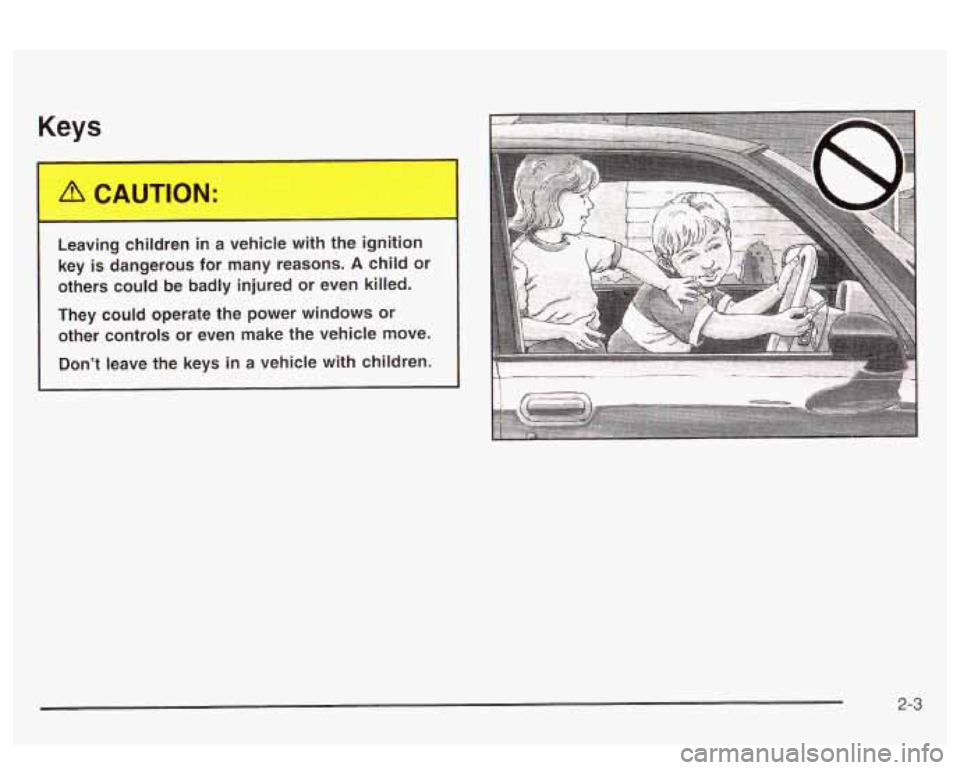
Leaving children in a vehicle with the ignition
key is dangerous for many reasons.
A child or
others could be badly injured or even killed.
They could operate the power windows or other controls
or even make the vehicle move.
Don’t leave the keys in a vehicle with children.
2-3
Page 69 of 418
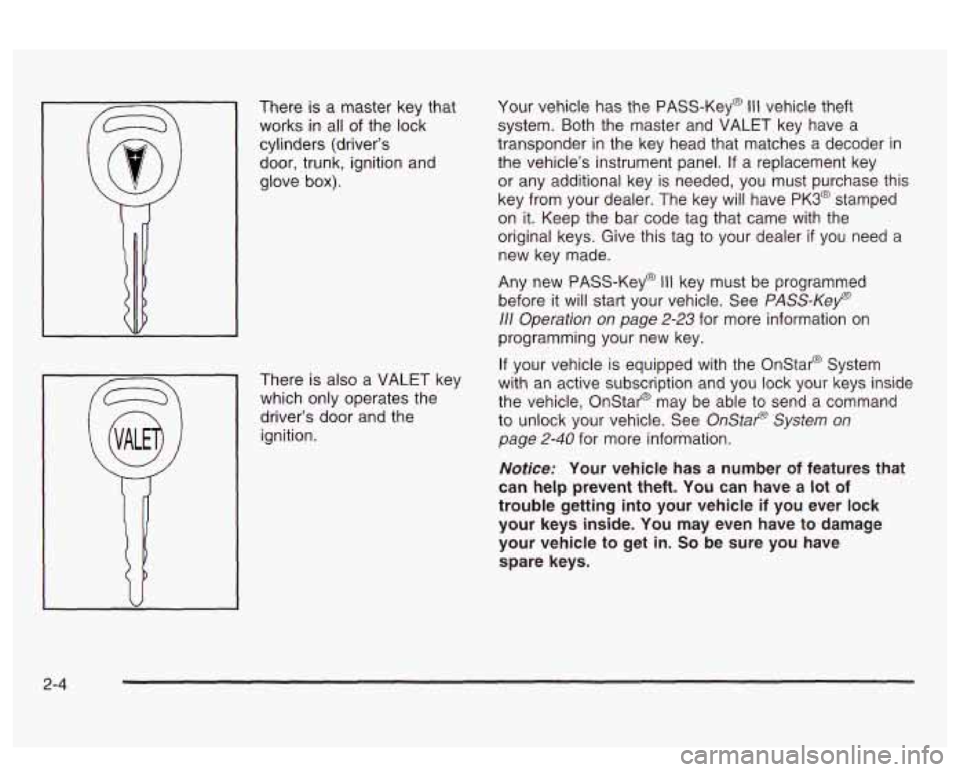
There is a master key that
works in all of the lock
cylinders (driver’s door, trunk, ignition and
glove
box).
There is also a VALET key
which only operates the
driver’s door and the
ignition. Your
vehicle has the PASS-Key@
Ill vehicle theft
system. Both the master and VALET key have a
transponder
in the key head that matches a decoder in
the vehicle’s instrument panel.
If a replacement key
or any additional key is needed, you must purchase this
key from your dealer. The key will have
PK3@ stamped
on it. Keep the bar code tag that came with the
original keys. Give this tag to your dealer
if you need a
new key made.
Any new PASS-Key@
Ill key must be programmed
before it will start your vehicle. See
PASS-Kef)
111 Operation on page 2-23 for more information on
programming your new key.
If your vehicle is equipped with the Onstar@ System
with an active subscription and you lock your keys inside
the vehicle, Onstar@ may be able to send a command
to unlock your vehicle. See
OnStap System on
page
2-40 for more information.
Notice: Your vehicle has a number of features that
can help prevent theft. You can have a lot of
trouble getting into your vehicle
if you ever lock
your keys inside. You may even have to damage
your vehicle to get in.
So be sure you have
spare keys.
2-4
Page 71 of 418
Remote Keyless Entry System
Operation
If your vehicle has this feature, you can lock and unlock
your doors or unlock your trunk from about
3 feet (1 m) up
to
30 feet (9 m) away using the remote keyless entry
transmitter supplied with your vehicle.
The numbers on the back
of the transmitters correspond
to DRIVER
#1 and DRIVER #2 on the DIC (if equipped).
See
Driver Information Center (DIC) on page 3-57 for
more information.
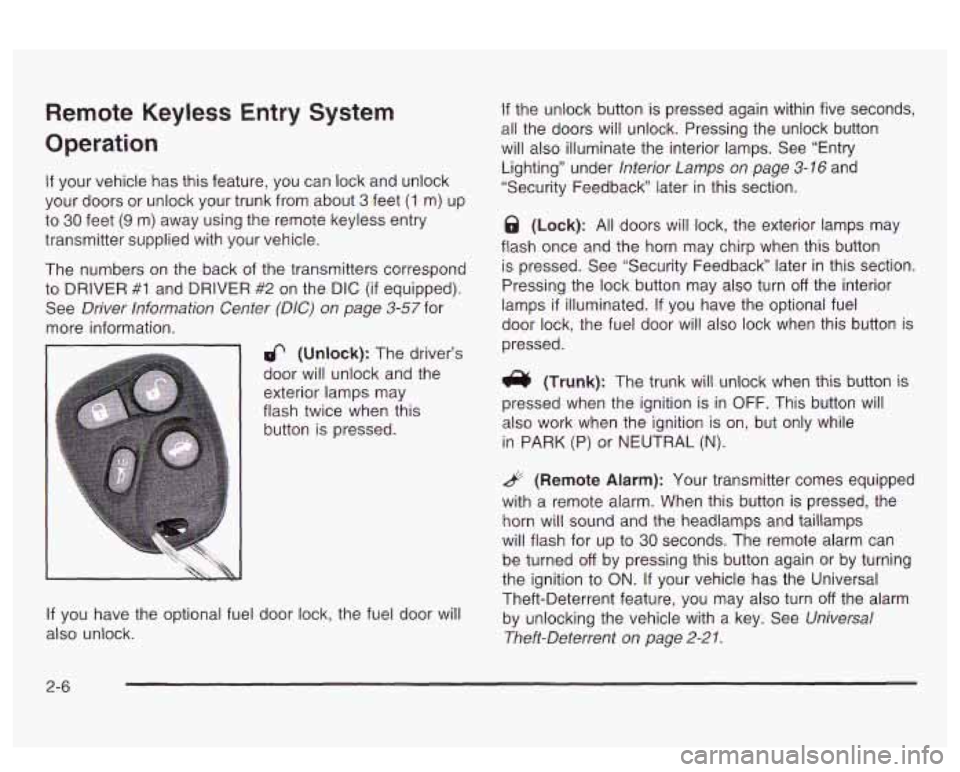
6 (Unlock): The driver’s
door will unlock and the
exterior lamps may
flash twice when this
button is pressed.
If you have the optional fuel door lock, the fuel door will
also unlock.
If the unlock button is pressed again within five seconds,
all the doors will unlock. Pressing the unlock button
will also illuminate the interior lamps. See “Entry
Lighting” under
Interior Lamps on page 3-16 and
“Security Feedback later in this section.
@ (Lock): All doors will lock, the exterior lamps may
flash once and the horn may chirp when this button
is pressed. See “Security Feedback” later in this section.
Pressing the lock button may also turn
off the interior
lamps
if illuminated. If you have the optional fuel
door lock, the fuel door will also lock when this button is
pressed.
(Trunk): The trunk will unlock when this button is
pressed when the ignition is in
OFF. This button will
also work when the ignition is on, but only while
in
PARK (P) or NEUTRAL (N).
& (Remote Alarm): Your transmitter comes equipped
with a remote alarm. When this button
is pressed, the
horn will sound and the headlamps and taillamps
will flash for up to
30 seconds. The remote alarm can
be turned
off by pressing this button again or by turning
the ignition to ON. If your vehicle has the Universal
Theft-Deterrent feature, you may also turn
off the alarm
by unlocking the vehicle with a key. See
Universal
Theft-Deterrent on page
2-21.
2-6
Page 73 of 418
To change to another mode, do the following:
the ignition on throughout this procedure.
in LOCK through Step
4.
1. Keep all doors closed, the vehicle in PARK (P) and
2. Press and hold the driver’s power door lock switch
3. Press the button with the trunk symbol on the
transmitter. The transmitter will remain in its
current mode and the horn will chirp as feedback.
4. Press the button with the trunk symbol again. Each
time the transmitter’s trunk button is pressed, the
mode will advance by one, going from Mode
2 to 3
to 4, etc. and the horn will chirp as feedback.
5. Release the power door lock switch. The security
feedback will remain in the most recent mode
selected.
This procedure changes the mode for the transmitter
used
to change this setting. The procedure will need to
be repeated for the second transmitter.
To verify the mode selected, remove the key from the
ignition and close all
of the doors after you’ve exited the
vehicle. Press the lock button
on the transmitter to be
verified and confirm the appropriate feedback. Repeat with the unlock button.
Matching Transmitter(s) to Your
Vehicle
Each remote keyless entry transmitter is coded to
prevent another transmitter from unlocking your vehicle.
If a transmitter is lost or stolen, a replacement can
be purchased through your dealer. Remember
to bring
any remaining transmitters with you when you go
to
your dealer. When the dealer matches the replacement
transmitter
to your vehicle, any remaining transmitters
must also be matched. Once your dealer has coded the
new transmitter, the lost transmitter will not unlock
your vehicle. Each vehicle can have a maximum of four
transmitters matched
to it.
See your dealer
to match additional transmitters to your
vehicle.
2-8
Page 77 of 418
Delayed Locking
This feature lets the driver delay the actual locking of
the vehicle. When the driver’s power door lock switch or
the remote keyless entry lock button is pressed, with
the key removed from the ignition and the driver’s door
open, a chime will sound three times to signal that
the delayed locking system
is active. When all doors
have been closed, the doors will lock automatically after
five seconds.
If any door is opened before this, the
five-second timer will reset itself once all the doors have
been closed again.
Pressing a power door lock switch or the remote
keyless entry lock button again will override this feature.
Personalization Programming
The delayed locking feature can be turned on or off.
If your vehicle is not equipped with remote keyless
entry, the delayed locking feature can be turned on
or
off by using the following procedure:
1. Keep all doors closed, the vehicle in PARK (P) and
the ignition on throughout this procedure.
2. Press and hold the driver’s power door lock switch
in LOCK through Step
4.
3. Cycle the parking lamp switch from off to on six
times. On the sixth cycle, the doors will unlock to
confirm that the feature has been turned on.
Your doors will remain locked
if delayed locking is
off. If the doors unlock, delayed locking is on.
switch once more.
A locking action will confirm
the new mode.
4. To change modes, cycle the parking lamp
5. Release the power door lock switch.
If your vehicle is equipped with the Driver Information
Center
(DIC), you must program this feature through the
DIC. See
DIC Vehicle Personalization on page 3-62.
2-1 2