2003 PONTIAC BONNEVILLE reset
[x] Cancel search: resetPage 174 of 418
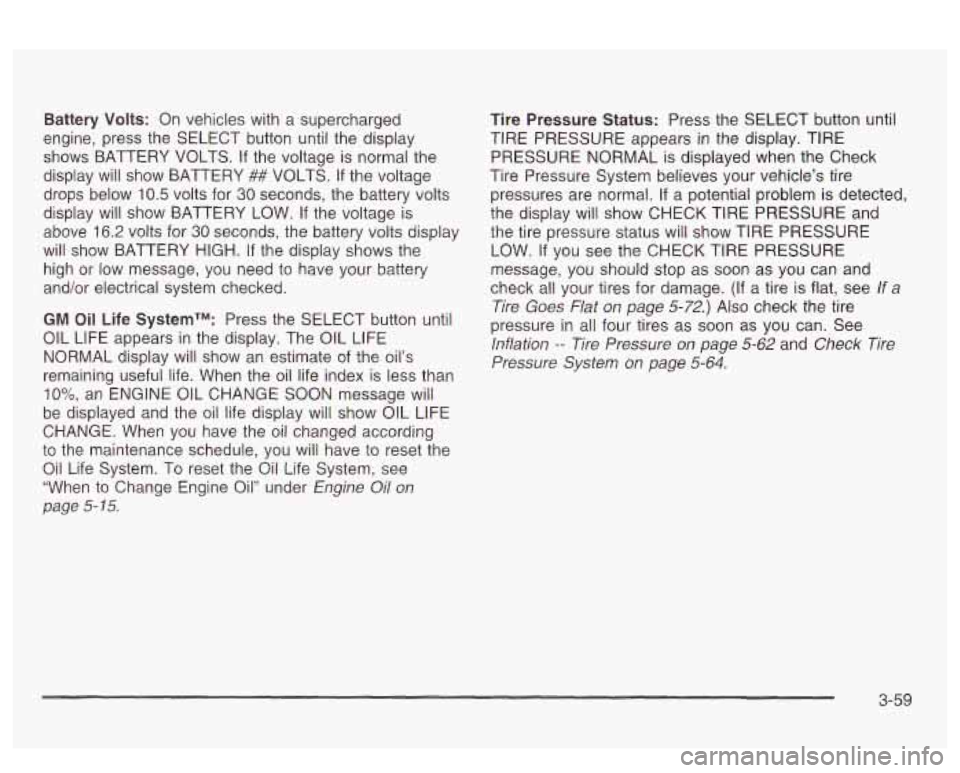
Battery Volts: On vehicles with a supercharged
engine, press the SELECT button until the display
shows BATTERY VOLTS. If the voltage is normal the
display will show BATTERY
## VOLTS. If the voltage
drops below
10.5 volts for 30 seconds, the battery volts
display will show BATTERY LOW.
If the voltage is
above
16.2 volts for 30 seconds, the battery volts display
will show BATTERY HIGH.
If the display shows the
high or low message, you need to have your batterv
and/or electrical system checked.
GM Oil Life SystemTM: Press the SELECT button until
OIL LIFE appears in the display. The
OIL LIFE
NORMAL display will show an estimate of the oil’s
remaining useful life. When the oil life index is less than
IO%, an ENGINE 0iL CHANGE SOON message wiii
be displayed and the oil life display
will show OIL LIFE
CHANGE. When you have the
oil changed according
to the maintenance schedule, you will have to reset the
Oil Life System. To reset the Oil Life System, see
“When to Change Engine Oil” under
Engine Oil on
page
5- 15.
Tire Pressure Status: Press the SELECT button until
TIRE PRESSURE appears
in the display. TIRE
PRESSURE NORMAL
is displayed when the Check
Tire Pressure System believes your vehicle’s tire
pressures are normal. If a potential problem is detected,
the display will show CHECK TIRE PRESSURE and
the tire pressure status will show TIRE PRESSURE
LOW.
If you see the CHECK TIRE PRESSURE
message, you should stop
as soon as you can and
check all your tires for damage.
(If a tire is flat, see If a
Tire Goes Flat on page
5-72.) Also check the tire
pressure in all four tires as soon as you can. See
lnflation -- Tire Pressure on page 5-62 and Check Tire
Pressure System on page
5-64.
3-59
Page 176 of 418
SERVICE STABILITY SYSTEM - 54: If you ever see
the SERVICE STABILITY SYSTEM message,
it
means there may be a problem with your stability
enhancement system.
If you see this message, try to
reset the system (stop; turn
off the engine; then start the
engine again).
If the SERVICE STABILITY SYSTEM
message still comes on, it means there is a problem.
You should see your dealer for service. Reduce
your speed and drive accordingly.
STABILITY SYSTEM ACTIVE - 55: You may see the
STABILITY SYSTEM ACTIVE message on the Driver
Information Center. It means that an advanced,
computer-controlled system has come on to help your
vehicle cmtinue to
go in the direction in which you’re
steering. This stability enhancement system activates
when the computer senses that your vehicle
is just
starting to spin, as it might
if you hit a patch of ice or
other slippery spot
on the road. When the system is on,
you may hear a noise or feel a vibration in the brake
pedal. This is normal.
When the STABILITY SYSTEM ACTIVE message
is on,
you should continue to steer in the direction you want
to go. The system is designed to help you in bad
weather or other difficult driving situations by making the
most
of whatever road conditions will permit. If the
STABiLiiY SYSTEM ACTIVE message comes on, you’!!
know that something has caused your vehicle to start
to spin,
so you should consider slowing down.
Tire Pressure Status - 144: If you see the CHECK
TIRE PRESSURE message, you should stop as soon as
you can and check all your tires for damage. (If a tire
is flat, see
If a Tire Goes Flat on page 5-72.) Also check
the tire pressure in all four tires as soon as you can.
See
inflation -- lire Pressure on page 5-62 and Check
Tire Pressure System
on page 5-64.
Driver Identifier DIC Display
This feature allows two different drivers to store and
recall their own preferred display mode. The
personalization settings displayed
on the DIC are
determined by the transmitter used to enter the vehicle.
After the uniock button
on a remote keyless entry
transmitter (if equipped) is pressed and the ignition is
in
ON, the DIC will display the identified driver. The
settings can also be changed by briefly pressing one of
the MEMORY buttons located on the driver’s door.
The DIC is used to program information for DRIVER
#I
UNKNOWN DRIVER if they are neither DRIVER #I nor
DRIVER
#2.
1 --a* .un TI^ nbfi ... :II :A~...+;$., ,-,~orp.,n Qc ~[IU unlvcn ft~. I IIZ UIU vvII1 luGltrl~y S r)bld-aI --
3-61
Page 178 of 418
4. The first choice to be made will be DRIVER ID 1
or 2. Press the RESET button to toggle between
your selections within a display and SELECT
to choose the current selection and move on to the
next personalization feature.
You are now in the selection mode and the DIC
is ready
to program your personal choices in memory.
Each feature that can be personalized will appear in the
display. Once you have made a selection for a
feature, the DIC will move on to the next personalization
feature.
Scroll through the following messages and feature
options:
AUTO DOOR LOCKS - OFFiON
UNLOCK - OFF/ON
UNLOCK - KEY OFF/PARK
DOOR TO UNLOCK - DRIVER/ALL
WINDOW LOCKOUT - R + PASS/REAP
KEYLESS FEEDBACK - OFF/ON
LIGHTS FEEDBACK - OFF/ON
HORN FEEDBACK - OFF/ON
DELAYED LOCKING - OFF/ON
PERIMETER LIGHTS - OFF/ON
PERIMETER LIGHTS - TIMEOUT 15 SEC
SEAT RECALL - OFF/ON
* RECALL POSITION - MEMORY/EXIT
TILT MIRROR - OFF/ON
0 DRIVER ID - OFF/ON
If you would like to exit the selection mode without
moving through each of the personalization features,
simply press a different button on the DIC or turn off the
ignition. The personal choices you made will still be
retained, even without passing through each of
the features. In order for your personal choices
to save,
you must press SELECT after making your selections.
If you happen to move past a selection you would like to
make a personal choice for, press unlock on your
transmitter or press the appropriate driver number on
the memory seat control. This will return you to the
A description of each feature programmable through the
DIC follows.
k.--i-n;-m uGylIlII,,Iy nf v, thn 'I ,v nntinn ..r""' foatt1t-P .-e--. nrnnr;lmming mode. I-. -a -.
3-63
Page 179 of 418
Automatic Door Locks
The door lock modes when shifting in and out of
PARK (P), can be changed through the DIC. You can
change these modes using different selections of
the following DIC displays:
AUTO DOOR LOCKS - OFF/ON
UNLOCK - OFFfON
UNLOCK - KEY OFF/PARK
DOOR TO UNLOCK - DRIVER/ALL
If you choose OFF for AUTO DOOR LOCKS, your door
locks will operate normally with
no automatic feature.
If you choose ON for AUTO DOOR LOCKS, ON
for UNLOCK and KEY OFF, your doors will lock every
time you shift out of PARK (P), and the doors will unlock
every time you stop and turn the ignition to OFF.
If you choose ON for AUTO DOOR LOCKS, ON for
UNLOCK and PARK, your doors will lock every time you
shift out of PARK (P), and the doors will unlock every
time you stop and shift into PARK
(P).
If you choose ON for AUTO DOOR LOCKS, and OFF
for UNLOCK, your doors will lock every time you
shift out of PARK (P), and there will be no automatic
door unlock when shifting back into PARK (P).
If you choose ON for UNLOCK and DRIVER for DOOR
TO UNLOCK, only the driver’s door will automatically
unlock when shifting into PARK (P) or turning the
key to OFF.
If you choose ON for UNLOCK and ALL for DOOR TO
UNLOCK, all doors will automatically unlock when
shifting into PARK
(P) or turning the key to OFF.
To change modes do the following:
1. Move the arrow on the display between the
selections by pressing the RESET button.
2. Once you have made your selection, press the
SELECT button and your choice will be retained
in memory.
See
Programmable Automatic Door Locks on page 2- 13
for more information about this feature.
3-64
Page 180 of 418
Window Lock Out
The number of passenger windows locked out by the
window LOCK switch can be programmed through
the DIC.
If you choose R + PASS, all three passenger window
switches will be inactive when the window LOCK switch
is enabled.
If you choose REAR, only the two rear passenger
window switches will be locked out when the window
LOCK switch is enabled.
To change modes do the following:
1. Move the arrow on the display between R + PASS
and REAR by pressing the RESET button.
2. Once you have made your selection, press the
SELECT button. Your choice will be retained in
memory.
For more information on this feature, see “Window Lock
Out” under
Power Windows on page 2-20.
Security Feedback
By choosing different combinations of these selections,
you can choose the type
of transmitter activated
feedback when locking and unlocking your vehicle with
your transmitter. Each time you make a selection by
pressing the RESET button, press the SELECT button
to record your choice.
@ KEYLESS FEEDBACK - OFF/ON
LIGHTS FEEDBACK - OFF/ON
HORN FEEDBACK - OFF/ON
If you choose
ON for KEYLESS FEEDBACK you will
also need to choose LIGHTS and/or HORN FEEDBACK.
You can select the following modes:
If you choose OFF for KEYLESS FEEDBACK, you
will receive no security feedback when locking or
unlocking your vehicle.
If you choose ON for KEYLESS FEEDBACK and
ON for LIGHTS FEEDBACK, the exterior lamps
will flash twice when unlocking your venicie
and once when locking your vehicle.
3-65
Page 181 of 418
If you choose ON for KEYLESS FEEDBACK and
ON for HORN FEEDBACK, your horn will chirp
when locking and unlocking your vehicle.
If you choose ON for KEYLESS, LIGHTS and
HORN FEEDBACK, your exterior lamps will
flash twice at the first unlock button press, your
exterior lamps will flash twice and your horn
will chirp once at the second unlock button press,
and the exterior lamps will flash once and the
horn will chirp once when locking your vehicle.
For more information on this feature, see “Security
Feedback under
Remote Keyless Entry System
Operation on page
2-6.
Delayed Locking
The delayed locking feature, which delays the actual
locking of the vehicle, can be made active or inactive
through the DIC. When DELAYED LOCKING
- OFF/ON
appears on the display, use the RESET button to
toggle the arrow between OFF and
ON. When you have
made your choice, press the SELECT button to record
your selection.
Perimeter Lighting
When the button with the unlock symbol on the
transmitter is pressed, the Daytime Running Lamps
(high-beams at reduced intensity), parking lamps and
back-up lamps will turn on
if it is dark enough according
to the Twilight Sentinel@
.
You can control activation of this feature by choosing
OFF
or ON when the PERIMETER LIGHTS choice
is displayed on the DIC. Make your choice by pressing
the RESET button and record your choice by pressing
the SELECT button. You will then be prompted
to
choose a TIMEOUT period.
The PERIMETER LIGHTS TIMEOUT feature can be
changed
to the desired setting by using the RESET
button to toggle from
5 to 30 seconds. Each toggle will
increase the time by five seconds. Once the desired
timeout
is displayed, press the SELECT button to record
your choice and move on to the next personalization
feature.
For more information on this feature, see “Perimeter
Lighting” under
lnterior Lamps on page 3-16.
For more information on this feature, see Delayed
Locking
on page 2-12.
3-66
Page 182 of 418
Memory Seats
If your vehicle has this feature, the memory seat and
mirror positions will be recalled for the identified
driver when the remote keyless entry transmitter is used
to enter the vehicle.
You can program this feature to be active by choosing
ON when the SEAT RECALL choice appears, or
inactive by choosing
OFF when the SEAT RECALL
choice appears on the DIC. Make your choices
by pressing the RESET button and store them to
memory by pressing the SELECT button.
You can also program this feature
to recall your
memory seat position or the exit seat position.
Memory Position: Choose ON when the SEAT
RECALL choice appears and then choose
MEMORY when the RECALL POSITION choice
appears.
Ex!! PesW?!?: Chwse ON when the SEAT
RECALL choice appears and then choose
EXIT
when the RECALL POSITION choice appears.
The seat will move when you enter the vehicle after
unlocking it with a remote keyless entry transmitter.
This will allow for easy entry.
For more information on this feature, see
Memory Seat
and Mirrors on page 2-48.
Outside Curb View Assist Mirror
If your vehicle has this feature, the outside curb view
assist mirror, which tips the passenger mirror while the
vehicle is in REVERSE
(R), can be made active or
inactive through the DIC. When TILT MIRROR
-OFF/ON
appears on the display, use the RESET button to
toggle the arrow between
OFF and ON. When you have
made your choice, press the SELECT button to record
your selection. For more information on this feature, see
Outside Curb View Assist Mirror on page 2-39.
Driver ID
This feature displays the DRIVER ID, as identified by
the
DIC. If this feature is ON, the DRIVER ID will
be displayed every time the ignition
is turned on. If the
DRIVER ID
is OFF, the DRIVER ID can be displayed
by pressing either a button on the remote keyless entry
transmitter or a memory seat button.
3-67
Page 184 of 418
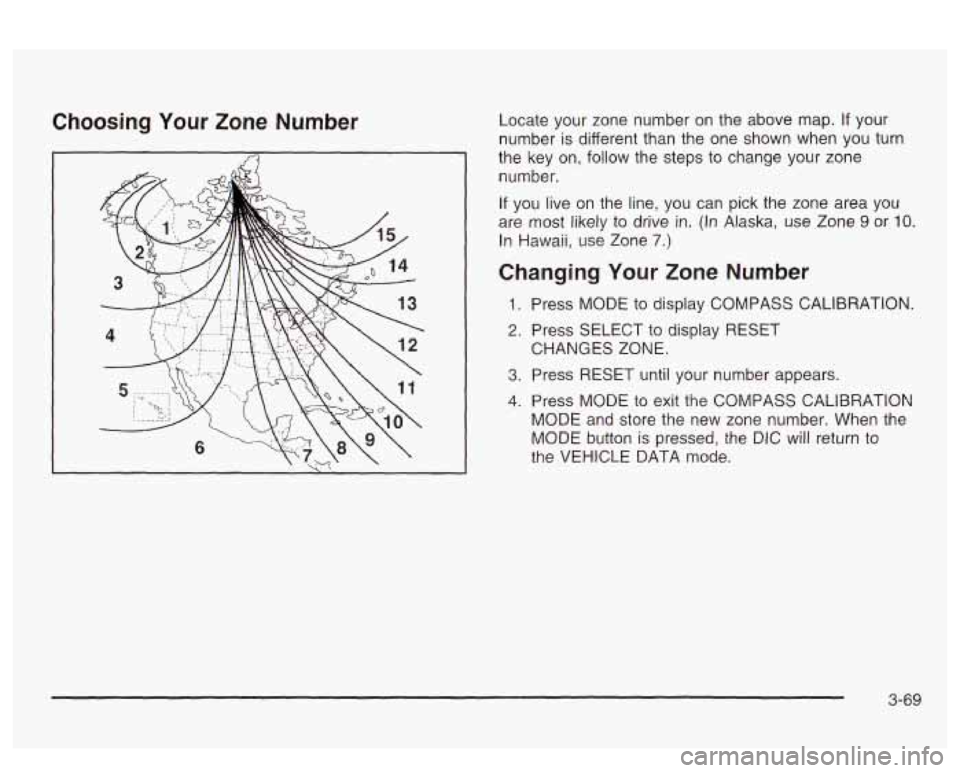
Choosing Your Zone Number Locate your zone number on the above map. If your
number
is different than the one shown when you turn
the key on,
follow the steps to change your zone
number.
If you live on the line, you can pick the zone area you
are most likely to drive
in. (In Alaska, use Zone 9 or IO.
In Hawaii, use Zone 7.)
Changing Your Zone Number
1. Press MODE to display COMPASS CALIBRATION.
2. Press SELECT to display RESET
3. Press RESET until your number appears.
4. Press MODE to exit the COMPASS CALIBRATION
MODE and store the new zone number. When the
MODE button is pressed, the DIC will return to
the VEHICLE DATA mode. CHANGES ZONE.
3-69