2003 PONTIAC BONNEVILLE heating
[x] Cancel search: heatingPage 11 of 418
Power Lumbar
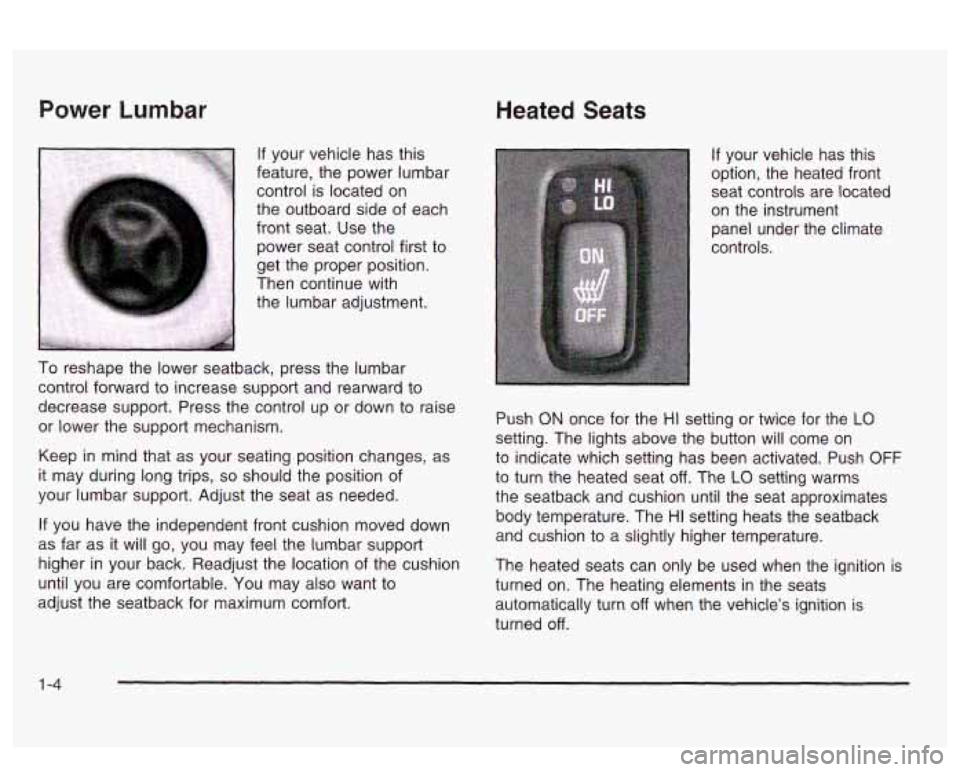
If your vehicle has this
feature, the power lumbar
control is located on
the outboard side of each
front seat.
Use the
power seat control first to
get the proper position.
Then continue with the lumbar adjustment.
To reshape the lower seatback, press the lumbar
control forward to increase support and rearward to
decrease support. Press the control up or down to raise
or lower the support mechanism.
Keep in mind that as your seating position changes, as
it may during long trips,
so should the position of
your lumbar support. Adjust the seat as needed.
If you have the independent front cushion moved down
as
far as it will go, you may feel the lumbar support
higher in your back. Readjust the location of the cushion
until you are comfortable. You may also want to
adjust the seatback for maximum comfort.
Heated Seats
If your vehicle has this
option, the heated front
seat controls are located
on the instrument panel under the climate
controls.
Push
ON once for the HI setting or twice for the LO
setting. The lights above the button will come on
to indicate which setting has been activated. Push
OFF
to turn the heated seat off. The LO setting warms
the seatback and cushion until the seat approximates
body temperature. The
HI setting heats the seatback
and cushion to a slightly higher temperature.
The heated seats can only be used when the ignition is
turned on. The heating elements in the seats
automatically turn
off when the vehicle’s ignition is
turned
off.
1 -4
Page 81 of 418
Leaving Your Vehicle
If you are leaving the vehicle, take your keys, open
your door and set the locks from the inside. Then get out
and close the door.
You may also use the lock button
on the remote keyless entry transmitter after shutting
the doors.
If your vehicle has a theft-deterrent system, see
Universal Theft-Deterrent on page 2-21.
Trunk
L% CAUTION:
It can be dangerous to drive with the trunk lid
open because carbon monoxide (CO) gas can
come into your vehicle.
You can’t see or smell
CO.
It can cause unconsciousness and
even death.
CAUTION: (Continued) If
you must drive with the trunk lid open or if
electrical wiring
or other cable connections
must pass through the seal between the body
and the trunk
lid:
Make sure all other windows are shut.
Turn the fan on your heating or cooling
system to
its highest speed and select the
control setting that will force outside air
into your vehicle. See “Climate Controls”
in the Index.
instrument panel, open them all the way.
If you have air outlets on or under the
See “Engine Exhaust” in the Index.
Trunk Lock Release
To unlock the trunk from the outside, insert the master
key and turn it.
2-1 6
Page 139 of 418
Notice: Adding some electrical equipment to your
vehicle can damage
it or keep other things from
working as they should. This wouldn’t be covered by
your warranty. Check with your dealer before adding electrical equipment, and never use anything
that exceeds the amperage rating.
When adding electrical equipment, be sure to follow the
proper installation instructions included with the
equipment.
Notice: Power outlets are designed for accessory
plugs only.
Do not hang any type of accessory
or accessory bracket from the plug. Improper use of
the power outlet can cause damage not covered
by your warranty.
Ashtrays and Cigarette Lighter
Push down on the cover to reveal the front ashtray.
To clean the ashtray,
lift it out by pulling on the finger
holes on each side.
On models without a console, an ashtray is located
underneath the instrument panel.
To clean the ashtray,
lift it out by pulling up on the tabs on either side.
It snaps back into place.
To open a rear ashtray, lift the cover
Notice: Don’t put papers or other flammable
items into your ashtrays. Hot cigarettes or other
smoking materials could ignite them, causing
a damaging fire.
The cigarette lighter is located next to the storage tray.
To use a lighter, just push the center in all the way
and let
it go. When it is ready, the center will pop back
out by itself. Pull out the entire unit to use it.
Notice: Don’t hold a cigarette lighter in with your
hand while
it is heating. If you do, it won’t be able to
back away from the heating element when it’s
ready. That can make
it overheat, damaging the
lighter and the heating element.
The cigarette lighter will only operate when the ignition
key is in
ON and for 10 minutes after turning the
ignition
OFF. If you would like the lighter to operate
regardless of ignition position, and for extended periods
of time, see “Engine Compartment Fuse Block under
Fuses and Circuit Breakers on page 5-92 or see
your dealer.
3-24
Page 140 of 418
Climate Controls
Climate Control System
With this system you can control the heating, cooling
and ventilation for your vehicle.
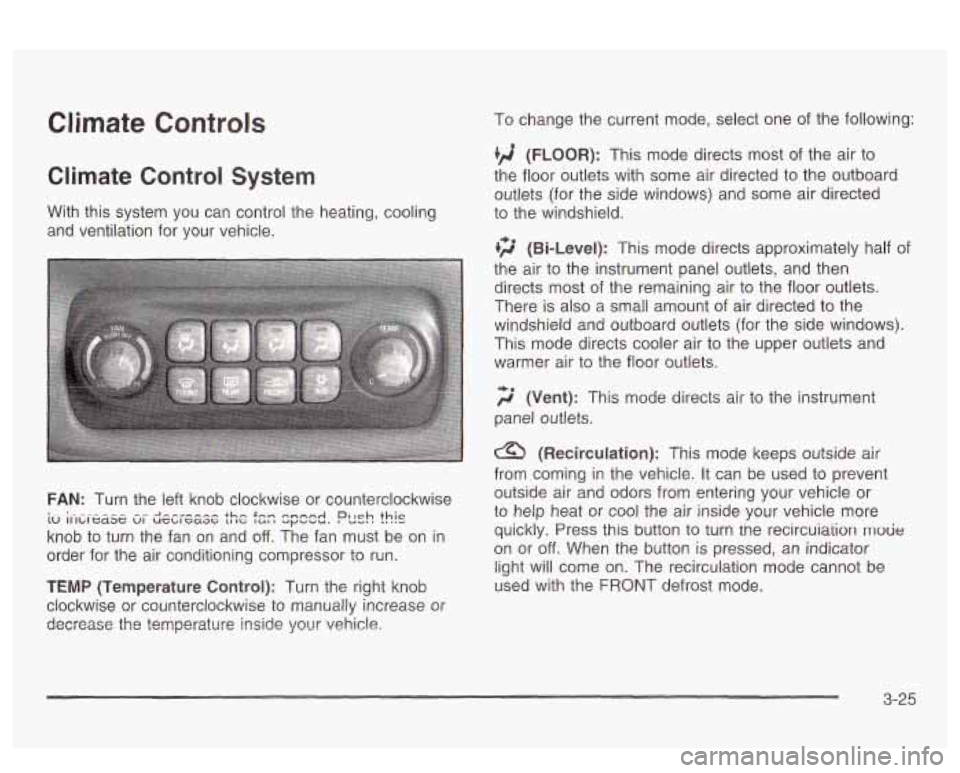
FAN: Turn the left knob clockwise or counterclockwise
knob to turn the fan on and
off. The fan must be on in
order for the air conditioning compressor to run.
I ~ . - -.-- --- -- -I-,,,,,, +hm .Fn- n.nnnA , Ich )hic 10 IIILIC~~G VI wsblcaac (ut I apbuu. Du-. I ..
TEMP (Temperature Control): Turn the right knob
clockwise or counterclockwise to manually increase or
decrease
the temperature inside your vehicle,
To change the current mode, select one of the following:
(FLOOR): This mode directs most of the air to
the floor outlets with some air directed to the outboard
outlets (for the side windows) and some air directed
to the windshield.
li;' (Bi-Level): This mode directs approximately half of
the air to the instrument panel outlets, and then
directs most
of the remaining air to the floor outlets.
There is also a small amount of air directed to the
windshield and outboard outlets (for the side windows).
This mode directs cooler air to the upper outlets and
warmer air to the floor outlets.
f;' (Vent): This mode directs air io th2 imtr~ment
panel outlets.
(Recirculation): This mode keeps outside air
from coming in the vehicle.
It can be used to prevent
outside air and odors from entering your vehicle or
to help heat or cool the air inside your vehicle more
quickly. Press
this button to turn tne recircuia'rion mode
on or off. When the button is pressed, an indicator
light will come on. The recirculation mode cannot be
used with the FRONT defrost mode.
3-25
Page 143 of 418

Automatic Climate Control System
With this system you can control the heating, cooling
and ventilation for your vehicle.
Automatic Operation
AUTO (Automatic): Press the AUTO button for
automatic control of the inside temperature, the air
delivery mode and the fan speed.
1. Press the AUTO button. Whenever this button is
pressed, the display will show the current settings
for five seconds before returning the display to
the exterior temperature.
2. Adjust the temperature to 75” F (24” C).
Choosing the coldest or warmest temperature
setting will not cause the system to heat or cool any
faster.
If you set the system at the warmest
temperature setting, the system will remain at the
maximum heat setting and fan speed.
In cold weather, the system will start at reduced fan
speeds to avoid blowing cold air into your vehicle
until warmer air is available. The system will
start out blowing air at the floor but may change
modes automatically as the vehicle warms up
to maintain the chosen temperature setting. The
length of time needed for warm up will depend on
the outside temperature and the length of time
that has elapsed since your vehicle was last driven.
3. Wait for the system to regulate. This may take from
10 to 30 minutes. Then adjust the temperature, if
necessary.
Do not cover the solar sensor located in the center OT
the instrument panel, near the windshield. For more
information on the solar sensor, see “Sensors” later in
this section.
3-28
Page 160 of 418
The optional Traction Control System is active and
is limiting wheel spin. You may feel the system
working, but this is normal. Slippery road conditions
may exist,
so adjust your driving accordingly.
If the LOW TRAC light comes on, slippery road
conditions may exist,
so you should consider slowing
down and adjusting your driving accordingly.
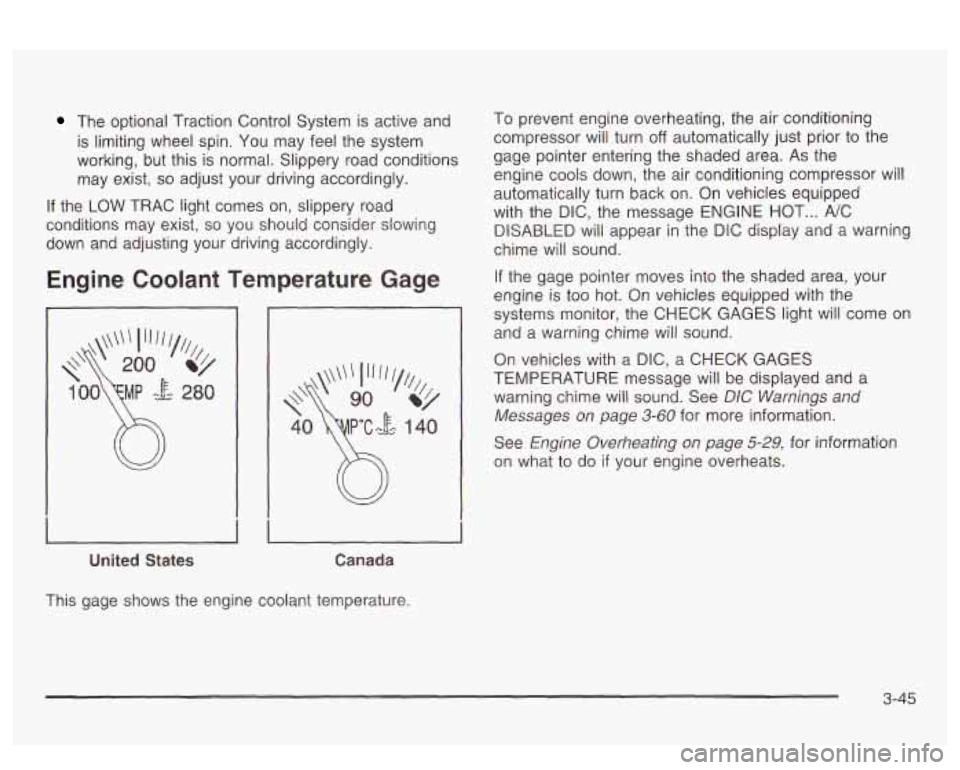
Engine Coolant Temperature Gage
United States Canada
To prevent engine overheating, the air conditioning
compressor will turn
off automatically just prior to the
gage pointer entering the shaded area. As the
engine cools down, the air conditioning compressor will
automatically turn back on. On vehicles equipped
with the DIC, the message ENGINE HOT
... NC
DISABLED will appear in the DiC display and a warning
chime will sound.
If the gage pointer moves into the shaded area, your
engine is too hot.
On vehicles equipped with the
systems monitor, the CHECK GAGES light will come
on
and a warning chime will sound.
On vehicles with a
DIC, a CHECK GAGES
TEMPERATURE message will be displayed and a
warning cnime wili sound.
See DIC bVamiisgs and
Messages on page 3-60 for more information.
See
Engine Overheating on page 5-29, for information
on what to do
if your engine overheats.
This gage shows the engine coolant temperature.
3-45
Page 258 of 418
Driving On Grades
Reduce speed and shift to a lower gear before you start
down a long or steep downgrade. If you don’t shift
down, you might have to use your brakes
so much that
they would get hot and no longer work well.
On a long uphill grade, shift down to
THIRD (3) and
reduce your speed to around 45 mph
(70 km/h) to
reduce the possibility
of the engine and transaxle
overheating.
Parking on Hills
You really should not park your vehicle, with a
trailer attached, on a hill.
If something goes
wrong, your rig could start
to move. People
can be injured, and both your vehicle and the
trailer can be damaged.
But if you ever have to park your rig on a hill, here’s
how to
do it:
1. Apply your regular brakes, but don’t shift into
2. Have someone place chocks under the trailer
PARK (P) yet.
wheels.
3. When the wheel chocks are in place, release the
regular brakes until the chocks absorb the load.
4. Reapply the regular brakes. Then apply your
parking brake, and then shift to PARK (P).
5. Release the regular brakes.
When YQU Are Ready to Leave After
Parking on a Hill
1. Apply your regular brakes and hold the pedal down
while you:
* start your engine,
shift into a gear, and
0 reiease the parking brake.
2. Let up on the brake pedal.
3. Drive slowly until the trailer is clear of the chocks.
4. Stop and have someone pick up and store the
chocks.
4-41
Page 259 of 418
Maintenance When Trailer Towing
Your vehicle will need service more often when you’re
pulling a trailer. See the Maintenance Schedule for more
on this. Things that are especially important in trailer
operation are automatic transaxle fluid (don’t overfill),
engine oil, drive belt, cooling system and brake system.
Each of these is covered in this manual, and the
Index will help you find them quickly.
If you’re trailering,
it’s a good idea to review this information before you
start your trip.
Engine Cooling When Trailer Towing
Your cooling system may temporarily overheat during
severe operating conditions. See
Engine Overheating on
page 5-29.
Check periodically to see that all hitch nuts and bolts
are tight.
4-42