2003 PONTIAC BONNEVILLE recommended oil
[x] Cancel search: recommended oilPage 215 of 418
Care of Your Cassette Tape Player
A tape player that is not cleaned regularly can cause
reduced sound quality, ruined cassettes or a damaged
mechanism. Cassette tapes should be stored
in their
cases away from contarninants, direct sunlight and
extreme heat.
If they aren’t, they may not operate
properly or may cause failure of the tape player.
Your tape player should be cleaned regularly after every
50 hours of use. Your radio may display CLEAN
PLAYER to indicate that you have used your tape player
for
50 hours without resetting the tape clean timer. If
this message appears on the display, your cassette tape
player needs to be cleaned.
It will still play tapes, but
you should clean
it as soon as possible to prevent
damage to your tapes and player.
If you notice a
reduction in sound quality, try a known good cassette to
see
if the tape or the tape player is at fault. If this
other cassette has no improvement in sound quality,
clean the tape player.
For best results, use a scrubbing action, non-abrasive
cleaning cassette with pads which scrub the tape
head as the hubs
of the cleaner cassette turn. The
recommended cleaning cassette is available through
your dealership.
You may also choose a non-scrubbing action, wet-type
cleaner which uses a cassette with a fabric belt to
clean the tape head. This type of cleaning cassette will not eject
on its own. A non-scrubbing action cleaner
may not clean as thoroughly as the scrubbing type
cleaner. The use of a non-scrubbing action, dry-type
cleaning cassette is not recommended.
After you clean the player, press and hold the eject
button for five seconds to reset the CLEAN PLAYER
indicator. The radio will display CLEANED to show the
indicator was reset.
Cassettes are subject to wear and the sound quality
may degrade over time. Always make sure the cassette
tape is in good condition before you have your tape
player serviced.
Care of Your CDs
Handle discs carefully. Store them in their original cases
or other protective cases and away from direct sunlight
and dust.
If the surface of a disc is soiled, dampen
a clean, soft cloth in a mild, neutral detergent solution
and clean it, wiping from the center to the edge.
Be sure never to touch the side without writing when
handling discs. Pick up discs by grasping the outer
edges or the edge
of the hole and the outer edge.
3-1 00
Page 239 of 418
Once you are moving on the freeway, make certain you
allow a reasonable following distance.
Expect to move slightly slower at night.
When you want to leave the freeway, move to the
proper lane well in advance.
If you miss your exit, do
not, under any circumstances, stop and back up. Drive
on to the next exit.
The exit ramp can be curved, sometimes quite sharply.
The exit speed is usually posted. Reduce your speed
according to your speedometer, not to your sense
of motion. After driving for any distance at higher
speeds, you may tend to think you are going slower
than you actually are. Of
course, you’ll find experienced and able service
experts in dealerships all across North America. They’ll
be ready and willing to help
if you need it.
Here are some things you can check before a trip:
a
Before Leaving on a Long Trip
Make sure you’re ready. Try to be well rested. If you
must start when you’re not fresh
- such as after a day’s
work
- don’t plan to make too many miles that first
part of the journey. Wear comfortable clothing and shoes
you can easily drive in.
Is your vehicle ready for a long trip? If you keep
it serviced and maintained, it’s ready to go. If it
needs service, have it done before starting out.
Windshield Washer Fluid: Is the reservior full? Are
all windows clean inside and outside?
Wiper Blades: Are they in good shape?
Fuel, Engine Oil, Other Fluids: Have you checked
all levels?
Lamps: Are they all working? Are the lenses clean?
Tires: They are vitally important to a safe,
trouble-free trip.
Is the tread good enough for
long-distance driving? Are the tires all inflated
to the
recommended pressure?
Weather Forecasts: What’s the weather outlook
along your route? Should you delay your trip a
short time to avoid a major storm system?
Maps: Do you have up-to-date maps?
4-22
Page 266 of 418
Notice: Your vehicle was not designed for fuel that
contains methanol. Don’t use fuel containing
methanol. It can corrode metal parts in your fuel
system and also damage the plastic and rubber
parts. That damage wouldn’t be covered under your
warranty.
Some gasolines that are not reformulated for low
emissions may contain an octane-enhancing additive
called methylcyclopentadienyl manganese tricarbonyl
(MMT); ask the attendant where you buy gasoline
whether the fuel contains MMT. General Motors does
not recommend the use of such gasolines. Fuels
containing MMT can reduce the life of spark plugs and
the performance of the emission control system may
be affected. The malfunction indicator
lamp may turn on.
If this occurs, return to your authorized GM dealer for
service.
Fuels in Foreign Countries
If you plan on driving in another country outside the
United States or Canada, the proper fuel may be hard
to find. Never use leaded gasoline or any other fuel
not recommended in the previous text on fuel. Costly
repairs caused by use of improper fuel wouldn’t be
covered by your warranty.
To check the fuel availability, ask an auto club, or
contact a major oil company that does business in the
country where you’ll be driving.
5-7
Page 277 of 418
What Kind of Engine Oil to Use
Oils recommended for your vehicle can be identified by
looking for the starburst symbol.
This symbol indicates that the oil has been certified by
the American Petroleum Institute (API).
Do not use
any oil which does not carry this starburst symbol.
II If you choose to perform
the engine oil change
service yourself, be sure
the oil you use has
the starburst symbol on
the front of the oil
container.
If you have your
oil changed for you, be
sure the oil put into
your engine is American You
should also use the proper viscosity oil for your
vehicle, as shown in the viscosity chart.
SAE 1OW-30 is the viscosity grade recommended for
your vehicle. However, you can use SAE 5W-30
if
it’s going to be colder than 60°F (16°C) before your next
oil change. When it is very cold, colder than
0°F
(-18°C) you should use an SAE 5W-30 oil. These
numbers on an oil container show its viscosity,
or thickness.
Do not use other viscosity grade oils, such
as SAE 1OW-40 or SAE 20W-50 under any conditions.
I I Petroleum Institute certified
for gasoline engines.
5-1
8
Page 278 of 418
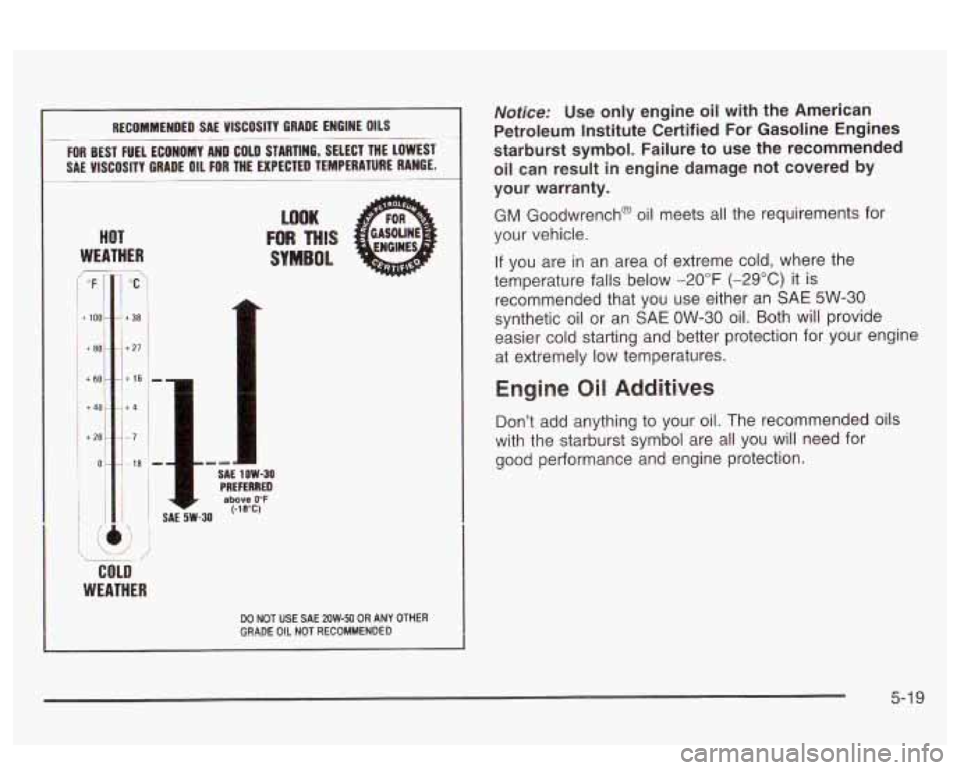
RECOMMENDED SAE VISCOSITY GRADE ENGINE OILS
FOR BEST FUEL ECONOMY AND COLD STARTING, SELECT THE LOWEST
SAE VISCOSITY GRADE
OIL FOR THE EXPECTED TEMPERATURE RANGE.
HOT
WEATHER
+ 80 ~
+ 60
."I
7 "C
t 38
f 21
t 16
+4
-7
18
COLD
WEATHER
~ 1'
/.
SAE~W-XI
LOOK
FOR THIS
SYMBOL
.- SAE 1OW-30 PREFERRED above 0°F (-1WC)
DO NOT USE SAE 2OW-50 OR ANY OTHER GRADE OIL NOT REGOMMEMBED
Notice: Use only engine oil with the American
Petroleum Institute Certified For Gasoline Engines
starburst symbol. Failure to use the recommended
oil can result in engine damage not covered by
your warranty.
GM Goodwrench@ oil meets all the requirements for
your vehicle.
If you are in an area of extreme cold, where the
temperature falls below -20°F (-29°C) it is
recommended that you use either an
SAE 5W-30
synthetic oil or an SAE OW-30 oil. Both will provide
easier cold starting and better protection for your engine
at extremely
low temperatures.
Engine Oil Additives
Don't add anything to your oil. The recommended oils
with the starburst symbol are
all you will need for
good performance and engine protection.
5-1 9
Page 281 of 418
What Kind of Oil to Use
Use only the recommended supercharger oil. See Part
D: Recommended Fluids and Lubricants on page 6-24.
How to Check and Add Oil
Park the vehicle on a level surface. Check oil only when
the engine is cold. Allow the engine to cool two to
three hours after running.
Engine Air CleanedFilter
If you remove the supercharger oil fill plug
while the engine
is hot, pressure may cause
hot oil to blow out
of the oil fill hole. You may
be burned.
Do not remove the plug until the
engine cools.
1. Clean the area around the oil fill plug before
2. Remove the oil fill plug.
removing it.
3. The oil level
is correct when it just reaches the
bottom of the threads of the inspection hole.
4. Replace the oil plug with the O-ring in place.
Tighten to
88 Ib-in (1 0 N*m ).
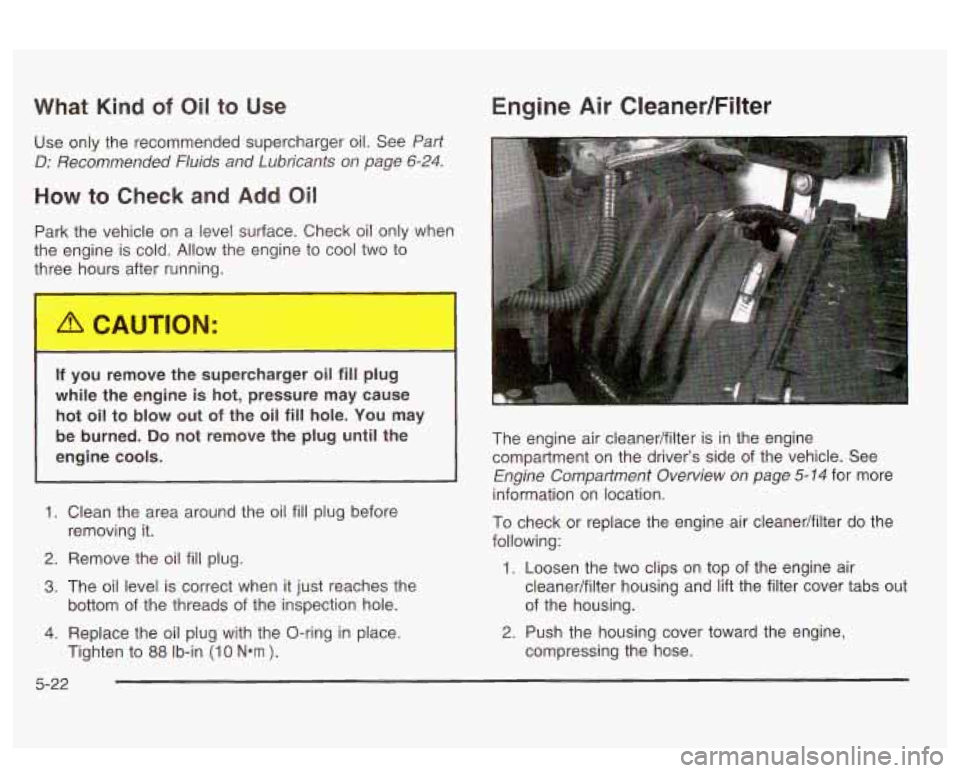
The engine air cleanedfilter is in the engine
compartment on the driver’s side of the vehicle. See
Engine Compartment Overview on page 5-14 for more
information on location.
To check or replace the engine air cleanedfilter do the
following:
1. Loosen the two clips on top of the engine air
cleanedfilter housing and lift the filter cover tabs out
of the housing.
2. Push the housing cover toward the engine,
compressing the hose.
5-22
Page 285 of 418
How to Add Fluid
Refer to the Maintenance Schedule to determine what
kind of transaxle fluid
to use. See Part D:
Recommended Fluids and Lubricants on page 6-24.
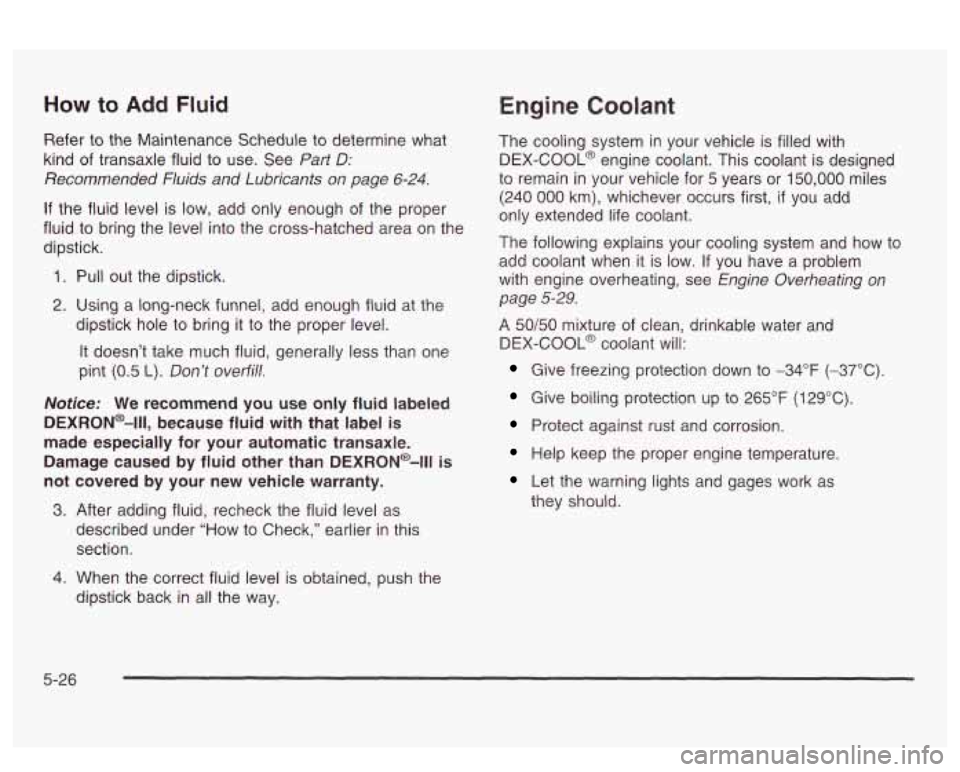
If the fluid level is low, add only enough of the proper
fluid
to bring the level into the cross-hatched area on the
dipstick.
1. Pull out the dipstick.
2. Using a long-neck funnel, add enough fluid at the
dipstick hole
to bring it to the proper level.
It doesn’t take much fluid, generally less than one
pint
(0.5 L). Don’t overfill.
Notice: We recommend you use only fluid labeled
DEXRON@-Ill, because fluid with that label is
made especially for your automatic transaxle.
Damage caused by fluid other than DEXRON@-Ill
is
not covered by your new vehicle warranty.
3. After adding fluid, recheck the fluid level as
described under “How to Check,” earlier in this
section.
Engine Coolant
The cooling system in your vehicle is filled with
DEX-COOL@ engine coolant. This coolant is designed
to remain
in your vehicle for 5 years or 150,000 miles
(240
000 km), whichever occurs first, if you add
only extended life coolant.
The following explains your cooling system and how to
add coolant when it is low. If you have a problem
with engine overheating, see
Engine Overheating on
page
5-29.
A 50/50 mixture of clean, drinkable water and
DEX-COOL@ coolant will:
Give freezing protection down to -34°F (-37°C).
Give boiling protection up to 265°F (129°C)
Protect against rust and corrosion.
Help keep the proper engine temperature.
Let the warning lights and gages work as
they should.
4. When the correct fluid level is obtained, push the
dipstick back
in all the way.
5-26
Page 293 of 418
How to Add Coolant to the Coolant
Recovery Tank
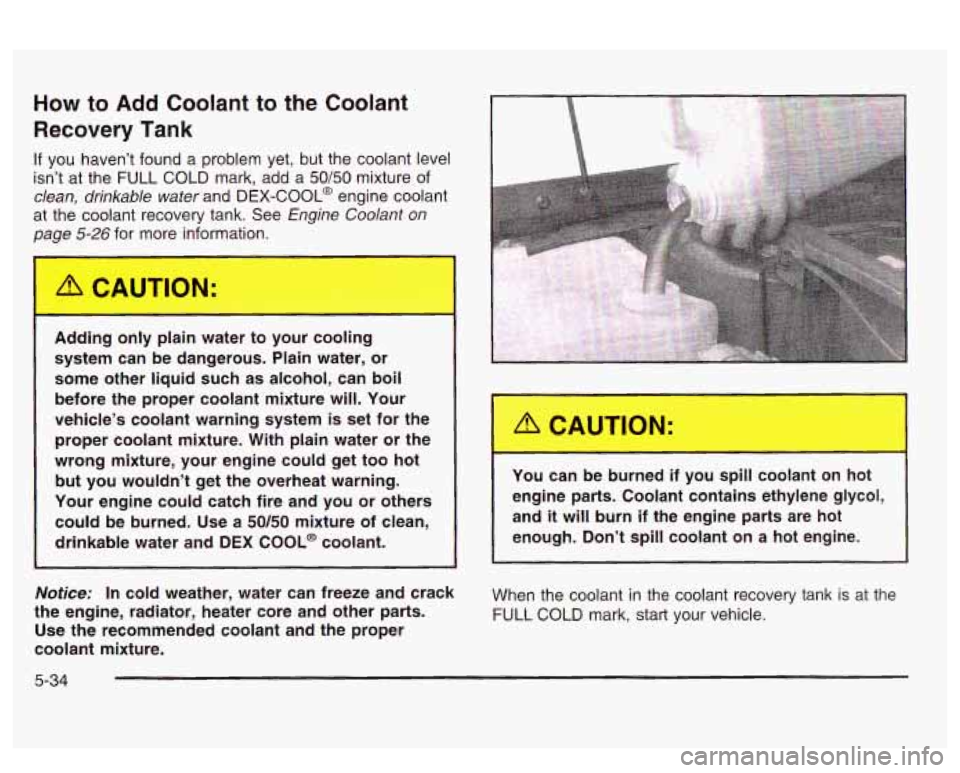
If you haven’t found a problem yet, but the coolant level
isn’t at the FULL COLD mark, add a
50/50 mixture of
clean, drinkable water and DEX-COOL@ engine coolant
at the coolant recovery tank. See
Engine Coolant on
page
5-26 for more information.
Adding only plain water to your cooling system can be dangerous. Plain water, or
some other liquid such as alcohol, can boil
before the proper coolant mixture will. Your
vehicle’s coolant warning system
is set for the
proper coolant mixture. With plain water or the
wrong mixture, your engine could get too hot
but you wouldn’t get the overheat warning.
Your engine could catch fire and you or others could be burned. Use a
50/50 mixture of clean,
drinkable water and DEX COOL@ coolant.
Notice: In cold weather, water can freeze and crack
the engine, radiator, heater core and other parts. Use the recommended coolant and the proper
coolant mixture. You
can be burned if you spill coolant on hot
engine parts. Coolant contains ethylene glycol, and
it will burn if the engine parts are hot
enough. Don’t
spill coolant on a hot engine.
When the coolant in the coolant recovery tank is at the
FULL
COLD mark, start your vehicle.
5-34