2003 NISSAN 350Z lock
[x] Cancel search: lockPage 129 of 227
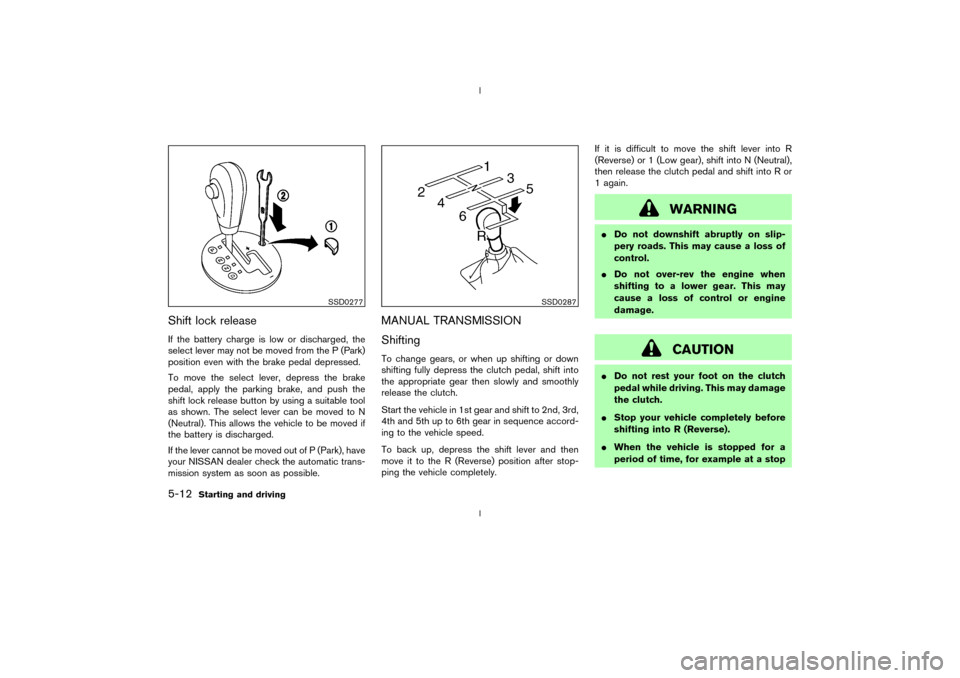
Shift lock releaseIf the battery charge is low or discharged, the
select lever may not be moved from the P (Park)
position even with the brake pedal depressed.
To move the select lever, depress the brake
pedal, apply the parking brake, and push the
shift lock release button by using a suitable tool
as shown. The select lever can be moved to N
(Neutral). This allows the vehicle to be moved if
the battery is discharged.
If the lever cannot be moved out of P (Park), have
your NISSAN dealer check the automatic trans-
mission system as soon as possible.
MANUAL TRANSMISSION
ShiftingTo change gears, or when up shifting or down
shifting fully depress the clutch pedal, shift into
the appropriate gear then slowly and smoothly
release the clutch.
Start the vehicle in 1st gear and shift to 2nd, 3rd,
4th and 5th up to 6th gear in sequence accord-
ing to the vehicle speed.
To back up, depress the shift lever and then
move it to the R (Reverse) position after stop-
ping the vehicle completely.If it is difficult to move the shift lever into R
(Reverse) or 1 (Low gear), shift into N (Neutral),
then release the clutch pedal and shift into R or
1 again.
WARNING
IDo not downshift abruptly on slip-
pery roads. This may cause a loss of
control.
IDo not over-rev the engine when
shifting to a lower gear. This may
cause a loss of control or engine
damage.
CAUTION
IDo not rest your foot on the clutch
pedal while driving. This may damage
the clutch.
IStop your vehicle completely before
shifting into R (Reverse).
IWhen the vehicle is stopped for a
period of time, for example at a stop
SSD0277
SSD0287
5-12
Starting and driving
Z
02.9.13/Z33-D/V5.0
X
Page 136 of 227
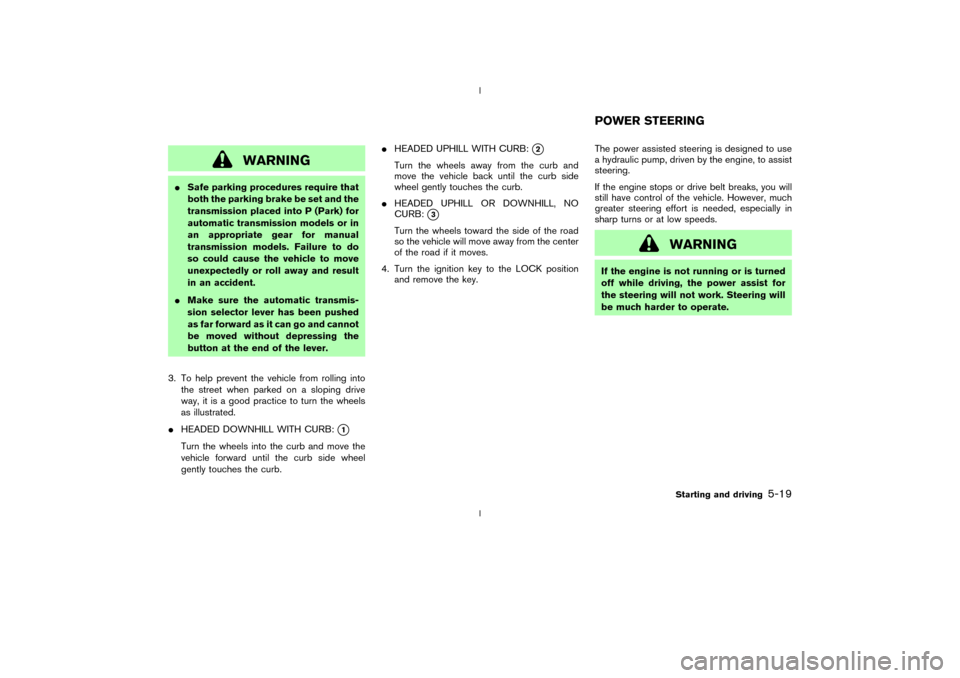
WARNING
ISafe parking procedures require that
both the parking brake be set and the
transmission placed into P (Park) for
automatic transmission models or in
an appropriate gear for manual
transmission models. Failure to do
so could cause the vehicle to move
unexpectedly or roll away and result
in an accident.
IMake sure the automatic transmis-
sion selector lever has been pushed
as far forward as it can go and cannot
be moved without depressing the
button at the end of the lever.
3. To help prevent the vehicle from rolling into
the street when parked on a sloping drive
way, it is a good practice to turn the wheels
as illustrated.
IHEADED DOWNHILL WITH CURB:
q1
Turn the wheels into the curb and move the
vehicle forward until the curb side wheel
gently touches the curb.IHEADED UPHILL WITH CURB:
q2
Turn the wheels away from the curb and
move the vehicle back until the curb side
wheel gently touches the curb.
IHEADED UPHILL OR DOWNHILL, NO
CURB:
q3
Turn the wheels toward the side of the road
so the vehicle will move away from the center
of the road if it moves.
4. Turn the ignition key to the LOCK position
and remove the key.The power assisted steering is designed to use
a hydraulic pump, driven by the engine, to assist
steering.
If the engine stops or drive belt breaks, you will
still have control of the vehicle. However, much
greater steering effort is needed, especially in
sharp turns or at low speeds.
WARNING
If the engine is not running or is turned
off while driving, the power assist for
the steering will not work. Steering will
be much harder to operate.POWER STEERING
Starting and driving
5-19
Z
02.9.13/Z33-D/V5.0
X
Page 137 of 227
BRAKING PRECAUTIONSThe brake system has two separate hydraulic
circuits. If one circuit malfunctions, you will still
have braking at two wheels.Vacuum assisted brakeThe brake booster aids braking by using engine
vacuum. If the engine stops, you can stop the
vehicle by depressing the brake pedal. However,
greater foot pressure on the brake pedal will be
required to stop the vehicle and the stopping
distance will be longer.Using the brakesAvoid resting your foot on the brake pedal while
driving. This overheats the brakes, increases
wear on the brake linings and pads, and reduces
gas mileage.
To help save the brakes and to prevent the
brakes from overheating, reduce speed and
downshift to a lower gear before going down a
slope or long grade. Overheated brakes may
reduce braking performance and could result in
loss of vehicle control.
WARNING
IWhile driving on a slippery surface,
be careful when braking, accelerat-
ing or downshifting. Abrupt braking
or accelerating could cause the
wheels to skid and result in an acci-
dent.
IIf the engine is not running or is
turned off while driving, the power
assist for the brakes will not work.
Braking will be harder.Wet brakesWhen the vehicle is washed or driven through
water, the brakes may get wet. As a result, your
braking distance will be longer and the vehicle
may pull to one side during braking.
To dry brakes, drive the vehicle at a safe speed
while lightly pressing the brake pedal to heat-up
the brakes. Do this until the brakes return to
normal. Avoid driving the vehicle at high speeds
until the brakes function correctly.ANTI-LOCK BRAKE SYSTEM (ABS)The anti-lock brake system controls the brakesat each wheel so the wheels will not lock when
braking abruptly or when braking on slippery
surfaces. The system detects the rotation speed
at each wheel and varies the brake fluid pressure
to prevent each wheel from locking and sliding.
By preventing wheel lockup, the system helps
the driver maintain steering control and helps to
minimize swerving and spinning on slippery sur-
faces.
Using the systemDepress the brake pedal and hold it down.
WARNING
Do not pump the brake pedal. Doing so
may result in increased stopping dis-
tances.Normal operationThe anti-lock brake system will not operate at
speeds below 3 to 6 MPH (5 to 10 km/h) to
completely stop the vehicle. (The speeds will
vary according to road conditions.) When the
anti-lock system senses that one or more wheels
are close to locking up, the actuator (under the
hood) rapidly applies and releases hydraulic
pressure (like pumping the brakes very quickly).
BRAKE SYSTEM5-20
Starting and driving
Z
02.9.13/Z33-D/V5.0
X
Page 138 of 227
While the actuator is working, you may feel a
pulsation in the brake pedal and hear a noise or
vibration from the actuator under the hood. This
is normal and indicates that the anti-lock system
is working properly. However, the pulsation may
indicate that road conditions are hazardous and
extra care is required while driving.Self-test featureThe anti-lock brake system consists of electronic
sensors, electric pumps, and hydraulic solenoids
controlled by a computer. The computer has a
built-in diagnostic feature that tests the system
each time you start the engine and move the
vehicle at a low speed in forward or reverse.
When the self-test occurs, you may hear a clunk
noise and/or feel a pulsation in the brake pedal.
This is normal and is not an indication of any
malfunction. If the computer senses any mal-
function, it switches the anti-lock brake system
OFF and turns on the ABS warning light in the
dashboard. The brake system will then behave
normally, but without anti-lock assistance.
If the light comes on during the self check, or
while you are driving, you should take your
vehicle to your NISSAN dealer for repair at your
earliest convenience.
WARNING
The anti-lock brake system is a sophis-
ticated device, but it cannot prevent ac-
cidents resulting from careless or dan-
gerous driving techniques. It can help
maintain vehicle control during braking
on slippery surfaces, but remember that
the stopping distance on slippery sur-
faces will be longer than on normal
surfaces, even with the anti-lock sys-
tem. Stopping distances may also be
longer on rough, gravel or snow covered
roads, or if you are using tire chains.
Always maintain a safe distance from
the vehicle in front of you. Ultimately,
the responsibility for safety of yourself
and others rests in the hands of the
driver.
Tire type and condition of tires may also
affect braking effectiveness.
IWhen replacing tires, install the
specified size for the front and rear
tires.IWhen installing a spare tire, make
sure it is the proper size and type as
specified on the tire placard. See
ªVehicle identificationº in the ª9.
Technical and consumer informationº
section for tire placard location.
Starting and driving
5-21
Z
02.9.13/Z33-D/V5.0
X
Page 141 of 227

FREEING A FROZEN DOOR LOCKTo prevent a door lock from freezing, apply
de-icer or glycerin to it through the key hole. If
the lock becomes frozen, heat the key before
inserting it into the key hole.ANTI-FREEZEIn the winter when it is anticipated that the
temperature will drop below 32ÉF (0ÉC), check
anti-freeze to assure proper winter protection.
For additional information, see ªEngine Cooling
Systemº in the ª8. Maintenance and do-it-
yourselfº section.BATTERYIf the battery is not fully charged during extremely
cold weather conditions, the battery fluid may
freeze and damage the battery. To maintain
maximum efficiency, the battery should be
checked regularly. For additional information,
see ªBatteryº in the ª8. Maintenance and do-it-
yourselfº section.DRAINING OF COOLANT WATERIf the vehicle is to be left outside without anti-
freeze, drain the cooling system by opening the
drain plug located under the radiator. Refill
before operating the vehicle. See ªEngine cool-
ing systemº in the ª8. Maintenance and do-it-
yourselfº section for changing engine coolant.
TIRE EQUIPMENT1. SUMMER tires are of a tread design to
provide superior performance on dry pave-
ment. However, the performance of these
tires will be substantially reduced in snowy
and icy conditions. If you operate your vehicle
on snowy or icy roads, NISSAN recommends
the use of MUD & SNOW or ALL SEASON
tires on all four wheels. Please consult your
NISSAN dealer for the tire type, size, speed
rating and availability information.
2. For additional traction on icy roads, studded
tires may be used. However, some provinces
and states prohibit their use. Check local,
state and provincial laws before installing
studded tires.
Skid and traction capabilities of studded
snow tires, on wet or dry surfaces, may be
poorer than that of non-studded snow
tires.
3. Tire chains may be used if desired. Make sure
they are of proper size for the tires on your
vehicle and are installed according to the
chain manufacturer's suggestions. Use of tire
chains may be prohibited according to loca-
tion. Check the local laws before installing
tire chains. When installing tire chains, make
sure they are of proper size for the tires on
your vehicle and are installed according tothe chain manufacturer's suggestions.Use
only SAE Class S chains.Class ªSº chains
are used on vehicles with restricted tire to
vehicle clearance. Vehicles that can use
Class ªSº chains are designed to meet the
SAE standard minimum clearances between
the tire and the closest vehicle suspension or
body component required to accommodate
the use of a winter traction device (tire chains
or cables). The minimum clearances are de-
termined using the factory equipped tire size.
Other types may damage your vehicle. Use
chain tensioners when recommended by the
tire chain manufacturer to ensure a tight fit.
Loose end links of the tire chain must be
secured or removed to prevent the possibility
of whipping action damage to the fenders or
underbody. If possible, avoid fully loading
your vehicle when using tire chains. In addi-
tion, drive at a reduced speed. Otherwise,
your vehicle may be damaged and/or vehicle
handling and performance may be adversely
affected.
Never install tire chains on a T-type spare tire.
Do not use tire chains on dry roads.
SPECIAL WINTER EQUIPMENTIt is recommended that the following items be
carried in the vehicle during winter:
Ia scraper and stiff-bristled brush to remove
COLD WEATHER DRIVING5-24
Starting and driving
Z
02.9.13/Z33-D/V5.0
X
Page 142 of 227
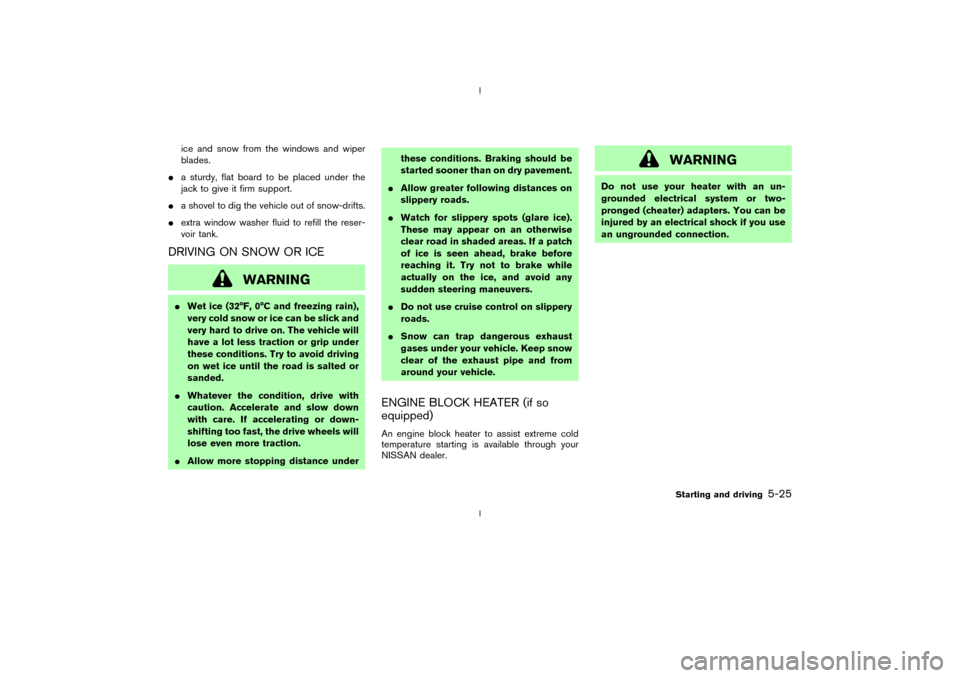
ice and snow from the windows and wiper
blades.
Ia sturdy, flat board to be placed under the
jack to give it firm support.
Ia shovel to dig the vehicle out of snow-drifts.
Iextra window washer fluid to refill the reser-
voir tank.
DRIVING ON SNOW OR ICE
WARNING
IWet ice (32ÉF, 0ÉC and freezing rain),
very cold snow or ice can be slick and
very hard to drive on. The vehicle will
have a lot less traction or grip under
these conditions. Try to avoid driving
on wet ice until the road is salted or
sanded.
IWhatever the condition, drive with
caution. Accelerate and slow down
with care. If accelerating or down-
shifting too fast, the drive wheels will
lose even more traction.
IAllow more stopping distance underthese conditions. Braking should be
started sooner than on dry pavement.
IAllow greater following distances on
slippery roads.
IWatch for slippery spots (glare ice).
These may appear on an otherwise
clear road in shaded areas. If a patch
of ice is seen ahead, brake before
reaching it. Try not to brake while
actually on the ice, and avoid any
sudden steering maneuvers.
IDo not use cruise control on slippery
roads.
ISnow can trap dangerous exhaust
gases under your vehicle. Keep snow
clear of the exhaust pipe and from
around your vehicle.
ENGINE BLOCK HEATER (if so
equipped)An engine block heater to assist extreme cold
temperature starting is available through your
NISSAN dealer.
WARNING
Do not use your heater with an un-
grounded electrical system or two-
pronged (cheater) adapters. You can be
injured by an electrical shock if you use
an ungrounded connection.
Starting and driving
5-25
Z
02.9.13/Z33-D/V5.0
X
Page 146 of 227
verse), or the automatic transmission
into P (Park).
INever change tires when the vehicle
is on a slope, ice or slippery areas.
This is hazardous.
INever change tires if oncoming traffic
is close to your vehicle. Wait for pro-
fessional road assistance.
IWhen a spare tire is mounted or a
wheel is replaced, tire pressure will
not be indicated and the low tire
pressure warning system will not
function. Contact your NISSAN
dealer as soon as possible for tire
replacement and/or system reset-
ting. (For models with the low tire
pressure warning system)
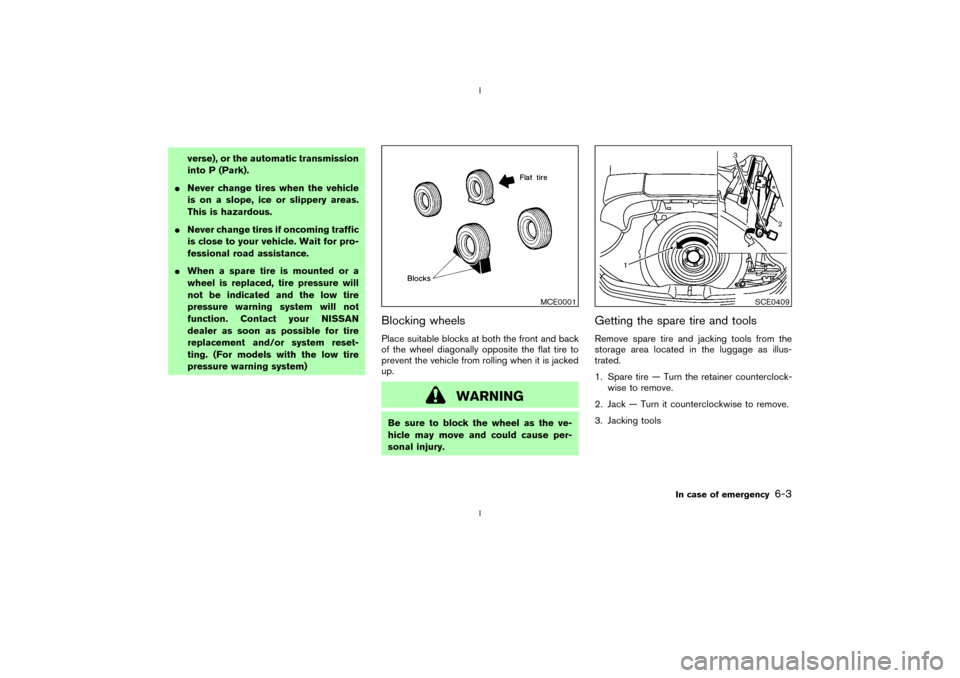
Blocking wheelsPlace suitable blocks at both the front and back
of the wheel diagonally opposite the flat tire to
prevent the vehicle from rolling when it is jacked
up.
WARNING
Be sure to block the wheel as the ve-
hicle may move and could cause per-
sonal injury.
Getting the spare tire and toolsRemove spare tire and jacking tools from the
storage area located in the luggage as illus-
trated.
1. Spare tire Ð Turn the retainer counterclock-
wise to remove.
2. Jack Ð Turn it counterclockwise to remove.
3. Jacking tools
MCE0001
SCE0409
In case of emergency
6-3
Z
02.9.13/Z33-D/V5.0
X
Page 147 of 227
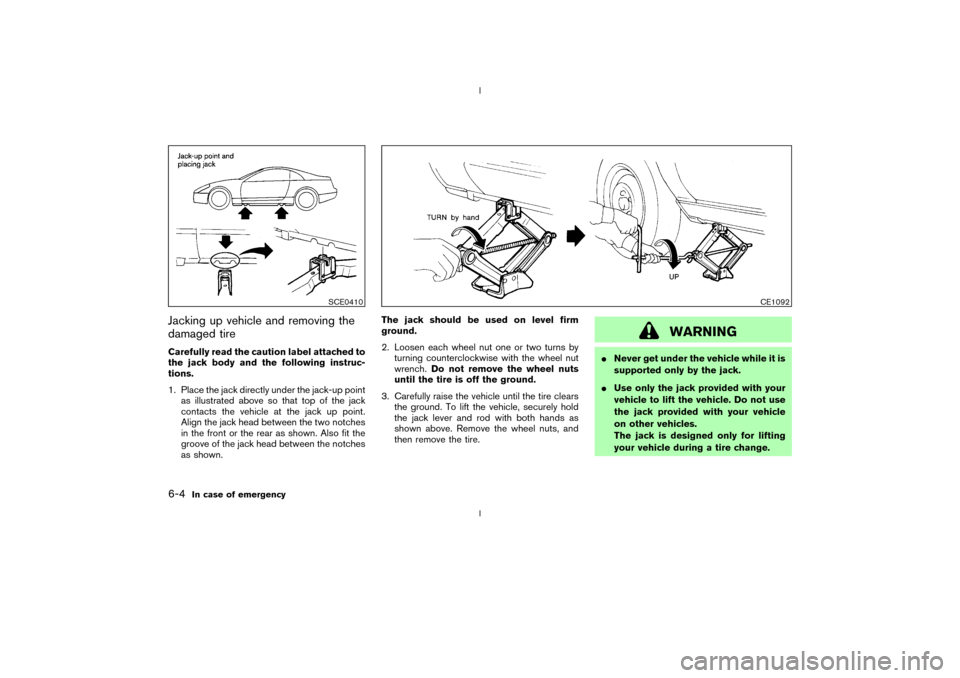
Jacking up vehicle and removing the
damaged tireCarefully read the caution label attached to
the jack body and the following instruc-
tions.
1. Place the jack directly under the jack-up point
as illustrated above so that top of the jack
contacts the vehicle at the jack up point.
Align the jack head between the two notches
in the front or the rear as shown. Also fit the
groove of the jack head between the notches
as shown.The jack should be used on level firm
ground.
2. Loosen each wheel nut one or two turns by
turning counterclockwise with the wheel nut
wrench.Do not remove the wheel nuts
until the tire is off the ground.
3. Carefully raise the vehicle until the tire clears
the ground. To lift the vehicle, securely hold
the jack lever and rod with both hands as
shown above. Remove the wheel nuts, and
then remove the tire.
WARNING
INever get under the vehicle while it is
supported only by the jack.
IUse only the jack provided with your
vehicle to lift the vehicle. Do not use
the jack provided with your vehicle
on other vehicles.
The jack is designed only for lifting
your vehicle during a tire change.
SCE0410
CE1092
6-4
In case of emergency
Z
02.9.13/Z33-D/V5.0
X