2003 NISSAN 350Z maintenance
[x] Cancel search: maintenancePage 52 of 227
immediatelyand call a NISSAN dealer or other
authorized repair shop.
The engine oil pressure warning light is not
designed to indicate a low oil level. Use the
dipstick to check the oil level.See ªEngine
oilº in the ª8. Maintenance and do-it-yourselfº
section.
CAUTION
Running the engine with the engine oil
pressure warning light on could cause
serious damage to the engine almost
immediately. Turn off the engine as
soon as it is safe to do so.
Low tire pressure warning light
(if so equipped)
The light comes on for about 1 second when the
key switch is turned ON, and then it turns off.
If the vehicle is being driven with a flat tire or
extremely low tire pressure, the light will illumi-
nate. Also a chime will sound for about 10
seconds if a tire is flat.
For additional information, see ªLow tire pres-
sure warning systemº in the ª5. Starting and
drivingº section and ªFlat tireº in the ª6. In caseof emergencyº section. Also, you can check the
tire pressure of all 4 tires on the trip computer
display. See ªTrip computerº earlier in this sec-
tion.
WARNING
IIf the light does not come on with the
key switch turned ON, have the ve-
hicle checked by a NISSAN dealer as
soon as possible.
IIf the light comes on while driving,
avoid sudden steering maneuvers or
abrupt braking, reduce vehicle speed,
pull off the road to a safe location
and stop the vehicle as soon as pos-
sible. Serious vehicle damage could
occur and may lead to an accident
and could result in serious personal
injury. Check the pressure for all four
tires and adjust the pressure to the
COLD tire pressure shown on the tire
placard. If the light still comes on
while driving after adjusting the tire
pressure, a tire may be flat. If you
have a flat tire, replace it with a spare
tire as soon as possible.IWhen a spare tire is mounted or a
wheel is replaced, tire pressure will
not be indicated and the low tire
pressure warning system will not
function. Contact your NISSAN
dealer as soon as possible for tire
replacement and/or system reset-
ting.
CAUTION
IThe low tire pressure warning is not a
substitute for the regular tire pres-
sure check. Be sure to check the tire
pressure regularly.
IIf the vehicle is being driven at
speeds of less than 20 MPH (32
km/h), the low tire pressure warning
system may not operate correctly.
IBe sure to install the specified size
for the front and rear tires.
Low washer fluid warning light
This light comes on when the washer tank fluid is
Instruments and controls
2-13
Z
02.9.13/Z33-D/V5.0
X
Page 125 of 227
IMake sure the area around the vehicle is
clear.
IMaintenance items should be checked peri-
odically, for example, each time you check
engine oil.
ICheck that all windows and lights are clean.
IVisually inspect tires for their appearance and
condition. Also, check tires for proper infla-
tion.
ILock all doors.
IPosition seat and adjust head restraints.
IAdjust inside and outside mirrors.
IFasten seat belts and ask all passengers to
do likewise.
ICheck the operation of warning lights when
key is turned to the ON (3) position.1. Apply the parking brake.
2.Automatic transmission:
Move the selector lever to P (Park) or N
(Neutral). (P preferred.)
The starter is designed not to operate if the
selector lever is in one of the driving posi-
tions.
Manual transmission:
Move the shift lever to N (Neutral) position,
and depress the clutch pedal to the floor
while cranking the engine.
The starter is designed not to operate unless
the clutch pedal is fully depressed.
3. Crank the enginewith your foot off the
accelerator pedalby turning the ignition
key to START. Release the key when the
engine starts. If the engine starts, but fails to
run, repeat the above procedure.
IWhen the engine is very hard to start in
extremely cold weather or when restarting,
depress the accelerator pedal a little (ap-
proximately 1/5 to the floor) and hold it then
crank the engine. Release the key and the
accelerator pedal when the engine starts.
IWhen the engine is very hard to start be-
cause it is flooded, depress the acceleratorpedal all the way to the floor and hold it.
Crank the engine for 5 to 6 seconds. After
cranking the engine, release the accelerator
pedal. Crank the enginewith your foot off
the accelerator pedalby turning the igni-
tion key to START. Release the key when the
engine starts. If the engine starts, but fails to
run, repeat the above procedure.
CAUTION
Do not operate the starter for more than
15 seconds at a time. If the engine does
not start, turn the key off and wait 10
seconds before cranking again, other-
wise the starter could be damaged.
4.Warm-up
Allow the engine to idle for at least 30
seconds after starting. Drive at moderate
speed for a short distance first, especially in
cold weather.
BEFORE STARTING THE ENGINE STARTING THE ENGINE5-8
Starting and driving
Z
02.9.13/Z33-D/V5.0
X
Page 141 of 227
FREEING A FROZEN DOOR LOCKTo prevent a door lock from freezing, apply
de-icer or glycerin to it through the key hole. If
the lock becomes frozen, heat the key before
inserting it into the key hole.ANTI-FREEZEIn the winter when it is anticipated that the
temperature will drop below 32ÉF (0ÉC), check
anti-freeze to assure proper winter protection.
For additional information, see ªEngine Cooling
Systemº in the ª8. Maintenance and do-it-
yourselfº section.BATTERYIf the battery is not fully charged during extremely
cold weather conditions, the battery fluid may
freeze and damage the battery. To maintain
maximum efficiency, the battery should be
checked regularly. For additional information,
see ªBatteryº in the ª8. Maintenance and do-it-
yourselfº section.DRAINING OF COOLANT WATERIf the vehicle is to be left outside without anti-
freeze, drain the cooling system by opening the
drain plug located under the radiator. Refill
before operating the vehicle. See ªEngine cool-
ing systemº in the ª8. Maintenance and do-it-
yourselfº section for changing engine coolant.
TIRE EQUIPMENT1. SUMMER tires are of a tread design to
provide superior performance on dry pave-
ment. However, the performance of these
tires will be substantially reduced in snowy
and icy conditions. If you operate your vehicle
on snowy or icy roads, NISSAN recommends
the use of MUD & SNOW or ALL SEASON
tires on all four wheels. Please consult your
NISSAN dealer for the tire type, size, speed
rating and availability information.
2. For additional traction on icy roads, studded
tires may be used. However, some provinces
and states prohibit their use. Check local,
state and provincial laws before installing
studded tires.
Skid and traction capabilities of studded
snow tires, on wet or dry surfaces, may be
poorer than that of non-studded snow
tires.
3. Tire chains may be used if desired. Make sure
they are of proper size for the tires on your
vehicle and are installed according to the
chain manufacturer's suggestions. Use of tire
chains may be prohibited according to loca-
tion. Check the local laws before installing
tire chains. When installing tire chains, make
sure they are of proper size for the tires on
your vehicle and are installed according tothe chain manufacturer's suggestions.Use
only SAE Class S chains.Class ªSº chains
are used on vehicles with restricted tire to
vehicle clearance. Vehicles that can use
Class ªSº chains are designed to meet the
SAE standard minimum clearances between
the tire and the closest vehicle suspension or
body component required to accommodate
the use of a winter traction device (tire chains
or cables). The minimum clearances are de-
termined using the factory equipped tire size.
Other types may damage your vehicle. Use
chain tensioners when recommended by the
tire chain manufacturer to ensure a tight fit.
Loose end links of the tire chain must be
secured or removed to prevent the possibility
of whipping action damage to the fenders or
underbody. If possible, avoid fully loading
your vehicle when using tire chains. In addi-
tion, drive at a reduced speed. Otherwise,
your vehicle may be damaged and/or vehicle
handling and performance may be adversely
affected.
Never install tire chains on a T-type spare tire.
Do not use tire chains on dry roads.
SPECIAL WINTER EQUIPMENTIt is recommended that the following items be
carried in the vehicle during winter:
Ia scraper and stiff-bristled brush to remove
COLD WEATHER DRIVING5-24
Starting and driving
Z
02.9.13/Z33-D/V5.0
X
Page 149 of 227
For models equipped with the low tire
pressure warning system:
After adjusting tire pressure to the COLD tire
pressure, the display of the tire pressure infor-
mation may show higher pressure than the
COLD tire pressure after the vehicle has been
driven more than 1 mile (1.6 km). This is because
the tire pressurizes as the tire temperature rises.
This does not indicate a system malfunction.
WARNING
Retighten the wheel nuts when the ve-
hicle has been driven for 600 miles
(1,000 km) (also in cases of a flat tire,
etc.).Stowing the tire and toolsSecurely store the spare tire and jacking equip-
ment in the vehicle.
WARNING
IAlways make sure that the spare tire
and jacking equipment are properly
secured after use. Such items canbecome dangerous projectiles in an
accident or sudden stop.
IThe T-type spare tire and small size
spare tire are designed for emer-
gency use. See ªWheels and tiresº in
the ª8. Maintenance and do-it-
yourselfº section.To start your engine with a booster battery, the
instructions and precautions below must be
followed.
WARNING
IIf done incorrectly, jump starting can
lead to a battery explosion, resulting
in severe injury or death. It could also
damage your vehicle.
IExplosive hydrogen gas is always
present in the vicinity of the battery.
Keep all sparks and flames away
from the battery.
IDo not allow battery fluid to come
into contact with eyes, skin, cloth or
painted surfaces. Battery fluid is a
corrosive sulphuric acid solution
which can cause severe burns. If the
fluid should come into contact with
anything, immediately flush the con-
tacted area with water.
IKeep battery out of the reach of chil-
dren.
IThe booster battery must be rated atJUMP STARTING
6-6
In case of emergency
Z
02.9.13/Z33-D/V5.0
X
Page 162 of 227
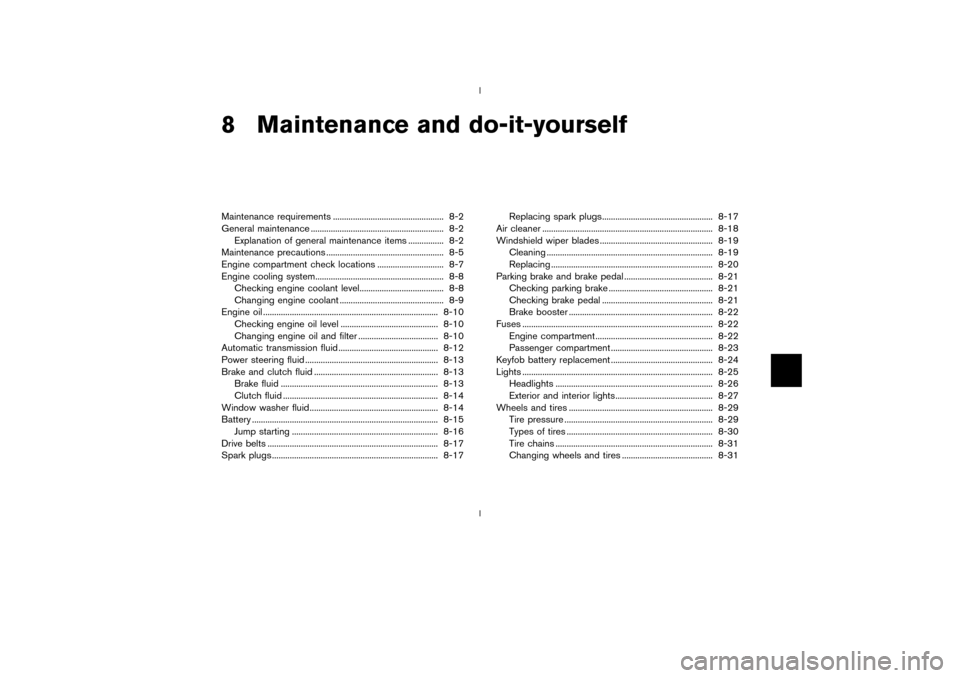
8 Maintenance and do-it-yourselfMaintenance requirements .................................................. 8-2
General maintenance ............................................................ 8-2
Explanation of general maintenance items ................ 8-2
Maintenance precautions ..................................................... 8-5
Engine compartment check locations .............................. 8-7
Engine cooling system.......................................................... 8-8
Checking engine coolant level...................................... 8-8
Changing engine coolant ............................................... 8-9
Engine oil ............................................................................... 8-10
Checking engine oil level ............................................ 8-10
Changing engine oil and filter .................................... 8-10
Automatic transmission fluid ............................................. 8-12
Power steering fluid ............................................................ 8-13
Brake and clutch fluid ........................................................ 8-13
Brake fluid ....................................................................... 8-13
Clutch fluid ...................................................................... 8-14
Window washer fluid.......................................................... 8-14
Battery .................................................................................... 8-15
Jump starting .................................................................. 8-16
Drive belts ............................................................................. 8-17
Spark plugs ........................................................................... 8-17Replacing spark plugs.................................................. 8-17
Air cleaner ............................................................................. 8-18
Windshield wiper blades ................................................... 8-19
Cleaning ........................................................................... 8-19
Replacing ......................................................................... 8-20
Parking brake and brake pedal ........................................ 8-21
Checking parking brake ............................................... 8-21
Checking brake pedal .................................................. 8-21
Brake booster ................................................................. 8-22
Fuses ...................................................................................... 8-22
Engine compartment ..................................................... 8-22
Passenger compartment .............................................. 8-23
Keyfob battery replacement .............................................. 8-24
Lights ...................................................................................... 8-25
Headlights ....................................................................... 8-26
Exterior and interior lights............................................ 8-27
Wheels and tires ................................................................. 8-29
Tire pressure ................................................................... 8-29
Types of tires .................................................................. 8-30
Tire chains ....................................................................... 8-31
Changing wheels and tires ......................................... 8-31
Z
02.9.13/Z33-D/V5.0
X
Page 163 of 227
Your new NISSAN has been designed to have
minimum maintenance requirements with longer
service intervals to save you both time and
money. However, some day-to-day and regular
maintenance is essential to maintain your
NISSAN's good mechanical condition, as well
as its emission and engine performance.
It is the owner's responsibility to make sure that
scheduled maintenance, as well as general
maintenance, is performed.
As the vehicle owner, you are the only one who
can ensure that your vehicle receives the proper
maintenance care. You are a vital link in the
maintenance chain.
Scheduled maintenance:
For your convenience, both required and op-
tional scheduled maintenance items are de-
scribed and listed in your ªService and Mainte-
nance Guideº. You must refer to that guide to
ensure that necessary maintenance is performed
on your NISSAN at regular intervals.
General maintenance:
General maintenance includes those items
which should be checked during normal day-to-
day operation of the vehicle. They are essential if
your vehicle is to continue to operate properly. It
is your responsibility to perform these proce-
dures regularly as prescribed.Performing general maintenance checks require
minimal mechanical skill and only a few general
automotive tools.
These checks or inspections can be done by
yourself, a qualified technician or, if you prefer,
your NISSAN dealer.
Where to go for service:
If maintenance service is required or your vehicle
appears to malfunction, have the systems
checked and tuned by an authorized NISSAN
dealer.
NISSAN technicians are well-trained specialists
and are kept up to date with the latest service
information through technical bulletins, service
tips, and in-dealership training programs. They
are completely qualified to work on NISSAN
vehiclesbeforethey work on your vehicle,
rather than after they have worked on it.
You can be confident that your NISSAN dealer's
service department performs the best job to
meet the maintenance requirements of your ve-
hicle Ð in a reliable and economic way.During the normal day-to-day operation of the
vehicle, general maintenance should be per-
formed regularly as prescribed in this section. If
you detect any unusual sounds, vibrations or
smell, be sure to check for the cause or have
your NISSAN dealer check it promptly. In addi-
tion, you should notify your NISSAN dealer if you
think that repairs are required.
When performing any checks or maintenance
work, closely observe the ªMaintenance precau-
tionsº later in this section.
EXPLANATION OF GENERAL
MAINTENANCE ITEMSAdditional information on the following
items with ª*º is found later in this section.Outside the vehicleThe maintenance items listed here should be
performed from time to time, unless otherwise
specified.
Tires*:Check the pressure with a gauge at least
once a month and always prior to long distance
trips. Adjust the pressure in all tires, including
the spare, to the pressure specified. Check
carefully for damage, cuts or excessive wear.
Wheel nuts*:When checking the tires, make
sure no nuts are missing, and check for any
loose nuts. Tighten if necessary.
MAINTENANCE REQUIREMENTS GENERAL MAINTENANCE8-2
Maintenance and do-it-yourself
Z
02.9.13/Z33-D/V5.0
X
Page 164 of 227
Tire rotation*:Tires cannot be rotated in this
vehicle.
Wheel alignment and balance:If the vehicle
pulls to either side while driving on a straight and
level road, or if you detect uneven or abnormal
tire wear, there may be a need for wheel align-
ment.
If the steering wheel or seat vibrates at normal
highway speeds, wheel balancing may be
needed.
For additional information regarding tires, refer to
ªImportant Tire Safety Informationº (US) or ªTire
Safety Informationº (Canada) in the Warranty
Information booklet.
Windshield:Clean the windshield on a regular
basis. Check the windshield at least every six
months for cracks or other damage. Have a
damaged windshield repaired by a qualified re-
pair facility.
Windshield wiper blades*:Check for cracks
or wear if they do not wipe properly.
Doors and engine hood:Check that all doors
and the engine hood operate smoothly as well as
the trunk lid or back hatch. Also make sure that
all latches lock securely. Lubricate if necessary.
Make sure that the secondary latch keeps the
hood from opening when the primary latch is
released.When driving in areas using road salt or other
corrosive materials, check lubrication frequently.
Lights*:Clean the headlights on a regular basis.
Make sure that the headlights, stop lights, tail
lights, turn signal lights, and other lights are all
operating properly and installed securely. Also
check headlight aim.
Inside the vehicleThe maintenance items listed here should be
checked on a regular basis, such as when
performing periodic maintenance, cleaning the
vehicle, etc.
Warning lights and chimes:Make sure that all
warning lights and chimes are operating prop-
erly.
Windshield wiper and washer*:Check that
the wipers and washer operate properly and that
the wipers do not streak.
Windshield defroster:Check that the air
comes out of the defroster outlets properly and
in good quantity when operating the heater or air
conditioner.
Steering wheel:Check for changes in the
steering conditions, such as excessive free play,
hard steering or strange noises.
Seats:Check seat position controls such as
seat adjusters, seatback recliner, etc. to ensurethey operate smoothly and that all latches lock
securely in every position. Check that the head
restraints move up and down smoothly and that
the locks (if equipped) hold securely in all
latched positions.
Seat belts:Check that all parts of the seat belt
system (for example, buckles, anchors, adjusters
and retractors) operate properly and smoothly,
and are installed securely. Check the belt web-
bing for cuts, fraying, wear or damage.
Accelerator pedal:Check the pedal for
smooth operation and make sure the pedal does
not catch or require uneven effort. Keep the floor
mat away from the pedal.
Clutch pedal*:Make sure the pedal operates
smoothly and check that it has the proper free
play.
Brakes:Check that the brakes do not pull the
vehicle to one side when applied.
Brake pedal and booster*:Check the pedal
for smooth operation and make sure it has the
proper distance under it when depressed fully.
Check the brake booster function. Be sure to
keep floor mat away from the pedal.
Parking brake*:Check that the lever has the
proper travel and make sure that the vehicle is
held securely on a fairly steep hill when only the
parking brake is applied.
Maintenance and do-it-yourself
8-3
Z
02.9.13/Z33-D/V5.0
X
Page 165 of 227
Automatic transmission P (Park) position
mechanism:On a fairly steep hill check that the
vehicle is held securely with the selector lever in
the P (Park) position without applying any
brakes.Under the hood and the vehicleThe maintenance items listed here should be
checked periodically (for example, each time you
check the engine oil or refuel).
Windshield washer fluid*:Check that there is
adequate fluid in the tank.
Engine coolant level*:Check the coolant level
when the engine is cold.
Radiator and hoses:Check the front of the
radiator and clean off any dirt, insects, leaves,
etc., that may have accumulated. Make sure the
hoses have no cracks, deformation, deterioration
or loose connections.
Brake and clutch fluid levels*:Make sure that
the brake and clutch fluid levels are between the
MAX and MIN lines on the reservoir.
Battery*:Check the fluid level in each cell. It
should be between the MAX and MIN lines.
Vehicles operated in high temperatures or under
severe conditions require frequent checks of the
battery fluid level.
Engine drive belts*:Make sure that no belt isfrayed, worn, cracked or oily.
Engine oil level*:Check the level on the
dipstick after parking the vehicle on a level spot,
turning off the engine and waiting 10 minutes.
Power steering fluid level* and lines:Check
the level in the reservoir tank with the engine off.
Check the lines for proper attachment, leaks,
cracks, etc.
Exhaust system:Make sure there are no loose
supports, cracks or holes. If the sound of the
exhaust seems unusual or there is a smell of
exhaust fumes, immediately locate the trouble
and correct it. (See ªPrecautions when starting
and drivingº in the ª5. Starting and drivingº
section for exhaust gas (carbon monoxide).)
Underbody:The underbody is frequently ex-
posed to corrosive substances such as those
used on icy roads or to control dust. It is very
important to remove these substances, other-
wise rust will form on the floor pan, frame, fuel
lines and around the exhaust system. At the end
of winter, the underbody should be thoroughly
flushed with plain water, being careful to clean
those areas where mud and dirt may accumu-
late. For additional information, see ªCleaning
exteriorº in the ª7. Appearance and careº sec-
tion.
Fluid leaks:Check under the vehicle for fuel,oil, water or other fluid leaks after the vehicle has
been parked for a while. Water dripping from the
air conditioner after use is normal. If you should
notice any leaks or if gasoline fumes are evident,
check for the cause and have it corrected imme-
diately.8-4
Maintenance and do-it-yourself
Z
02.9.13/Z33-D/V5.0
X