Page 207 of 416
207 Controls in detail
Driving systems
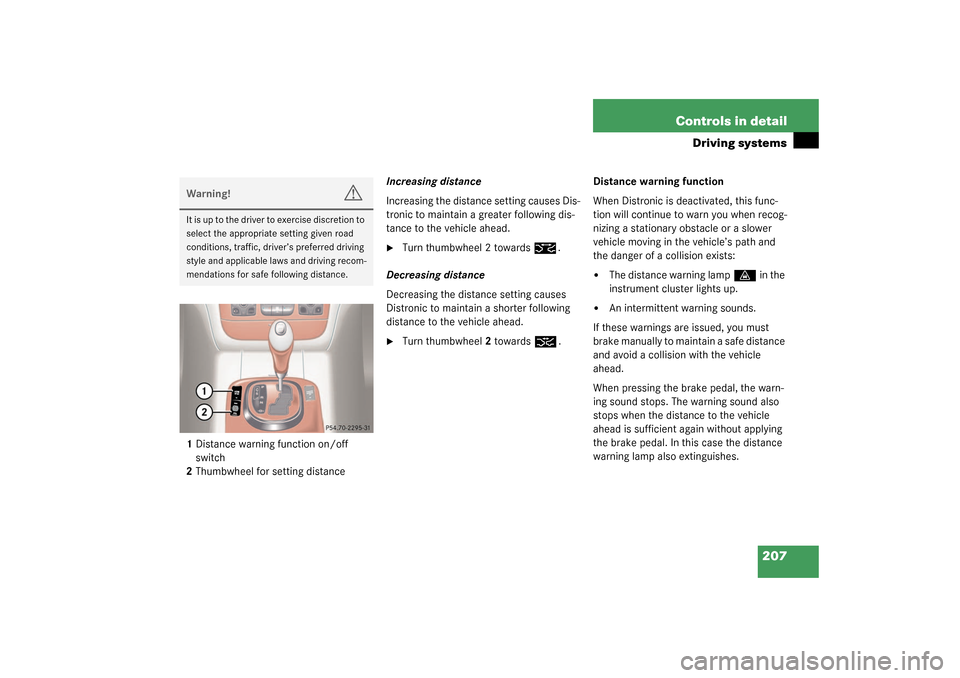
1Distance warning function on/off
switch
2Thumbwheel for setting distanceIncreasing distance
Increasing the distance setting causes Dis-
tronic to maintain a greater following dis-
tance to the vehicle ahead.
�
Turn thumbwheel 2 towards
¯
.
Decreasing distance
Decreasing the distance setting causes
Distronic to maintain a shorter following
distance to the vehicle ahead.
�
Turn thumbwheel2 towards
®
.Distance warning function
When Distronic is deactivated, this func-
tion will continue to warn you when recog-
nizing a stationary obstacle or a slower
vehicle moving in the vehicle’s path and
the danger of a collision exists:
�
The distance warning lamp
l
in the
instrument cluster lights up.
�
An intermittent warning sounds.
If these warnings are issued, you must
brake manually to maintain a safe distance
and avoid a collision with the vehicle
ahead.
When pressing the brake pedal, the warn-
ing sound stops. The warning sound also
stops when the distance to the vehicle
ahead is sufficient again without applying
the brake pedal. In this case the distance
warning lamp also extinguishes.
Warning!
G
I t is up t o t he d ri ver to exer c is e di s cr et io n to
select the appropriate setting given road
conditions, traffic, driver’s preferred driving
style and applicable laws and driving recom-
mendations for safe following distance.
Page 208 of 416
208 Controls in detailDriving systems
Activating�
Press switch1.
The indicator lamp on the switch lights
up. A loudspeaker symbol appears in
the multifunction display (
�page 203).
Deactivating
�
Press switch1.
The indicator lamp on the switch goes
out.Driving with Distronic
This section describes a number of driving
situations where special precaution is re-
quired on the part of the driver. Be pre-
pared to brake in such situations which will
deactivate the Distronic system.
Warning!
G
If the Distronic warning lamp
l
in the in-
strument cluster lights up while driving
and/or an intermittent warning sounds, im-
mediate attention on the part of the driver is
required.
As required by the traffic situation, apply the
brakes and navigate around a possible ob-
stacle. However, do not drive by relying on
the distance warning function, as this will re-
sult in an emergency braking application.
Especially depending on road surface condi-
tions and driver reaction, this will not always
enable you to avoid a collision.
iComplex driving situations are not al-
ways fully recognized by Distronic. This
could result in wrong or missing dis-
tance warnings.
Warning!
G
Distronic works to maintain the speed se-
lected by the driver unless a moving obsta-
cle proceeding directly ahead of it in the
same travel direction is detected (e.g. fol-
lowing another vehicle ahead of you at a dis-
tance set by Distronic). This means that:�
Your vehicle can pass another vehicle
after you change lanes.
�
While in a sharp turn or if the vehicle in
front is in a sharp turn, Distronic could
lose sight of a vehicle traveling in front
of it, then your vehicle could accelerate
to the previously selected speed.
��
Page 219 of 416

219 Controls in detail
Driving systems
Range of the sensors
To function properly, the sensors must be
free of dirt, ice, snow and slush. Clean the
sensors regularly, being careful not to
scratch or damage the sensors.Front sensors
Rear sensorsMinimum distance
If the system detects an obstacle in this
range, all the warning lamps light up and
you hear a warning signal. If the obstacle is
closer than the minimum distance, the ac-
tual distance might no longer be indicated
by the system.
Center
approx. 40 in (100 cm)
Corners
approx. 24 in (60 cm)
Center
approx. 48 in (120 cm)
Corners
approx. 32 in (80 cm)
!During parking maneuvers, pay special
attention to objects located above or
below the height of the sensors (e.g.
planters or trailer hitches). The Park-
tronic system will not detect such ob-
jects at close range and damage to
your vehicle or the object may result.
Ultrasonic signals from outside sourc-
es (e.g. truck air brakes or jackham-
mers) may impair the operation of the
Parktronic system.
Center
approx. 8 in (20 cm)
Corners
approx. 6 in (15 cm)
Page 221 of 416
221 Controls in detail
Driving systems
As your vehicle approaches an object, one
or more segments will light up, depending
on the distance between your vehicle and
the object. When the eighth segment lights
up, you have reached the minimum dis-
tance.�
Front area: An intermittent acoustic
warning will sound as the first red seg-
ment lights up and a constant acoustic
warning, both lasting a maximum of
three seconds, will sound for the eighth
segment, i.e. the second red segment.
�
Rear area: An intermittent acoustic
warning will sound as the first red seg-
ment lights up and a constant acoustic
warning, both lasting a maximum of
three seconds, will sound for the eighth
segment, i.e. the second red segment.
The signal is canceled when the selec-
tor lever is placed in position D orP.Switching the Parktronic system
on/off
You can switch off the Parktronic system
manually.
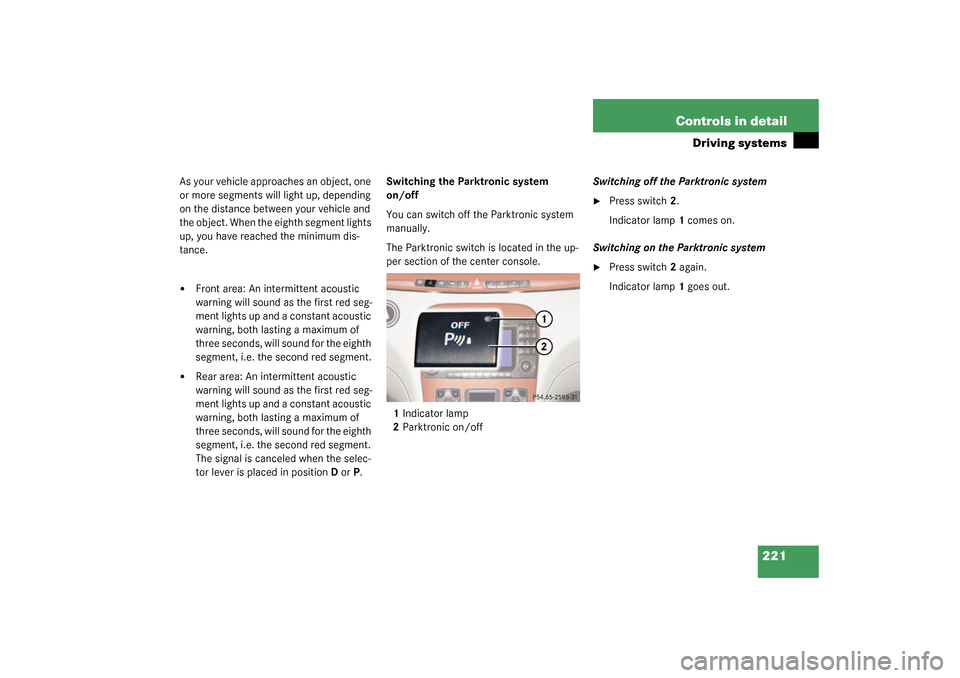
The Parktronic switch is located in the up-
per section of the center console.
1Indicator lamp
2Parktronic on/offSwitching off the Parktronic system
�
Press switch2.
Indicator lamp1 comes on.
Switching on the Parktronic system
�
Press switch2 again.
Indicator lamp1 goes out.
Page 224 of 416
224 Controls in detailUseful features
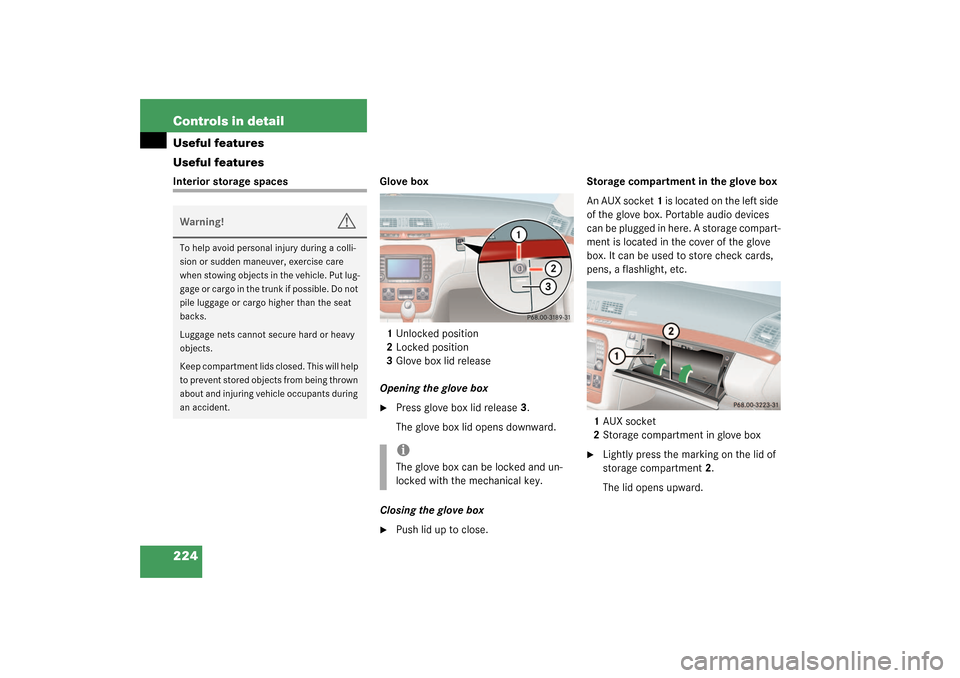
Useful featuresInterior storage spaces Glove box
1Unlocked position
2Locked position
3Glove box lid release
Opening the glove box
�
Press glove box lid release3.
The glove box lid opens downward.
Closing the glove box
�
Push lid up to close.Storage compartment in the glove box
An AUX socket 1 is located on the left side
of the glove box. Portable audio devices
can be plugged in here. A storage compart-
ment is located in the cover of the glove
box. It can be used to store check cards,
pens, a flashlight, etc.
1AUX socket
2Storage compartment in glove box
�
Lightly press the marking on the lid of
storage compartment2.
The lid opens upward.
Warning!
G
To help avoid personal injury during a colli-
sion or sudden maneuver, exercise care
when stowing objects in the vehicle. Put lug-
g a g e o r c a r g o i n t h e t r u n k i f p o s s i b l e . D o n o t
pile luggage or cargo higher than the seat
backs.
Luggage nets cannot secure hard or heavy
objects.
Keep compartment lids closed. This will help
to prevent stored objects from being thrown
about and injuring vehicle occupants during
an accident.
iThe glove box can be locked and un-
locked with the mechanical key.
Page 225 of 416
225 Controls in detail
Useful features
Storage compartment in the center
console
The storage compartment is located in the
lower portion of the center console.
1Storage compartment
Opening�
Slide the mark on the compartment
cover forward.
Closing
�
Lightly press the mark on the compart-
ment cover forward. The cover closes
automatically.Storage compartment in front of arm-
rest
1Storage compartment
Opening
The compartment contains a cup holder
(
�page 229).
�
Lightly touch cover plate1.
The cover opens automatically.
Closing
�
Lightly push cover plate1 up until it en-
gages.Storage compartment below the front
armrest
The buttons are located under the cushion
of the armrest.
1Button to open storage compartment
2Button to open storage tray
Page 232 of 416
232 Controls in detailUseful featuresParcel net in front passenger footwell
A small convenience parcel net is located
in the front passenger footwell. It is for
small and light items, such as road maps,
mail, etc.Parcel net in trunk
You can hang a parcel net in the trunk. The
hooks and the parcel net in the trunk can
hold a load of up to 29.8 lbs (13.5 kg).
�
Hang the parcel net on hooks1 on the
left and right sides of the trunk.
Ashtrays
Center console ashtray
Opening ashtray�
Briefly touch cover plate1.
The ashtray opens automatically.
Warning!
G
Do not place heavy or fragile objects, or ob-
jects having sharp edges, in the parcel net.
In an accident, during hard braking, or sud-
den maneuvers they could be thrown
around inside the vehicle and cause injury to
vehicle occupants.
!The parcel net cannot protect or suffi-
ciently secure goods in the event of an
accident.
Page 233 of 416
233 Controls in detail
Useful features
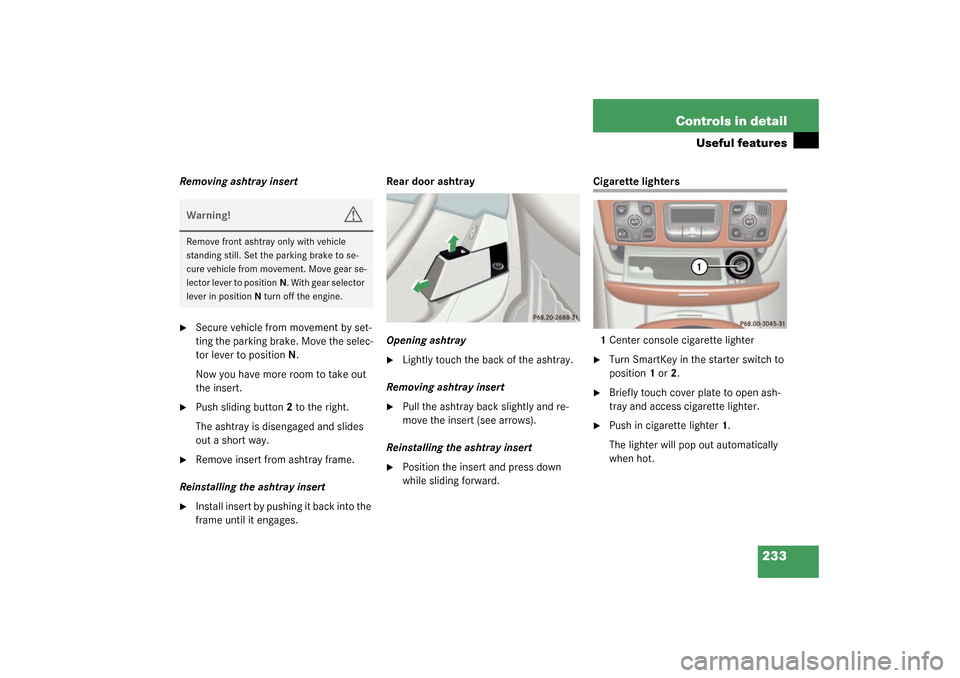
Removing ashtray insert�
Secure vehicle from movement by set-
ting the parking brake. Move the selec-
tor lever to positionN.
Now you have more room to take out
the insert.
�
Push sliding button2 to the right.
The ashtray is disengaged and slides
out a short way.
�
Remove insert from ashtray frame.
Reinstalling the ashtray insert
�
Install insert by pushing it back into the
frame until it engages.Rear door ashtray
Opening ashtray
�
Lightly touch the back of the ashtray.
Removing ashtray insert
�
Pull the ashtray back slightly and re-
move the insert (see arrows).
Reinstalling the ashtray insert
�
Position the insert and press down
while sliding forward.
Cigarette lighters
1Center console cigarette lighter�
Turn SmartKey in the starter switch to
position1 or2.
�
Briefly touch cover plate to open ash-
tray and access cigarette lighter.
�
Push in cigarette lighter1.
The lighter will pop out automatically
when hot.
Warning!
G
Remove front ashtray only with vehicle
standing still. Set the parking brake to se-
cure vehicle from movement. Move gear se-
lector lever to positionN. With gear selector
lever in positionN turn off the engine.