2003 INFINITI G35 warning light
[x] Cancel search: warning lightPage 87 of 256
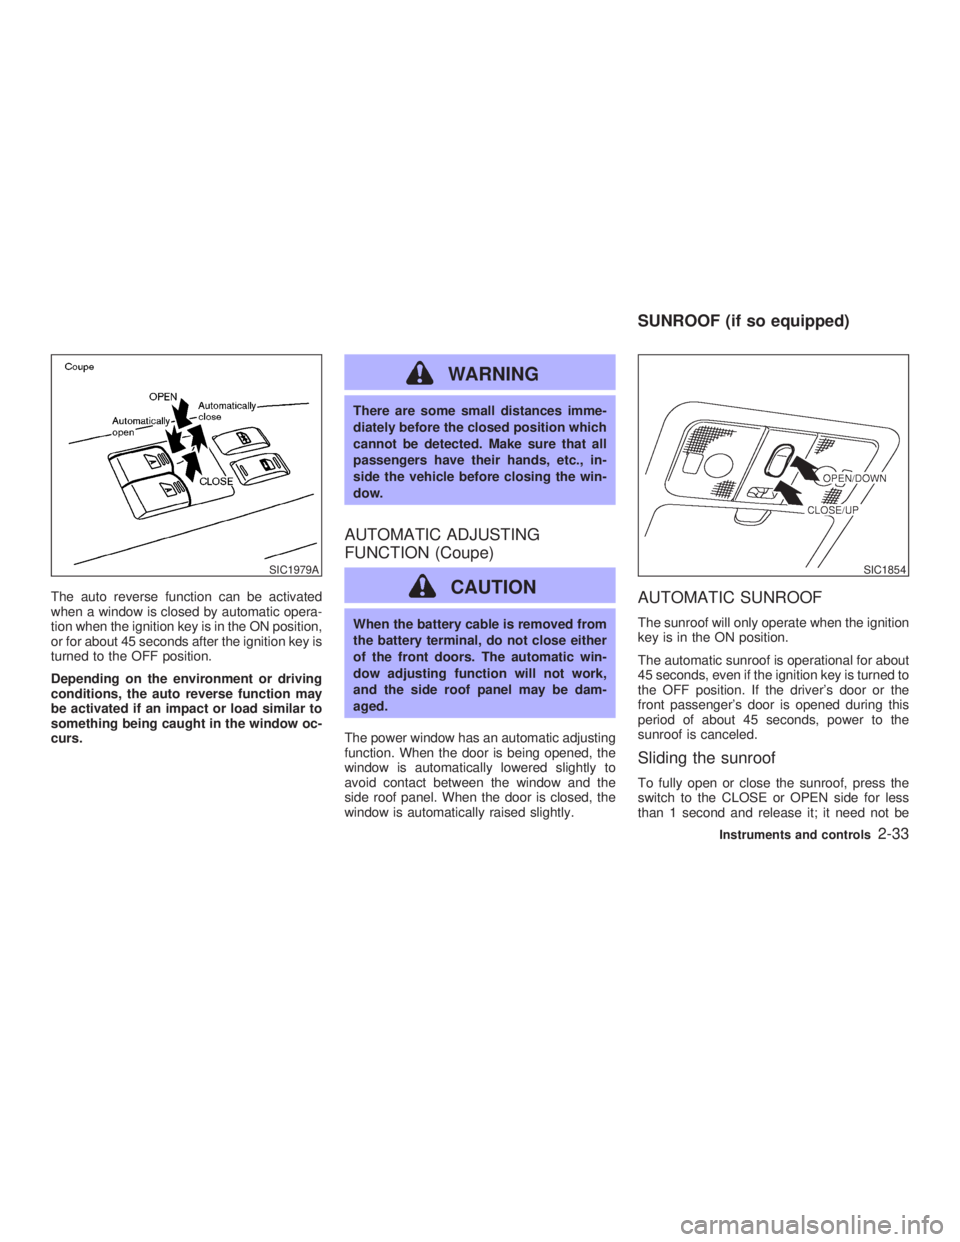
The auto reverse function can be activated
when a window is closed by automatic opera-
tion when the ignition key is in the ON position,
or for about 45 seconds after the ignition key is
turned to the OFF position.
Depending on the environment or driving
conditions, the auto reverse function may
be activated if an impact or load similar to
something being caught in the window oc-
curs. WARNING There are some small distances imme-
diately before the closed position which
cannot be detected. Make sure that all
passengers have their hands, etc., in-
side the vehicle before closing the win-
dow.
AUTOMATIC ADJUSTING
FUNCTION (Coupe)
CAUTION When the battery cable is removed from
the battery terminal, do not close either
of the front doors. The automatic win-
dow adjusting function will not work,
and the side roof panel may be dam-
aged.
The power window has an automatic adjusting
function. When the door is being opened, the
window is automatically lowered slightly to
avoid contact between the window and the
side roof panel. When the door is closed, the
window is automatically raised slightly. AUTOMATIC SUNROOF The sunroof will only operate when the ignition
key is in the ON position.
The automatic sunroof is operational for about
45 seconds, even if the ignition key is turned to
the OFF position. If the driver's door or the
front passenger's door is opened during this
period of about 45 seconds, power to the
sunroof is canceled.
Sliding the sunroof To fully open or close the sunroof, press the
switch to the CLOSE or OPEN side for less
than 1 second and release it; it need not beSIC1979A SIC1854
SUNROOF (if so equipped)
Instruments and controls
2-33
Z 02.7.29/V35-D/V5.0
X
Page 91 of 256
The light illuminates when the trunk lid is
opened. When the trunk lid is closed, the light
will go off. The HomeLink Universal Transceiver pro-
vides a convenient way to consolidate the
functions of up to three individual hand-held
transmitters into one built-in device.
HomeLink Universal Transceiver:
O Will operate most Radio Frequency (RF)
devices such as garage doors, gates, home
and office lighting, entry door locks and
security systems.
O Is powered by your vehicle's battery. No
separate batteries are required. If the vehi-
cle's battery is discharged or is discon-
nected, HomeLink will retain all program-
ming.
Once the HomeLink Universal Transceiver
is programmed, retain the original trans-
mitter for future programming procedures
(i.e., new vehicle purchases). Upon sale of
the vehicle, the programmed HomeLink
Universal Transceiver buttons should be
erased for security purposes. For addi-
tional information, refer to ªProgramming
HomeLink º later in this section. WARNING O Do not use the HomeLink Universal
Transceiver with any garage door
opener that lacks safety stop and
reverse features as required by fed-
eral safety standards. (These stan-
dards became effective for opener
models manufactured after April 1,
1982). A garage door opener which
cannot detect an object in the path of
a closing garage door and then auto-
matically stop and reverse, does not
meet current federal safety stan-
dards. Using a garage door opener
without these features increases the
risk of serious injury or death.
O During programming, your garage
door or gate may open or close. Make
sure that people and objects are clear
of the garage door or gate that you
are programming.
O Your vehicle's engine should be
turned off while programming the
HomeLink
Universal Transceiver.TRUNK LIGHT
HomeLink UNIVERSAL
TRANSCEIVER (if so equipped)
Instruments and controls
2-37
Z 02.7.29/V35-D/V5.0
X
Page 102 of 256

Continue to press the UNLOCK button for 3
seconds. All the door windows will be lowered.
Continue to press the UNLOCK button until
windows are fully open.
To stop lowering the windows, release the
UNLOCK button.
To start lowering the windows, press the UN-
LOCK button again for more than 3 seconds.
The rear door windows will operate 0.5 sec-
onds after the front windows' operation (if so
equipped).
Releasing the trunk lid 1. Push the TRUNK button on the keyfob for
longer than 0.5 seconds with the key re-
moved from the ignition key cylinder.
2. The trunk lid opens.
Using the panic alarm If you are near your vehicle and feel threat-
ened, you may activate the alarm to call atten-
tion as follows:
1. Push the PANIC button on the keyfob for
longer than 0.5 seconds with the key
removed from the ignition key cylinder.
2. The theft warning alarm and headlights will
stay on for 30 seconds. 3. The panic alarm stops when:
O It has run for 30 seconds, or
O The LOCK or the UNLOCK button is
pressed, or
O The PANIC or the TRUNK button is pushed
on the keyfob for longer than 0.5 seconds.
BATTERY REPLACEMENT Replace the battery as follows:
1. Open the lid using a suitable tool.
2. Replace the battery with a new one. SPA1374
3-8 Pre-driving checks and adjustments
Z 02.11.1/V35-D/V5.0
X
Page 104 of 256

1. Pull the hood lock release handle
j 1
lo-
cated below the instrument panel; the hood
will then spring up slightly.
2. Raise the lever
j 2
at the front of the hood
with your fingertips and raise the hood.
3. Insert the assist bar into the slot
j 3
in the
front edge of the hood.
4. When closing the hood, reset the assist bar
to its original position, then slowly close the
hood and make sure it locks into place.
WARNING O Make sure the hood is completely
closed and latched before driving.
Failure to do so could cause the hood
to fly open and result in an accident.
O If you see steam or smoke coming
from the engine compartment, to
avoid injury do not open the hood. WARNING O Do not drive with the trunk lid open.
This could allow dangerous exhaust
gases to be drawn into the vehicle.
See ªPrecautions when starting and
drivingº in the ª5. Starting and driv-
ingº section for exhaust gas.
O Closely supervise children when they
are around cars to prevent them from
playing and becoming locked in the
trunk where they could be seriously
injured. Keep the car locked with the
trunk closed when not in use, and
prevent children's access to car keys. SPA1423
HOOD TRUNK LID
3-10 Pre-driving checks and adjustments
Z 02.7.29/V35-D/V5.0
X
Page 106 of 256

INTERIOR TRUNK LID RELEASE
WARNINGClosely supervise children when they
are around cars to prevent them from
playing and becoming locked in the
trunk where they could be seriously in-
jured. Keep the car locked, with the
trunk closed, when not in use, and pre-
vent children's access to car keys. The interior trunk lid release mechanism pro-
vides a means of escape for children and
adults in the event they become locked inside
the trunk.
The handle is located on the back side of the
trunk lid inside the trunk compartment.
To open the trunk lid from the inside, pull
the release handle towards you until the
lock releases and push up on the trunk lid.
The release lever is made of a material that
glows in the dark after a brief exposure to
ambient light.SPA1591 SPA1426A SPA1561
3-12 Pre-driving checks and adjustments
Z 02.7.29/V35-D/V5.0
X
Page 111 of 256
CAUTIONStore the main sun visor after storing
the extension sun visor.
AUTOMATIC ANTI-GLARE INSIDE
MIRROR (if so equipped)
WARNING Use the AUTO position only when nec-
essary, because it reduces rear view
clarity.
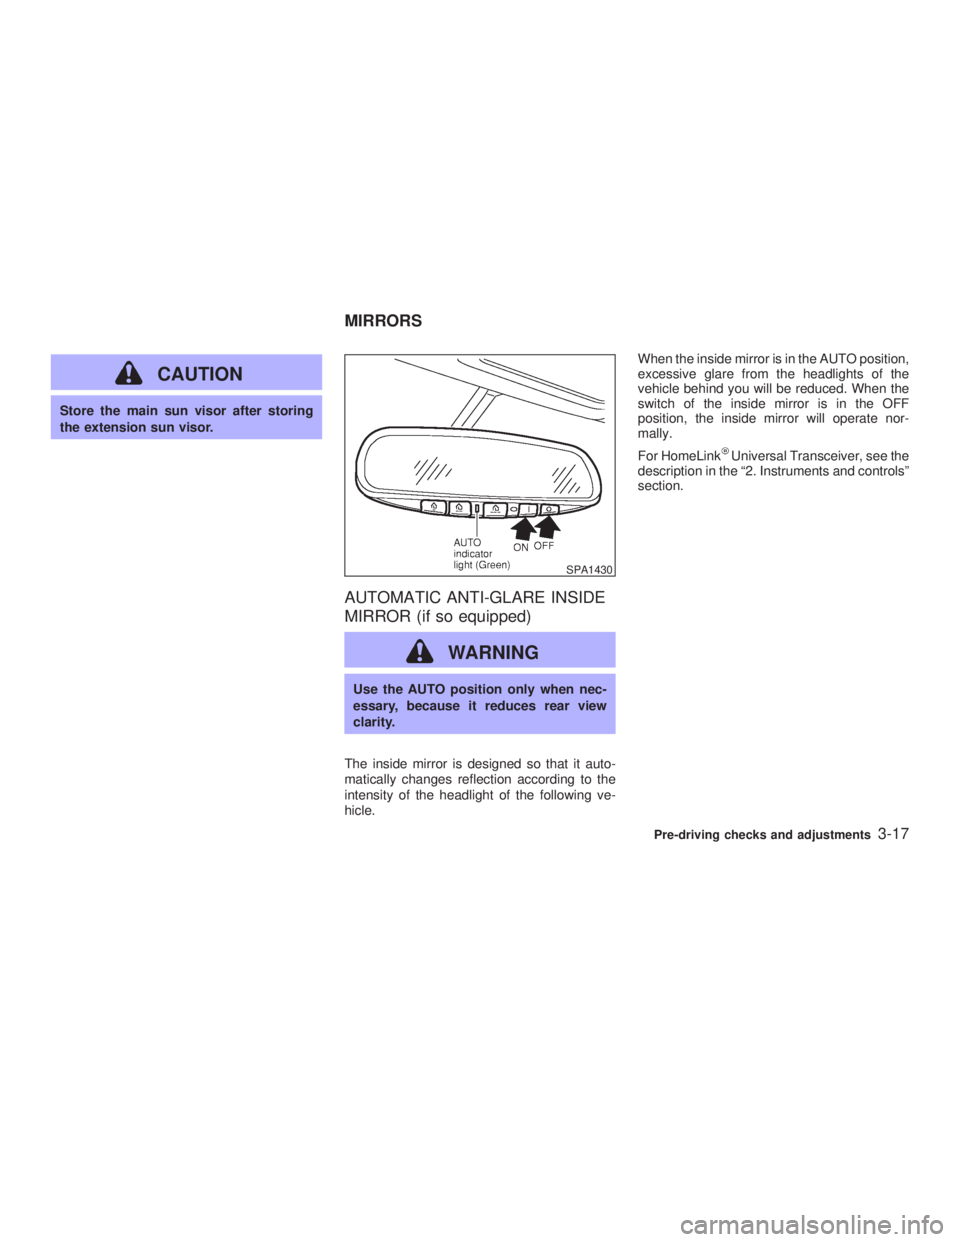
The inside mirror is designed so that it auto-
matically changes reflection according to the
intensity of the headlight of the following ve-
hicle. When the inside mirror is in the AUTO position,
excessive glare from the headlights of the
vehicle behind you will be reduced. When the
switch of the inside mirror is in the OFF
position, the inside mirror will operate nor-
mally.
For HomeLink Universal Transceiver, see the
description in the ª2. Instruments and controlsº
section. SPA1430
MIRRORS
Pre-driving checks and adjustments
3-17
Z 02.7.29/V35-D/V5.0
X
Page 139 of 256
LOCK position, proceed as follows to remove
the key:
1. Move the selector lever into the P (Park)
position.
2. Turn the ignition key slightly in the ON
direction.
3. Turn the key toward the LOCK position.
4. Remove the key.
If the key is removed from the ignition switch,
the selector lever cannot be moved from P
(Park) position. The selector lever can be
moved if the ignition switch is in the ON
position and the foot brake pedal is de-
pressed.
There is an OFF position in between LOCK
and ACC, although it does not show on the
lock cylinder. When the ignition is in OFF the
steering wheel is not locked.
In order for the steering wheel to be locked, it
must be turned about 1/6 of a turn counter-
clockwise from the straight up position.
To lock the steering wheel, turn the key to
the LOCK position. Remove the key. To
unlock the steering wheel, insert the key
and turn it gently while rotating the steer-
ing wheel slightly right and left. WARNING Never remove or turn the key to the
LOCK position while driving. The steer-
ing wheel will lock. This may cause the
driver to lose control of the vehicle and
could result in serious vehicle damage
and/or personal injury.
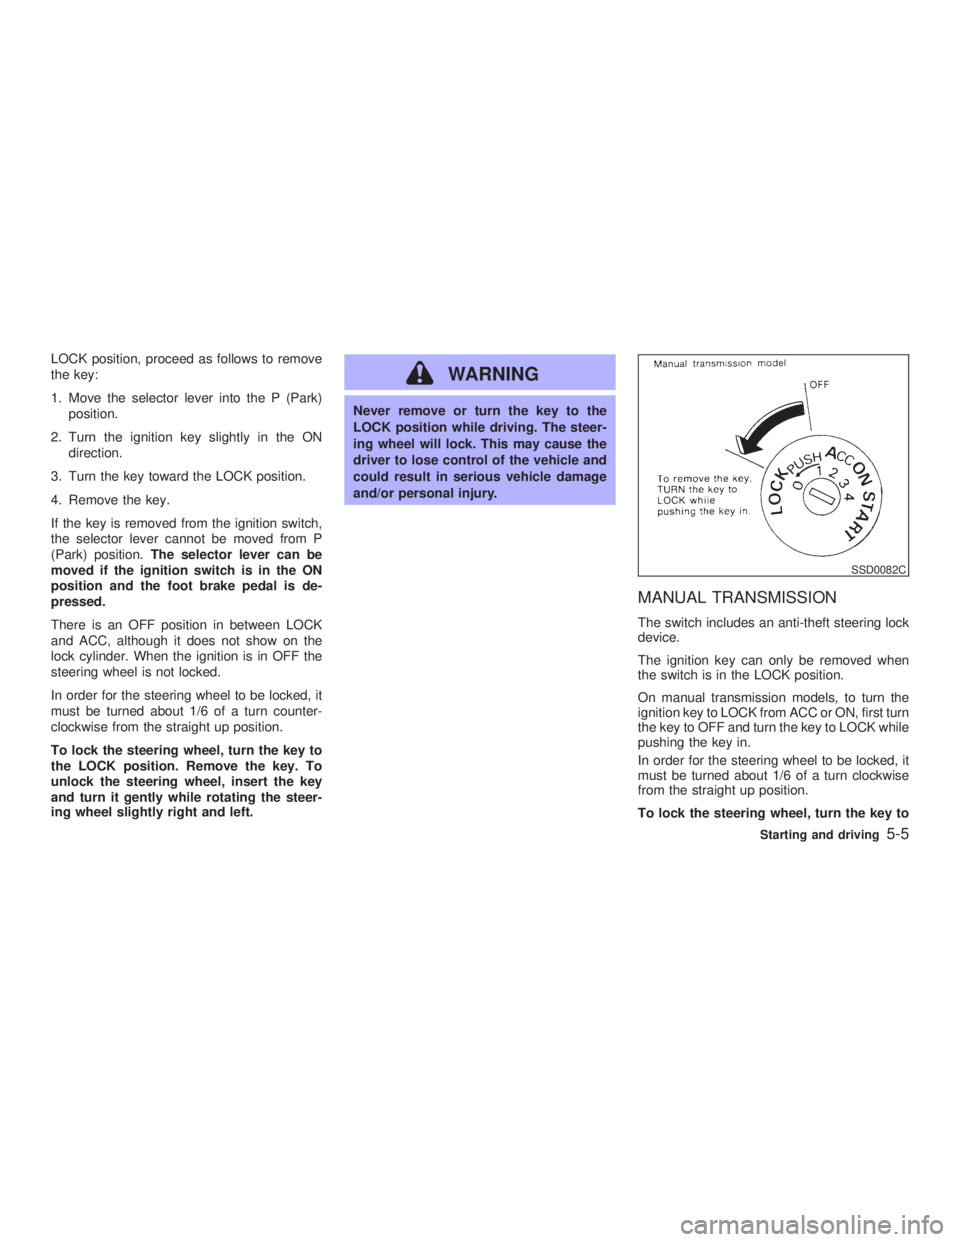
MANUAL TRANSMISSION The switch includes an anti-theft steering lock
device.
The ignition key can only be removed when
the switch is in the LOCK position.
On manual transmission models, to turn the
ignition key to LOCK from ACC or ON, first turn
the key to OFF and turn the key to LOCK while
pushing the key in.
In order for the steering wheel to be locked, it
must be turned about 1/6 of a turn clockwise
from the straight up position.
To lock the steering wheel, turn the key to SSD0082C
Starting and driving
5-5
Z 02.7.29/V35-D/V5.0
X
Page 140 of 256
the LOCK position. Remove the key. To
unlock the steering wheel, insert the key
and turn it gently while rotating the steer-
ing wheel slightly right and left.
WARNINGNever remove or turn the key to the
LOCK position while driving. The steer-
ing wheel will lock. This may cause the
driver to lose control of the vehicle and
could result in serious vehicle damage
and/or personal injury.
KEY POSITIONS The switch includes an anti-theft steering lock
device.
LOCK (Normal parking position) (0)
The ignition key can only be removed when
the switch is in this position.
OFF (1)
The engine can be turned off without locking
the steering wheel.
The ignition lock is designed so that the key
cannot be turned to LOCK and removed until the selector lever is moved to the P (Park)
position.
ACC (Accessories) (2)
This position activates electrical accessories
such as the radio when the engine is not
running.
ON (Normal operating position) (3)
This position turns on the ignition system and
the electrical accessories.
START (4)
This position activates the starter motor, start-
ing the engine.
INFINITI VEHICLE IMMOBILIZER
SYSTEM The Infiniti Vehicle Immobilizer System will not
allow the engine to start without the use of the
registered Infiniti Vehicle Immobilizer System
key.
If the engine fails to start using the registered
Infiniti Vehicle Immobilizer System key, it may
be due to interference caused by another
Infiniti Vehicle Immobilizer System key, an
automated toll road device or automated pay-
ment device on the key ring. Restart the en-
gine using the following procedures: 1. Leave the ignition switch in the ON position
for approximately 5 seconds.
2. Turn the ignition switch to the OFF or LOCK
position and wait approximately 10 sec-
onds.
3. Repeat step 1 and 2 again.
4. Restart the engine while holding the device
(which may have caused the interference)
separate from the registered Infiniti Vehicle
Immobilizer System key.
If this procedure allows the engine to start,
INFINITI recommends placing the registered
Infiniti Vehicle Immobilizer System key on a
separate key ring to avoid interference from
other devices.
5-6 Starting and driving
Z 02.7.29/V35-D/V5.0
X