2003 INFINITI G35 flat tire
[x] Cancel search: flat tirePage 39 of 256
the seat belts to retract until they are com-
pletely dry.
O If dirt builds up in the shoulder belt guide of
the seat belt anchors, the seat belts may
retract slowly. Wipe the shoulder belt guide
with a clean, dry cloth.
O Periodically check to see that the seat
belt and the metal components such as
buckles, tongues, retractors, flexible wires
and anchors work properly. If loose parts,
deterioration, cuts or other damage on the
webbing is found, the entire belt assembly
should be replaced. PRECAUTIONS ON CHILD
RESTRAINTS
WARNING O Infants and small children should al-
ways be placed in an appropriate
child restraint while riding in the ve-
hicle. Failure to use a child restraint
can result in serious injury or death.
O Infants and small children should
never be carried on your lap. It is not
possible for even the strongest adult
to resist the forces of a severe acci-
dent. The child could be crushed be-
tween the adult and parts of the ve-
hicle. Also, do not put the same seat
belt around both your child and your-
self.
O Never install a rear facing child re-
straint in the front seat. An inflating
supplemental air bag could seriously
injure or kill your child. A rear facing
child restraint must only be used in
the rear seat. O INFINITI recommends that the child
restraint be installed in the rear seat.
According to accident statistics, chil-
dren are safer when properly re-
strained in the rear seat than in the
front seat.
O An improperly installed child re-
straint could lead to serious injury or
death in an accident.
In general, child restraints are designed to be
installed with the lap portion of a three-point
type seat belt. In addition, this vehicle is
equipped with a universal child restraint lower
anchor system, referred to as the LATCH
(Lower Anchors and Tether for Children) sys-
tem. Some child restraints include two rigid or
webbing-mounted attachments that can be
connected to these lower anchors. For details,
see ªLATCH (Lower Anchors and Tether for
Children) SYSTEMº later in this section.
Child restraints for infants and children of
various sizes are offered by several manufac-
turers. When selecting any child restraint,
keep the following points in mind:
O Choose only a restraint with a label certify-
ing that it complies with Federal MotorCHILD RESTRAINTS
Seats, restraints and supplemental air bag systems
1-33
Z 02.7.29/V35-D/V5.0
X
Page 141 of 256
O Make sure the area around the vehicle is
clear.
O Maintenance items should be checked pe-
riodically, e.g., each time you check engine
oil.
O Check that all windows and lights are clean.
O Visually inspect tires for their appearance
and condition. Also, check tires for proper
inflation.
O Lock all doors.
O Position seat and adjust head restraints.
O Adjust inside and outside mirrors.
O Fasten seat belts and ask all passengers to
do likewise.
O Check the operation of warning lights when
key is turned to the ON (3) position. 1. Apply the parking brake.
2. Automatic transmission:
Move the selector lever to P (Park) or N
(Neutral). (P preferred.)
The starter is designed not to operate if the
selector lever is in one of the driving posi-
tions.
Manual transmission:
Move the shift lever to N (Neutral) position,
and depress the clutch pedal to the floor
while cranking the engine.
The starter is designed not to operate un-
less the clutch pedal is fully depressed.
3. Crank the engine with your foot off the
accelerator pedal by turning the ignition
key to START. Release the key when the
engine starts. If the engine starts, but fails
to run, repeat the above procedure.
O If the engine is very hard to start in ex-
tremely cold weather or when restarting,
depress the accelerator pedal a little (ap-
proximately 1/5 to the floor) and hold it then
crank the engine. Release the key and the
accelerator pedal when the engine starts.
O If the engine is very hard to start because it
is flooded, depress the accelerator pedal all the way to the floor and hold it. Crank the
engine for 5 to 6 seconds. After cranking
the engine, release the accelerator pedal.
Crank the engine with your foot off the
accelerator pedal by turning the ignition
key to START. Release the key when the
engine starts. If the engine starts, but fails
to run, repeat the above procedure.
CAUTION Do not operate the starter for more than
15 seconds at a time. If the engine does
not start, turn the key off and wait 10
seconds before cranking again, other-
wise the starter could be damaged.
4. Warm-up
Allow the engine to idle for at least 30
seconds after starting. Drive at moderate
speed for a short distance first, especially in
cold weather.BEFORE STARTING THE ENGINE STARTING THE ENGINE
Starting and driving
5-7
Z 02.7.29/V35-D/V5.0
X
Page 151 of 256

During the first 1,200 miles (2,000 km), follow
these recommendations to obtain maximum
engine performance and ensure the future
reliability and economy of your new vehicle.
Failure to follow these recommendations may
result in shortened engine life and reduced
engine performance.
O Avoid driving for long periods at constant
speed, either fast or slow. Do not run the
engine over 4,000 rpm.
O Do not accelerate at full throttle in any gear.
O Avoid quick starts.
O Avoid hard braking as much as possible.
O Do not tow a trailer for the first 500 miles
(800 km). O Accelerate slowly and smoothly. Maintain
cruising speeds with a constant accelerator
position.
O Drive at moderate speeds on the highway.
Driving at high speed will lower fuel
economy.
O Avoid unnecessary stopping and braking.
Maintain a safe distance behind other ve-
hicles.
O Use a proper gear range which suits road
conditions. On level roads, shift into high
gear as soon as possible.
O Avoid unnecessary engine idling. O Keep your engine tuned up.
O Follow the recommended periodic mainte-
nance schedule.
O Keep the tires inflated at the correct pres-
sure. Low pressure will increase tire wear
and waste fuel.
O Keep the front wheels in correct alignment.
Improper alignment will cause not only tire
wear but also lower fuel economy.
O Air conditioner operation lowers fuel
economy. Use the air conditioner only when
necessary.
O When cruising at highway speeds, it is
more economical to use the air conditioner
and leave the windows closed to reduce
drag. SD1001M
BREAK-IN SCHEDULE INCREASING FUEL ECONOMY
Starting and driving
5-17
Z 02.7.29/V35-D/V5.0
X
Page 159 of 256
6 In case of emergency Roadside assistance program................................... 6-2
Flat tire ...................................................................... 6-2
Changing a flat tire ............................................... 6-2
Jump starting............................................................. 6-7
Push starting ............................................................. 6-9 If your vehicle overheats ......................................... 6-10
Towing your vehicle ................................................ 6-11
Towing recommended by INFINITI .................... 6-11
Vehicle recovery (Freeing a stuck vehicle) ........ 6-13
Z 02.7.29/V35-D/V5.0
X
Page 160 of 256
Every new INFINITI comes with a 4 year,
unlimited mileage Roadside Assistance plan.
In the event of a roadside emergency,
Roadside Assistance Service is available to
you. Please refer to your Warranty Booklet
(U.S.) or Warranty & Roadside assistance
information booklet (Canada) for details. Both
the Warranty Booklet and Roadside
Assistance Calling Card in your Owner's
Literature Portfolio provide the Toll-Free
Number to call for assistance. Roadside
Assistance is provided 24 hours a day, 365
days a year, for 4 years from the date sold to
give emergency roadside help, in the event of
mechanical or nonmechanical trouble(s) such
as flat tires, out-of-gas, dead battery, lost
keys, mechanical breakdown, accident, etc. CHANGING A FLAT TIRE If you have a flat tire, follow the instructions
below.
Stopping the vehicle 1. Safely move the vehicle off the road away
from traffic.
2. Turn on the hazard warning flashers.
3. Park on a level surface and apply the
parking brake. Shift the manual transmis-
sion into R (Reverse) position (automatic
transmission in P (Park) position).
4. Turn off the engine.
5. Raise the hood to warn other traffic, and to
signal professional road assistance person-
nel that you need assistance.
6. Have all passengers get out of the vehicle
and stand in a safe place, away from traffic
and clear of the vehicle.
WARNING O Make sure that the parking brake is
securely applied and the manual
transmission is shifted into R (Re- verse), or the automatic transmission
into P (Park).
O Never change tires when the vehicle
is on a slope, ice or slippery areas.
This is hazardous.
O Never change tires if oncoming traffic
is close to your vehicle. Wait for pro-
fessional road assistance.ROADSIDE ASSISTANCE
PROGRAM FLAT TIRE
6-2 In case of emergency
Z 02.7.29/V35-D/V5.0
X
Page 161 of 256

Blocking wheels Place suitable blocks at both the front and
back of the wheel diagonally opposite the flat
tire to prevent the vehicle from rolling when it is
jacked up.
WARNINGBe sure to block the wheel as the vehicle
may move and could cause personal
injury. Getting the spare tire and tools Remove jacking tools 1 and spare tire 2 from
the storage area located inside the trunk as
illustrated.
If spacers are equipped, remove them before
removing the spare tire.MCE0001 SCE0382A
SCE0383A
In case of emergency
6-3
Z 02.7.29/V35-D/V5.0
X
Page 164 of 256
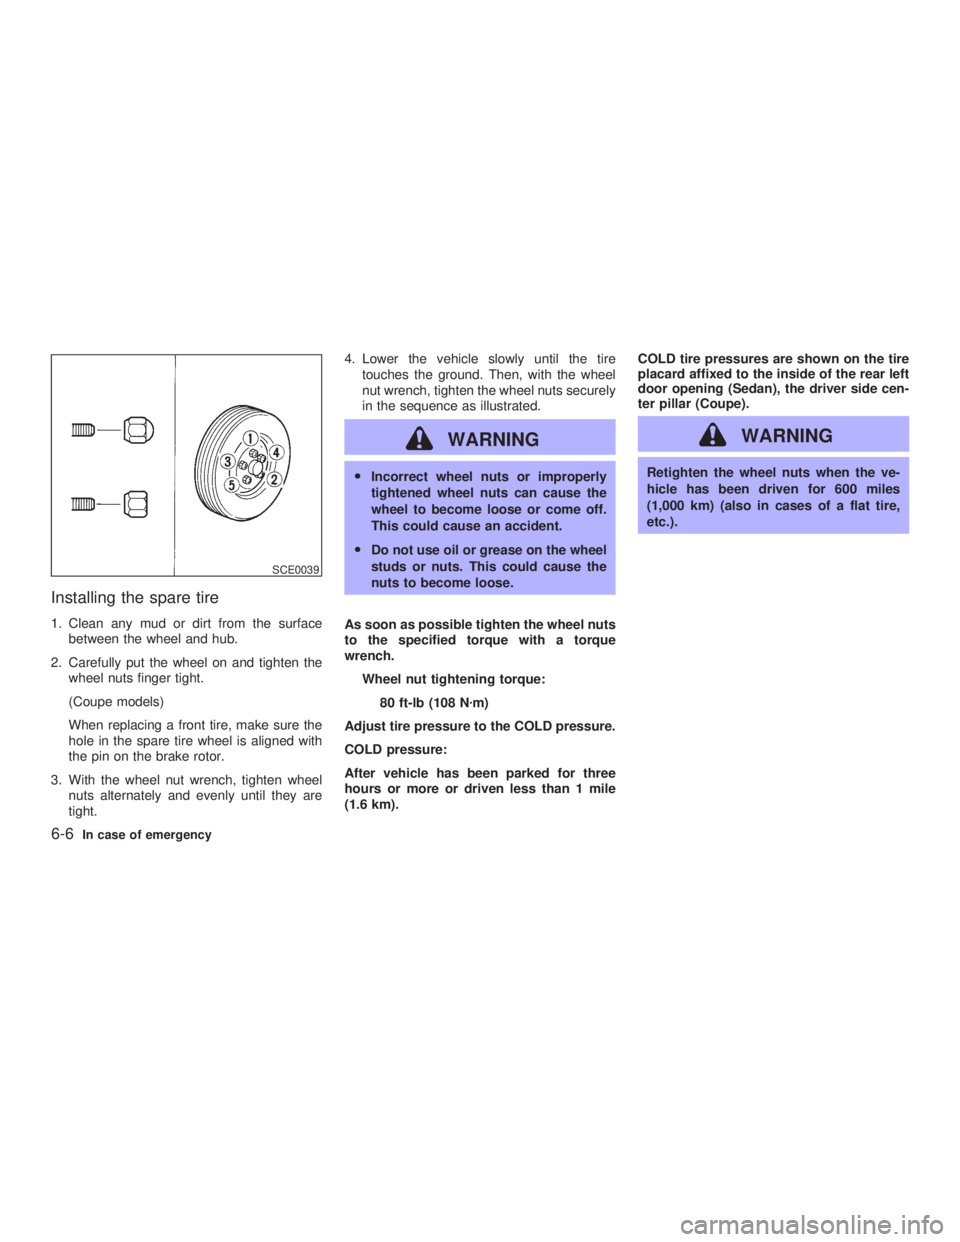
Installing the spare tire 1. Clean any mud or dirt from the surface
between the wheel and hub.
2. Carefully put the wheel on and tighten the
wheel nuts finger tight.
(Coupe models)
When replacing a front tire, make sure the
hole in the spare tire wheel is aligned with
the pin on the brake rotor.
3. With the wheel nut wrench, tighten wheel
nuts alternately and evenly until they are
tight. 4. Lower the vehicle slowly until the tire
touches the ground. Then, with the wheel
nut wrench, tighten the wheel nuts securely
in the sequence as illustrated.
WARNING O Incorrect wheel nuts or improperly
tightened wheel nuts can cause the
wheel to become loose or come off.
This could cause an accident.
O Do not use oil or grease on the wheel
studs or nuts. This could cause the
nuts to become loose.
As soon as possible tighten the wheel nuts
to the specified torque with a torque
wrench.
Wheel nut tightening torque:
80 ft-lb (108 N z m)
Adjust tire pressure to the COLD pressure.
COLD pressure:
After vehicle has been parked for three
hours or more or driven less than 1 mile
(1.6 km). COLD tire pressures are shown on the tire
placard affixed to the inside of the rear left
door opening (Sedan), the driver side cen-
ter pillar (Coupe).
WARNING Retighten the wheel nuts when the ve-
hicle has been driven for 600 miles
(1,000 km) (also in cases of a flat tire,
etc.).SCE0039
6-6 In case of emergency
Z 02.11.6/V35-D/V5.0
X
Page 208 of 256
If you have a flat tire, see ªFlat tireº in the
ª6. In case of emergencyº section.
TIRE PRESSURE
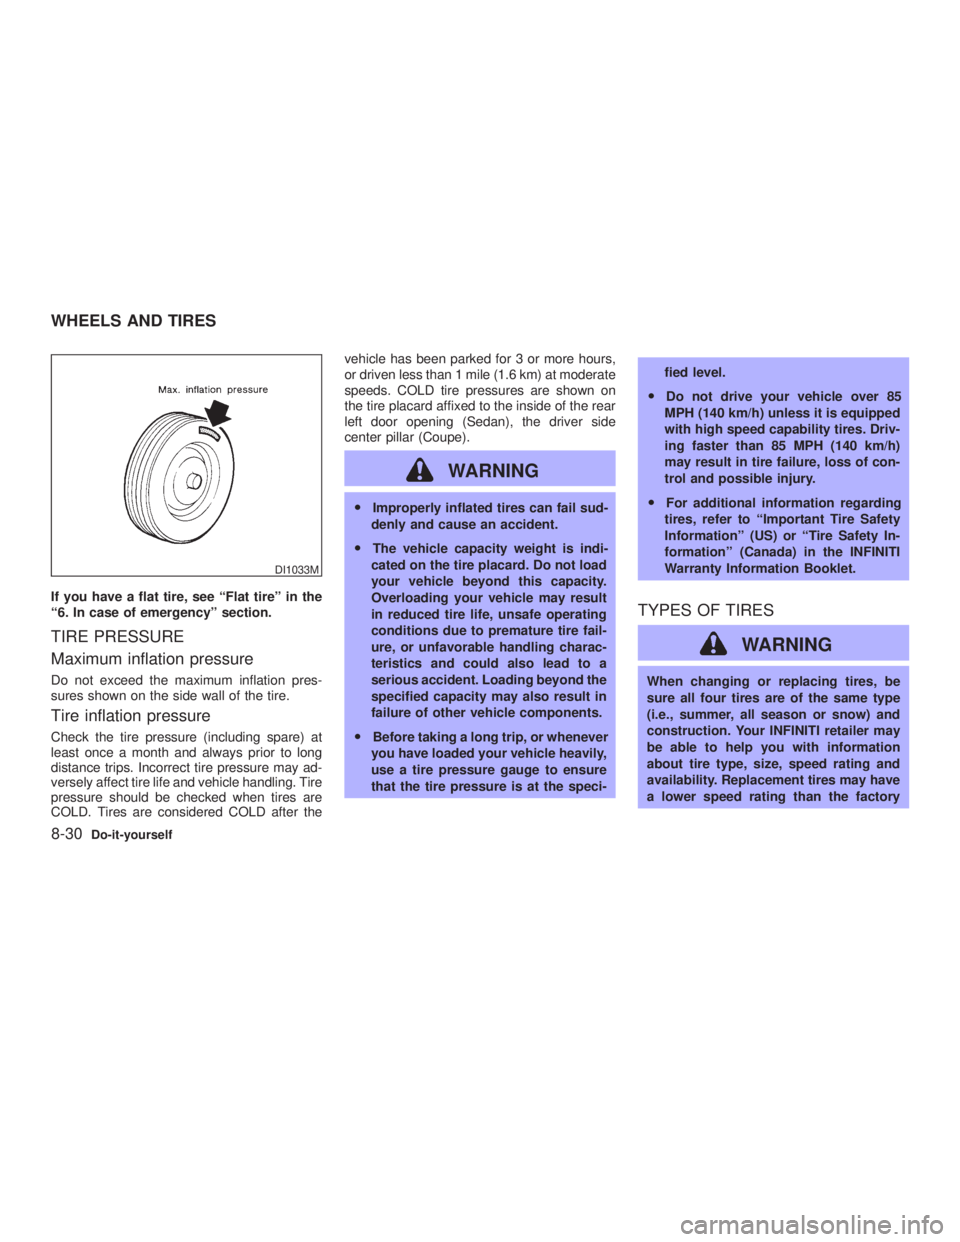
Maximum inflation pressure Do not exceed the maximum inflation pres-
sures shown on the side wall of the tire.
Tire inflation pressure Check the tire pressure (including spare) at
least once a month and always prior to long
distance trips. Incorrect tire pressure may ad-
versely affect tire life and vehicle handling. Tire
pressure should be checked when tires are
COLD. Tires are considered COLD after the vehicle has been parked for 3 or more hours,
or driven less than 1 mile (1.6 km) at moderate
speeds. COLD tire pressures are shown on
the tire placard affixed to the inside of the rear
left door opening (Sedan), the driver side
center pillar (Coupe).
WARNING O Improperly inflated tires can fail sud-
denly and cause an accident.
O The vehicle capacity weight is indi-
cated on the tire placard. Do not load
your vehicle beyond this capacity.
Overloading your vehicle may result
in reduced tire life, unsafe operating
conditions due to premature tire fail-
ure, or unfavorable handling charac-
teristics and could also lead to a
serious accident. Loading beyond the
specified capacity may also result in
failure of other vehicle components.
O Before taking a long trip, or whenever
you have loaded your vehicle heavily,
use a tire pressure gauge to ensure
that the tire pressure is at the speci- fied level.
O Do not drive your vehicle over 85
MPH (140 km/h) unless it is equipped
with high speed capability tires. Driv-
ing faster than 85 MPH (140 km/h)
may result in tire failure, loss of con-
trol and possible injury.
O For additional information regarding
tires, refer to ªImportant Tire Safety
Informationº (US) or ªTire Safety In-
formationº (Canada) in the INFINITI
Warranty Information Booklet.
TYPES OF TIRES
WARNING When changing or replacing tires, be
sure all four tires are of the same type
(i.e., summer, all season or snow) and
construction. Your INFINITI retailer may
be able to help you with information
about tire type, size, speed rating and
availability. Replacement tires may have
a lower speed rating than the factoryDI1033M
WHEELS AND TIRES
8-30 Do-it-yourself
Z 02.7.29/V35-D/V5.0
X