Page 14 of 256
Armrest (if so equipped) Pull the armrest forward until it is horizontal. Interior trunk access Sedan:
Pull the partition down to access the trunk from
the rear seat.
The partition can be locked using the mas-
ter key to prevent unauthorized access.
Remove the key while opening or closing the
partition. Otherwise, the partition may be dam-
aged. Coupe:
Pull the handle on the left side of the trunk and
push the seatback forward to access the trunk
from the rear seat.
WARNING Properly secure all cargo to help prevent
it from sliding or shifting. Do not place
cargo higher than the seatbacks. In a
sudden stop or collision, unsecured
cargo could cause personal injury.SSS0186 SSS0187 SSS0219
1-8 Seats, restraints and supplemental air bag systems
Z 02.7.29/V35-D/V5.0
X
Page 16 of 256

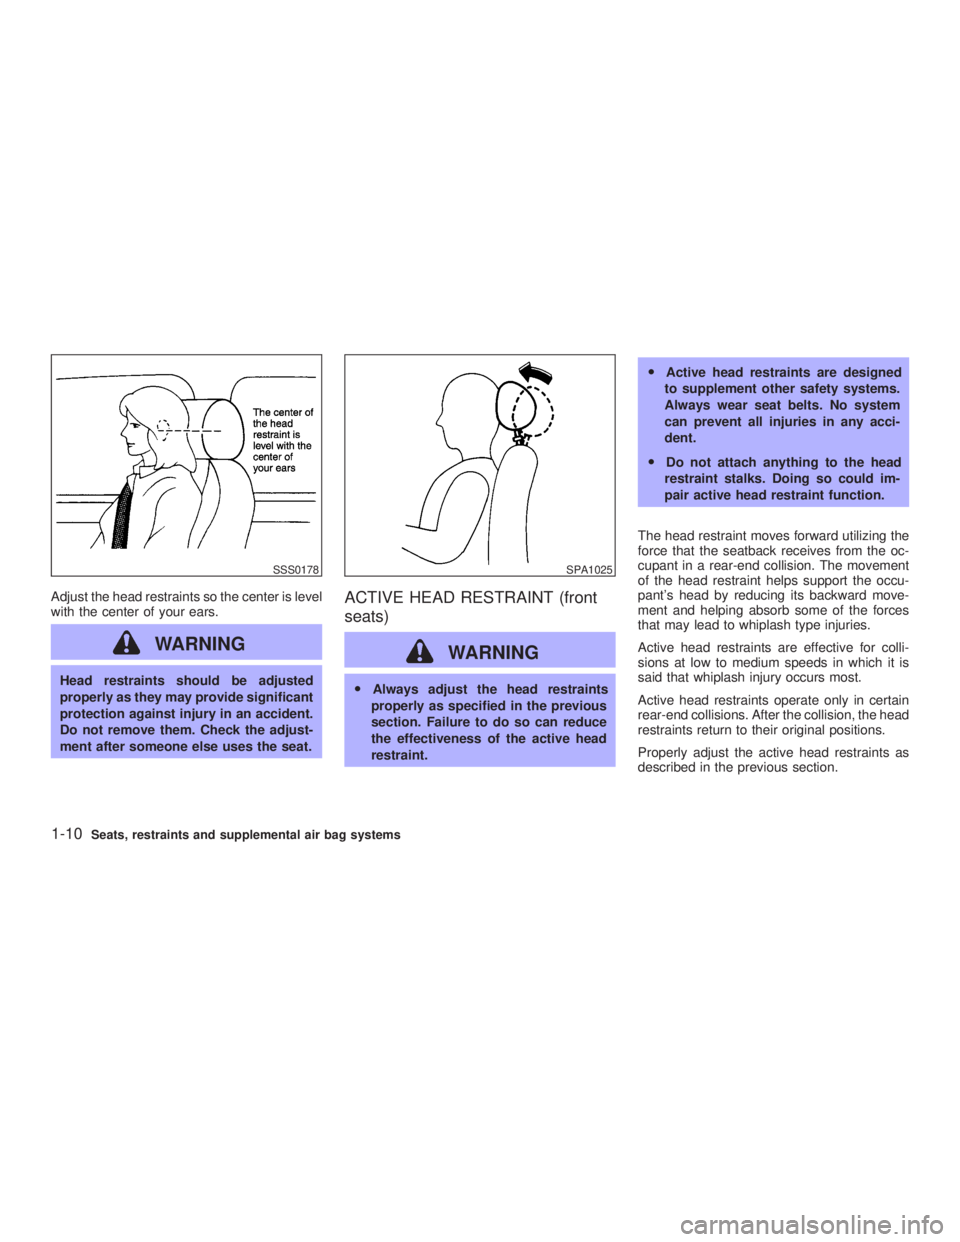
Adjust the head restraints so the center is level
with the center of your ears.
WARNINGHead restraints should be adjusted
properly as they may provide significant
protection against injury in an accident.
Do not remove them. Check the adjust-
ment after someone else uses the seat. ACTIVE HEAD RESTRAINT (front
seats)
WARNING O Always adjust the head restraints
properly as specified in the previous
section. Failure to do so can reduce
the effectiveness of the active head
restraint. O Active head restraints are designed
to supplement other safety systems.
Always wear seat belts. No system
can prevent all injuries in any acci-
dent.
O Do not attach anything to the head
restraint stalks. Doing so could im-
pair active head restraint function.
The head restraint moves forward utilizing the
force that the seatback receives from the oc-
cupant in a rear-end collision. The movement
of the head restraint helps support the occu-
pant's head by reducing its backward move-
ment and helping absorb some of the forces
that may lead to whiplash type injuries.
Active head restraints are effective for colli-
sions at low to medium speeds in which it is
said that whiplash injury occurs most.
Active head restraints operate only in certain
rear-end collisions. After the collision, the head
restraints return to their original positions.
Properly adjust the active head restraints as
described in the previous section.SSS0178 SPA1025
1-10 Seats, restraints and supplemental air bag systems
Z 02.7.29/V35-D/V5.0
X
Page 42 of 256
2. Route the seat belt tongue through the child
restraint and insert it into the buckle until
you hear and feel the latch engage.
Be sure to follow the child restraint manu-
facturer's instructions for belt routing. 3. Pull on the shoulder belt until all of the belt
is fully extended. At this time, the belt
retractor is in the automatic locking mode
(child restraint mode). It reverts back to
emergency locking mode when the belt is
fully retracted. 4. Allow the belt to retract. Pull up on the belt
to remove any slack in the belt.SSS0043 SSS0107 SSS0062
1-36 Seats, restraints and supplemental air bag systems
Z 02.7.29/V35-D/V5.0
X
Page 43 of 256

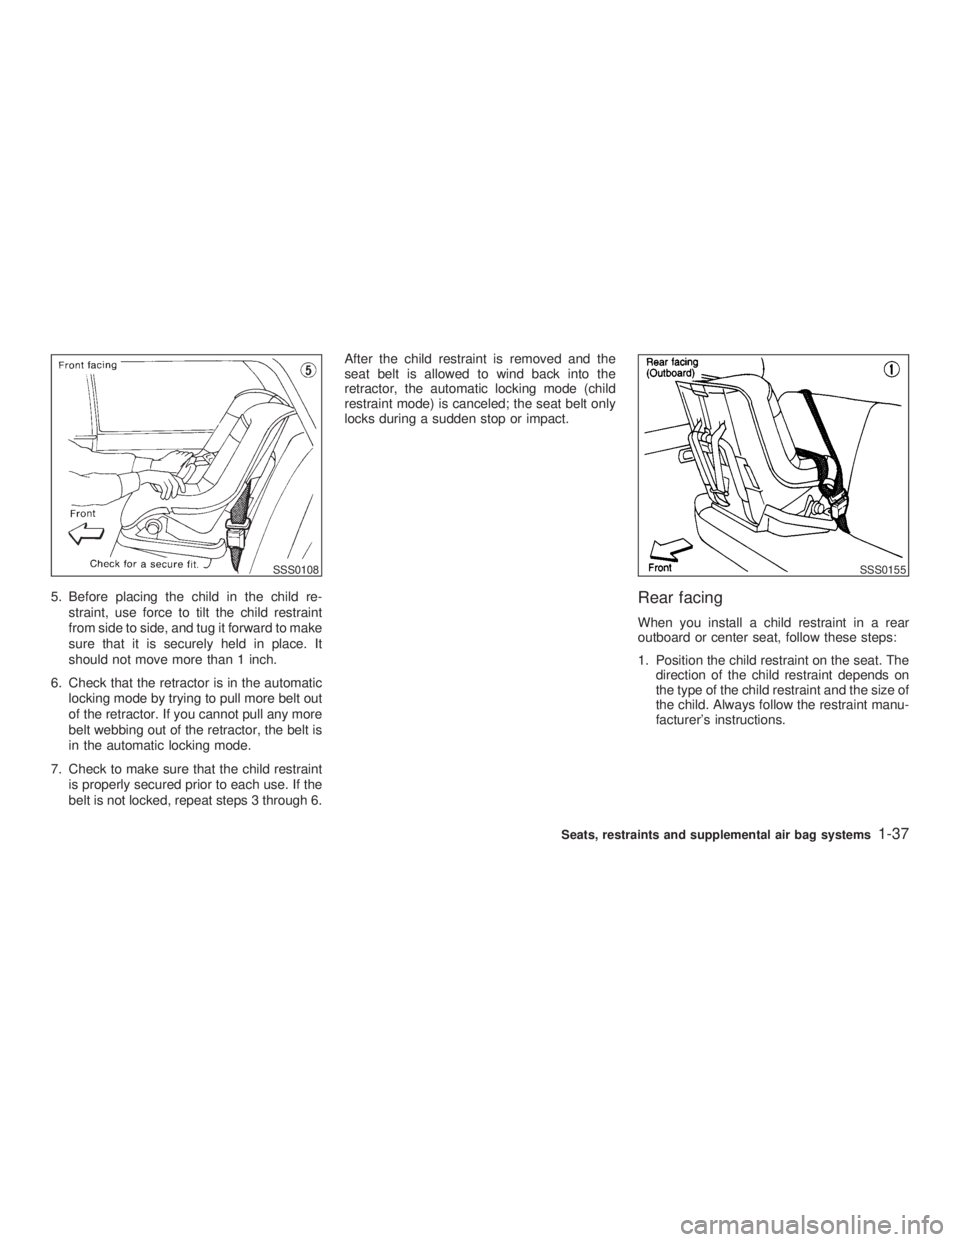
5. Before placing the child in the child re-
straint, use force to tilt the child restraint
from side to side, and tug it forward to make
sure that it is securely held in place. It
should not move more than 1 inch.
6. Check that the retractor is in the automatic
locking mode by trying to pull more belt out
of the retractor. If you cannot pull any more
belt webbing out of the retractor, the belt is
in the automatic locking mode.
7. Check to make sure that the child restraint
is properly secured prior to each use. If the
belt is not locked, repeat steps 3 through 6. After the child restraint is removed and the
seat belt is allowed to wind back into the
retractor, the automatic locking mode (child
restraint mode) is canceled; the seat belt only
locks during a sudden stop or impact.
Rear facing When you install a child restraint in a rear
outboard or center seat, follow these steps:
1. Position the child restraint on the seat. The
direction of the child restraint depends on
the type of the child restraint and the size of
the child. Always follow the restraint manu-
facturer's instructions.SSS0108 SSS0155
Seats, restraints and supplemental air bag systems
1-37
Z 02.11.1/V35-D/V5.0
X
Page 45 of 256
4. Allow the belt to retract. Pull up on the belt
to remove any slack in the belt. 5. Before placing the child in the child re-
straint, use force to tilt the child restraint
from side to side, and tug it forward to make
sure that it is securely held in place. It
should not move more than 1 inch.
6. Check that the retractor is in the automatic
locking mode by trying to pull more belt out
of the retractor. If you cannot pull any more
belt webbing out of the retractor, the belt is
in the automatic locking mode.
7. Check to make sure that the child restraint
is properly secured prior to each use. If the
belt is not locked, repeat steps 3 through 6. After the child restraint is removed and the
seat belt is allowed to wind back into the
retractor, the automatic locking mode (child
restraint mode) is canceled; the seat belt only
locks during a sudden stop or impact.
SSS0109 SSS0110
Seats, restraints and supplemental air bag systems
1-39
Z 02.11.1/V35-D/V5.0
X
Page 48 of 256

O After removing a rear seat head re-
straint for top tether installation,
store it securely to prevent it from
causing injury to passengers or dam-
age to the vehicle in case of sudden
braking or an accident. Always re-
place it and adjust properly when top
tether is no longer in use. If your child restraint has a top tether strap, it
must be secured to the anchor point provided
behind its position.
First, adjust the seat back so that it is upright.
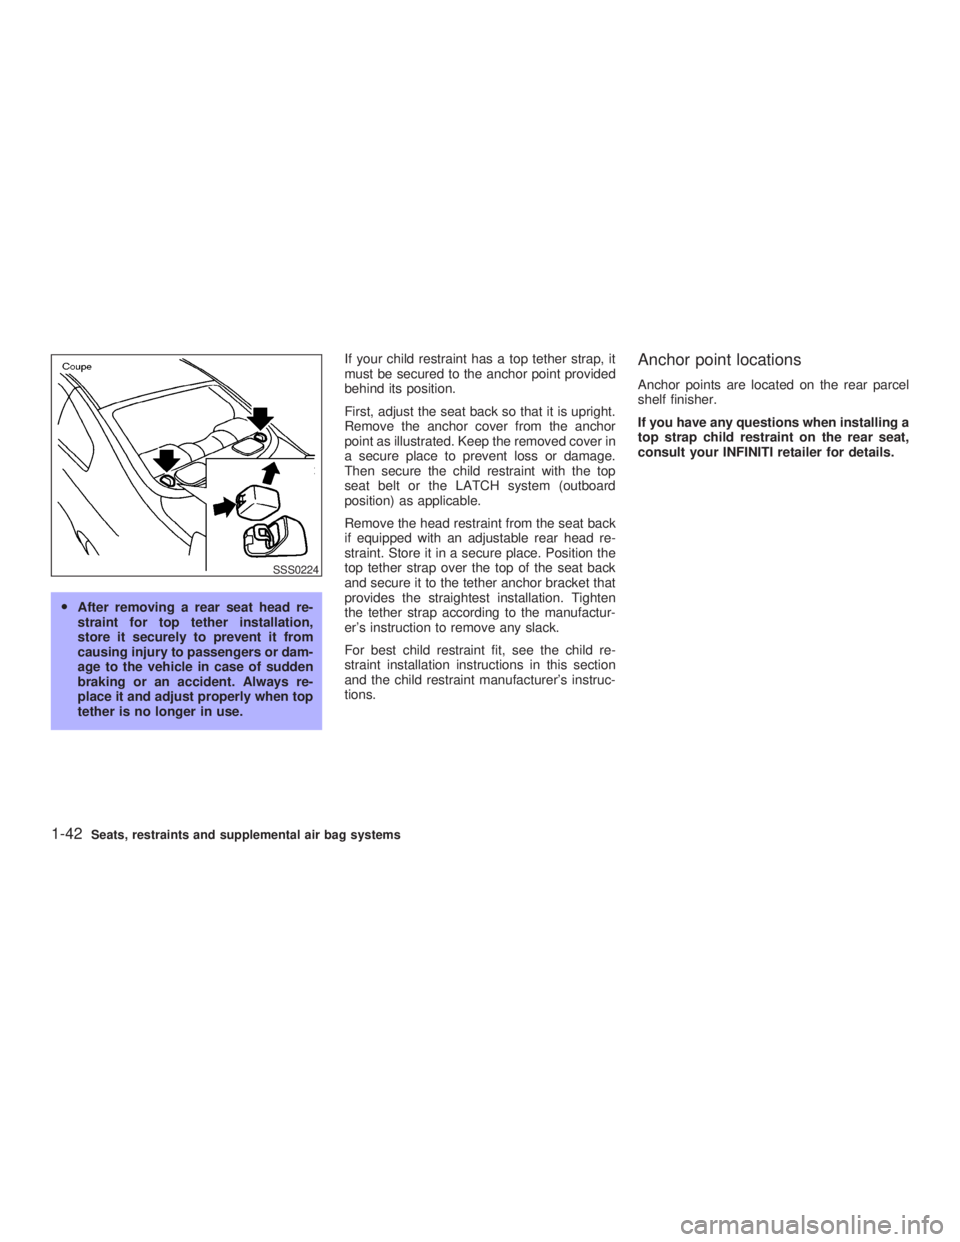
Remove the anchor cover from the anchor
point as illustrated. Keep the removed cover in
a secure place to prevent loss or damage.
Then secure the child restraint with the top
seat belt or the LATCH system (outboard
position) as applicable.
Remove the head restraint from the seat back
if equipped with an adjustable rear head re-
straint. Store it in a secure place. Position the
top tether strap over the top of the seat back
and secure it to the tether anchor bracket that
provides the straightest installation. Tighten
the tether strap according to the manufactur-
er's instruction to remove any slack.
For best child restraint fit, see the child re-
straint installation instructions in this section
and the child restraint manufacturer's instruc-
tions. Anchor point locations Anchor points are located on the rear parcel
shelf finisher.
If you have any questions when installing a
top strap child restraint on the rear seat,
consult your INFINITI retailer for details.SSS0224
1-42 Seats, restraints and supplemental air bag systems
Z 02.11.6/V35-D/V5.0
X
Page 51 of 256
4. Allow the belt to retract. Pull up on the belt
to remove any slack in the belt. 5. Before placing the child in the child re-
straint, use force to tilt the child restraint
from side to side, and tug it forward to make
sure that it is securely held in place. It
should not move more than 1 inch.
6. Check that the retractor is in the automatic
locking mode by trying to pull more belt out
of the retractor. If you cannot pull any more
belt webbing out of the retractor, the belt is
in the automatic locking mode.
7. Check to make sure that the child restraint
is properly secured prior to each use. If the
lap belt is not locked, repeat steps 3
through 6. After the child restraint is removed and the
seat belt is allowed to wind back into the
retractor, the automatic locking mode (child
restraint mode) is canceled; the seat belt only
locks during a sudden stop or impact.
SSS0056 SSS0114
Seats, restraints and supplemental air bag systems
1-45
Z 02.11.1/V35-D/V5.0
X
Page 113 of 256

AUTOMATIC SEAT POSITIONER
OPERATION This system is designed so that the driver's
seat will automatically move when the auto-
matic transmission selector lever is in the P
(Park) position or when the parking brake is
applied (manual transmission model). This al-
lows the driver to get in and out of the driver's
seat more easily.
When one of the following conditions is met,
the driver's seat will slide backward. (AT mod-
els only)
O When the key is removed from the ignition
switch.
O When the driver's door is opened with the
key turned to ACC or LOCK.
O When the key is turned from ON to ACC
with the driver's door open.
When one of the following conditions is met,
the driver's seat will return to the positions
before being set. (AT models only)
O When the key is inserted into the ignition
switch.
O When the driver's door is closed with the
key turned to LOCK.
O When the key is turned from ACC to ON with the driver's door open.
PROCEDURE FOR STORING
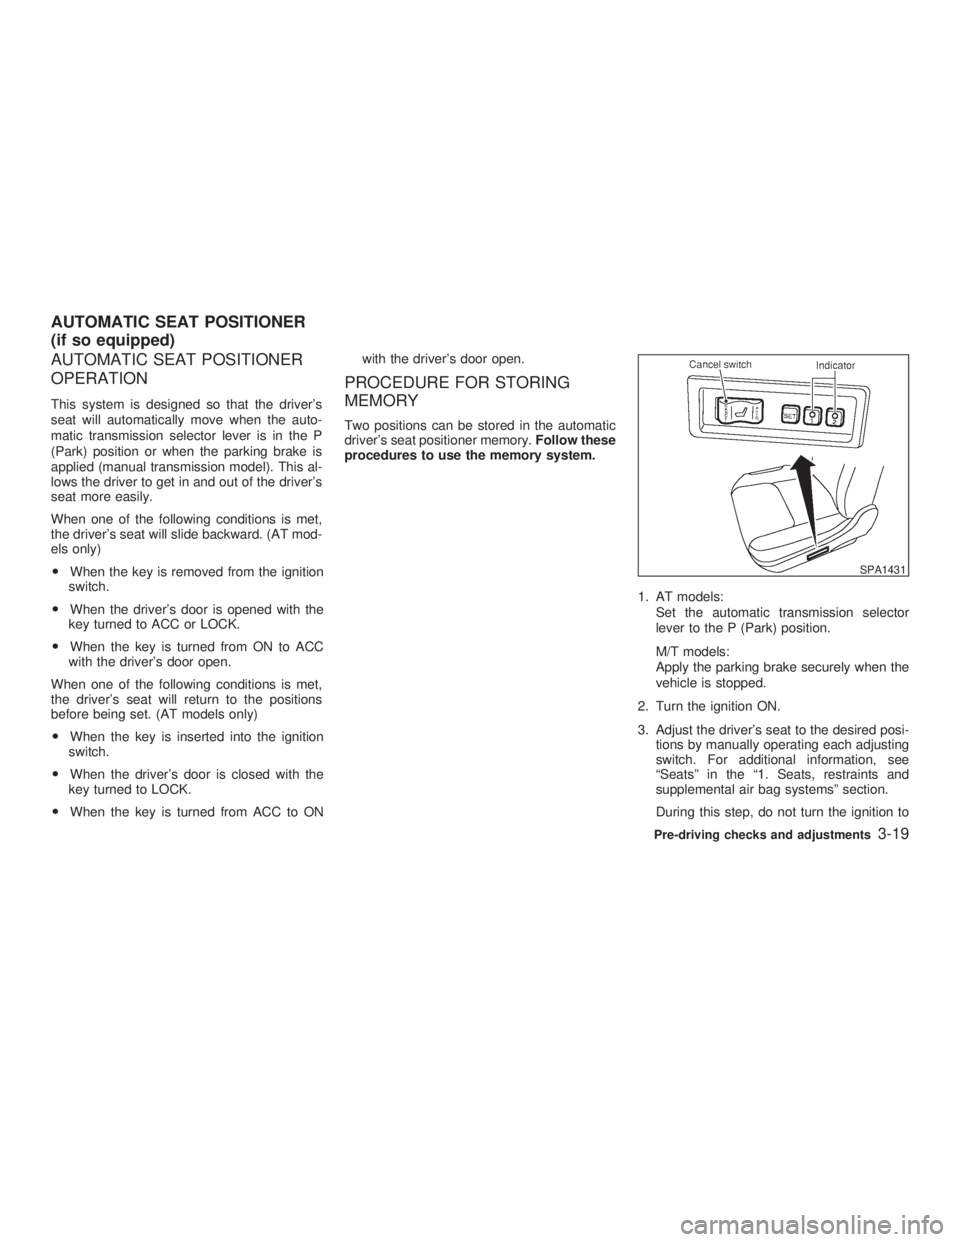
MEMORY Two positions can be stored in the automatic
driver's seat positioner memory. Follow these
procedures to use the memory system.
1. AT models:
Set the automatic transmission selector
lever to the P (Park) position.
M/T models:
Apply the parking brake securely when the
vehicle is stopped.
2. Turn the ignition ON.
3. Adjust the driver's seat to the desired posi-
tions by manually operating each adjusting
switch. For additional information, see
ªSeatsº in the ª1. Seats, restraints and
supplemental air bag systemsº section.
During this step, do not turn the ignition to SPA1431
AUTOMATIC SEAT POSITIONER
(if so equipped)
Pre-driving checks and adjustments
3-19
Z 02.7.29/V35-D/V5.0
X