2003 INFINITI G35 homelink
[x] Cancel search: homelinkPage 55 of 256
Sunroof (if so equipped) ......................................... 2-33
Automatic sunroof .............................................. 2-33
Interior light ............................................................. 2-35
Interior light......................................................... 2-35
Map light ............................................................. 2-35
Rear personal light ............................................. 2-36
Vanity mirror light (if so equipped) .......................... 2-36
Trunk light ............................................................... 2-37
HomeLink
Universal Transceiver
(if so equipped) ....................................................... 2-37 Programming HomeLink
................................... 2-38
Programming HomeLink
for Canadian
customers ........................................................... 2-39
Operating the HomeLink
Universal
Transceiver ......................................................... 2-39
Programming trouble diagnosis.......................... 2-39
Clearing the programmed information................ 2-40
Reprogramming a single HomeLink
button...... 2-40
If your vehicle is stolen ...................................... 2-40
Z 02.7.29/V35-D/V5.0
X
Page 91 of 256
The light illuminates when the trunk lid is
opened. When the trunk lid is closed, the light
will go off. The HomeLink Universal Transceiver pro-
vides a convenient way to consolidate the
functions of up to three individual hand-held
transmitters into one built-in device.
HomeLink Universal Transceiver:
O Will operate most Radio Frequency (RF)
devices such as garage doors, gates, home
and office lighting, entry door locks and
security systems.
O Is powered by your vehicle's battery. No
separate batteries are required. If the vehi-
cle's battery is discharged or is discon-
nected, HomeLink will retain all program-
ming.
Once the HomeLink Universal Transceiver
is programmed, retain the original trans-
mitter for future programming procedures
(i.e., new vehicle purchases). Upon sale of
the vehicle, the programmed HomeLink
Universal Transceiver buttons should be
erased for security purposes. For addi-
tional information, refer to ªProgramming
HomeLink º later in this section. WARNING O Do not use the HomeLink Universal
Transceiver with any garage door
opener that lacks safety stop and
reverse features as required by fed-
eral safety standards. (These stan-
dards became effective for opener
models manufactured after April 1,
1982). A garage door opener which
cannot detect an object in the path of
a closing garage door and then auto-
matically stop and reverse, does not
meet current federal safety stan-
dards. Using a garage door opener
without these features increases the
risk of serious injury or death.
O During programming, your garage
door or gate may open or close. Make
sure that people and objects are clear
of the garage door or gate that you
are programming.
O Your vehicle's engine should be
turned off while programming the
HomeLink
Universal Transceiver.TRUNK LIGHT
HomeLink UNIVERSAL
TRANSCEIVER (if so equipped)
Instruments and controls
2-37
Z 02.7.29/V35-D/V5.0
X
Page 92 of 256
PROGRAMMING HomeLink To program your HomeLink Transceiver to
operate a garage door, gate, or entry door
opener, home or office lighting, you need to be
at the same location as the device. Note:
Garage door openers (manufactured after
1996) have ªrolling code protectionº. To pro-
gram a garage door opener equipped with
ªrolling code protectionº; you will need to use a
ladder to get up to the garage door opener
motor to be able to access the ªsmart or learnº
program button.
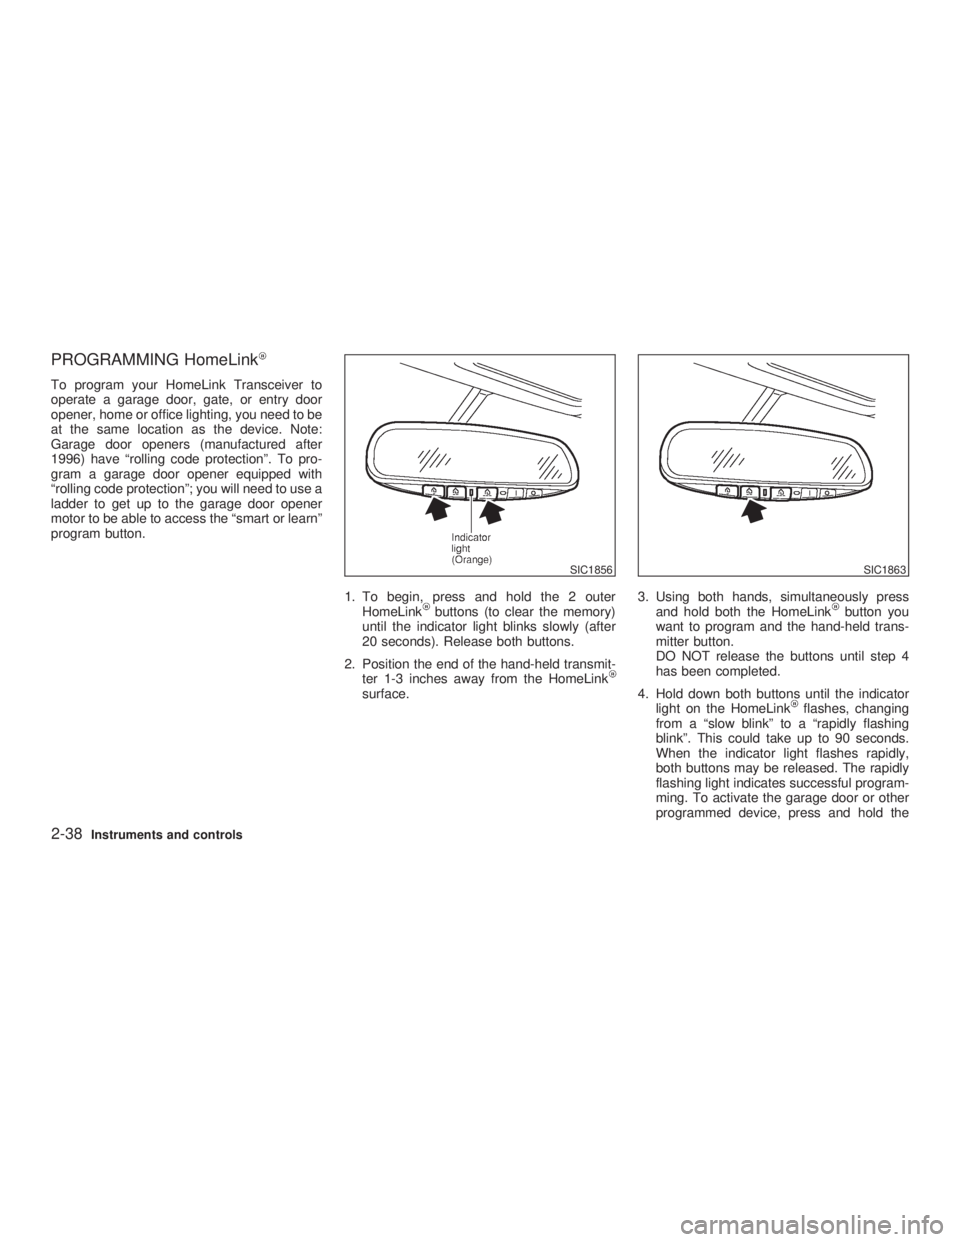
1. To begin, press and hold the 2 outer
HomeLink buttons (to clear the memory)
until the indicator light blinks slowly (after
20 seconds). Release both buttons.
2. Position the end of the hand-held transmit-
ter 1-3 inches away from the HomeLink
surface. 3. Using both hands, simultaneously press
and hold both the HomeLink button you
want to program and the hand-held trans-
mitter button.
DO NOT release the buttons until step 4
has been completed.
4. Hold down both buttons until the indicator
light on the HomeLink flashes, changing
from a ªslow blinkº to a ªrapidly flashing
blinkº. This could take up to 90 seconds.
When the indicator light flashes rapidly,
both buttons may be released. The rapidly
flashing light indicates successful program-
ming. To activate the garage door or other
programmed device, press and hold the SIC1856 SIC1863
2-38 Instruments and controls
Z 02.7.29/V35-D/V5.0
X
Page 93 of 256
programmed HomeLink button - releasing
when the device begins to activate.
5. If the indicator light on the HomeLink
blinks rapidly for two seconds and then
turns solid, HomeLink has picked up a
ªrolling codeº garage door opener signal.
You will need to proceed with the next steps
to train the HomeLink to complete the
programming which may require a ladder
and another person for convenience.
6. Press and release the ªsmartº or ªlearnº
program button located on the garage door
opener's motor to activate the ªtraining
modeº. This button is usually located near
the antenna wire that hangs down from the
motor. If the wire originates from under a
light lens, you will need to remove the lens
to access the program button.
NOTE:
Once you have pressed and released the
program button on the garage door open-
er's motor and the ªtraining lightº is lit, you
have 30 seconds in which to perform step
7. Use the help of a second person for
convenience to assist when performing
this step.
7. Quickly within 30 seconds of pressing and
releasing the garage door opener program button, firmly press and release the
HomeLink button you've just pro-
grammed. Press and release the
HomeLink button up to three times to
complete the training.
8. Your HomeLink button should now be
programmed. (To program the remaining
HomeLink buttons for additional door or
gate openers, follow steps 2-8 only.
NOTE:
Do not repeat step one unless you want to
ªclearº all previously programmed
HomeLink buttons).
If you have any questions or are having diffi-
culty programming your HomeLink buttons,
please refer to the HomeLink web site at:
www.homelink.com or call 1-800-662-6200.
PROGRAMMING HomeLink FOR
CANADIAN CUSTOMERS Prior to 1992, D.O.C. regulations required
hand-held transmitters to stop transmitting af-
ter 2 seconds. To program your hand-held
transmitter to HomeLink , continue to press
and hold the HomeLink button (note steps 2
through 4 under ªProgramming HomeLink º)
while you press and re-press (ªcycleº) your
hand-held transmitter every 2 seconds until the indicator light flashes rapidly (indicating
successful programming).
NOTE:
If programming a garage door opener, etc.,
it is advised to unplug the device during
the ªcyclingº process to prevent possible
damage to the garage door opener compo-
nents.
OPERATING THE HomeLink
UNIVERSAL TRANSCEIVER The HomeLink Universal Transceiver (once
programmed) may now be used to activate the
garage door, etc. To operate, simply press the
appropriate programmed HomeLink Univer-
sal Transceiver button. The red indicator light
will illuminate while the signal is being trans-
mitted.
PROGRAMMING TROUBLE
DIAGNOSIS If the HomeLink does not quickly learn the
hand-held transmitter information:
O replace the hand-held transmitter batteries
with new batteries.
O position the hand-held transmitter with its
battery area facing away from the
HomeLink surface. Instruments and controls
2-39
Z 02.7.29/V35-D/V5.0
X
Page 94 of 256
O press and hold both the HomeLink and
hand-held transmitter buttons without inter-
ruption.
O position the hand-held transmitter 2 to 5
inches (50 to 127 mm) away from the
HomeLink surface. Hold the transmitter in
that position for up to 15 seconds. If
HomeLink is not programmed within that
time, try holding the transmitter in another
position - keeping the indicator light in view
at all times.
If you continue to have programming difficul-
ties, please contact the INFINITI Consumer
Affairs Department. The phone numbers are
located in the Foreword of this Owner's
Manual.
CLEARING THE PROGRAMMED
INFORMATION Individual buttons cannot be cleared, however
to clear all programming, press and hold the
two outside buttons and release when the
indicator light begins to flash (approximately
20 seconds). REPROGRAMMING A SINGLE
HomeLink BUTTONTo reprogram a HomeLink Universal Trans-
ceiver button, complete the following.
1. Press and hold the desired HomeLink
button. Do not release the button until step
4 has been completed.
2. When the indicator light begins to flash
slowly (after 20 seconds), position the
hand-held transmitter 2 to 5 inches (50 to
127 mm) away from the HomeLink sur-
face.
3. Press and hold the hand-held transmitter
button.
4. The HomeLink indicator light will flash,
first slowly and then rapidly. When the
indicator light begins to flash rapidly, re-
lease both buttons.
The HomeLink Universal Transceiver button
has now been reprogrammed. The new device
can be activated by pushing the HomeLink
button that was just programmed. This proce-
dure will not affect any other programmed
HomeLink buttons.
IF YOUR VEHICLE IS STOLEN If your vehicle is stolen, you should change the codes of any non-rolling code device that has
been programmed into HomeLink . Consult
the Owner's Manual of each device or call the
manufacturer or dealer of those devices for
additional information.
When your vehicle is recovered, you will
need to reprogram the HomeLink Univer-
sal Transceiver with your new transmitter
information.
FCC Notice:
This device complies with FCC rules part
15. Operation is subject to the following
two conditions: (1) This device may not
cause harmful interference and (2) This
device must accept any interference that
may be received, including interference
that may cause undesired operation.
The transmitter has been tested and com-
plies with FCC and DOC/MDC rules.
Changes or modifications not expressly
approved by the party responsible for com-
pliance could void the user's authority to
operate the device.
DOC: ISTC 1763K1313
FCC I.D.: CB2V67690
2-40 Instruments and controls
Z 02.7.29/V35-D/V5.0
X
Page 111 of 256
CAUTIONStore the main sun visor after storing
the extension sun visor.
AUTOMATIC ANTI-GLARE INSIDE
MIRROR (if so equipped)
WARNING Use the AUTO position only when nec-
essary, because it reduces rear view
clarity.
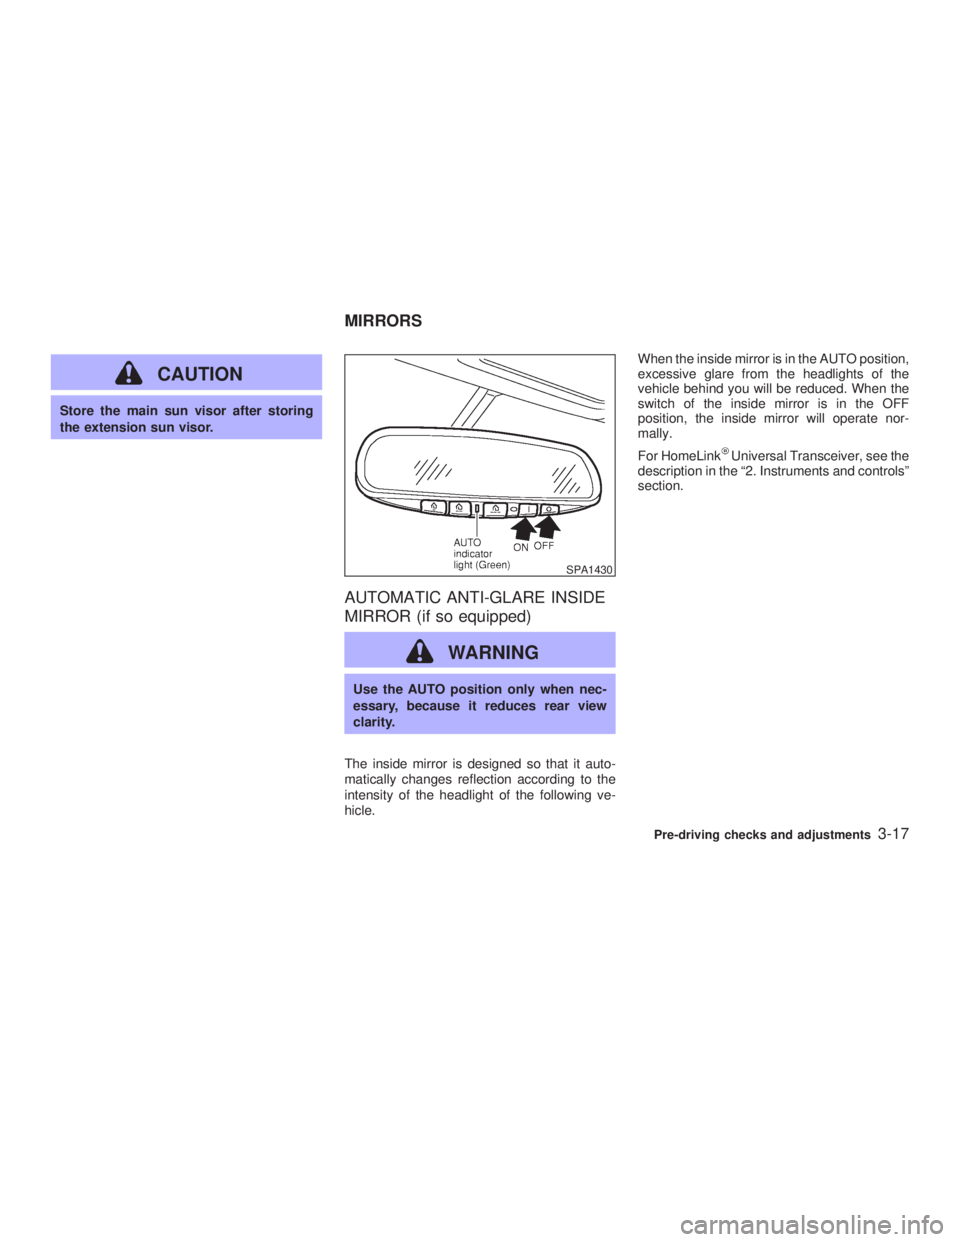
The inside mirror is designed so that it auto-
matically changes reflection according to the
intensity of the headlight of the following ve-
hicle. When the inside mirror is in the AUTO position,
excessive glare from the headlights of the
vehicle behind you will be reduced. When the
switch of the inside mirror is in the OFF
position, the inside mirror will operate nor-
mally.
For HomeLink Universal Transceiver, see the
description in the ª2. Instruments and controlsº
section. SPA1430
MIRRORS
Pre-driving checks and adjustments
3-17
Z 02.7.29/V35-D/V5.0
X
Page 249 of 256

Fuel
Capacities and recommended fuel/lubricants/
fluids .......................................................... 10-2
filler cap ..................................................... 3-14
filler lid ....................................................... 3-14
Fuel economy ............................................ 5-17
Fuel octane rating ..................................... 10-3
Fuel recommendation................................ 10-3
Gauge .......................................................... 2-5
Fuses .............................................................. 8-20
Fusible links .................................................... 8-20
G
Garage door opener, HomeLink Universal
Transceiver ..................................................... 2-37
Gas cap .......................................................... 3-14
Gauge ............................................................... 2-3
Engine coolant temperature gauge ............. 2-5
Fuel gauge .................................................. 2-5
Odometer..................................................... 2-4
Speedometer ............................................... 2-4
Tachometer ................................................. 2-4
General maintenance ....................................... 9-2
Glasses case .................................................. 2-26
Glove box........................................................ 2-27
Glove box lock ................................................ 2-27
H
Hazard warning flasher switch........................ 2-20
Head restraints ................................................. 1-9 Headlights
Bulb replacement ...................................... 8-25
Headlight switch ........................................ 2-17
Xenon headlights ..................................... 2-17
Heated seats................................................... 2-21
Heater
Engine coolant heater ............................... 5-24
Heater and air conditioner (automatic) ....... 4-3
HomeLink Universal Transceiver .................. 2-37
Hood, release ................................................. 3-10
Horn ................................................................ 2-21
How to stop alarm, Vehicle security ............... 2-14
I
Ignition switch ................................................... 5-4
Automatic transmission models ........... 5-4, 5-8
Key positions ............................................... 5-6
Manual transmission models ............. 5-5, 5-12
Immobilizer system ......................................... 2-14
In-cabin microfilter ............................................ 4-5
Indicator lights................................................. 2-11
Infiniti Vehicle Immobilizer System, Engine
start ................................................................... 5-6
Inside Automatic anti-glare mirror................... 3-17
Inspection/maintenance (I/M) test................. 10-21
Installing front bumper cover ........................ 10-12
Instrument panel ............................................... 2-2
Instrument pocket ........................................... 2-25
Interior light ..................................................... 2-35
Interior light replacement ................................ 8-26
Interior trunk lid release .................................. 3-12
ISOFIX child restraint ..................................... 1-40 J
Jump starting .................................................... 6-7
K
Keyless entry (See remote keyless entry
system) ............................................................. 3-5
Keys .................................................................. 3-2
L
Label, Air conditioner specification label ...... 10-12
Label, Emission control information label ..... 10-11
Label, F.M.V.S.S. certification label.............. 10-10
Labels
Air bag warning labels............................... 1-23
Engine serial number .............................. 10-10
Vehicle identification number (VIN)........... 10-9
LATCH system................................................ 1-40
License plate, Installing front license plate... 10-13
Light
Air bag warning light ................................. 1-23
Bulb replacement ...................................... 8-23
Flashing signal .......................................... 2-19
Fog light switch ......................................... 2-20
Headlight switch ........................................ 2-17
Headlights Bulb replacement .................... 8-25
Interior light................................................ 2-35
Map light .................................................... 2-35
Rear personal light .................................... 2-36
Replacement ............................................. 8-23
Trunk light.................................................. 2-37
11-3
Z 02.7.29/V35-D/V5.0
X
Page 252 of 256

T
Tachometer ....................................................... 2-4
Temperature gauge, Engine coolant temperature
gauge ................................................................ 2-5
Theft (Infiniti Vehicle Immobilizer System), Engine
start ................................................................. 2-14
Three way catalyst ............................................ 5-3
Tilting steering wheel ...................................... 3-16
Tire
Flat tire ........................................................ 6-2
Uniform tire quality grading ..................... 10-19
Tires
Spare tire ................................................... 8-34
Tire chains ................................................. 8-31
Tire placard ............................................. 10-11
Tire pressure ............................................. 8-30
Types of tires............................................. 8-30
wheel/tire size............................................ 10-8
Wheels and tires ....................................... 8-30
Top tether strap child restraints ...................... 1-41
Towing
Tow truck towing ....................................... 6-11
Towing a trailer........................................ 10-15
Towing load/specification chart ............... 10-15
Towing safety .......................................... 10-17
Trailer towing ................................................ 10-15
Transceiver, HomeLink
Universal
Transceiver ..................................................... 2-37
Transmission
Automatic transmission fluid (ATF) ........... 8-10
Driving with automatic transmission .... 5-4, 5-8
Driving with manual transmission ...... 5-5, 5-12 Transmission selector lever lock
release ....................................................... 5-12
Transmitter (See remote keyless entry
system) ............................................................. 3-5
Traveling or registering your vehicle in another
country ............................................................ 10-9
Trunk
Access through rear seat ............................ 1-8
Interior trunk lid release ............................ 3-12
Lid lock opener lever ................................. 3-10
Light ........................................................... 2-37
Secondary trunk lid release ...................... 3-13
Turn signal switch ........................................... 2-19
U
Underbody cleaning .......................................... 7-3
Uniform tire quality grading........................... 10-19
V
Vanity mirror light ............................................ 2-36
Vehicle
Dimensions and weights ........................... 10-8
Dynamics control (VDC) system ............... 5-21
Identification number (VIN) ....................... 10-9
Loading information ................................. 10-14
Recovery (freeing a stuck vehicle)............ 6-13
Security system ......................................... 2-13
Ventilators ......................................................... 4-2 W
Warning labels, Air bag warning labels .......... 1-23
Warning light
Air bag warning light ........................ 1-23, 2-11
Anti-lock brake warning light ....................... 2-9
Brake warning light...................................... 2-9
Door open warning light ............................ 2-10
Seat belt warning light and chime............. 2-11
Warning lights ................................................... 2-9
Warning, Hazard warning flasher switch ........ 2-20
Warning, Warning/indicator lights and audible
reminders .......................................................... 2-9
Warranty, Emission control system
warranty ........................................................ 10-20
Washer switch, Windshield wiper and washer
switch .............................................................. 2-16
Washing ............................................................ 7-2
Waxing .............................................................. 7-2
Weights (See dimensions and weights) ......... 10-8
Wheel/tire size ................................................ 10-8
Wheels and tires ............................................. 8-30
Cleaning aluminum alloy wheels................. 7-3
Window washer fluid ....................................... 8-12
Window(s)
Automatic adjustment function (Coupe) .... 2-33
Automatic operation (For all door windows or
front door windows) ................................... 2-32
Cleaning ...................................................... 7-3
Open/close with key .................................... 3-3
Power windows ......................................... 2-31
Windshield wiper and washer switch.............. 2-16
Wiper
Windshield wiper and washer switch ........ 2-16
11-6
Z 02.7.29/V35-D/V5.0
X