Page 264 of 415

�µ
CONT INUED
This position mechani-
cally locks the transmission. Use
Park whenever you are turning of f or
starting the engine. To shif t out of
Park, you must press on the brake
pedal and have your f oot of f the
accelerator pedal. Pull the shif t lever
towards you, then move it out of
Park.
If you have done all of the above and
still cannot move the lever out of
Park, see Shif t Lock Release on page .
You must also pull the shif t lever
towards you to shift into Park. To
avoid transmission damage, come to
a complete stop bef ore shif ting into
Park. The shif t lever must be in Park
bef ore you can remove the key f rom
the ignition switch.
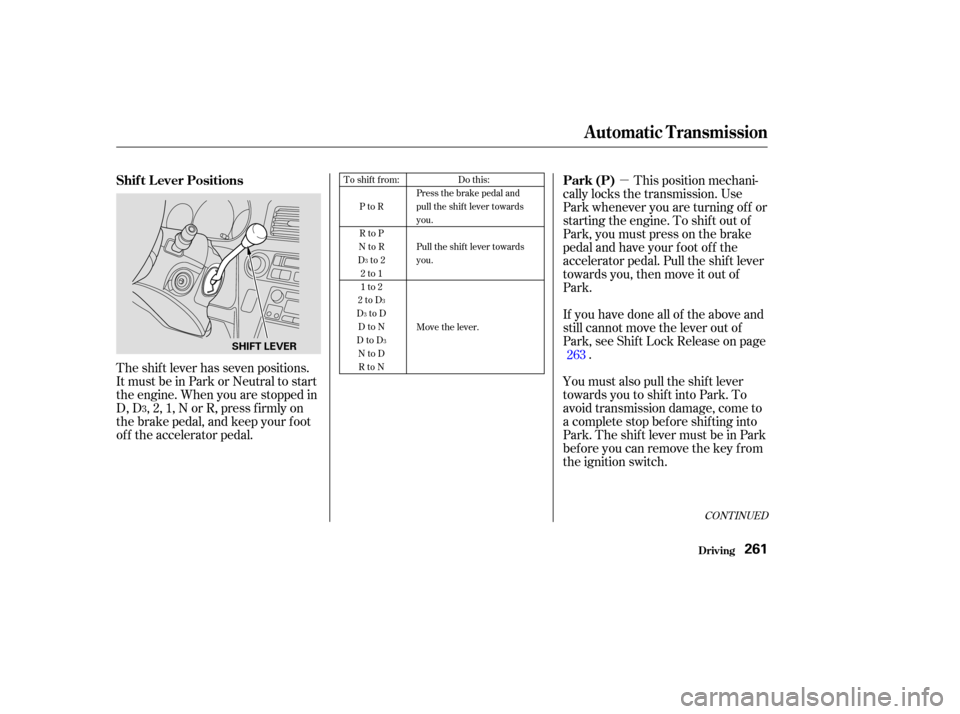
The shift lever has seven positions.
It must be in Park or Neutral to start
the engine. When you are stopped in
D, D , 2, 1, N or R, press f irmly on
the brake pedal, and keep your f oot
of f the accelerator pedal.
263Do this:
Press the brake pedal and
pull the shift lever towards
you.
Pull the shift lever towards
you.
Move the lever.
To shift from:
PtoR
RtoP
NtoR
Dto2 2to1
1to2
2toD
DtoD DtoN
DtoD NtoDRtoN
3
3
3
3
3
Automatic Transmission
Driving
Park (P)
Shif t L ever Positions
261
SHIFT LEVER
Page 266 of 415

�µ
�µ To shif t to Second,
pull the shif t lever towards you, then
shif t to the lower gear. This position
locks the transmission in second
gear. It does not downshif t to f irst
gear when you come to a stop.
Second gives you more power when
climbing, and increased engine
braking when going down steep hills.
Usesecondgearwhenstartingout
on a slippery surf ace or in deep snow.
It will help reduce wheelspin.
When driving down hill with a trailer,
use the Second position. If you exceed the maximum speed
f or the gear you are in, the engine
speed will enter into the tachometer’s
red zone. If this occurs, you may f eel
the engine cut in and out. This is
caused by a limiter in the engine’s
computer controls. The engine will
run normally when you reduce the
RPM below the red zone.
This allows you to move the shif t
lever out of Park if the normal
method of pushing on the brake
pedal and pulling the shif t lever does
not work.
Set the Parking brake.
Remove the key from the ignition
switch.
Place a cloth on the edge of the
Shif t Lock Release slot cover on
the steering column. Remove the
cover by caref ully prying on the
edge with a small f lat-tipped
screwdriver (not included in the
tool kit).
To shif t f rom Second to
First, pull the shift lever towards you,
then shift to the lower gear. With the
lever in this position, the transmis-
sion locks in First gear. By upshif t-
ing and downshif ting through 1, 2,
D , and D, you can operate this
transmission much like a manual
transmission without a clutch pedal. 1.
2.
3.
CONT INUED
3
Automatic Transmission
Driving
Second (2)
Engine Speed L imiter Shif t L ock Release
First (1)
263
Page 267 of 415
Insert the key in the Shift Lock
Release slot.
Push down on the key while you
pull the shif t lever towards you
and move it out of Park to Neutral.Remove the key from the Shift
Lock Release slot, then install a
new cover. Depress the brake
pedal and restart the engine.
If you need to use the Shif t Lock
Release, it means your vehicle is
developing a problem. Have the
vehicle checked by your Honda
dealer.
4.
5.
6.
Automatic Transmission
Driving264
SHIFT LOCK RELEASE SLOT COVER
Page 300 of 415
To add oil, unscrew and remove the
engine oil f ill cap on top of the valve
cover. Pour in the oil, and install the
engine oil f ill cap. Tighten it securely.
Wait a f ew minutes and recheck the
oil level. Do not f ill above the upper
mark; you could damage the engine.Oil is a major contributor to your
engine’s perf ormance and longevity.
Always use a premium-grade 5W-20
detergent oil displaying the API
Certif ication Seal. This seal indicates
the oil is energy conserving, and that
it meets the American Petroleum
Institute’s latest requirements.
Honda Motor Oil is the pref erred
5W-20 lubricant f or your vehicle. It is
highly recommended that you use
genuine Honda Motor Oil in your
vehicle f or optimum engine
protection.
Pour the oil slowly and caref ully so
you do not spill. Clean up any spills
immediately. Spilled oil could
damage components in the engine
compartment.
CONT INUED
A dding Oil
Recommended Oil
Engine Oil
Maint enance297
ENGINE OIL FILL CAP
Page 302 of 415

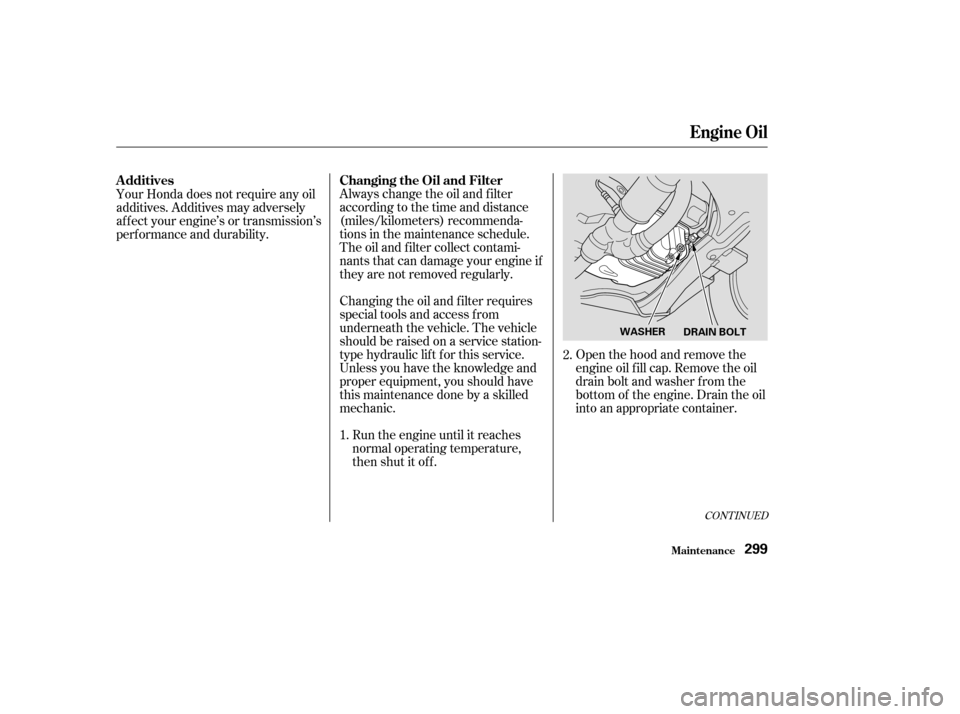
Always change the oil and f ilter
accordingtothetimeanddistance
(miles/kilometers) recommenda-
tions in the maintenance schedule.
The oil and f ilter collect contami-
nants that can damage your engine if
they are not removed regularly.
Changing the oil and f ilter requires
special tools and access f rom
underneath the vehicle. The vehicle
should be raised on a service station-
type hydraulic lif t f or this service.
Unless you have the knowledge and
proper equipment, you should have
this maintenance done by a skilled
mechanic.Run the engine until it reaches
normal operating temperature,
then shut it off. Open the hood and remove the
engine oil f ill cap. Remove the oil
drain bolt and washer f rom the
bottom of the engine. Drain the oil
into an appropriate container.
Your Honda does not require any oil
additives. Additives may adversely
af f ect your engine’s or transmission’s
perf ormance and durability.
1.2.
CONT INUED
Additives
Changing the Oil and Filter
Engine Oil
Maint enance299
WASHER
DRAIN BOLT
Page 303 of 415

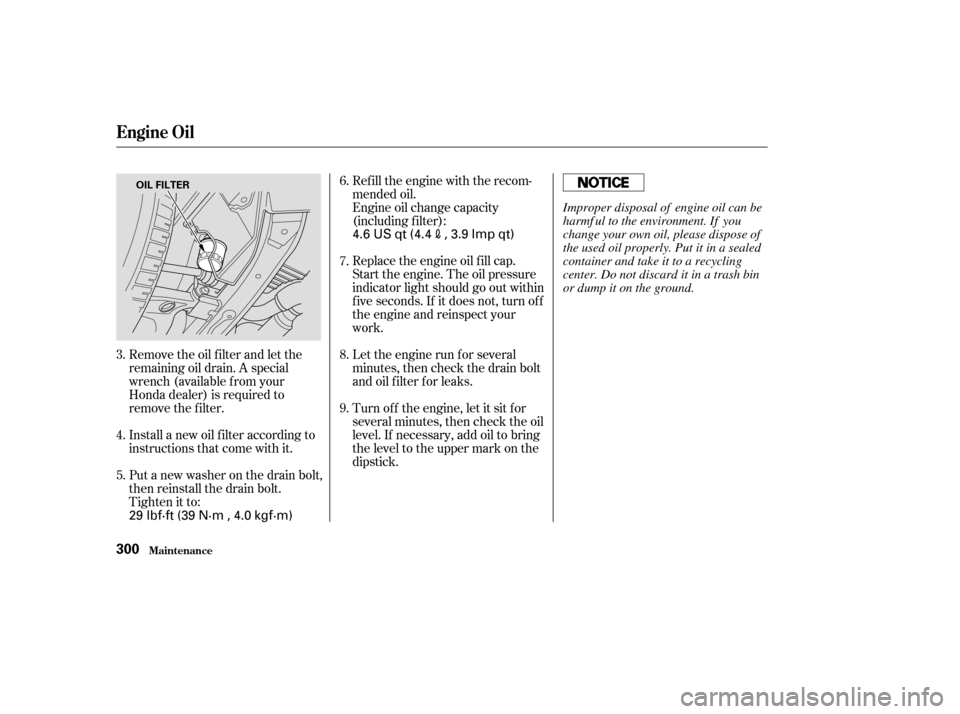
Remove the oil f ilter and let the
remaining oil drain. A special
wrench (available from your
Honda dealer) is required to
remove the f ilter.
Install a new oil f ilter according to
instructions that come with it.
Put a new washer on the drain bolt,
then reinstall the drain bolt.
Tighten it to:Refill the engine with the recom-
mended oil.
Engine oil change capacity
(including f ilter):
Replace the engine oil f ill cap.
Start the engine. The oil pressure
indicator light should go out within
f ive seconds. If it does not, turn of f
the engine and reinspect your
work.
Let the engine run f or several
minutes, then check the drain bolt
and oil f ilter f or leaks.
Turn of f the engine, let it sit f or
several minutes, then check the oil
level. If necessary, add oil to bring
the level to the upper mark on the
dipstick.
9. 8. 7. 6.
4.
5. 3.
Engine Oil
Maint enance300
OIL FILTER
29 lbf·ft (39 N·m , 4.0 kgf·m) 4.6 US qt (4.4
, 3.9 Imp qt)
Improper disposal of engine oil can be
harmf ul to the environment. If you
change your own oil, please dispose of
the used oil properly. Put it in a sealed
container and take it to a recycling
center. Do not discard it in a trash bin
or dump it on the ground.
Page 305 of 415
Make sure the engine and radiator
are cool.
Turn the radiator cap counter-
clockwise, without pressing down
on it, until it stops. This relieves
any pressure remaining in the
cooling system.
Remove the radiator cap by
pushing down and turning
counterclockwise.The coolant level should be up to
the base of the f iller neck. Add
coolant if it is low.Put the radiator cap back on.
Tighten it f ully.
Pour coolant into the reserve tank.
Fill it to half way between the MAX
and MIN marks. Put the cap back
on the reserve tank.
Do not add any rust inhibitors or
other additives to your vehicle’s
cooling system. They may not be
compatible with the coolant or
engine components.
Pour the coolant slowly and caref ully
so you do not spill. Clean up any
spills immediately. Spilled coolant
could damage components in the
engine compartment.
3. 4.5.
6.
1.
2.
Cooling Syst em
Maint enance302
RADIATOR CAP RESERVE TANK
Page 306 of 415
CONT INUED
Thecoolingsystemshouldbe
completely drained and ref illed with
new coolant according to the time
and distance recommendations in
the maintenance schedule. Only use
Honda All Season Antif reeze/
Coolant Type 2.
Draining the coolant requires access
to the underside of the vehicle.
Unless you have the tools and
knowledge, you should have this
maintenance done by a skilled
mechanic.Turn the ignition ON (II). Turn
the heater temperature control
dial f ully clockwise or set the
climate control system to
90°F (32°C). Turn the ignition of f .
Openthehood.Makesurethe
engine and radiator are cool to the
touch.
Remove the radiator cap.Loosen the drain plug on the
bottom of the radiator. The
coolant will drain through the
splash guard. Drain the coolant
into an appropriate container.
1.
3.
2.
Replacing Engine Coolant
Cooling Syst em
Maint enance303
DRAIN PLUG
DRAIN BOLT