Page 1110 of 1139
Check for voltage between the No. 2 terminal ofgauge assembly connector B (22P) and bodyground. There should be battery voltage.
GAUGE ASSEMBLY CONNECTOR B {22P)
Wire side of female terminals
ls there battery voltage?
YES Faulty side airbag cutoff indicator circuit;
replace the gauge assembly.l
NO Open in dashboard wire harness A; replace
dashboard wire harness A.I
YEL
12345X68910
1t12IJ,/1,/1,/)112122
\,
32.
33.
35.
36.
34.
Turn the ignition switch OFF.
Disconnect the OPDS unit harness 8P connector (A)
from the OPDS unit (see page 23- 124).
Turn the ignition switch ON (ll).
Does the slde airbag cutotf indicator come on?
YES Go to step 35.
NO Faulty OPDS unit; replace the OPDS unit.l
Turn the ignition switch OFF.
Remove the gauge assembly (see page 22-64).
Then disconnect gauge assembly connector A from
the gauge assembly.
(cont'd)
23-103
Page 1111 of 1139
sRs
DTG Troubleshooting (cont'dl
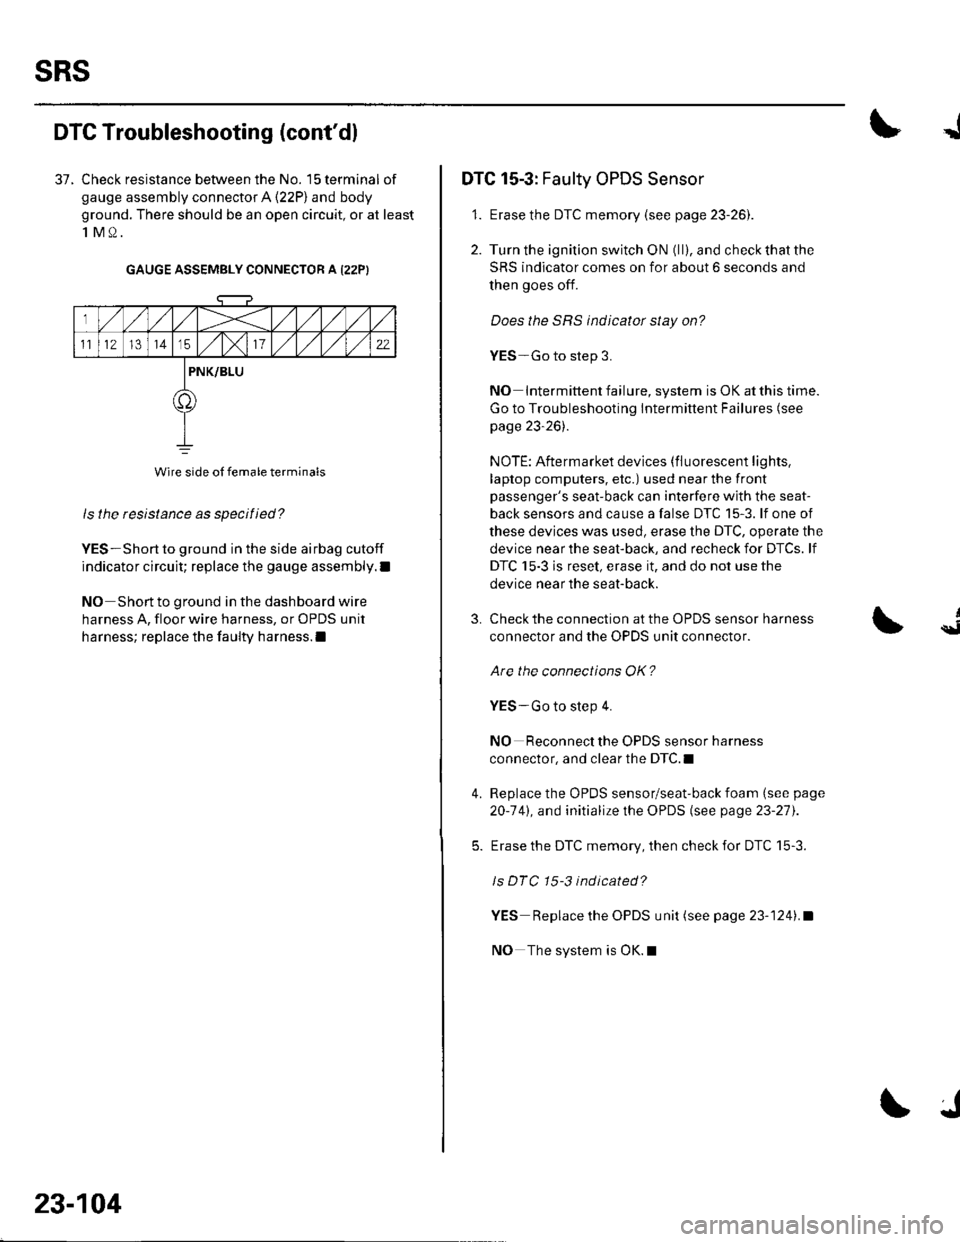
37. Check resistance between the No. 15 terminal of
gauge assembly connector A (22P) and body
ground. There should be an open circuit, or at least
1M0.
GAUGE ASSEMBLY CONNECTOR A I22PI
ls the resistance as specified?
YES-Short to ground in the side airbag cutoff
indicator circuit; replace the gauge assembly.l
NO Short to ground in the dashboard wire
harness A, floor wire harness, or OPDS unit
harness; replace the faulty harness.l
Wire side of female terminals
23-104
J
DTC 15-3: Faulty OPDS Sensor
1. Erase the DTC memory {see page 23-261.
2. Turn the ignition switch ON (ll), and check that the
SRS indicator comes on for about 6 seconds and
then goes off.
Does the SRS indicator stay on?
YES-Go to step 3.
NO Intermittent failure, system is OK at this time.
Go to Troubleshooting Intermittent Failures (see
page 23-26).
NOTE: Aftermarket devices (fluorescent lights,
laptop computers, etc.) used near the front
passenger's seat-back can interfere with the seat-
back sensors and cause a false DTC 15-3. lf one of
these devices was used, erase the DTC, operate the
device near the seat-back, and recheck for DTCs. lf
DTC 15-3 is reset, erase it, and do not use the
device near the seat-back.
3.
4.
Check the connection at the OPDS sensor harness
connector and the OPDS unit connector.
Are the connections OK?
YES-Go to step 4.
NO Reconnect the OPDS sensor harness
connector, and clear the DTC.I
Replace the OPDS sensor/seat-back foam (see page
20-141, and initialize the OPDS (see page 23-27).
Erase the DTC memory, then check for DTC 15-3.
ls DTC 15-3 indicated?
YES Replace the OPDS unit (see page 23-1241.a
NO The system is OK.l
{
Page 1112 of 1139
I
d
\9I
SRS Indicator Circuit Troubleshooting
The SRS Indicator Doesn't Come On
1. Turn the ignition switch ON (ll), and see if the otherindicators come on {brake system, etc).
Do the other indicators come on?
YES Go to step 2.
NO-Go to step 8.
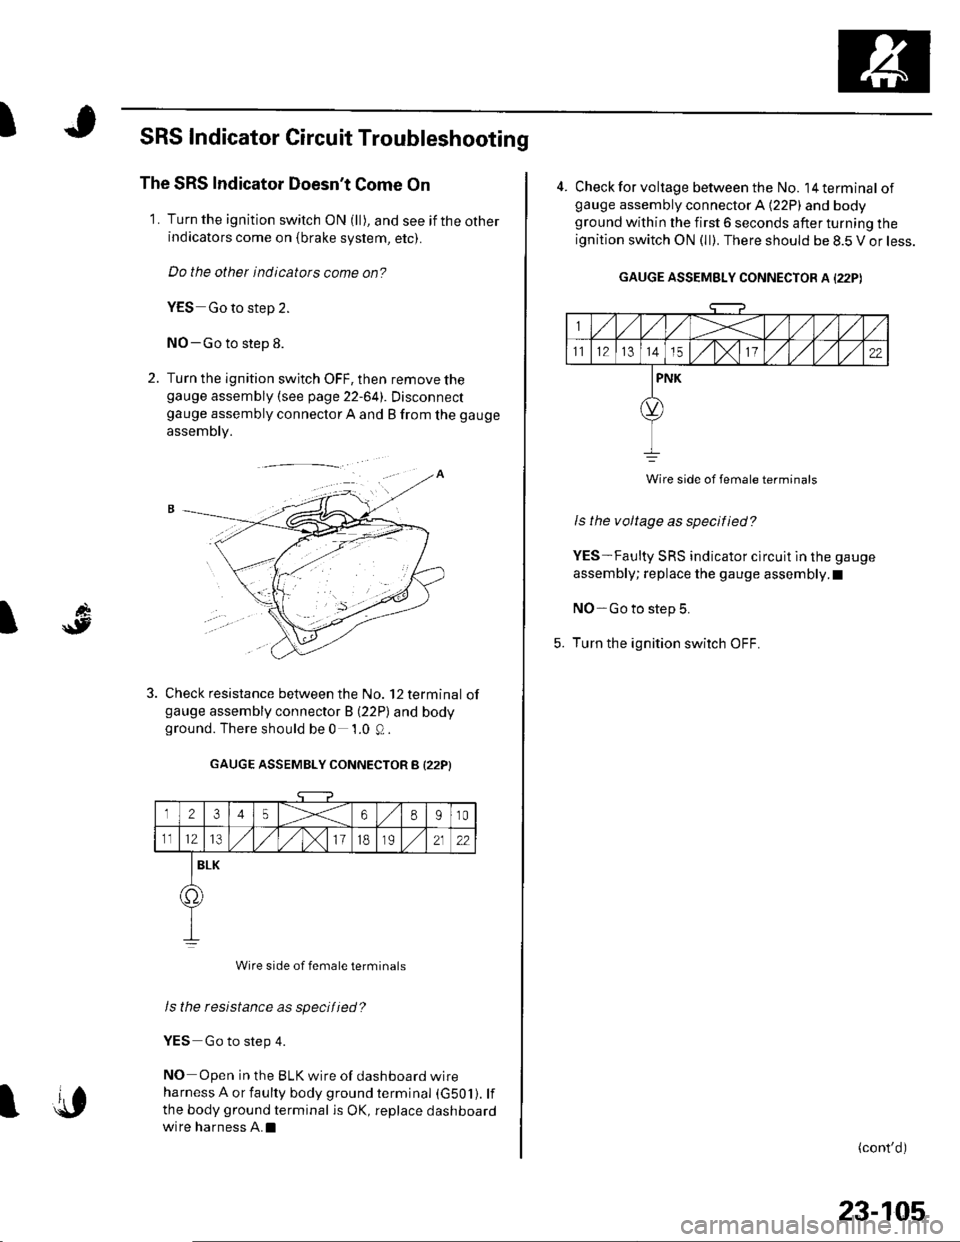
2. Turn the ignition switch OFF, then remove thegauge assembly {see page 22-641. Disconnectgauge assembly connector A and B from the gauge
assembly.
Check resistance between the No. 12 terminal ofgauge assembly connector B (22P) and bodyground. There should be 0 1.0 Q.
GAUGE ASSEMBLY CONNECTOR B I22PI
12345X68910
1112l3/)x111B2122
BLK
o.
Wire side of female terminals
Is the resistance as specified?
YES Go to step 4.
NO Open in the BLK wire of dashboard wire
harness A or faulty body ground terminal (G501). lf
the body ground terminal is OK, replace dashboard
wire harness A.Il{,
23-105
4. Check for voltage between the No. l4terminal ofgauge assembly connector A (22P) and bodyground within the first 6 seconds after turning the
ignition switch ON (ll). There should be 8.5 V or less.
GAUGE ASSEMBLY CONNECTOR A I22PI
Wire side of female terminats
Is the voltage as specified?
YES-Faulty SRS indicator clrcuit in the gauge
assembly; replace the gauge assembly.I
NO-Go to step 5.
Turn the ignition switch OFF.
(cont'd)
Page 1113 of 1139
sRs
6.
SRS Indicator Circuit Troubleshooting (cont'dl
7.
Disconnect SRS unit connector C (8P) from the SRS
unit {see step 7 on page 23-22).
Disconnect gauge assembly connector A (22P).
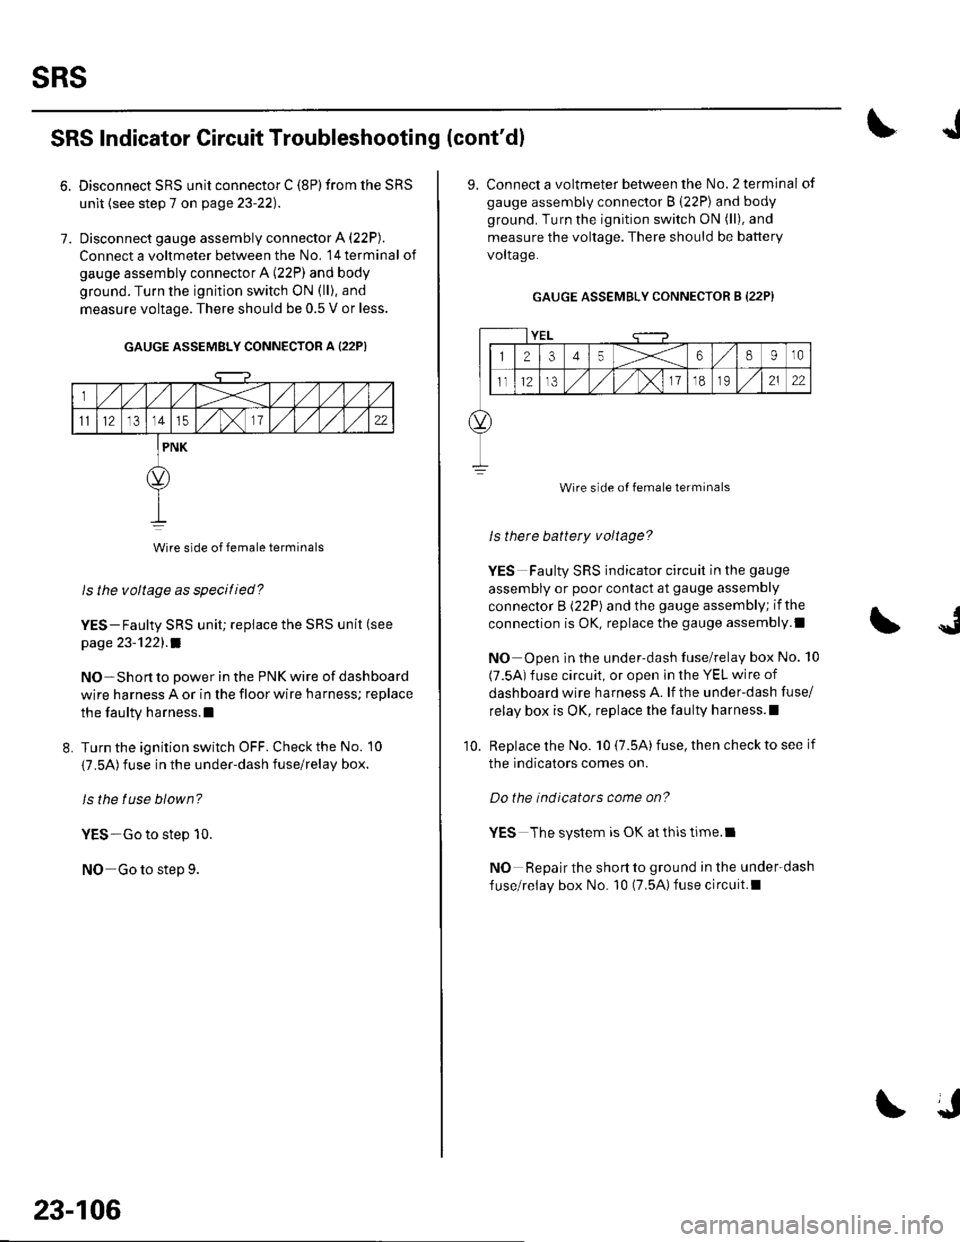
Connect a voltmeter between the No, l4terminal of
gauge assembly connector A (22P) and body
ground. Turn the ignition switch ON (ll), and
measure voltage. There should be 0.5 V or less.
GAUGE ASSEMBLY CONNECTOR A {22P)
Wire side of female terminals
ls the voltage as specitied?
YES-Faulty SRS unit; replace the SRS unit (see
page 23-'l22l.a
NO-Short to power in the PNK wire of dashboard
wire harness A or in the floor wire harness; replace
the faulty harness.l
L Turn the ignition switch OFF. Check the No. 10
{7.5A)fuse in the under-dash fuse/relay box.
ls the tuse blown?
YES-Go to step 10.
NO Go to step 9.
23-106
J
9. Connect a voltmeter between the No.2 terminal of
gauge assembly connector B (22P) and body
ground. Turn the ignition switch ON (ll), and
measure the voltage. There should be battery
voltaqe.
GAUGE ASSEMBLY CONNECTOR B (22P}
YEL
12345X68910
ll12,/ ,/,/x11o2122
Wire side of female terminals
ls therc battery voltage?
YES Faulty SRS indicator circuit in the gauge
assembly or poor contact at gauge assembly
connector B (22P) and the gauge assembly; if the
connection is OK, replace the gauge assembly.l
NO Open in the under-dash fuse/relay box No. 10
(7.5A) fuse circuit, or open in the YEL wire of
dashboard wire harness A. lf the under-dash fuse/
relay box is OK, replace lhe faulty harness.l
Replace the No. 10 (7.5A) fuse, then check to see if
the indicators comes on.
Do the indicators come on?
YES The system is OK at thls time.l
NO Repair the short to ground in the under-dash
fuse/relay box No. 10 (7.5A)fuse circuit.l
10.
Page 1115 of 1139
sRs
from the under-dash fuse/relav bor.
11.
18.
SRS Indicator Circuit Troubleshooting (cont'd)
'16. Disconnect dashboard wire harness B connector S
Turn the ignition switch ON {ll), and wait for 30
seconds. Then turn the ignition switch OFF,
Check the No. 13 (10A) fuse.
ls the f use OK?
YES Short to ground in dashboard wire harness
B; replace dashboard wire harness B.I
NO-Short to ground in the under-dash fuse/relay
box; replace the under-dash fuse/relay box.l
Turn the ignition switch OFF. Disconnect the
battery negative cable, and wait for 3 minutes.
Disconnect the driver's airbag 4P connector (see
step 2 on page 23-2'l).
Disconnect the front passenger's airbag 4P
connector (see step 3 on page 23-21).
Disconnect both seat belt tensioner 2P connectors
(see step 5 on page 23-22).
Disconnect SRS unit connector A (18P) from the
SRS unit (see step 7 on page 23-22).
19.
20.
21.
22.
23-108
24.Beconnect the battery negative cable.
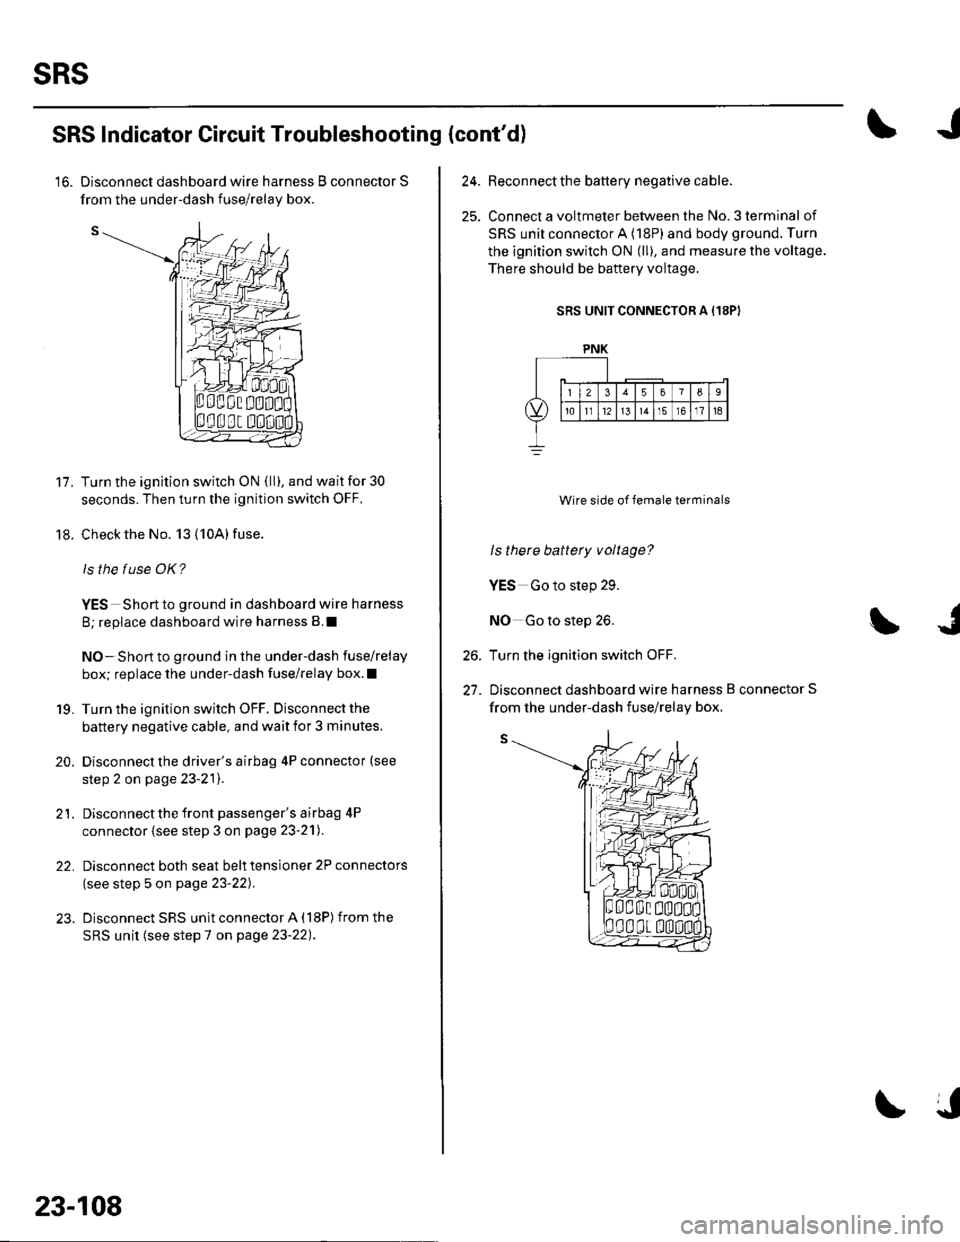
Connect a voltmeter between the No. 3 terminal of
SRS unit connector A (18P) and body ground. Turn
the ignition switch ON (ll), and measure the voltage.
There should be baftery voltage.
SRS UNIT CONNECTOR A (18PI
Wire side of female terminals
ls there battery voltage?
YES Go to step 29.
NO Go to step 26.
Turn the ignition switch OFF.
Disconnect dashboard wire harness B connector S
26.
27.
PNK
from the under-dash fuse/relav box.
Page 1117 of 1139
sRs
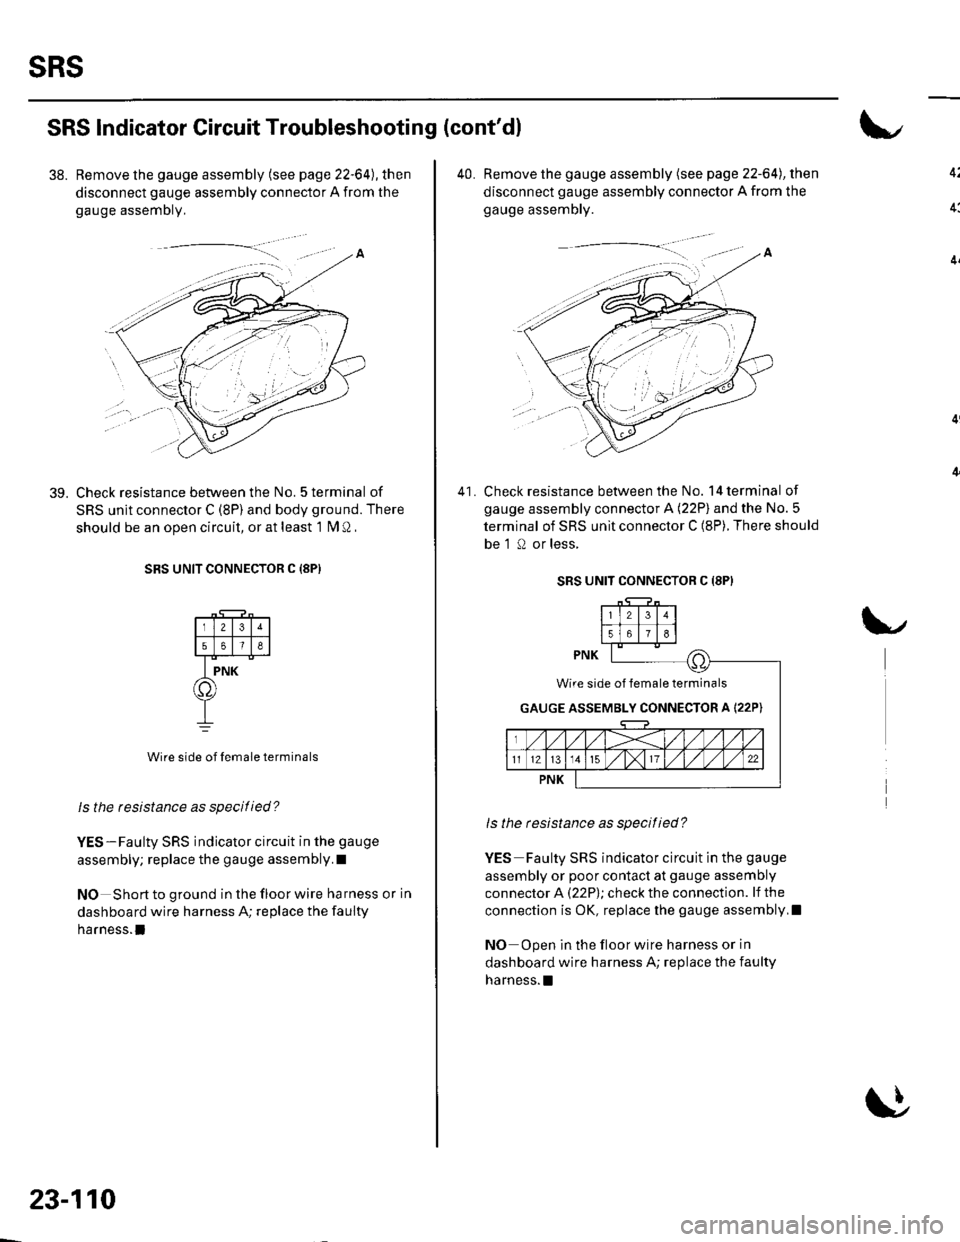
39.
SRS lndicator Gircuit Troubleshooting (cont'dl
38. Remove the gauge assembly (see page 22-64), then
disconnect gauge assembly connector A from the
gauge assemDly,
Check resistance between the No. 5 terminal of
SRS unit connector C (8P) and body ground. There
should be an ooen circuit, or at least 1 fM Q ,
SRS UNIT CONNECTOR C {8PI
Wire side of lemale terminals
ls the resbtance as specitied?
YES-Faulty SRS indicator circuit in the gauge
assembly; replace the gauge assembly.I
NO Short to ground in the floor wire harness or in
dashboard wire harness A; replace the faulty
harness.l
23-110
40. Remove the gauge assembly (see page 22-64), then
disconnect gauge assembly connector A from the
gauge assembly.
Check resistance between the No. 14 terminal of
gauge assembly connector A (22P) and the No.5
terminal of SRS unit connector C (8P). There should
be 'l 0 or less,
41.
SRS UNIT CONNECTOR C (8P}
ls the resistance as specitied?
YES Faulty SRS indicator circuit in the gauge
assembly or poor contact at gauge assembly
connector A (22P); check the connection. lf the
connection is OK, replace the gauge assembly,I
NO Open in the floor wire harness or in
dashboard wire harness A; replace the faulty
harness. !
Wire side of lemale terminals
GAUGE ASSEMBLY CONNECTOR A I22P)
Page 1119 of 1139
sRs
Component Replacement/lnspection After Deployment
NOTE: Before doing any SRS repairs. use the PGM
Tester SRS menu method to check for DTCS; refer to the
DTC Troubleshooting Index for the less obvious
deployed parts (seat beit tensioners, front sensors, side
airbag sensors, etc.)
After a collision where the seat belt tensioners
deployed, replace these items:' Seat belt tensioners. Seat belt buckle tensioners. SRS unit. Front impact sensors
After a collision where the front airbag(s) deployed.
replace these items:. SRS unit. Deployed airbag(s). Seat belt tensioners. Seat belt buckle tensioners. Front impact sensors
After a collision where the side airbag{s) deployed,
replace these items:. SRS unit. Deployed side airbag(s). Side impact senso(s)for the side(s) that deployed
During the repair process, inspect these areas:
. lnspect allthe SRS wire harnesses. Replace, don't
repair, any damaged harnesses.. Inspectthecable reelfor heatdamage. lf there is any
damage, replace the cable reel.
Afterthe vehicle is completely repaired, turn the
ignition switch ON (ll). lf the SRS indicator comes on for
about 6 seconds and then goes off, the SRS airbag
system is OK. lf the indicator does not function properly,
use the PGM Tester SRS Menu Method to read the DTC
(see page 23-23). lf this doesn't retrieve any codes, use
the Tester's SCS menu method (see page 23-24). lf you
still cannot retrieve a code, go to SRS Indicator Circuit
Troubleshooting.
23-112
\|J
Page 1124 of 1139
)
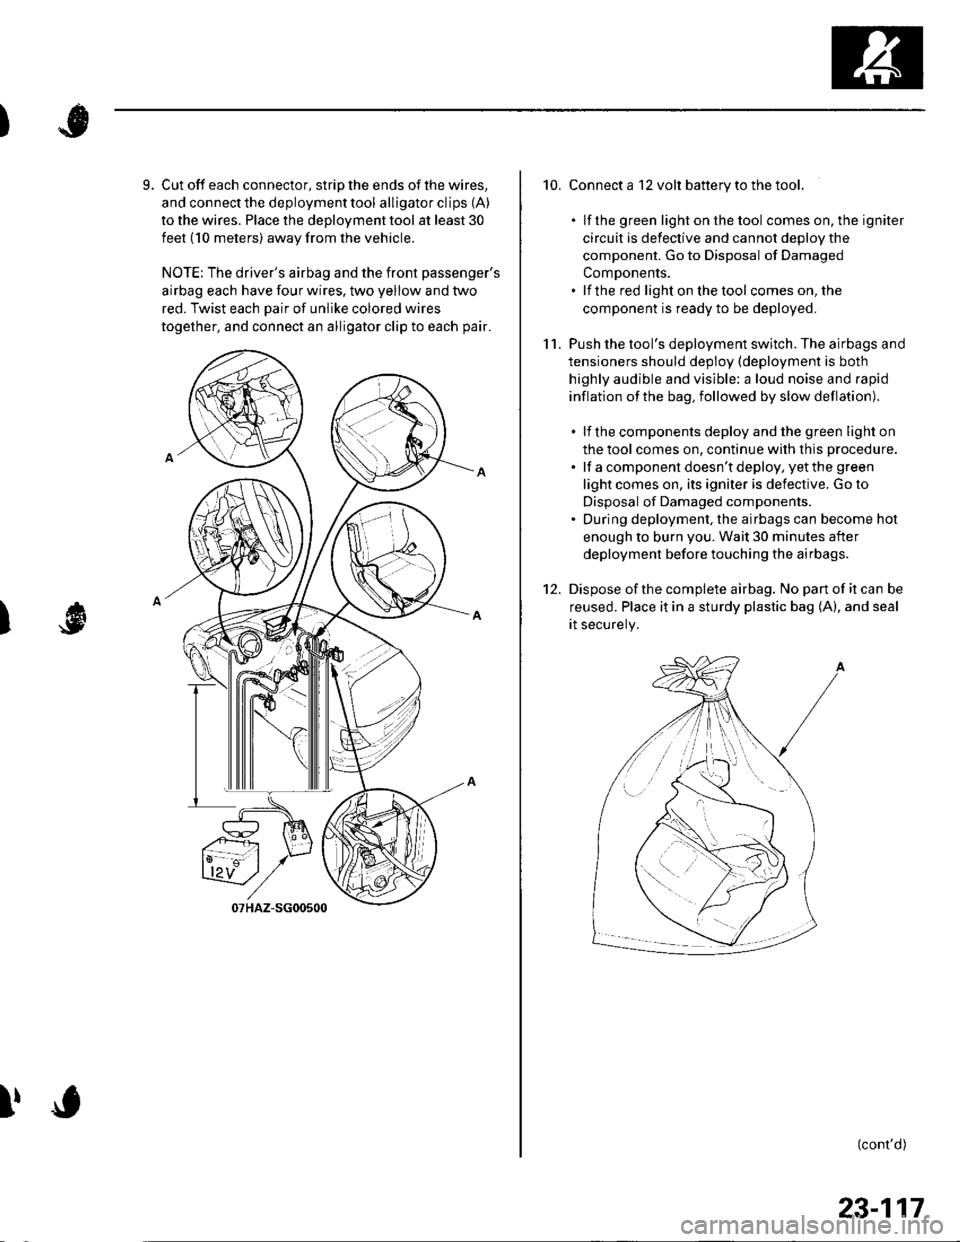
9. Cut off each connector, strip the ends of the wires,
and connect the deployment tool alligator clips (A)
to the wires. Place the deployment tool at least 30
feet (10 meters) away from the vehicle.
NOTE: The driver's airbag and the front passenger's
airbag each have four wires, two yellow and two
red. Twist each Dair of unlike colored wires
together, and connect an alligator clip to each pair.
I
!
10. Connect a 12 volt battery to the tool.
. lf the green light on the tool comes on, the igniter
circuit is defective and cannot deDlov the
component. Go to Disposal of Damaged
ComDonents.. lf the red light on the tool comes on, the
component is ready to be deployed.
11. Push the tool's deployment switch. The airbags and
tensioners should deploy (deployment is both
highly audible and visible: a loud noise and rapid
inflation of the bag, followed by slow deflation).
. lf the components deploy and the green light on
the tool comes on, continue with this procedure.
. lf a component doesn't deploy, yet the green
light comes on, its igniter is defective. Go to
Disposal of Damaged components.. During deployment, the airbags can become hot
enough to burn you. Wait 30 minutes after
deployment before touching the airbags.
12. Dispose ofthe complete airbag. No pan of it can be
reused. Place it in a sturdy plastic bag (A), and seal
rt securery.
(cont'd)
/:
i'..-':
23-117