2003 GMC SIERRA DENALI ignition
[x] Cancel search: ignitionPage 197 of 428

Playing a Cassette Tape
Your tape player is built to work best with tapes that are
up
to 30 to 45 minutes long on each side. Tapes
longer than that are so thin they may not work well in
this player. The longer side with the tape visible should
face
to the right. If the ignition is on, but the radio is
off, the tape can be inserted and will begin playing. A
tape symbol is shown on the display whenever a tape is
inserted. If you hear nothing but a garbled sound, the
tape may not be in squarely. Press the eject symbol
to
remove the tape and start over.
While the tape is playing, use the VOL, AUDIO and
SEEK controls just as you do for the radio. The display
will show TAPE and an arrow showing which side of
the tape is playing.
If you want to insert a tape while the ignition is
off, first
press the eject symbol or DISP.
If an error appears on the display, see “Cassette Tape
Messages” later in this section.
1 PREV (Previous): Your tape must have at least three
seconds of silence between each selection for previous
to work. Press this pushbutton to go to the previous
selection on the tape
if the current selection has been
playing for less than three seconds. If pressed when the
current selection has been playing from 3
to 13 seconds,
it will go
to the beginning of the previous selection or
the beginning
of the current selection, depending upon
the position on the tape. If pressed when the current
selection has been playing for more than 13 seconds, it
will go
to the beginning of the current selection.
SEEK and a negative number will appear on the display
while the cassette player is in the previous mode.
Pressing this pushbutton multiple times will increase the
number of selections to be searched back, up to
-9.
2 NEXT: Your tape must have at least three seconds of
silence between each selection for next
to work.
Press this pushbutton
to go to the next selection on the
tape.
If you press the pushbutton more than once,
the player will continue moving forward through the tape.
SEEK and a positive number will appear on the
display.
3 REV (Reverse): Press this pushbutton to reverse the
tape rapidly. Press it again
to return to playing speed.
The radio will play while the tape reverses. The
station frequency and REV will appear on the display.
You may select stations during reverse operation
by using the TUNE and SEEK.
3-72
Page 199 of 428

CLEAN: If this message appears on the display, the
cassette tape player needs to be cleaned. It will still play
tapes, but you should clean it as soon as possible to
prevent damage to the tapes and player. See
Care
of Your Cassette Tape Player on page 3-83.
If any error occurs repeatedly or if an error can’t be
corrected, contact your dealer.
CD Adapter Kits
It is possible to use a portable CD player adapter kit
with your cassette tape player after activating the bypass
feature on your tape player.
To activate the bypass feature, perform the following
steps:
1. Turn the ignition on.
2. Turn the radio off.
3. Press and hold the TAPE DISC button for five
seconds. The radio will display READY and the
tape symbol on the display will flash, indicating the
feature is active.
4. Insert the adapter into the cassette tape slot. It will
power up the radio and begin playing.
The override feature will remain active until the eject
symbol is pressed.
Playing a Compact Disc
Insert a disc partway into the slot, label side up. The
player will pull it in and the disc should begin playing.
The display will show the CD symbol. If you want
to insert a compact disc with the ignition
off, first press
DlSP or the eject symbol.
If an error appears on the display, see “Compact Disc
Messages” later in this section.
1 PREV (Previous): Press this pushbutton to go to the
previous track
if the current track has been playing
for less than eight seconds. If pressed when the current
track has been playing for more than eight seconds,
it will go to the beginning of the current track. TRACK
and the track number
will appear on the display. If
you hold this pushbutton or press it more than once, the
player will continue moving back through the disc.
2 NEXT: Press this pushbutton to go to the next track.
TRACK and the track number will appear
on the
display.
If you hold this pushbutton or press it more than
once, the player will continue moving forward through
the disc.
3-74
Page 200 of 428
3 REV (Reverse): Press and hold this pushbutton to
reverse quickly within a track. Press and hold this
pushbutton for less than two seconds to reverse at six
times the normal playing speed. Press and hold it
for more than two seconds to reverse at
17 times the
normal playing speed. Release it to play the passage.
The display will show
ET and the elapsed time.
4 FWD (Forward): Press and hold this pushbutton to
advance quickly within a track. Press and hold this
pushbutton for less than two seconds to advance at six
times the normal playing speed. Press and hold it for
more than two seconds to advance at
17 times the
normal playing speed. Release it to play the passage.
The display will show
ET and the elapsed time.
6 RDM (Random): Press this pushbutton to hear the
tracks in random, rather than sequential, order. RDM ON
will appear on the display. RDM T and the track
number will appear on the display when each track
starts to play. Press this pushbutton again to turn
off random play. RDM OFF will appear on the display.
4 SEEK b : Press the left arrow to go to the start
of the current or to the previous track. Press the right
arrow to go to the start of the next track. If either
arrow is held or pressed more then once, the player will
continue moving backward or forward through the CD.
4 SCAN b : To scan the disc, press and hold either
SCAN arrow for more than two seconds until SCAN
appears on the display and you hear a beep. Use this
feature to listen to
10 seconds of each track of the disc.
Press either
SCAN arrow again, to stop scanning.
DlSP (Display): Press this knob to see how long the
current track has been playing. ET and the elapsed time
will appear on the display. To change the default on
the display (track or elapsed time), push the knob until
you see the display you want, then hold the knob
for two seconds. The radio will produce one beep and
selected display will now be the default.
BAND: Press this button to listen to the radio when a
CD is playing. The CD will stop but remain in the player.
TAPE DISC: Press this button to play a tape when
listening to the radio. Press this button to switch
between the tape and compact disc
if both are loaded.
The inactive tape or CD will remain safely inside the
radio for future listening.
& (Eject): Press this button to stop a CD when it is
playing or to eject a CD when
it is not playing. Eject
may be activated with either the ignition or radio
off. CDs
may be loaded with the radio and ignition
off if this
button is pressed first.
3-75
Page 203 of 428
PROG (Program): The front passengers must be
listening to something different for each of these
functions to work:
Press this button to go to the preset radio stations
When a cassette tape is playing, press this button
When a CD is playing in the radio, press this button
set
on the pushbuttons on the main radio.
to go to the other side
of the tape.
to go back to the beginning of the CD.
When a CD is playing in the CD changer, press this
button to select a disc.
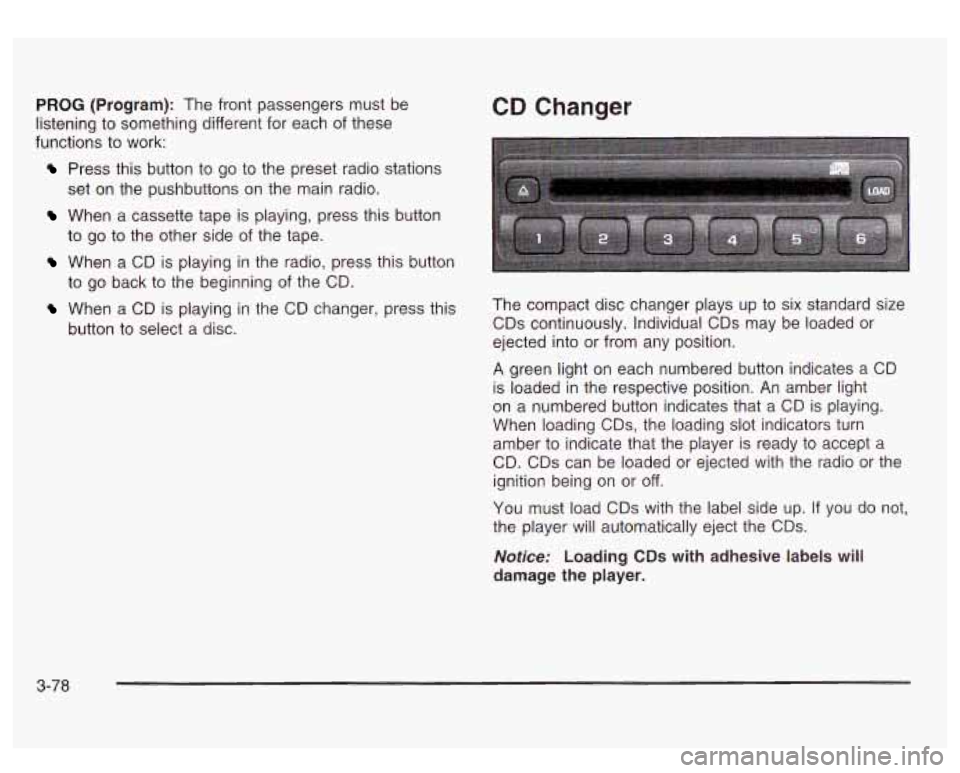
CD Changer
The compact disc changer plays up to six standard size
CDs continuously. Individual CDs may be loaded or
ejected into or from any position.
A green light on each numbered button indicates a CD
is loaded in the respective position. An amber light
on a numbered button indicates that a CD is playing.
When loading
CDs, the loading slot indicators turn
amber to indicate that the player is ready to accept a
CD. CDs can be loaded or ejected with the radio or the
ignition being on or
off.
You must load CDs with the label side up. If you do not,
the player will automatically eject the CDs.
Notice: Loading CDs with adhesive labels will
damage the player.
3-78
Page 208 of 428
Care of Your Cassette Tape Player
A tape player that is not cleaned regularly can cause
reduced sound quality, ruined cassettes or a damaged
mechanism. Cassette tapes should be stored in their
cases away from contaminants, direct sunlight and
extreme heat.
If they aren’t, they may not operate
properly or may cause failure of the tape player.
Your tape player should be cleaned regularly after every
50 hours of use. Your radio may display CLN to
indicate that you have used your tape player for
50 hours without resetting the tape clean timer. If this
message appears on the display, your cassette
tape player needs to be cleaned. It will still play tapes,
but you should clean it as soon as possible to
prevent damage to your tapes and player.
If you notice
a reduction in sound quality, try a known good
cassette to see
if the tape or the tape player is at fault.
If this other cassette has
no improvement in sound
quality, clean the tape player.
For best results, use a scrubbing action, non-abrasive
cleaning cassette with pads which scrub the tape
head as the hubs of the cleaner cassette turn. The
recommended cleaning cassette is available through
your dealership.
The cut tape detection feature of your cassette tape
player may identify the cleaning cassette as a damaged
tape, in error. To prevent the cleaning cassette from
being ejected, use the following steps:
1. Turn the ignition on.
2. Turn the radio off.
3. Press and hold the TAPE AUX button for five
seconds. The tape symbol
on the display will
flash for two seconds.
4. Insert the scrubbing action cleaning cassette.
5. Eject the cleaning cassette after the manufacturer’s
recommended cleaning time.
After the cleaning cassette is ejected, the cut tape
detection feature will be active again.
You may also choose a non-scrubbing action, wet-type
cleaner which uses a cassette with a fabric belt to
clean the tape head. This type of cleaning cassette will
not eject on its own. A non-scrubbing action cleaner
may not clean as thoroughly as the scrubbing type
cleaner. The use of a non-scrubbing action, dry-type
cleaning cassette is not recommended.
After you clean the player, press and hold the EJECT
button for five seconds to reset the CLN indicator.
The radio will display
- or CLEANED to show the
indicator was reset.
Cassettes are subject to wear and the sound quality
may degrade over time. Always make sure the cassette
tape is in good condition before you have your tape
player serviced.
3-83
Page 216 of 428
Anti-lock Brake System
Your vehicle has anti-lock brakes. ABS is an advanced
electronic braking system that will help prevent a
braking skid.
When you start your engine and begin to drive away,
your anti-lock brake system will check itself. You
may hear a momentary motor or clicking noise while
this test is going on. This is normal.
If there’s a problem with
the anti-lock brake system,
this warning light will stay on. See
Anti-Lock
Brake
System Warning
Light on page
3-35.
Along with ABS, your vehicle has a Dynamic Rear
Proportioning (DRP) system.
If there’s a DRP problem,
both the Brake and ABS warning lights will come on
accompanied by a 10-second chime. The lights
and chime will come on each time the ignition is turned
on until the problem
is repaired. See your dealer for
service. Let’s
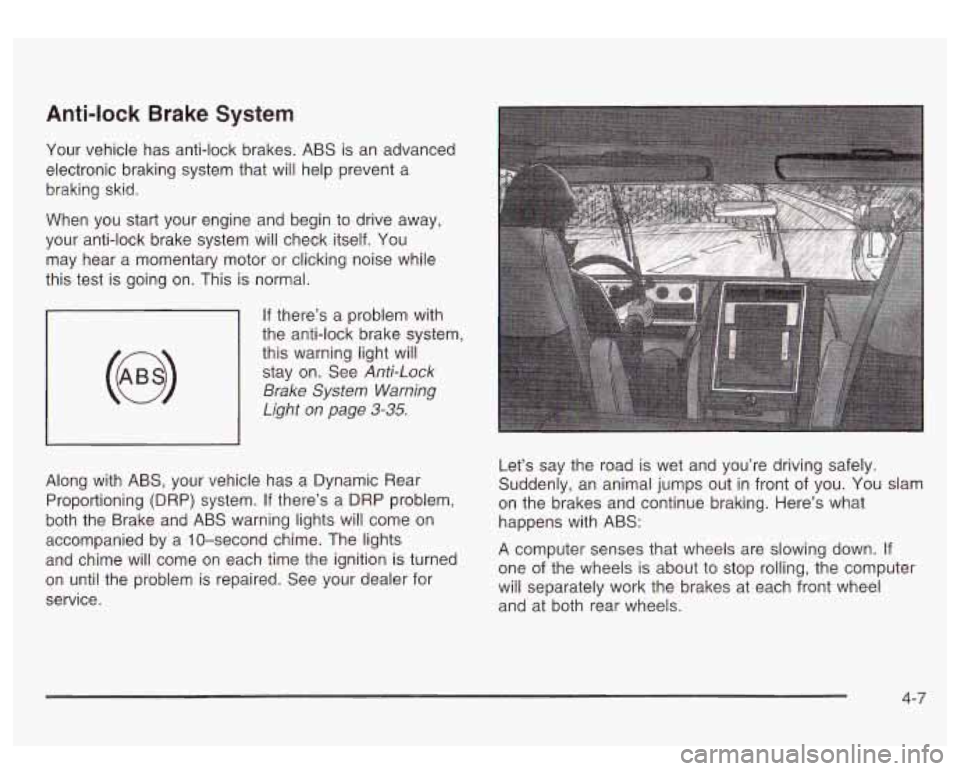
say the road is wet and you’re driving safely.
Suddenly, an animal jumps out in front of you.
You slam
on the brakes and continue braking. Here’s what
happens with ABS:
A computer senses that wheels are slowing down.
If
one of the wheels is about to stop rolling, the computer
will separately work the brakes at each front wheel
and at both rear wheels.
4-7
Page 237 of 428
If the water isn’t too deep, drive slowly through it. At
faster speeds, water splashes on your ignition system
and your vehicle can stall. Stalling can also occur
if you
get your tailpipe under water. And, as long as your
tailpipe is under water, you’ll never be able to start your
engine. When you go through water, remember that
when your brakes get wet, it may take you longer
+- stop.
,,jving thr,,gh rushing water can be
dangerous. Deep water can sweep your vehicle
downstream and you and your passengers
could drown. If it’s only shallow water, it can
still wash away the ground from under your
tires, and you could lose traction and roll the
water.
~ vehicle over. Don’t drive through rushing
I
After Off-Road Driving
Remove any brush or debris that has collected on the
underbody, chassis or under the hood. These
accumulations can be a fire hazard.
After operation
in mud or sand, have the brake linings
cleaned and checked. These substances can cause
glazing and uneven braking. Check the body structure,
steering, suspension, wheels, tires and exhaust
system for damage. Also, check the fuel lines and
cooling system for any leakage.
Your vehicle will require more frequent service due
to
off-road use. Refer to the Maintenance Schedule
for additional information.
See
Driving in Rain and on Wet Roads on page 4-30 for
more information on driving through water.
4-28
Page 246 of 428
If you drive regularly in steep country, or if you’re
planning to visit there, here are some tips that can make
your trips safer and more enjoyable. See
Operating
Your All-Wheel-Drive Vehicle
Off Paved Roads on
page
4-16 for information about driving off-road.
Keep your vehicle in good shape. Check all fluid
levels and also the brakes, tires, cooling system
and transmission. These parts can work hard
on mountain roads.
Know how to go down hills. The most important
thing to know is this: let your engine do some of
the slowing down. Shift to a lower gear when you go
down a steep or long hill.
If you don’t I R down, your -____ 3s COL- ge-
so hot that they wouldn’t work well. You would
then have poor braking or even none going
down a hill. You could crash. Shift down to let
your engine assist your brakes on a steep downhill slope. Coasting
UVwnlll..
..I NEUTRAL (N) G. .... h the
ignition
off is dangerous. Your brakes will have
to do all the work
of slowing down. They could
get
so hot that they wouldn’t work well. You
would then have poor braking or even none
going down a
hill. You could crash. Always
have your engine running and your vehicle in
gear when you go downhill.
Know how to go uphill. You may want to shift down to
a lower gear. The lower gears help cool your engine
and transmission, and you can climb the hill better.
roads in hills or mountains. Don’t swing wide or cut
across the center of the road. Drive at speeds that let
you stay in your own lane.
As you go over the top of a hill, be alert. There could
be something in your lane, like a stalled car or an
accident.
You may see highway signs on mountains that warn
of special problems. Examples are long grades,
passing or no-passing zones, a falling rocks area or
winding roads. Be alert to these and take appropriate
action.
Stay in your own lane when driving on two-lane
4-37