2003 GMC SIERRA DENALI lock
[x] Cancel search: lockPage 126 of 428

Section 3 Instrument Panel
I~s~Pu~~~IP Panel OWWV~~W ............................... 3.2
Hazard Warning Flashers
................................ 3.3
Other Warning Devices ................................... 3.4
Horn
............................................................. 3.4
Tilt Wheel
..................................................... 3.4
Turn SignaVMultifunction Lever
......................... 3.5
Exterior Lamps
............................................. 3.11
Interior Lamps
.............................................. 3.15
Accessory Power Outlets
............................... 3.16
Ashtrays and Cigarette Lighter
........................ 3.17
Climate Controls
............................................ 3.18
Dual Automatic Climate Control System
........... 3.18
Warning Lights, Gages and Indicators
............. 3.24
Instrument Panel Cluster
................................ 3.25
Speedometer and Odometer
........................... 3.26
Tachometer
................................................ -3-26
Safety Belt Reminder Light
............................. 3.26
Air Bag Readiness Light
................................ 3-27
Passenger Air Bag Status Indicator
................. 3.30
Battery Warning Light
.................................... 3.33
Brake System Warning Light
.......................... 3.34
Anti-Lock Brake System Warning Light
............. 3.35
Air
Bag
Off Light .......................................... 3-28
Voltmeter Gage
............................................ 3-33
Engine Coolant Temperature Gage
..... ..... 3.36 Transmission Temperature
Gage
..................... 3.36
Malfunction Indicator Lamp
............................. 3.38
Oil Pressure Gage
........................................ 3-40
Cruise Control Light
...................................... 3.41
Tow/Haul Mode Light
.................................... 3-41
Fuel Gage
................................................... 3.42
Driver Information Center (DIC)
....................... 3.43
DIC Operation and Displays
........................... 3.43
DIC Warnings and Messages
......................... 3.53
Audio System(s)
............................................. 3.61
Setting the Time
...................... .......... 3.6 1
Radio with Cassette and CD ..... .............. 3.62
Rear Seat Audio (RSA)
............................. 3.76
CD Changer
................................................ 3-78
Theft-Deterrent Feature
................................. -3-81
Audio Steering Wheel Controls
....................... 3.81
Understanding Radio Reception
...................... 3-82
Care of Your Cassette Tape Player
................ -3-83
Care of Your CDs
......................................... 3.84
Care of Your CD Player
................................ 3.84
Fixed Mast Antenna
...................................... 3.84
XMTM Satellite Radio Antenna System
............. 3.84
DAB Radio Antenna System
........................... 3.84
Low Fuel Warning Light
................................. 3-42
Page 128 of 428

Hazard Warning Flashers The main components of your instrument panel are the
following:
A. Dome Lamp Override Button
9. Exterior Lamp Control
C. Air Outlets
D. Storage Compartment
E. Multifunction Lever
F. Instrument Panel Cluster
G. Shift Lever
H. Tow/Haul Selector Switch (If Equipped)
I. Audio System
J. Comfort Control System
K. Instrument Panel Fuse Block
L. Hood Release
M. Audio Steering Wheel Controls
(If Equipped)
N. Center Instrument Panel Fuse Block
0. Tilt Lever
P. Parking Brake Release
Q. Compact Disc Changer (If Equipped)
R. Ashtray
S. Accessory Power Outlet
1. Air Bag Off Switch and 4-Wheel Steer Button
U. Glovebox Your hazard
warning flashers let you warn others. They
also let police know you have a problem. Your front
and rear turn signal lamps will flash on and
off.
3-3
Page 129 of 428

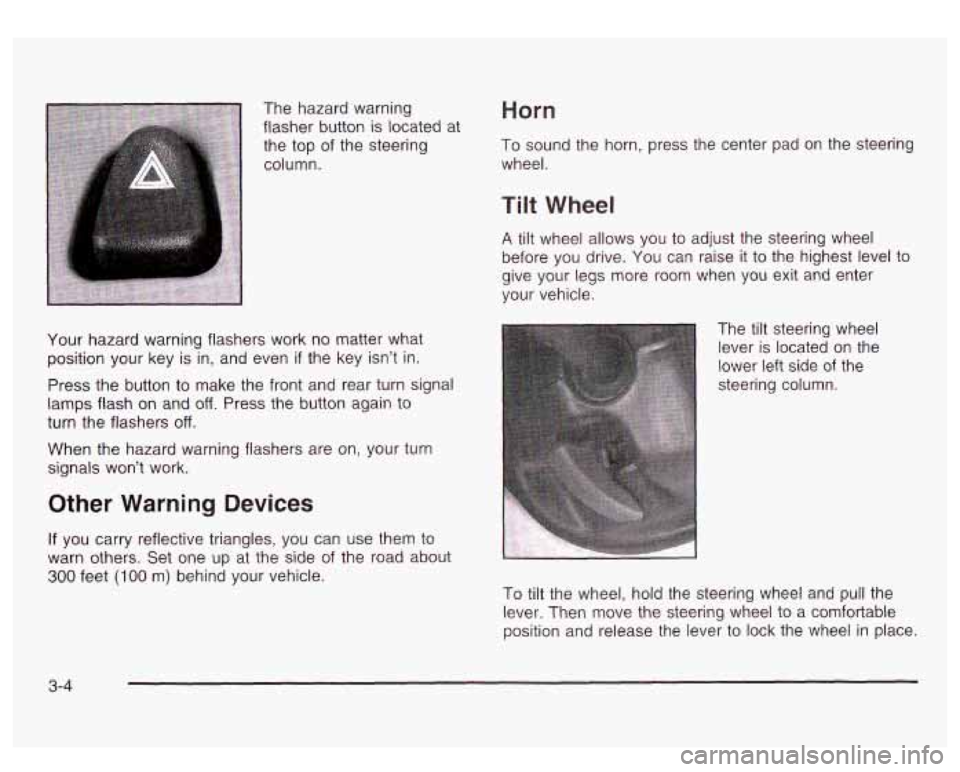
The hazard warning
flasher button is located at
the top
of the steering
column.
Horn
To sound the horn, press the center pad on the steerin?
wheel.
Your hazard warning flashers work no matter what
position your key is in, and even
if the key isn’t in.
Press the button to make the front and rear turn signal
lamps flash on and
off. Press the button again to
turn the flashers
off.
When the hazard warning flashers are on, your turn
signals won’t work.
Other Warning Devices
If you carry reflective triangles, you can use them to
warn others. Set one up at the side
of the road about
300 feet (100 m) behind your vehicle.
Tilt Wheel
A tilt wheel allows you to adjust the steering wheel
before you drive. You can raise
it to the highest level to
give your legs more room when you exit and enter
your vehicle.
The tilt steering wheel
lever is located on the
lower left side
of the
steering column.
To tilt the wheel, hold the steering wheel and pull the
lever. Then move the steering wheel to a comfortable
position and release the lever to lock the wheel in place.
3-4
Page 132 of 428

You can set the wiper speed for a long or short delay
between wipes. This can be very useful in light rain
or snow. Turn the band to choose the delay time. The
closer
to the top of the lever, the shorter the delay.
For steady wiping at low speed, turn the band away from
you to the first solid band past the delay settings.
position. For high-speed wiping, turn the band further, to
the second solid band past the delay settings.
To
stop the wipers, move the band to off position.
Be sure to clear ice and snow from the wiper blades
before using them.
If they’re frozen to the windshield,
carefully loosen or thaw them. If your blades do become
worn or damaged, get new blades or blade inserts.
Windshield Washer
There is a paddle marked with the windshield washer
symbol at the top of the multifunction lever. To
spray washer fluid on the windshield, push the paddle.
The wipers will clear the window and then either
stc~- 3r return to your preset -reed.
In freezing weather, don’t use your washer
until the windshield is warmed. Otherwise the
washer fluid can form ice on the windshield,
blocking your vision.
3-7
Page 136 of 428

Exterior Lamps
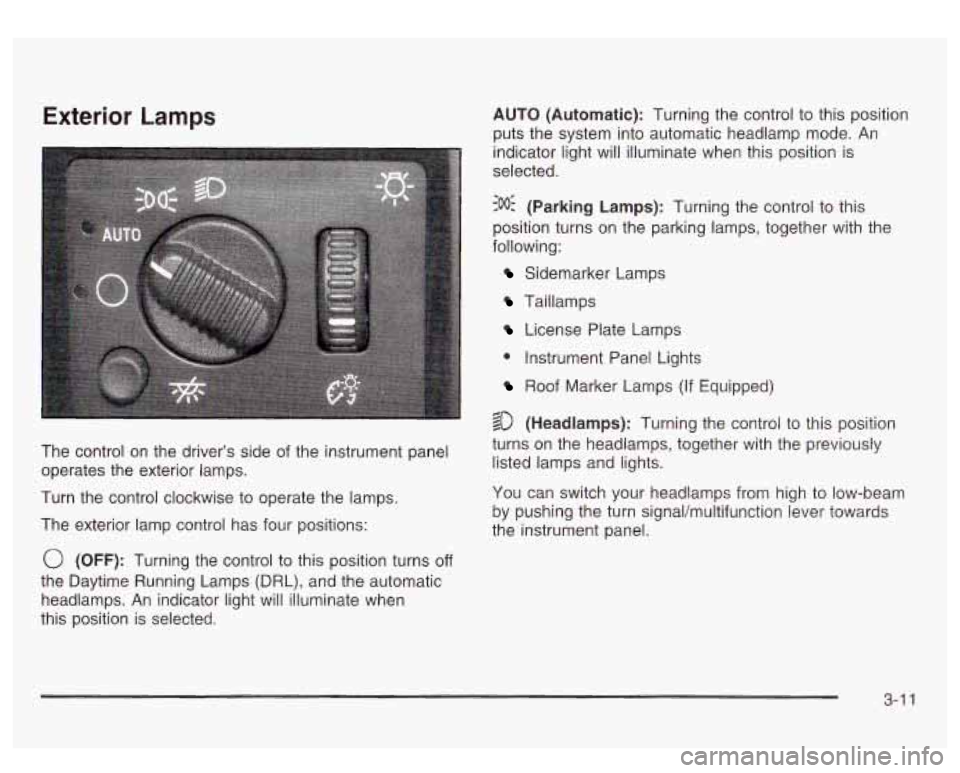
The control on the driver’s side of the instrument panel
operates the exterior lamps.
Turn the control clockwise to operate the lamps.
The exterior lamp control has four positions:
0 (OFF): Turning the control to this position turns off
the Daytime Running Lamps (DRL), and the automatic
headlamps. An indicator light will illuminate when
this position is selected. AUTO
(Automatic): Turning the control to this position
puts the system into automatic headlamp mode.
An
indicator light will illuminate when this position is
selected.
:oO: (Parking Lamps): Turning the control to this
position turns on the parking lamps, together with the
following:
Sidemarker Lamps
Taillamps
License Plate Lamps
0 Instrument Panel Lights
Roof Marker Lamps (If Equipped)
$0 (Headlamps): Turning the control to this position
turns on the headlamps, together with the previously
listed lamps and lights.
You can switch your headlamps from high to low-beam
by pushing the turn signal/multifunction lever towards
the instrument panel.
3-1 1
Page 137 of 428

Automatic Headlamp System
When it is dark enough outside, your automatic
headlamp system will turn on your headlamps at the
normal brightness along with other lamps such as
the taillamps, sidemarker, parking lamps and the
instrument panel lights. The radio lights will also be dim.
Your vehicle is equipped with a headlamp off delay,
which will keep the headlamps on for a short time after
the ignition is turned
off. For more information see
DIC Operation and Displays on page 3-43.
Your vehicle has a light sensor located on the top of the
instrument panel in the defroster grille. Be sure it is
not covered, or the system will be on whenever
the ignition is on.
The system may also turn on your headlamps when
driving through a parking garage, heavy overcast
weather or a tunnel. This is normal.
There is a delay in the transition between the daytime
and nighttime operation of the Daytime Running
Lamps (DRL) and the automatic headlamp systems
so
that driving under bridges or bright overhead street
lights does not affect the system. The DRL and
automatic headlamp system will only be affected when
the light sensor sees a change in lighting lasting
longer than the delay. one
minute for the automatic headlamp system to
change to DRL
if it is bright enough outside. During that
delay, your instrument panel cluster may not be as
bright as usual. Make sure your instrument panel
brightness control is in the full bright position. See
“Instrument Panel Brightness Control’’ under
Interior
Lamps on page
3-15.
To idle your vehicle with the automatic headlamp
system off, turn the control to the
off position.
You may be able to turn off your automatic headlamp
system. See Daytime Running Lamps (DRL) later in this
section for more information.
Your headlamps will also stay on after you exit the
vehicle. You can program this feature using the Driver
lnforrnation Center. See
Driver lnforrnation Center @IC)
on page
3-43
As with any vehicle, you should turn on the regular
headlamps
if you need them.
Lamps On Reminder
A reminder chime will sound when your headlamps or
parking lamps are manually turned on and your
ignition is off, in LOCK, ACCESSORY, or your door is
open. To disable the chime, turn the light
off, then
back on.
If you start your vehicle in a dark garage, the automatic
headlamp system will come on immediately. Once
you leave the garage, it will take approximately
3-1 2
Page 138 of 428

Daytime Running Lamps
Daytime Running Lamps (DRL) can make it easier for
others to see the front of your vehicle during the
day. DRL can be helpful
in many different driving
conditions, but they can be especially helpful in the short
periods after dawn and before sunset. Fully functional
daytime running lamps are required on all vehicles
first sold in Canada.
The DRL system will come on when the following
conditions are met:
The ignition is on,
0 the exterior lamp control is in AUTO
0 the automatic transmission is not in PARK (P), and
0 the light sensor determines it is daytime.
When the
DRL are on, only your DRL lamps will be on.
The taillamps, sidemarker and other lamps won’t be
on. The instrument panel won’t be lit up either. When
it begins to
get dark, the automatic headlamp
system will switch from DRL to the headlamps or the last
chosen headlamp setting that was used.
W-hen you turn the exterior iamp controi
to off, the
headlamps will go off, and your DRL lamps will
illuminate, provided it is not dark outside.
Shifting the transmission into PARK
(P) will allow you to
idle the vehicle with the DRL off. The DRL will stay
off until you release the parking brake or shift the
transmission out of PARK (P).
Puddle Lamps
Your vehicle is equipped with puddle lamps to help you
see the area near the base
of the front doors when it
is dark out. The puddle lamps will illuminate when a door
is opened or when you press the UNLOCK button on
the keyless entry transmitter.
3-1 3
Page 143 of 428

Climate Controls
Dual Automatic Climate Control
System
Your vehicle may have the optional dual automatic
climate control system. With this system you can control
the heating, cooling and ventilation for your vehicle.
If your vehicle is equipped with the dual automatic
climate control system, memory seats, and memory
mirrors, you can store and recall the climate control
settings for temperature, air delivery mode, and
fan speed for two different drivers. The personal choice
settings recalled are determined by the transmitter
used to enter the vehicle. After the button with the
unlock symbol on a remote keyless entry transmitter
is pressed, the climate control will adjust to the last
settings of the identified driver. The settings can also be
changed by pressing one of the memory buttons
(1 or 2) located on the driver’s door. When adjustments
are made, the new settings are automatically saved
for that driver.
A 8fj? v (Fan): Press this button to increase or
decrease the fan speed.
0 (Off): Press this button to turn off the entire climate
control system. Outside air will still enter the vehicle, and
will be directed to the floor. This direction can be changed
by pressing the mode button. The temperature can also
be adjusted using either temperature knob. Press the up
or down arrows on the fan switch, the defrost button, the
AUTO button, or the air conditioning button to turn the
system on when it is
off.
,% 4d (Mode): Press this button to manually select the air
delivery mode to the floor, panel, or windshield outlets.
This system will stay in the selected mode until the mode
button is pressed again, or the AUTO button, defrost
button, or the off button is pressed. Air delivery mode can
be adjusted while the system is off. A five second status
display will indicate the current mode.
3-1 8