2003 GMC SIERRA DENALI ECU
[x] Cancel search: ECUPage 247 of 428
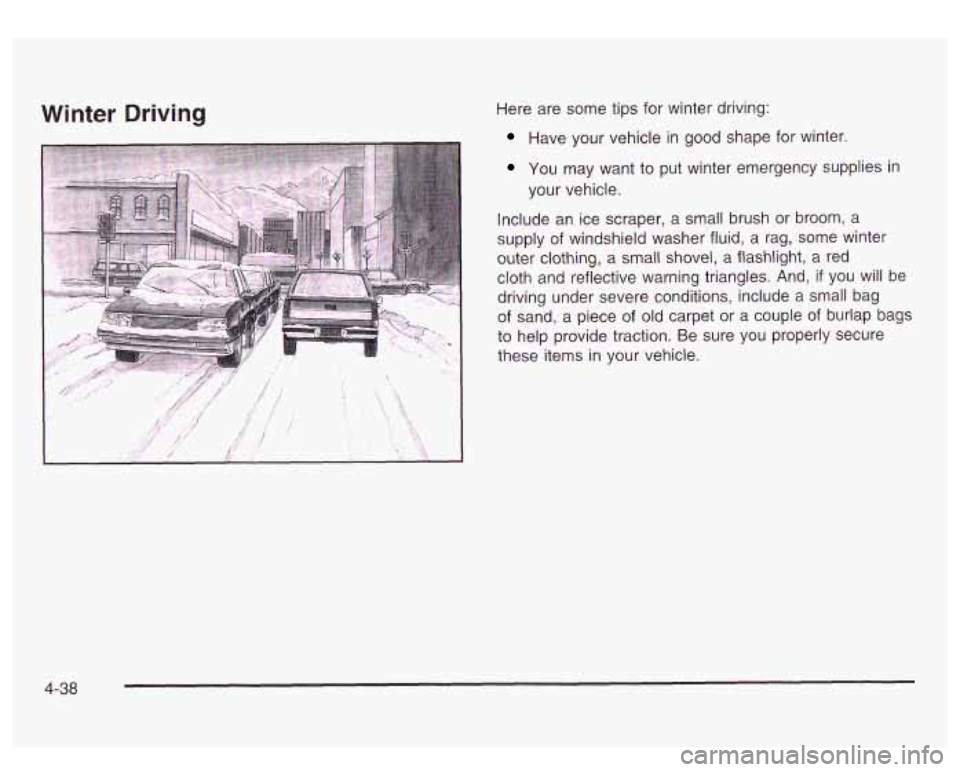
Winter Driving Here are some tips for winter driving:
Have your vehicle in good shape for winter.
You may want to put winter emergency supplies in
your vehicle.
Include an ice scraper, a small brush or broom, a
supply of windshield washer fluid, a rag, some winter
outer clothing,
a small shovel, a flashlight, a red
cloth and reflective warning triangles. And,
if you will be
driving under severe conditions, include
a small bag
of sand, a piece of old carpet or a couple of burlap bags
to help provide traction. Be sure you properly secure
these items
in your vehicle.
4-38
Page 255 of 428
The Certification/Tire label also tells you the maximum
weights for the front and rear axles, called Gross
Axle Weight Rating (GAWR).
To find out the actual loads
on your front and rear axles, you need to go to a
weigh station and weigh your vehicle. Your dealer can
help you with this. Be sure to spread out your load
equally on both sides of the centerline.
Never exceed the GVWR for your vehicle, or the GAWR
for either the front or rear axle.
And,
if you do have a heavy load, you should spread
it out.
In the case of a sudden stop or collision,
things carried in the bed of your truck could
shift forward and come into the passenger
area, injuring you and others. If you put things
in the bed of your truck, you should make sure
they are properly secured. Do
not load your vehicle any heavier than the
GVWR, or either the maximum front or rear
GAWR. If you do, parts on
your vehicle can
break, and
it can change the way your vehicle
handles. These could cause you to lose
control and crash.
Also, overloading can
shorten the life of your vehicle.
Your warranty does not cover parts or components that
fail because of overloading.
This will help you decide how much cargo and installed
equipment your truck can carry.
Using heavier suspension components to get added
durability might not change your weight ratings. Ask your
dealer to help you load your vehicle the right way.
If you put things inside your vehicle - like suitcases,
tools, packages, or anything else
- they go as fast
as the vehicle goes.
If you have to stop or turn quickly,
or
if there is a crash, they’ll keep going.
4-46
Page 256 of 428

Th.,,ds yo^ pur inside your vehicle can strike
and injure people in a sudden stop or turn, or
in a crash.
Put things in the trunk of your vehicle. In a
trunk, put them
as far forward as you can.
Try to spread the weight evenly.
Never stack heavier things, like suitcases,
inside the vehicle
so that some of them
are above the tops of the seats.
Don’t leave an unsecured child restraint in
your vehicle.
When you carry something inside the
vehicle, secure it whenever you can.
There’s also important loading information for off-road
driving in this manual. See “Loading Your Vehicle
for Off-Road Driving“ under
Operating Your
All- Wheel-Drive Vehicle Off Paved Roads on page 4- 16.
Payload
Payload capacity is the maximum load capacity that your
vehicle can carry. Be sure to include the weight of the
occupants as part of your load.
If you added any accessories or
equipment after your vehicle left the
factory, remember to subtract the weight of these things
from the payload. Your dealer can help you with this.
Remember not to exceed the Gross Axle Weight Rating
(GAWR) of the front or rear axle.
Two-Tiered Loading
By positioning four 2’’ x 6’’ wooden planks across the
width of the pickup box, you can create an upper
load platform. The planks must be inserted in the pickup
box depressions. The length of the planks must allow
for at least a
3/4 inch (2 cm) bearing surface on
each end of the plank.
When using this upper load platform, be sure the load is
securely tied down to prevent it from shifting. The
load’s center of gravity should be positioned in a zone
over the rear axle. The zone is located in the area
between the front of each wheel well and the rear of
each wheel well. The center of gravity height must not
extend above the top of the pickup box flareboard.
Any load that extends beyond the vehicle’s taillamp area
must be properly marked according to local laws and
regulations.
Remember not to exceed the Gross Axle Weight Rating
(GAWR) of the front or rear axle.
4-47
Page 265 of 428
Safety Chains
You should always attach safety chains between your
vehicle and your trailer. Cross the safety chains
under the tongue of the trailer to help prevent the tongue
from contacting the road
if it becomes separated from
the hitch.
You may attach the safety chains to the attaching point
on the hitch platform. Always leave just enough slack
so you can turn with your rig. Never allow safety chains
to drag on the ground.
Trailer Brakes
If your trailer weighs more than 2,000 Ibs. (900 kg)
loaded, then it needs its own brakes
- and they must be
adequate. Be sure to read and follow the instructions
for the trailer brakes
so you’ll be able to install,
adjust and maintain them properly.
Your trailer brake system can tap into the vehicle’s
hydraulic brake system only
if:
(20 650 kPa) of pressure.
The trailer parts can withstand 3,000 psi
The trailer’s brake system will use less than
0.02 cubic inch (0.3 cc) of fluid from your vehicle’s
master cylinder. Otherwise, both braking systems
won’t work well. You could even lose your brakes. If
everything checks out this far, make the brake tap at
the
port on the master cylinder that sends the fluid
to the rear brakes. But don’t use copper tubing for this.
If you do, it will bend and finally break off. Use steel
brake tubing.
Driving with a Trailer
Towing a trailer requires a certain amount of experience.
Before setting out for the open road, you’ll want to get
to know your rig. Acquaint yourself with the feel of
handling and braking with the added weight of the trailer.
And always keep in mind that the vehicle you are
driving is now a good deal longer and not nearly as
responsive as your vehicle is by itself.
Before you start, check the trailer hitch and platform
(and attachments), safety chains, electrical connector,
lamps, tires and mirror adjustment. If the trailer has
electric brakes, start your vehicle and trailer moving and
then apply the trailer brake controller by hand to be
sure the brakes are working. This lets you check your
electrical connection at the same time.
During your trip, check occasionally to be sure that the
load is secure, and that the lamps and any trailer
brakes are still working.
While towing a trailer or when exposed to long periods
of sunshine, the floor of the truck bed may become
very warm. Avoid putting items in the truck bed
that might be affected by high ambient temperatures.
4-56
Page 331 of 428
Inflation - Tire Pressure
The CertificationKire label, which is on the rear edge of
the driver’s door, shows the correct inflation pressures
for your tires when they’re cold. “Cold” means your
vehicle has been sitting for at least three hours or driven
no more than
1 mile (1.6 km).
Notice: Don’t let anyone tell you that underinflation
or overinflation is all right. It’s not. If your tires
don’t have enough air (underinflation), you can get
the following:
Too much flexing
Too much heat
Tire overloading
Bad wear
Bad handling
Bad fuel economy
If your tires have too much air (overinflation), you
can get the following:
Unusual wear
Bad handling
Rough ride
Needless damage from road hazards
5-62
When to Check
Check your tires once a month or more.
Also, check the tire pressure of the spare tire
How to Check
Use a good quality pocket-type gage to check tire
pressure. You can’t tell
if your tires are properly inflated
simply by looking at them. Radial tires may look
properly inflated even when they’re underinflated.
Be sure to put the valve caps back on the valve stems.
They help prevent leaks by keeping out dirt and
moisture.
Tire Inspection and Rotation
Tires should be rotated every 7,500 miles (12,500 km).
Any time you notice unusual wear, rotate your tires
as soon as possible and check wheel alignment.
Also
check for damaged tires or wheels. See When It Is Time
for New Tires on page 5-64 and Wheel Replacement
on page
5-67 for more information.
Make sure the spare tire
is stored securely. Push, pull,
and then try to rotate
or turn the tire. If it moves,
use the wheel wrench and jack handle extensions to
tighten the cable. See
Changing a Flat Tire on
page
5-69.
Page 344 of 428

To release the spare tire from the secondary latch do
the following:
1. Check under the vehicle to see if the cable end is
visible.
2. If it is not visible proceed to step 6.
If it is visible, first try to tighten the cable by turning
the wheel wrench clockwise until you hear two
clicks or feel it skip twice. You cannot overtighten
the cable.
3. Loosen the cable by turning the wrench
counterclockwise three or four turns.
4. Repeat this procedure at least two times, if the
spare tire lowers to the ground, continue with
step
4 of “Removing Your Spare Tire and Tools”
earlier in this section.
approximately six inches
(1 5 cm) of cable is
5. Turn the wrench counterclockwise until
exposed.
6. Stand the wheel blocks
on their shortest ends,
with the backs
facing each other.
7. Hook the bottom edge of the jack on the wheel
blocks, separating them
so that the jack is
balanced securely.
8. Attach the jack handle, extension, and wheel
wrench to the jack and place it (with the wheel
blocks) under the vehicle towards the front of the
rear bumper. Position the center
lift point of the jack
under the center of the spare tire.
5-75
Page 348 of 428
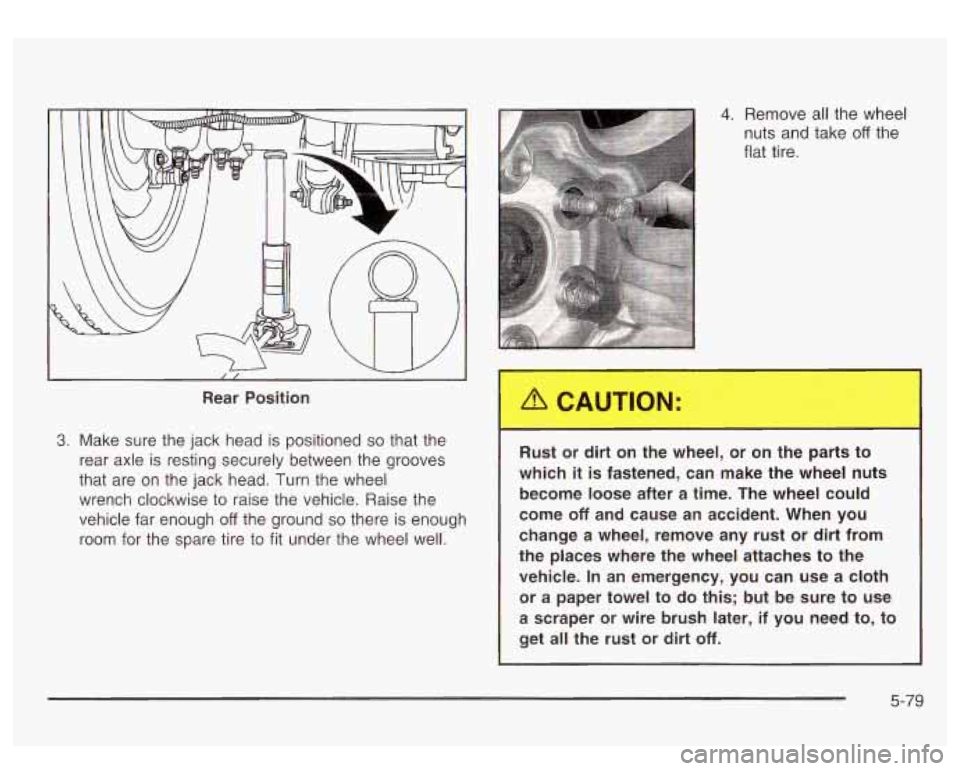
Rear Position
3. Make sure the jack head is positioned so that the
rear axle
is resting securely between the grooves
that are on the jack head. Turn the wheel
wrench clockwise to raise the vehicle. Raise the
vehicle far enough
off the ground so there is enough
room for the spare tire to
fit under the wheel well.
4. Remove all the wheel
nuts and take
off the
flat tire.
Rust or dirt on the wheel, or on the parts to
which
it is fastened, can make the wheel nuts
become loose after a time. The wheel could
come
off and cause an accident. When you
change
a wheel, remove any rust or dirt from
the places where the wheel attaches to the
vehicle. In an emergency, you can use a cloth
or
a paper towel to do this; but be sure to use
a scraper or wire brush later, if you need to, to
get all the rust
or dirt off.
5-79
Page 352 of 428
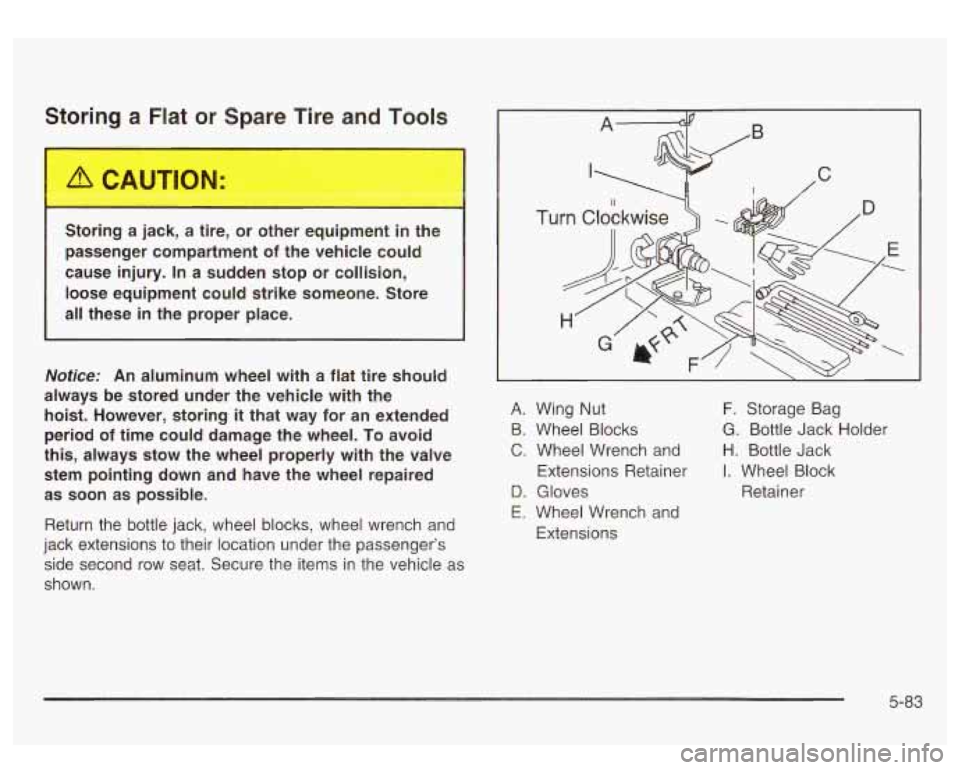
Storing a Flat or Spare Tire and Tools
--xing a jack, a --:e, or ---ier equipment in the
passenger compartment
of the vehicle could
cause injury. In a sudden stop or collision,
loose equipment could strike someone. Store
all these in the proper place.
Notice: An aluminum wheel with a flat tire should
always be stored under the vehicle with the hoist. However, storing
it that way for an extended
period
of time could damage the wheel. To avoid
this, always stow the wheel properly with the valve
stem pointing down and have the wheel repaired
as soon as possible.
Return the bottle jack, wheel blocks, wheel wrench and
jack extensions to their location under the passenger’s
side second row seat. Secure the items in the vehicle as
shown.
Tu
A. Wing Nut F. Storage Bag
B. Wheel Blocks G. Bottle Jack Holder
C. Wheel Wrench and H. Bottle Jack
Extensions Retainer
I. Wheel Block
D. Gloves Retainer
E. Wheel Wrench and
Extensions
5-83