2003 GMC SIERRA DENALI light
[x] Cancel search: lightPage 119 of 428
Using HomeLink@
Press and hold the appropriate HomeLink@ button for at
least half
of a second. The indicator light will come
on while the signal
is being transmitted.
Erasing HomeLink@ Buttons
To erase programming from the three buttons do the
following:
1. Press and hold down the two outside buttons until
the indicator light begins to flash, after
20 seconds.
2. Release both buttons. Do not hold for longer than
30 seconds.
HomeLink@ is now
in the train (learning) mode and can
be programmed at any time beginning with Step
2
under “Programming HomeLink@.”
individual buttons can not be erased, but they can be
reprogrammed. See “Reprogramming
a Single
HomeLink@ Button” next.
Reprogramming a Single HomeLink@
Button
To program a device to HomeLink@ using a HomeLink@
button previously trained, follow these steps:
1. Press and hold the desired HomeLink@ button. Do
2. The indicator light will begin to flash after
not release
the button.
20 seconds. While still holding the HomeLink@
button, proceed with Step
2 under “Programming
HomeLink@.”
Resetting Defaults
To reset HomeLink@ to default settings do the following:
1. Hold down the two outside buttons for about
20 seconds until the indicator light begins to flash.
2. Continue to hold both buttons until the HomeLink@
indicator light turns
off.
3. Release both buttons.
For questions or comments, contact HomeLink@ at
1-800-355-3515, or on the internet at
www.home1ink.com.
2-38
Page 126 of 428

Section 3 Instrument Panel
I~s~Pu~~~IP Panel OWWV~~W ............................... 3.2
Hazard Warning Flashers
................................ 3.3
Other Warning Devices ................................... 3.4
Horn
............................................................. 3.4
Tilt Wheel
..................................................... 3.4
Turn SignaVMultifunction Lever
......................... 3.5
Exterior Lamps
............................................. 3.11
Interior Lamps
.............................................. 3.15
Accessory Power Outlets
............................... 3.16
Ashtrays and Cigarette Lighter
........................ 3.17
Climate Controls
............................................ 3.18
Dual Automatic Climate Control System
........... 3.18
Warning Lights, Gages and Indicators
............. 3.24
Instrument Panel Cluster
................................ 3.25
Speedometer and Odometer
........................... 3.26
Tachometer
................................................ -3-26
Safety Belt Reminder Light
............................. 3.26
Air Bag Readiness Light
................................ 3-27
Passenger Air Bag Status Indicator
................. 3.30
Battery Warning Light
.................................... 3.33
Brake System Warning Light
.......................... 3.34
Anti-Lock Brake System Warning Light
............. 3.35
Air
Bag
Off Light .......................................... 3-28
Voltmeter Gage
............................................ 3-33
Engine Coolant Temperature Gage
..... ..... 3.36 Transmission Temperature
Gage
..................... 3.36
Malfunction Indicator Lamp
............................. 3.38
Oil Pressure Gage
........................................ 3-40
Cruise Control Light
...................................... 3.41
Tow/Haul Mode Light
.................................... 3-41
Fuel Gage
................................................... 3.42
Driver Information Center (DIC)
....................... 3.43
DIC Operation and Displays
........................... 3.43
DIC Warnings and Messages
......................... 3.53
Audio System(s)
............................................. 3.61
Setting the Time
...................... .......... 3.6 1
Radio with Cassette and CD ..... .............. 3.62
Rear Seat Audio (RSA)
............................. 3.76
CD Changer
................................................ 3-78
Theft-Deterrent Feature
................................. -3-81
Audio Steering Wheel Controls
....................... 3.81
Understanding Radio Reception
...................... 3-82
Care of Your Cassette Tape Player
................ -3-83
Care of Your CDs
......................................... 3.84
Care of Your CD Player
................................ 3.84
Fixed Mast Antenna
...................................... 3.84
XMTM Satellite Radio Antenna System
............. 3.84
DAB Radio Antenna System
........................... 3.84
Low Fuel Warning Light
................................. 3-42
Page 131 of 428
Turn Signal On Chime
If your turn signal is left on for more than 3/4 of a mile
(1.2 km), a chime will sound at each flash of the
turn signal. To turn
off the chime, move the turn signal
lever to the
off position.
Headlamp High/Low Beam Changer
To change the headlamps from low to high beam, push
the lever toward the instrument panel.
To return the
low-beam headlamps, pull the multifunction lever toward
you. Then release it.
When the high beams are
on, this light on the
instrument panel cluster
also will be on.
I I
Flash-To-Pass Feature
This feature allows you to use your high-beam
headlamps to signal a driver in front
of you that you
want to pass. It works even
if your headlamps are off
To use it, pull the turn signal lever toward you.
If your headlamps are
off or on low-beam, your
high-beam headlamps will turn on. They’ll stay on as long
as you hold the lever toward you and the high-beam
indicator on the instrument panel will come on. Release
the lever
to turn the high-beam headlamps off.
Windshield Wipers
0: OFF
$? : MIST
You control the windshield wipers by turning the band
with the wiper symbol on it.
For a single wiping cycle, turn the band to mist.
Hold it
there until the wipers start, then let go. The wipers
will stop after one wipe.
If you want more wipes, hold
the band on mist longer.
3-6
Page 132 of 428
You can set the wiper speed for a long or short delay
between wipes. This can be very useful in light rain
or snow. Turn the band to choose the delay time. The
closer
to the top of the lever, the shorter the delay.
For steady wiping at low speed, turn the band away from
you to the first solid band past the delay settings.
position. For high-speed wiping, turn the band further, to
the second solid band past the delay settings.
To
stop the wipers, move the band to off position.
Be sure to clear ice and snow from the wiper blades
before using them.
If they’re frozen to the windshield,
carefully loosen or thaw them. If your blades do become
worn or damaged, get new blades or blade inserts.
Windshield Washer
There is a paddle marked with the windshield washer
symbol at the top of the multifunction lever. To
spray washer fluid on the windshield, push the paddle.
The wipers will clear the window and then either
stc~- 3r return to your preset -reed.
In freezing weather, don’t use your washer
until the windshield is warmed. Otherwise the
washer fluid can form ice on the windshield,
blocking your vision.
3-7
Page 134 of 428
Setti- - Yruise Control
If you leave your cruise control on when you’re
not using cruise, you might hit a button and
go
into cruise when you don’t want to. You could
be startled and even lose control. Keep the
cruise control switch
off until you want to use
cruise control.
1. Move the cruise control switch to on
2. Get up to the speed you want.
3. Press in the set button at the end of the lever and
4. Take your foot off the accelerator pedal.
release it. The cruise light
on the instrument panel will illuminate
when the cruise control is engaged.
Resuming a Set Speed
Suppose you set your cruise control at a desired speed
and then you apply the brake or press the clutch
pedal (if equipped). This, of course, disengages the
cruise control. But you don’t need to reset it.
Once you’re going about 25 mph
(40 km/h) or more,
you can move the cruise control switch from on to
resume/accelerate briefly.
You’ll go right back up to your chosen speed and stay
there.
If you hold the switch at resume/accelerate briefly, the
vehicle will keep going faster until you release the switch
or apply the brake.
So unless you want to go faster,
don’t hold the switch at resume/accelerate.
3-9
Page 135 of 428
Increasing Speed While Using Cruise
Control
There are two ways to go to a higher speed:
0
0
Use the accelerator pedal to get to the higher
speed. Press the set button at the end of the lever,
then release the button and the accelerator
pedal. You’ll now cruise at the higher speed.
Move the cruise switch from on to
resume/accelerate. Hold it there until you get up to
the speed you want, and then release the switch.
To increase your speed in very small amounts,
move the switch to resume/accelerate briefly. Each
time you do this, your vehicle will go about
1 mph (1.6 km/h) faster.
Reducing Speed While Using Cruise
Control
Press and hold the set button at the end of the
lever until you reach the lower speed you want, then
release it.
To slow down in very small amounts, press the set
button briefly. Each time you do this, you’ll go
about
1 mph (1.6 km/h) slower.
Passing Another Vehicle While Using
Cruise Control
Use the accelerator pedal to increase your speed.
When you take your foot
off the pedal, your vehicle will
slow down to the cruise control speed you set earlier.
Using Cruise Control on Hills
How well your cruise control will work on hills depends
upon your speed, load and the steepness of the
hills. When going up steep hills, you may want to step
on the accelerator pedal to maintain your speed.
When going downhill, you may have to brake or shift to
a lower gear to keep your speed down. Of course,
applying the brake takes you out of cruise control. Many
drivers find this to be too much trouble and don’t use
cruise control on steep hills.
Ending Cruise Control
There are two ways to turn off the cruise control:
Step lightly on the brake pedal.
Step lightly on the clutch pedal (if equipped).
0 Move the cruise control switch to off.
Erasing Speed Memory
When you turn off the cruise control or the ignition, your
cruise control set speed memory is erased.
3-1 0
Page 136 of 428
Exterior Lamps
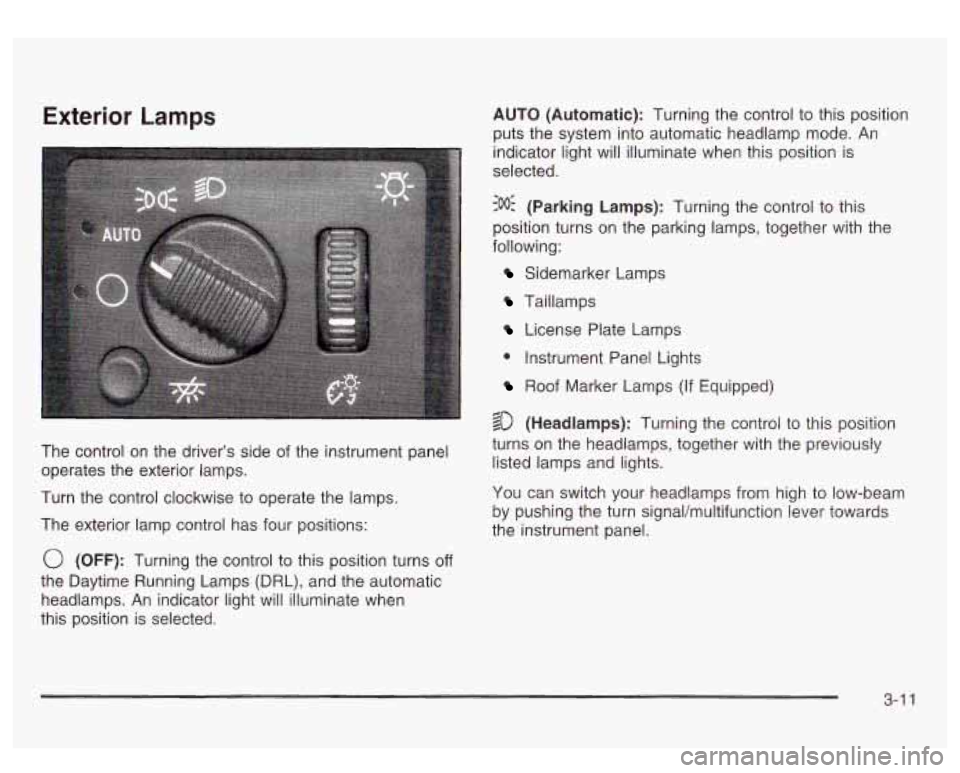
The control on the driver’s side of the instrument panel
operates the exterior lamps.
Turn the control clockwise to operate the lamps.
The exterior lamp control has four positions:
0 (OFF): Turning the control to this position turns off
the Daytime Running Lamps (DRL), and the automatic
headlamps. An indicator light will illuminate when
this position is selected. AUTO
(Automatic): Turning the control to this position
puts the system into automatic headlamp mode.
An
indicator light will illuminate when this position is
selected.
:oO: (Parking Lamps): Turning the control to this
position turns on the parking lamps, together with the
following:
Sidemarker Lamps
Taillamps
License Plate Lamps
0 Instrument Panel Lights
Roof Marker Lamps (If Equipped)
$0 (Headlamps): Turning the control to this position
turns on the headlamps, together with the previously
listed lamps and lights.
You can switch your headlamps from high to low-beam
by pushing the turn signal/multifunction lever towards
the instrument panel.
3-1 1
Page 137 of 428

Automatic Headlamp System
When it is dark enough outside, your automatic
headlamp system will turn on your headlamps at the
normal brightness along with other lamps such as
the taillamps, sidemarker, parking lamps and the
instrument panel lights. The radio lights will also be dim.
Your vehicle is equipped with a headlamp off delay,
which will keep the headlamps on for a short time after
the ignition is turned
off. For more information see
DIC Operation and Displays on page 3-43.
Your vehicle has a light sensor located on the top of the
instrument panel in the defroster grille. Be sure it is
not covered, or the system will be on whenever
the ignition is on.
The system may also turn on your headlamps when
driving through a parking garage, heavy overcast
weather or a tunnel. This is normal.
There is a delay in the transition between the daytime
and nighttime operation of the Daytime Running
Lamps (DRL) and the automatic headlamp systems
so
that driving under bridges or bright overhead street
lights does not affect the system. The DRL and
automatic headlamp system will only be affected when
the light sensor sees a change in lighting lasting
longer than the delay. one
minute for the automatic headlamp system to
change to DRL
if it is bright enough outside. During that
delay, your instrument panel cluster may not be as
bright as usual. Make sure your instrument panel
brightness control is in the full bright position. See
“Instrument Panel Brightness Control’’ under
Interior
Lamps on page
3-15.
To idle your vehicle with the automatic headlamp
system off, turn the control to the
off position.
You may be able to turn off your automatic headlamp
system. See Daytime Running Lamps (DRL) later in this
section for more information.
Your headlamps will also stay on after you exit the
vehicle. You can program this feature using the Driver
lnforrnation Center. See
Driver lnforrnation Center @IC)
on page
3-43
As with any vehicle, you should turn on the regular
headlamps
if you need them.
Lamps On Reminder
A reminder chime will sound when your headlamps or
parking lamps are manually turned on and your
ignition is off, in LOCK, ACCESSORY, or your door is
open. To disable the chime, turn the light
off, then
back on.
If you start your vehicle in a dark garage, the automatic
headlamp system will come on immediately. Once
you leave the garage, it will take approximately
3-1 2