Page 2 of 240
Seating and Safety Restraints 87
Seating 87
Safety restraints 98
Air bags 111
Child restraints 117
Driving 131
Starting 131
Brakes 134
Traction control 135
Transmission operation 139
Trailer towing 146
Roadside Emergencies 150
Getting roadside assistance 150
Hazard flasher switch 151
Fuel pump shut-off switch 151
Fuses and relays 152
Changing tires 160
Jump starting 167
Wrecker towing 172
Customer Assistance 173
Reporting safety defects (U.S. only) 181
Cleaning 182
Maintenance and Specifications 188
Engine compartment 190
Engine oil 191
Battery 194
Fuel information 201
Low tire warning system 215
Part numbers 220
Refill capacities 220
Lubricant specifications 222
Table of Contents
2
Page 8 of 240
These are some of the symbols you may see on your vehicle.
Vehicle Symbol Glossary
Safety Alert
See Owner’s Guide
Fasten Safety BeltAir Bag-Front
Air Bag-SideChild Seat
Child Seat Installation
WarningChild Seat Lower
Anchor
Child Seat Tether
AnchorBrake System
Anti-Lock Brake SystemBrake Fluid -
Non-Petroleum Based
Traction ControlAdvanceTrac
Master Lighting SwitchHazard Warning Flasher
Fog Lamps-FrontFuse Compartment
Fuel Pump ResetWindshield Wash/Wipe
Windshield
Defrost/DemistRear Window
Defrost/Demist
Introduction
8
Page 49 of 240
Resetting the PSD
The power sliding door may operate incorrectly or not at all because of
the following conditions:
•a low voltage or dead battery
•disconnecting the battery
•if the PSD fuse (fuse #6) is removed or blown. Refer toFuses and
relaysin theRoadside emergencieschapter.
If any of the above conditions has occured, preform the following steps
to reset the PSD:
1. Check to see if PSD is unlocked and securely closed.
2. Make sure the gearshift is in (P) Park.
3. Push the PSD control on the overhead console to open the door.
4. Wait five (5) seconds and close the door by pressing the PSD control
on the overhead console.
5. Wait five (5) seconds and repeat Steps 3 and 4 then go on to step 6.
6. Repeat steps 3–5 for opposite door.
If the door does not rest in the fully open position, repeat Steps 1–4
again. If the door still does not operate correctly:
7. Turn the ignition switch to OFF.
8. Remove the PSD fuse (fuse #6) from the passenger fuse panel and
leave it out for thirty (30) seconds. Refer toFuses and relaysin the
Roadside emergencieschapter.
9. Reinstall the fuse and wait ten (10) seconds.
10. Repeat steps 1–6 above.
If the door still does not operate correctly, see your dealer for service.
Sliding Door Child Safety Lock
Your vehicle is equipped with a sliding door child safety lock that helps
prevent passengers from operating the sliding door by using the inside
door handle, refer toChild safety locksin theLocks and Security
chapter.
To open the sliding door when the child safety lock is on:
•Unlock the sliding door and open the door from the outside.
•Press the right or left hand control on the overhead console to open
the door.
Driver Controls
49
Page 50 of 240
AUXILIARY POWER POINT
Power outlets are designed for accessory plugs only. Do not hang
any type of accessory or accessory bracket from the plug.
Improper use of the power outlet can cause damage not covered
by your warranty.
Do not plug optional electrical accessories into the cigarette lighter. Use
the power point.
Do not use the power point for operating the cigarette lighter element.
The Maximum power each power point can supply depends on the fuse
rating. For example: a 20A fuse should supply a maximum of 240 Watts,
a 15A fuse should supply a maximum of 180 Watts and a 10A fuse should
supply a maximum of 120 Watts. Exceeding these limits will result in a
blown fuse.
Always keep the power point caps closed when not being used.
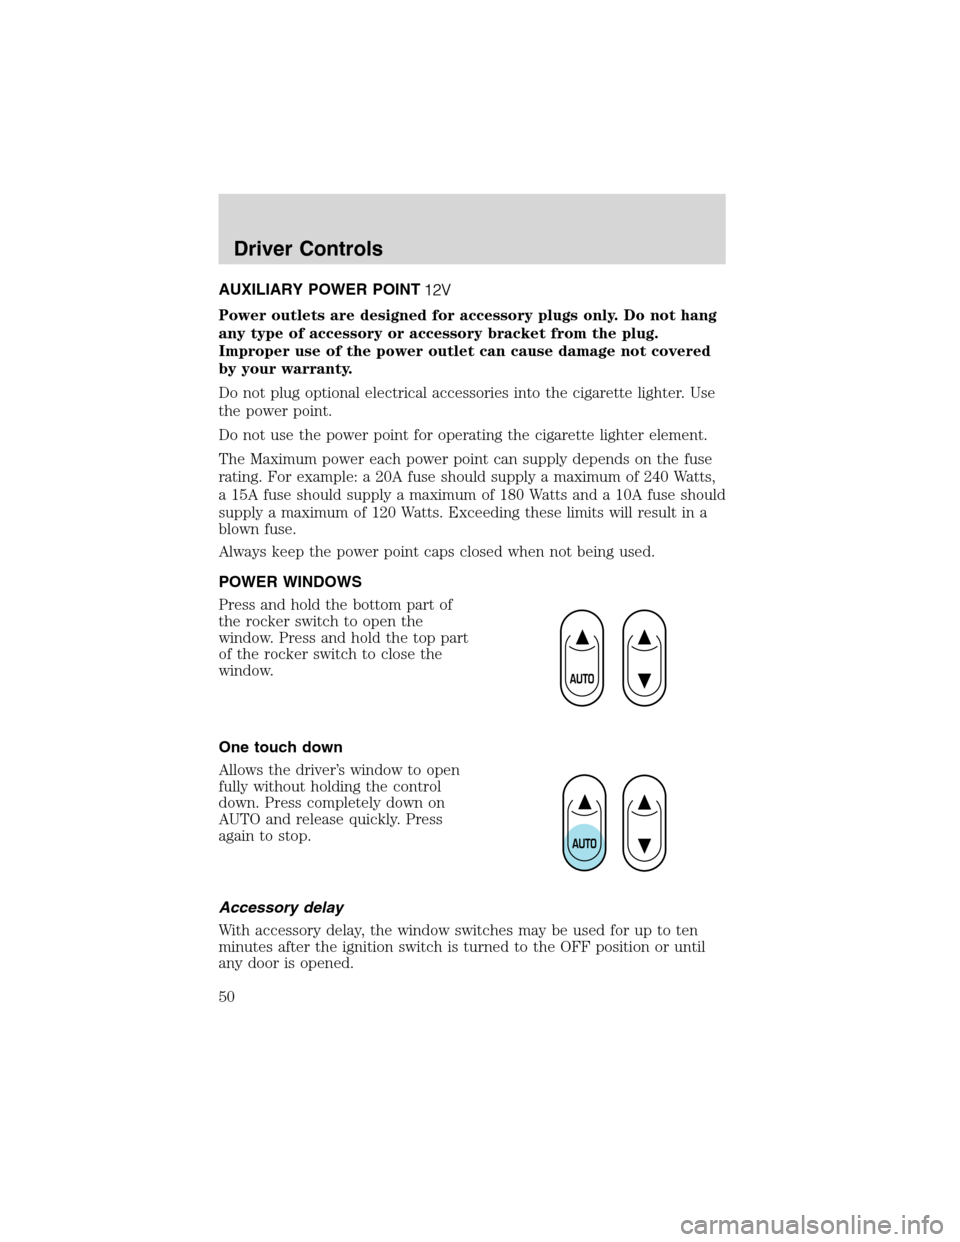
POWER WINDOWS
Press and hold the bottom part of
the rocker switch to open the
window. Press and hold the top part
of the rocker switch to close the
window.
One touch down
Allows the driver’s window to open
fully without holding the control
down. Press completely down on
AUTO and release quickly. Press
again to stop.
Accessory delay
With accessory delay, the window switches may be used for up to ten
minutes after the ignition switch is turned to the OFF position or until
any door is opened.
Driver Controls
50
Page 113 of 240
Do not attempt to service, repair, or modify the air bag
supplemental restraint systems or its fuses. See your Ford or
Lincoln Mercury dealer.
Modifying or adding equipment to the front end of the vehicle
(including frame, bumper, front end body structure and tow
hooks) may affect the performance of the air bag system, increasing
the risk of injury. Do not modify the front end of the vehicle.
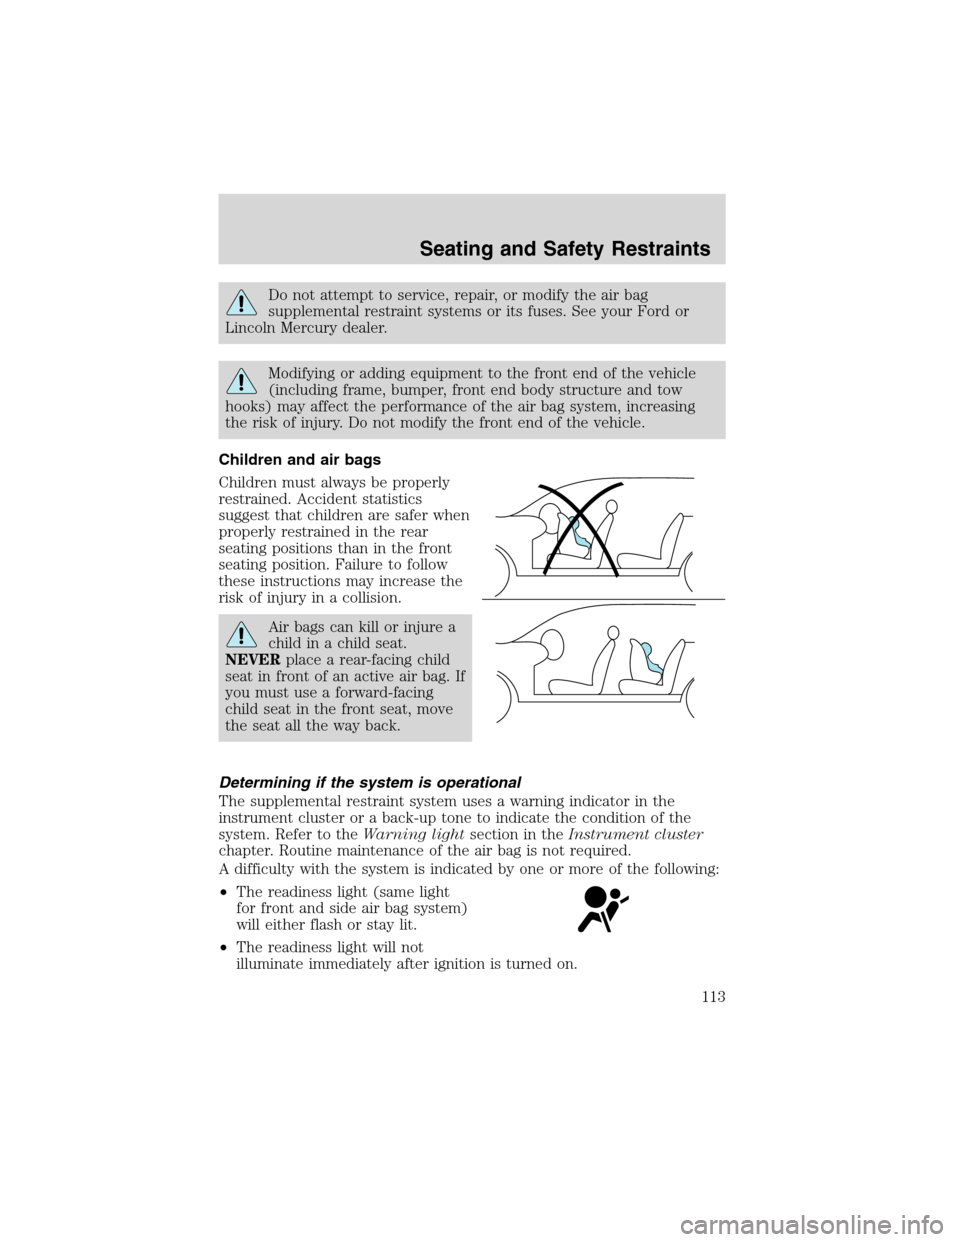
Children and air bags
Children must always be properly
restrained. Accident statistics
suggest that children are safer when
properly restrained in the rear
seating positions than in the front
seating position. Failure to follow
these instructions may increase the
risk of injury in a collision.
Air bags can kill or injure a
child in a child seat.
NEVERplace a rear-facing child
seat in front of an active air bag. If
you must use a forward-facing
child seat in the front seat, move
the seat all the way back.
Determining if the system is operational
The supplemental restraint system uses a warning indicator in the
instrument cluster or a back-up tone to indicate the condition of the
system. Refer to theWarning lightsection in theInstrument cluster
chapter. Routine maintenance of the air bag is not required.
A difficulty with the system is indicated by one or more of the following:
•The readiness light (same light
for front and side air bag system)
will either flash or stay lit.
•The readiness light will not
illuminate immediately after ignition is turned on.
Seating and Safety Restraints
113
Page 116 of 240
Do not use accessory seat covers. The use of accessory seat
covers may prevent the deployment of the side air bags and
increase the risk of injury in an accident.
Do not lean your head on the door. The side air bag could injure
you as it deploys from the side of the seatback.
Do not attempt to service, repair, or modify the air bag SRS, its
fuses or the seat cover on a seat containing an air bag. See your
Ford or Lincoln Mercury dealer.
All occupants of the vehicle should always wear their safety belts
even when an air bag SRS is provided.
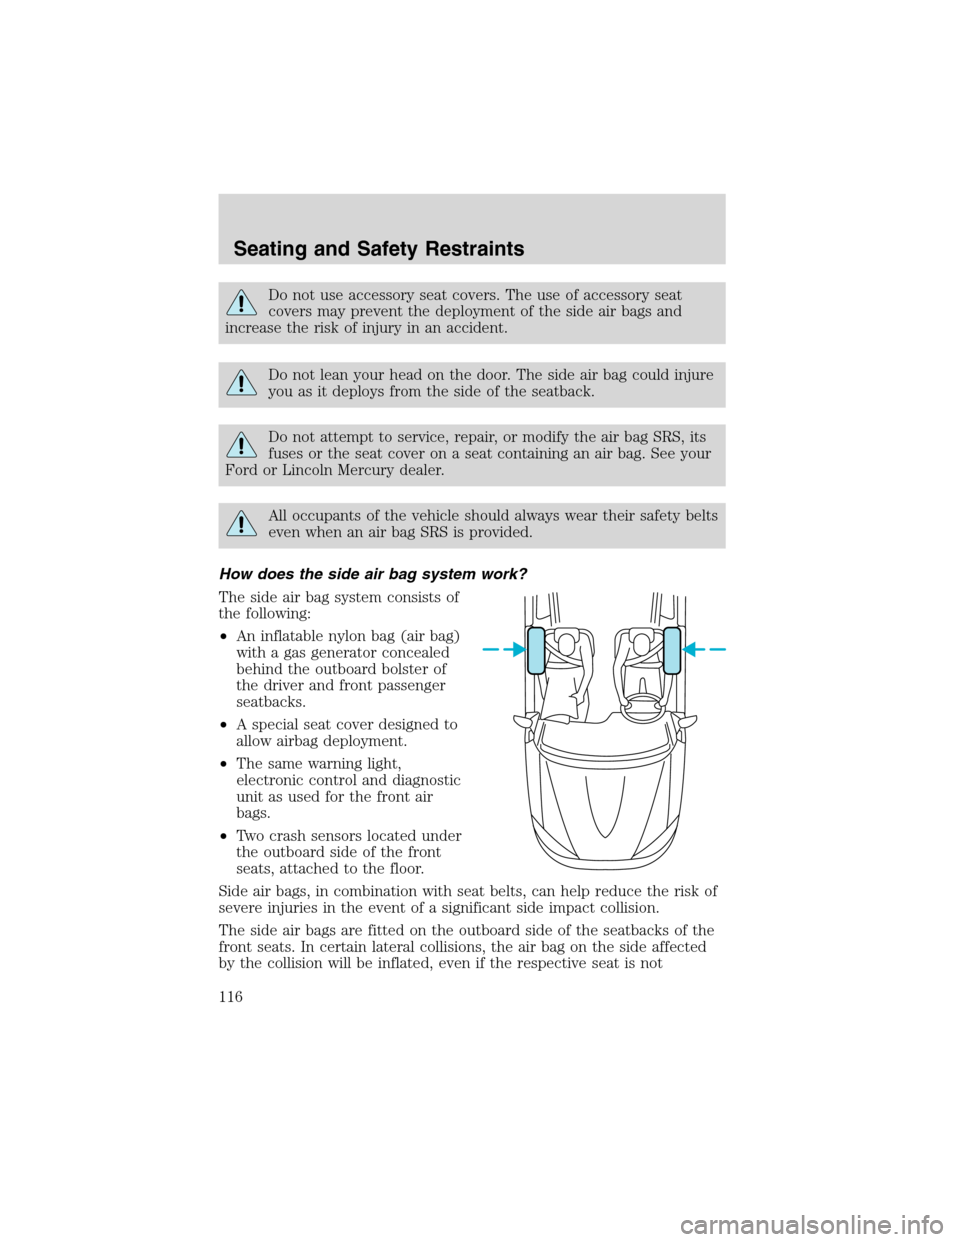
How does the side air bag system work?
The side air bag system consists of
the following:
•An inflatable nylon bag (air bag)
with a gas generator concealed
behind the outboard bolster of
the driver and front passenger
seatbacks.
•A special seat cover designed to
allow airbag deployment.
•The same warning light,
electronic control and diagnostic
unit as used for the front air
bags.
•Two crash sensors located under
the outboard side of the front
seats, attached to the floor.
Side air bags, in combination with seat belts, can help reduce the risk of
severe injuries in the event of a significant side impact collision.
The side air bags are fitted on the outboard side of the seatbacks of the
front seats. In certain lateral collisions, the air bag on the side affected
by the collision will be inflated, even if the respective seat is not
Seating and Safety Restraints
116
Page 139 of 240
AUTOMATIC TRANSAXLE OPERATION
Brake-shift interlock
This vehicle is equipped with a brake-shift interlock feature that prevents
the gearshift lever from being moved from P (Park) when the ignition is
in the ON position unless brake pedal is depressed.
If you cannot move the gearshift lever out of P (Park) with ignition in
the ON position and the brake pedal depressed:
1. Apply the parking brake, turn ignition key to LOCK, then remove the
key.
2. Insert the key and turn it to OFF.Apply the brake pedal and shift
to N (Neutral).
In the ignition OFF position, the automatic transmission shift
lever can be moved from the P (Park) position without the brake
pedal depressed. To avoid unwanted vehicle movement, always set the
parking brake.
3. Start the vehicle.
If it is necessary to use the above procedure to move the gearshift lever,
it is possible that a fuse has blown or the vehicle’s brakelamps are not
operating properly. Refer toFuses and relaysin theRoadside
emergencieschapter.
Do not drive your vehicle until you verify that the brakelamps
are working.
Always set the parking brake fully and make sure the gearshift is
latched in P (Park). Turn the ignition to the LOCK position and
remove the key whenever you leave your vehicle.
If the parking brake is fully released, but the brake warning lamp
remains illuminated, the brakes may not be working properly.
See your dealer or a qualified service technician.
Driving with an automatic overdrive transaxle with column
gearshift and O/D off switch
Your transaxle is equipped with an adaptive learning strategy found in
the vehicle computer. This feature is designed to increase durability and
Driving
139
Page 152 of 240
This switch is located behind the
service panel on the right side of
the cargo area.
To reset the switch:
1. Turn the ignition OFF.
2. Check the fuel system for leaks.
3. If no leaks are apparent, reset the
switch by pushing in on the reset
button.
4. Turn the ignition ON.
5. Wait a few seconds and return
the key to OFF.
6. Make another check of leaks.
FUSES AND RELAYS
Fuses
If electrical components in the
vehicle are not working, a fuse may
have blown. Blown fuses are
identified by a broken wire within
the fuse. Check the appropriate
fuses before replacing any electrical
components.
Note:Always replace a fuse with one that has the specified amperage
rating. Using a fuse with a higher amperage rating can cause severe wire
damage and could start a fire.
15
Roadside Emergencies
152