2003 FORD SUPER DUTY reset
[x] Cancel search: resetPage 53 of 256
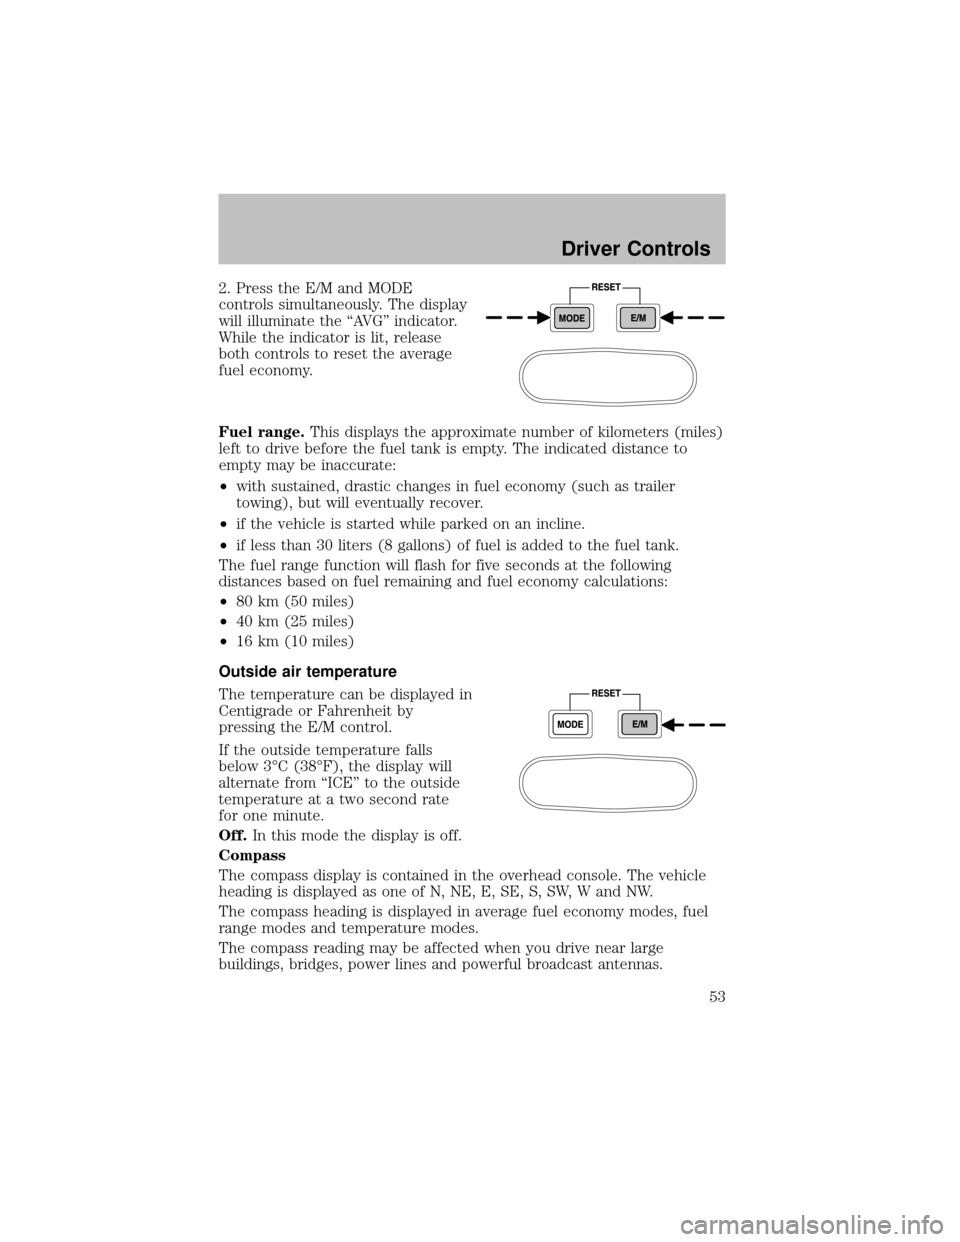
2. Press the E/M and MODE
controls simultaneously. The display
will illuminate the “AVG” indicator.
While the indicator is lit, release
both controls to reset the average
fuel economy.
Fuel range.This displays the approximate number of kilometers (miles)
left to drive before the fuel tank is empty. The indicated distance to
emptymaybe inaccurate:
•with sustained, drastic changes in fuel economy(such as trailer
towing), but will eventuallyrecover.
•if the vehicle is started while parked on an incline.
•if less than 30 liters (8 gallons) of fuel is added to the fuel tank.
The fuel range function will flash for five seconds at the following
distances based on fuel remaining and fuel economycalculations:
•80 km (50 miles)
•40 km (25 miles)
•16 km (10 miles)
Outside air temperature
The temperature can be displayed in
Centigrade or Fahrenheit by
pressing the E/M control.
If the outside temperature falls
below 3°C (38°F), the displaywill
alternate from “ICE” to the outside
temperature at a two second rate
for one minute.
Off.In this mode the displayis off.
Compass
The compass displayis contained in the overhead console. The vehicle
heading is displayed as one of N, NE, E, SE, S, SW, W and NW.
The compass heading is displayed in average fuel economy modes, fuel
range modes and temperature modes.
The compass reading maybe affected when you drive near large
buildings, bridges, power lines and powerful broadcast antennas.
Driver Controls
53
Page 150 of 256
•Tires have their maximum inflation pressure and associated load rating
imprinted on the tire sidewall. This pressure mayor maynot be the
same as that shown as recommended on the vehicle. The vehicle
operator mayhave to adjust the tire inflation pressure to
accommodate the snowplow and payload. Consult your dealer or
equipment installer for help with proper inflation pressures.
•Federal and some local regulations require additional exterior lamps
for snowplow-equipped vehicles. Consult your dealer for additional
information.
•After installing a snowplow to the vehicle, ensure the vehicle’s front
toe alignment and front ride height are within specification (reset if
required). These specifications are located in the vehicle’s Workshop
Manual.
Note:Do not exceed the GVWR or the GAWR specified on the
certification label.
Removing snowplow
After removing a snowplow from the vehicle, ensure the vehicle’s front toe
alignment and front ride height are within specification (reset if required).
Snowplowing with your air bag-equipped vehicle
Your vehicle is equipped with a driver and passenger air bag
Supplemental Restraint System (SRS) The SRS is designed to activate in
certain frontal and offset frontal collisions when the vehicle sustains
sufficient longitudinal deceleration.
Careless or high speed driving while plowing snow which results in
sufficient vehicle decelerations can deploythe air bag. Such driving also
increases the risk of accidents.
All occupants of the vehicle, including the driver, should always
properlywear their safetybelts, even when an air bag (SRS) is
provided.
Never remove or defeat the “tripping mechanisms” designed into the
snow removal equipment byits manufacturer. Doing so maycause
damage to the vehicle and the snow removal equipment as well as
possible air bag deployment.
Do not attempt to service, repair, or modifythe Air Bag
Supplemental Restraint System or its fuses. See your Ford or
Lincoln Mercurydealer.
Driving
150
Page 153 of 256
Canadian customers who require roadside assistance, call
1–800–665–2006.
If you need to arrange roadside assistance for yourself, Ford Motor
Companywill reimburse a reasonable amount. To obtain reimbursement
information, U.S. Ford or Mercuryvehicles customers call
1-800-241-3673; Lincoln vehicle customers call 1–800–521–4140.
Canadian customers who need to obtain reimbursement information, call
1–800–665–2006.
ROADSIDE COVERAGE BEYOND BASIC WARRANTY
In the United States, you may purchase additional roadside assistance
coverage beyond this period through the Ford Auto Club by contacting
your Ford or Lincoln Mercury dealer.
Similarlyin Canada, for uninterrupted Roadside Assistance coverage, you
maypurchase extended coverage prior to your Basic Warranty’s Roadside
Assistance expiring. For more information and enrollment, contact
1–877–294–2582 or visit our website at www.ford.ca.
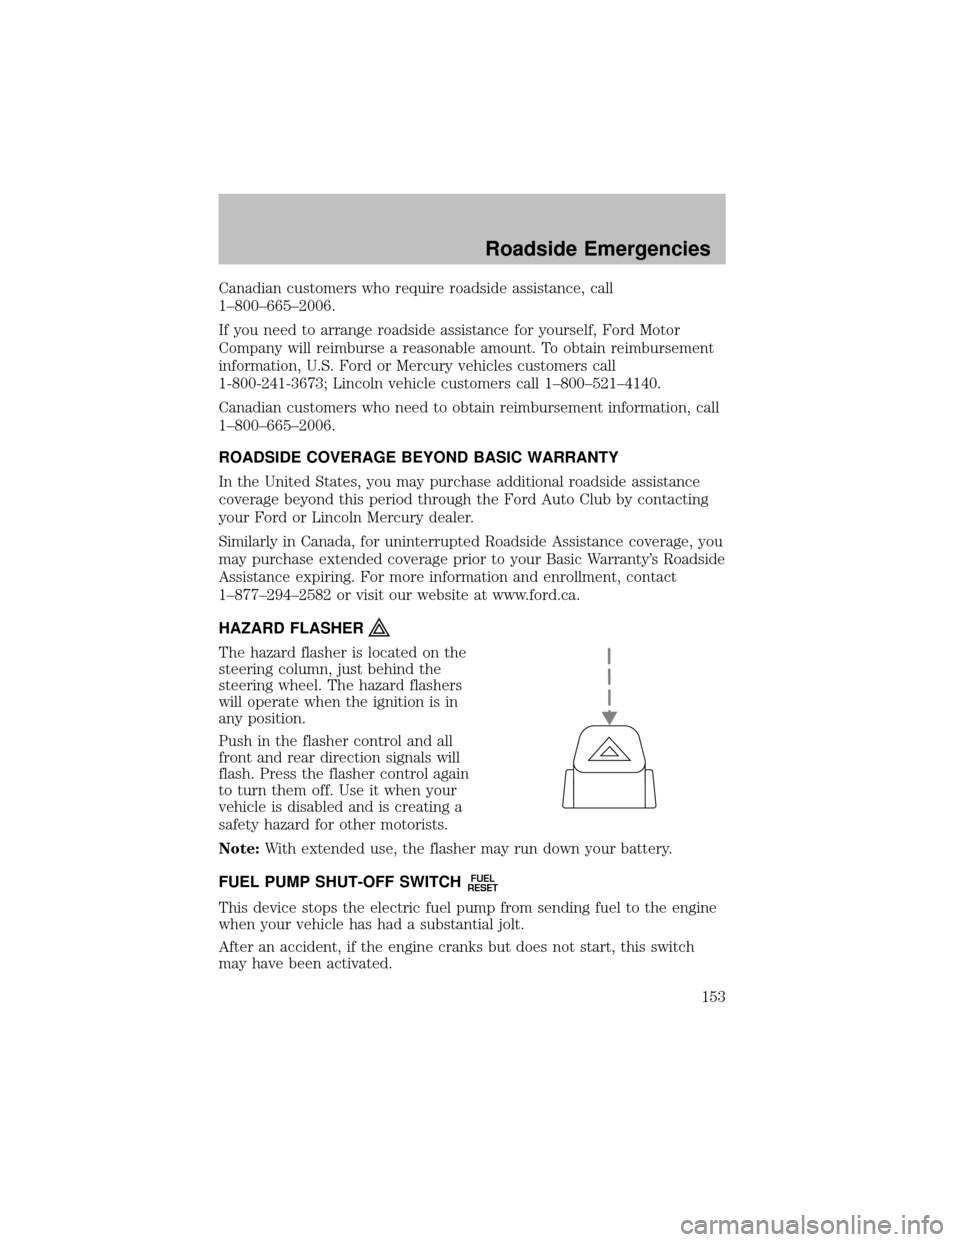
HAZARD FLASHER
The hazard flasher is located on the
steering column, just behind the
steering wheel. The hazard flashers
will operate when the ignition is in
anyposition.
Push in the flasher control and all
front and rear direction signals will
flash. Press the flasher control again
to turn them off. Use it when your
vehicle is disabled and is creating a
safetyhazard for other motorists.
Note:With extended use, the flasher mayrun down your battery.
FUEL PUMP SHUT-OFF SWITCH
FUEL
RESET
This device stops the electric fuel pump from sending fuel to the engine
when your vehicle has had a substantial jolt.
After an accident, if the engine cranks but does not start, this switch
mayhave been activated.
Roadside Emergencies
153
Page 154 of 256
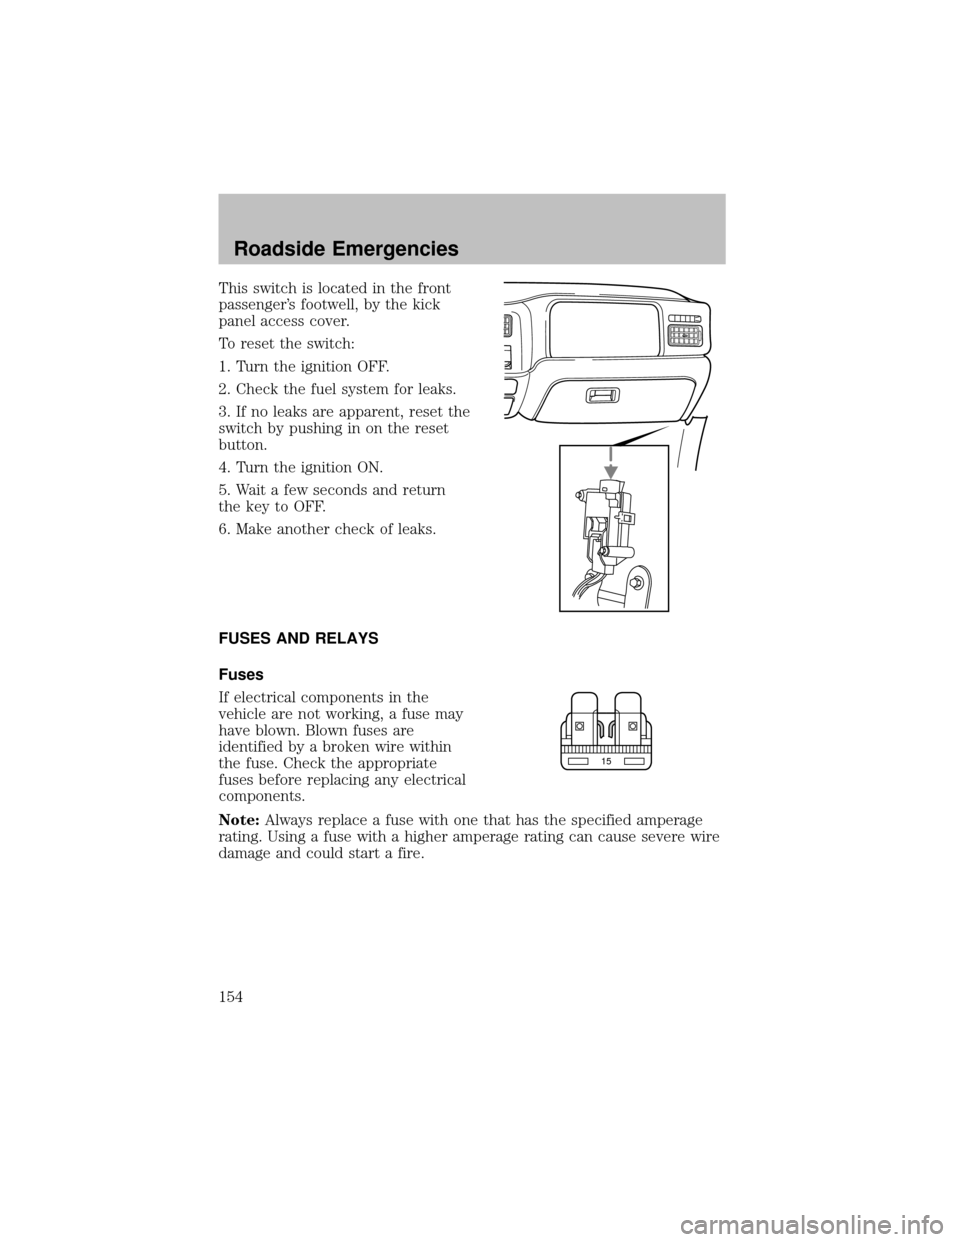
This switch is located in the front
passenger’s footwell, bythe kick
panel access cover.
To reset the switch:
1. Turn the ignition OFF.
2. Check the fuel system for leaks.
3. If no leaks are apparent, reset the
switch bypushing in on the reset
button.
4. Turn the ignition ON.
5. Wait a few seconds and return
the keyto OFF.
6. Make another check of leaks.
FUSES AND RELAYS
Fuses
If electrical components in the
vehicle are not working, a fuse may
have blown. Blown fuses are
identified bya broken wire within
the fuse. Check the appropriate
fuses before replacing anyelectrical
components.
Note:Always replace a fuse with one that has the specified amperage
rating. Using a fuse with a higher amperage rating can cause severe wire
damage and could start a fire.
15
Roadside Emergencies
154
Page 198 of 256
When lifting a plastic-cased battery, excessive pressure on the
end walls could cause acid to flow through the vent caps,
resulting in personal injuryand/or damage to the vehicle or battery.
Lift the batterywith a batterycarrier or with your hands on opposite
corners.
Keep batteries out of reach of children. Batteries contain sulfuric
acid. Avoid contact with skin, eyes or clothing. Shield your eyes
when working near the batteryto protect against possible splashing of
acid solution. In case of acid contact with skin or eyes, flush
immediatelywith water for a minimum of 15 minutes and get prompt
medical attention. If acid is swallowed, call a physician immediately.
Batteryposts, terminals and related accessories contain lead and
lead compounds.Wash hands after handling.
For information on transmission operation after the batteryhas been
disconnected see “Shift strategy” in the driving section.
Because your vehicle’s engine is also electronicallycontrolled bya
computer, some control conditions are maintained bypower from the
battery. When the batteryis disconnected or a new batteryis installed,
the engine must relearn its idle and fuel trim strategyfor optimum
driveabilityand performance. To begin this process:
1. With the vehicle at a complete stop, set the parking brake.
2. Put the gearshift in P (Park) (automatic transmission) or the neutral
position (manual transmission), turn off all accessories and start the
engine.
3. Run the engine until it reaches normal operating temperature.
4. Allow the engine to idle for at least one minute.
5. Turn the A/C on and allow the engine to idle for at least one minute.
6. Drive the vehicle to complete the relearning process.
•The vehicle mayneed to be driven 16 km (10 miles) or more to
relearn the idle and fuel trim strategy.
•If you do not allow the engine to relearn its idle trim, the idle
quality of your vehicle may be adversely affected until the idle
trim is eventually relearned.
If the batteryhas been disconnected or a new batteryhas been installed,
the clock and the preset radio stations must be reset once the batteryis
reconnected.
Maintenance and Specifications
198
Page 204 of 256
•Decreased engine coolant concentrations below 40% will
decrease the corrosion protection characteristics of the engine
coolant and may cause engine damage.
•Decreased engine coolant concentrations below 40% will
decrease the freeze protection characteristics of the engine
coolant and may cause engine damage.
•Refer to the chart on the coolant container to ensure the
coolant concentration in your vehicle will provide adequate
protection at the temperatures in which you drive.
Vehicles driven year-round in non-extreme climates should use a 50/50
mixture of engine coolant and distilled water for optimum cooling system
and engine protection.
What you should know about fail-safe cooling (if equipped)
If the engine coolant supplyis depleted, this feature allows the vehicle to
be driven temporarilybefore incremental component damage is incurred.
The “fail-safe” distance depends on ambient temperatures, vehicle load
and terrain.
How fail-safe cooling works
If the engine begins to overheat:
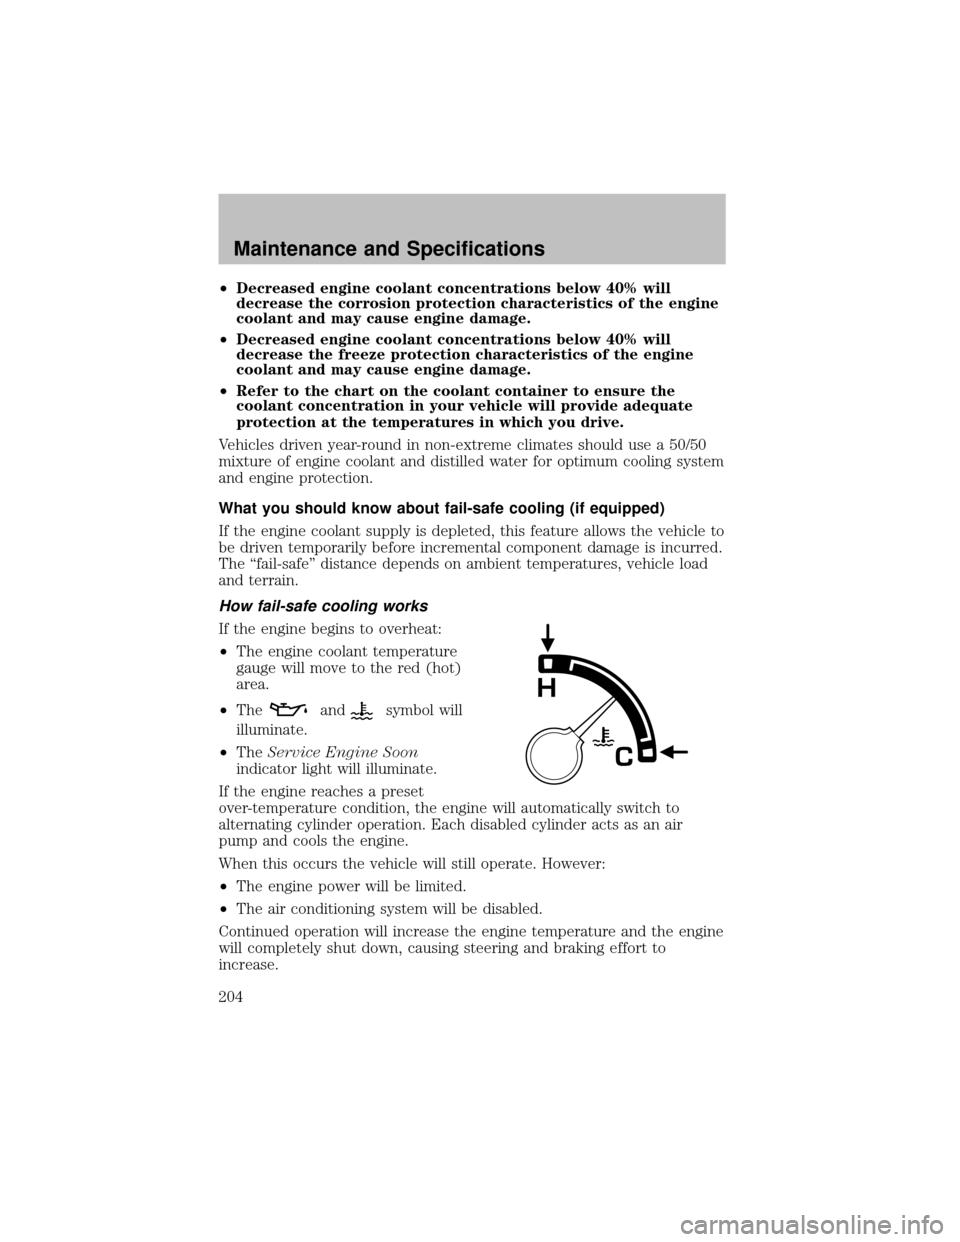
•The engine coolant temperature
gauge will move to the red (hot)
area.
•The
andsymbol will
illuminate.
•TheService Engine Soon
indicator light will illuminate.
If the engine reaches a preset
over-temperature condition, the engine will automaticallyswitch to
alternating cylinder operation. Each disabled cylinder acts as an air
pump and cools the engine.
When this occurs the vehicle will still operate. However:
•The engine power will be limited.
•The air conditioning system will be disabled.
Continued operation will increase the engine temperature and the engine
will completelyshut down, causing steering and braking effort to
increase.
Maintenance and Specifications
204
Page 214 of 256
Exhaust leaks mayresult in entryof harmful and potentially
lethal fumes into the passenger compartment.
Do not make anyunauthorized changes to your vehicle or engine. By
law, vehicle owners and anyone who manufactures, repairs, services,
sells, leases, trades vehicles, or supervises a fleet of vehicles are not
permitted to intentionallyremove an emission control device or prevent
it from working. Information about your vehicle’s emission system is on
the Vehicle Emission Control Information Decal located on or near the
engine. This decal identifies engine displacement and gives some tune up
specifications.
Please consult yourWarranty Guidefor complete emission warranty
information.
Readiness for Inspection/Maintenance (I/M) testing
In some localities, it maybe a legal requirement to pass an I/M test of
the on-board diagnostics system. If your “Check Engine/Service Engine
Soon” light is on, refer to the description in theWarning lights and
chimessection of theInstrument clusterchapter. Your vehicle maynot
pass the I/M test with the “Check Engine/Service Engine Soon” light on.
If the vehicle’s powertrain system or its battery has just been serviced,
the on-board diagnostics system is reset to a “not ready for I/M test”
condition. To readythe on-board diagnostics system for I/M testing, a
minimum of 30 minutes of cityand highwaydriving is necessaryas
described below:
•First, at least 10 minutes of driving on an expresswayor highway.
•Next, at least 20 minutes driving in stop-and-go, city-type traffic with
at least four idle periods.
Allow the vehicle to sit for at least eight hours without starting the
engine. Then, start the engine and complete the above driving cycle. The
engine must warm up to its normal operating temperature. Once started,
do not turn off the engine until the above driving cycle is complete.
Maintenance and Specifications
214