2003 FORD SUPER DUTY fuse
[x] Cancel search: fusePage 2 of 256
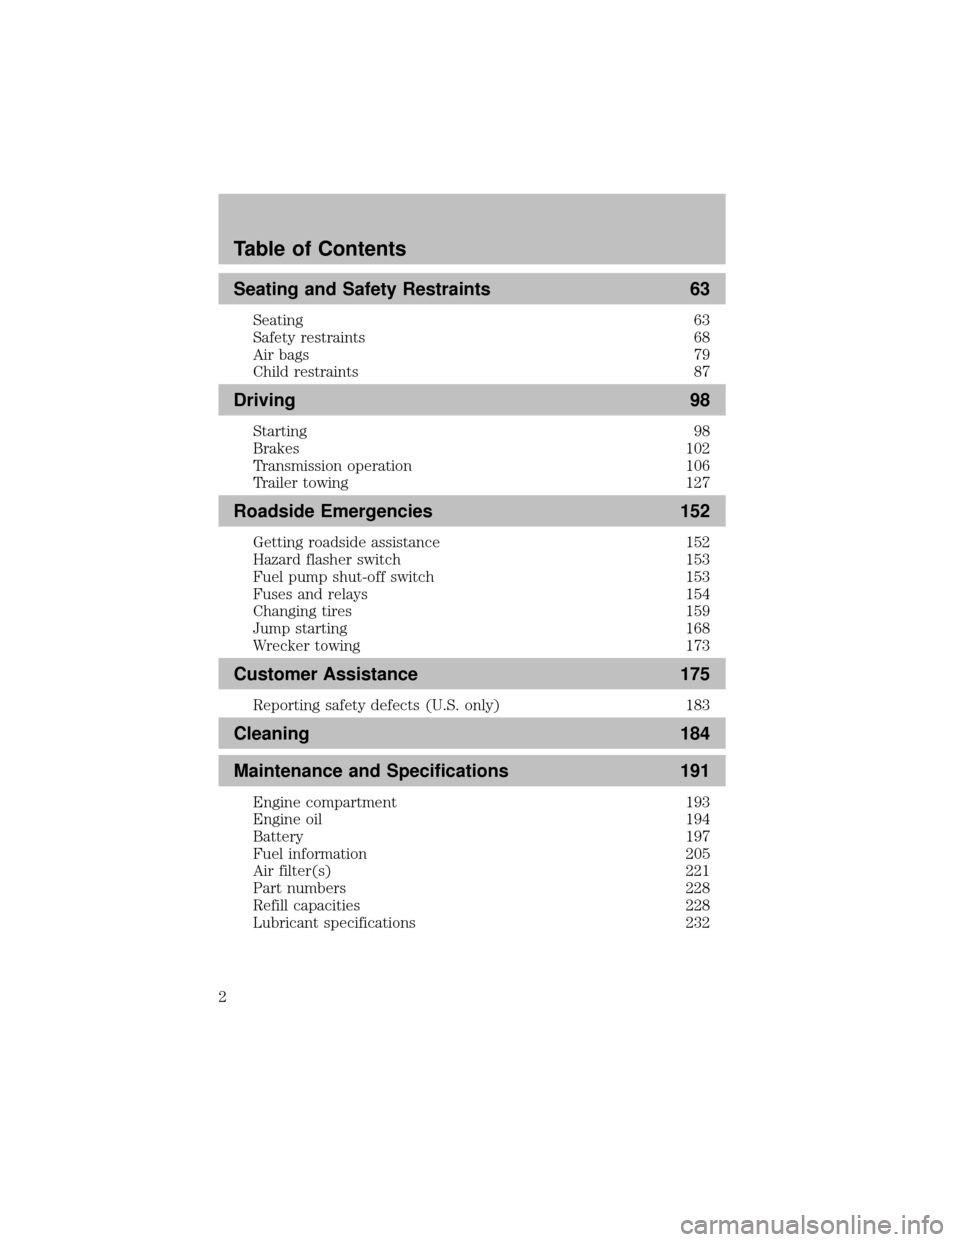
Seating and Safety Restraints 63
Seating 63
Safetyrestraints 68
Air bags 79
Child restraints 87
Driving 98
Starting 98
Brakes 102
Transmission operation 106
Trailer towing 127
Roadside Emergencies 152
Getting roadside assistance 152
Hazard flasher switch 153
Fuel pump shut-off switch 153
Fuses and relays 154
Changing tires 159
Jump starting 168
Wrecker towing 173
Customer Assistance 175
Reporting safetydefects (U.S. only) 183
Cleaning 184
Maintenance and Specifications 191
Engine compartment 193
Engine oil 194
Battery197
Fuel information 205
Air filter(s) 221
Part numbers 228
Refill capacities 228
Lubricant specifications 232
Table of Contents
2
Page 8 of 256
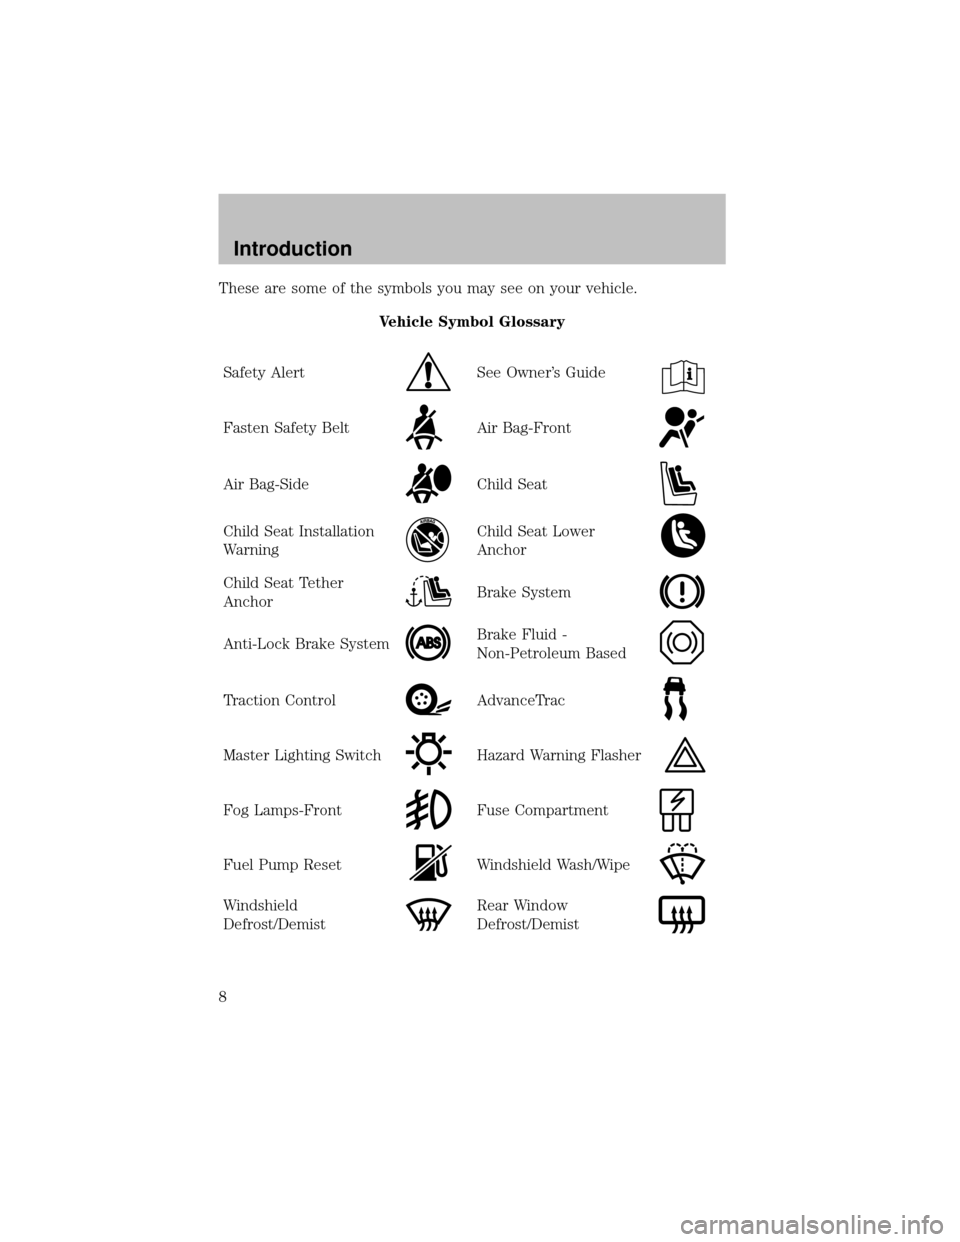
These are some of the symbols you may see on your vehicle.
Vehicle Symbol Glossary
SafetyAlert
See Owner’s Guide
Fasten SafetyBeltAir Bag-Front
Air Bag-SideChild Seat
Child Seat Installation
WarningChild Seat Lower
Anchor
Child Seat Tether
AnchorBrake System
Anti-Lock Brake SystemBrake Fluid -
Non-Petroleum Based
Traction ControlAdvanceTrac
Master Lighting SwitchHazard Warning Flasher
Fog Lamps-FrontFuse Compartment
Fuel Pump ResetWindshield Wash/Wipe
Windshield
Defrost/DemistRear Window
Defrost/Demist
Introduction
8
Page 80 of 256
Never place your arm over the air bag module as a deploying air
bag can result in serious arm fractures or other injuries.
To properlyposition yourself awayfrom the air bag:
•Move your seat to the rear as far as you can while still reaching the
pedals comfortably.
•Recline the seat slightlyone or two degrees from the upright position.
Do not put anything on or over the air bag module. Placing
objects on or over the air bag inflation area maycause those
objects to be propelled bythe air bag into your face and torso causing
serious injury.
Do not attempt to service, repair, or modifythe air bag
supplemental restraint systems or its fuses. See your Ford or
Lincoln Mercurydealer.
The front passenger air bag is not designed to offer protection to
an occupant in the center front seating position.
Modifying or adding equipment to the front end of the vehicle
(including frame, bumper, front end bodystructure and tow
hooks) mayaffect the performance of the air bag system, increasing
the risk of injury. Do not modify the front end of the vehicle.
Additional equipment such as snowplow equipment mayeffect
the performance of the air bag sensors increasing the risk of
injury. Please refer to the Body Builders Lay out Book for instructions
about the appropriate installation of additional equipment.
Removing the blocker beam without installing snow plow
attachment hardware mayeffect air bag deployment in a crash.
Do not operate the truck unless either the blocker beam or snow plow
attachment hardware is installed on the vehicle.
Children and air bags
For additional important safetyinformation, read all information on
safetyrestraints in this guide.
Seating and Safety Restraints
80
Page 106 of 256
Vehicles with a higher center of gravitysuch as utilityand
four-wheel drive vehicles handle differentlythan vehicles with a
lower center of gravity. Utility and four-wheel drive vehicles arenot
designed for cornering at speeds as high as passenger cars anymore
than low-slung sports cars are designed to perform satisfactorilyunder
off-road conditions. Avoid sharp turns, excessive speed and abrupt
maneuvers in these vehicles. Failure to drive cautiouslycould result in
an increased risk of loss of vehicle control, vehicle rollover, personal
injuryand death.
Loaded vehicles, with a higher center of gravity, may handle
differentlythan unloaded vehicles. Extra precautions, such as
slower speeds and increased stopping distance, should be taken when
driving a heavilyloaded vehicle.
AUTOMATIC TRANSMISSION OPERATION (IF EQUIPPED)
Brake-shift interlock
This vehicle is equipped with a brake-shift interlock feature that prevents
the gearshift lever from being moved from P (Park) when the ignition is
in the ON position unless brake pedal is depressed.
If you cannot move the gearshift lever out of P (Park) with ignition in
the ON position and the brake pedal depressed:
1. Applythe parking brake, turn ignition keyto LOCK, then remove the
key.
2. Insert the keyand turn it to OFF.Apply the brake pedal and shift
to N (Neutral).
In the ignition OFF position, the automatic transmission shift
lever can be moved from the P (Park) position without the brake
pedal depressed. To avoid unwanted vehicle movement, always set the
parking brake.
3. Start the vehicle.
If it is necessaryto use the above procedure to move the gearshift lever,
it is possible that a fuse has blown or the vehicle’s brakelamps are not
operating properly. Refer toFuses and relaysin theRoadside
emergencieschapter.
Driving
106
Page 147 of 256

Driving while you tow
When towing a trailer:
•Turn off the speed control. The speed control mayshut off
automaticallywhen you are towing on long, steep grades.
•Consult your local motor vehicle speed regulations for towing a trailer.
•To eliminate excessive shifting, use a lower gear. This will also assist
in transmission cooling. (For additional information, refer to the
Understanding the positions of the 4–speed automatic
transmissionsection in this chapter.
•Anticipate stops and brake gradually.
•Do not exceed the GCWR rating or transmission damage mayoccur.
Servicing after towing
If you tow a trailer for long distances, your vehicle will require more
frequent service intervals. Refer to your scheduled maintenance guide for
more information.
Trailer towing tips
•Practice turning, stopping and backing up before starting on a trip to
get the feel of the vehicle trailer combination. When turning, make
wider turns so the trailer wheels will clear curbs and other obstacles.
•Allow more distance for stopping with a trailer attached.
•The trailer tongue weight should be 10–15% of the loaded trailer
weight.
•After you have traveled 80 km (50 miles), thoroughly check your
hitch, electrical connections and trailer wheel lug nuts.
•To aid in engine/transmission cooling and A/C efficiencyduring hot
weather while stopped in traffic, place the gearshift lever in P (Park)
(automatic transmission) or N (Neutral) (manual transmissions).
•Vehicles with trailers should not be parked on a grade. If you must
park on a grade, place wheel chocks under the trailer’s wheels.
Launching or retrieving a boat
When backing down a ramp during boat launching or retrieval,
•Do not allow the static water level to rise above the bottom edge of
the rear bumper.
•Do not allow waves to break higher than 15 cm (6 inches) above the
bottom edge of the rear bumper.
•Disconnect the trailer tow electrical connector to prevent blown fuses
caused bywater entering into your trailer’s electrical wiring.
Driving
147
Page 150 of 256
•Tires have their maximum inflation pressure and associated load rating
imprinted on the tire sidewall. This pressure mayor maynot be the
same as that shown as recommended on the vehicle. The vehicle
operator mayhave to adjust the tire inflation pressure to
accommodate the snowplow and payload. Consult your dealer or
equipment installer for help with proper inflation pressures.
•Federal and some local regulations require additional exterior lamps
for snowplow-equipped vehicles. Consult your dealer for additional
information.
•After installing a snowplow to the vehicle, ensure the vehicle’s front
toe alignment and front ride height are within specification (reset if
required). These specifications are located in the vehicle’s Workshop
Manual.
Note:Do not exceed the GVWR or the GAWR specified on the
certification label.
Removing snowplow
After removing a snowplow from the vehicle, ensure the vehicle’s front toe
alignment and front ride height are within specification (reset if required).
Snowplowing with your air bag-equipped vehicle
Your vehicle is equipped with a driver and passenger air bag
Supplemental Restraint System (SRS) The SRS is designed to activate in
certain frontal and offset frontal collisions when the vehicle sustains
sufficient longitudinal deceleration.
Careless or high speed driving while plowing snow which results in
sufficient vehicle decelerations can deploythe air bag. Such driving also
increases the risk of accidents.
All occupants of the vehicle, including the driver, should always
properlywear their safetybelts, even when an air bag (SRS) is
provided.
Never remove or defeat the “tripping mechanisms” designed into the
snow removal equipment byits manufacturer. Doing so maycause
damage to the vehicle and the snow removal equipment as well as
possible air bag deployment.
Do not attempt to service, repair, or modifythe Air Bag
Supplemental Restraint System or its fuses. See your Ford or
Lincoln Mercurydealer.
Driving
150
Page 154 of 256
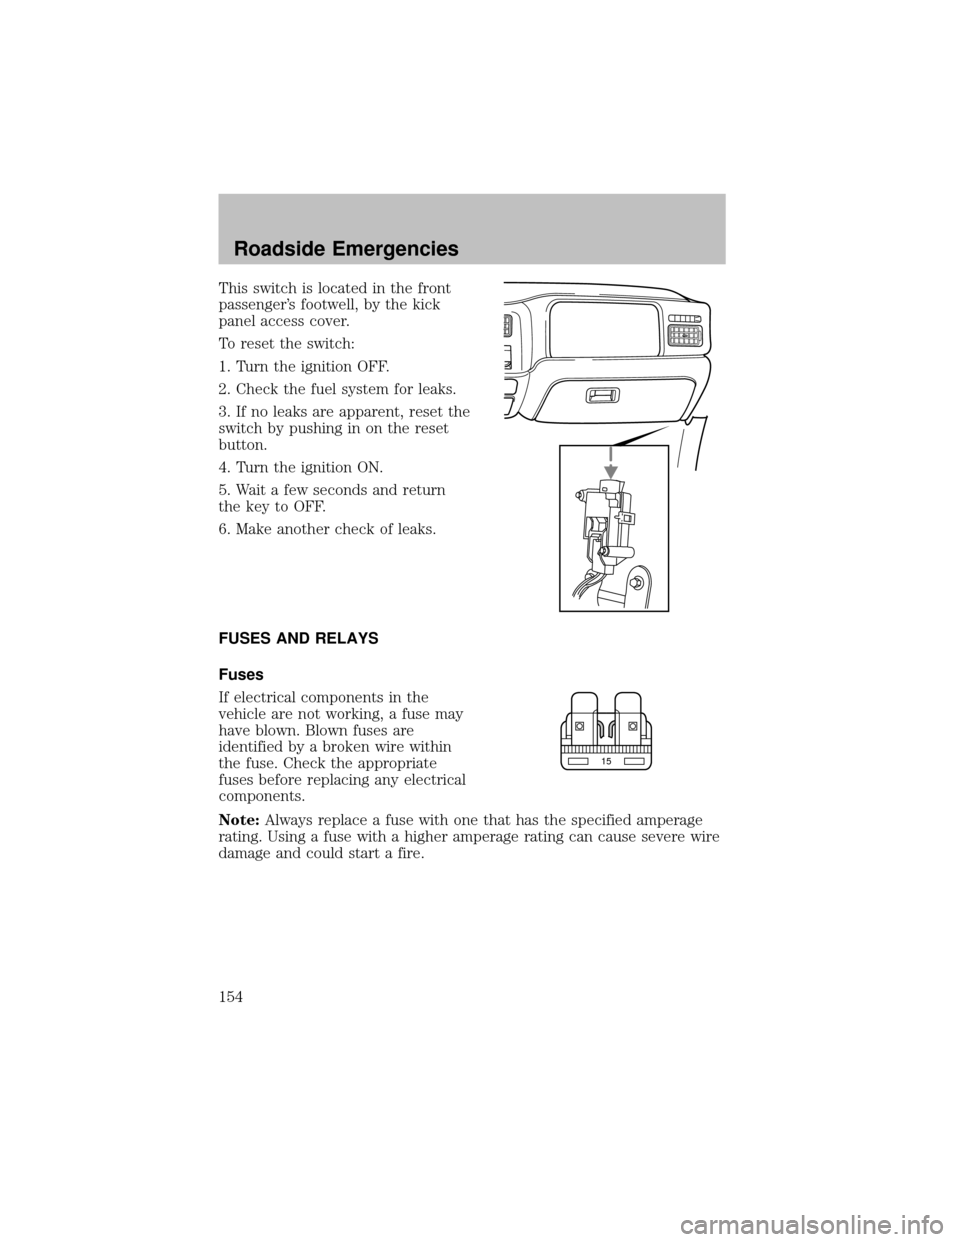
This switch is located in the front
passenger’s footwell, bythe kick
panel access cover.
To reset the switch:
1. Turn the ignition OFF.
2. Check the fuel system for leaks.
3. If no leaks are apparent, reset the
switch bypushing in on the reset
button.
4. Turn the ignition ON.
5. Wait a few seconds and return
the keyto OFF.
6. Make another check of leaks.
FUSES AND RELAYS
Fuses
If electrical components in the
vehicle are not working, a fuse may
have blown. Blown fuses are
identified bya broken wire within
the fuse. Check the appropriate
fuses before replacing anyelectrical
components.
Note:Always replace a fuse with one that has the specified amperage
rating. Using a fuse with a higher amperage rating can cause severe wire
damage and could start a fire.
15
Roadside Emergencies
154
Page 155 of 256
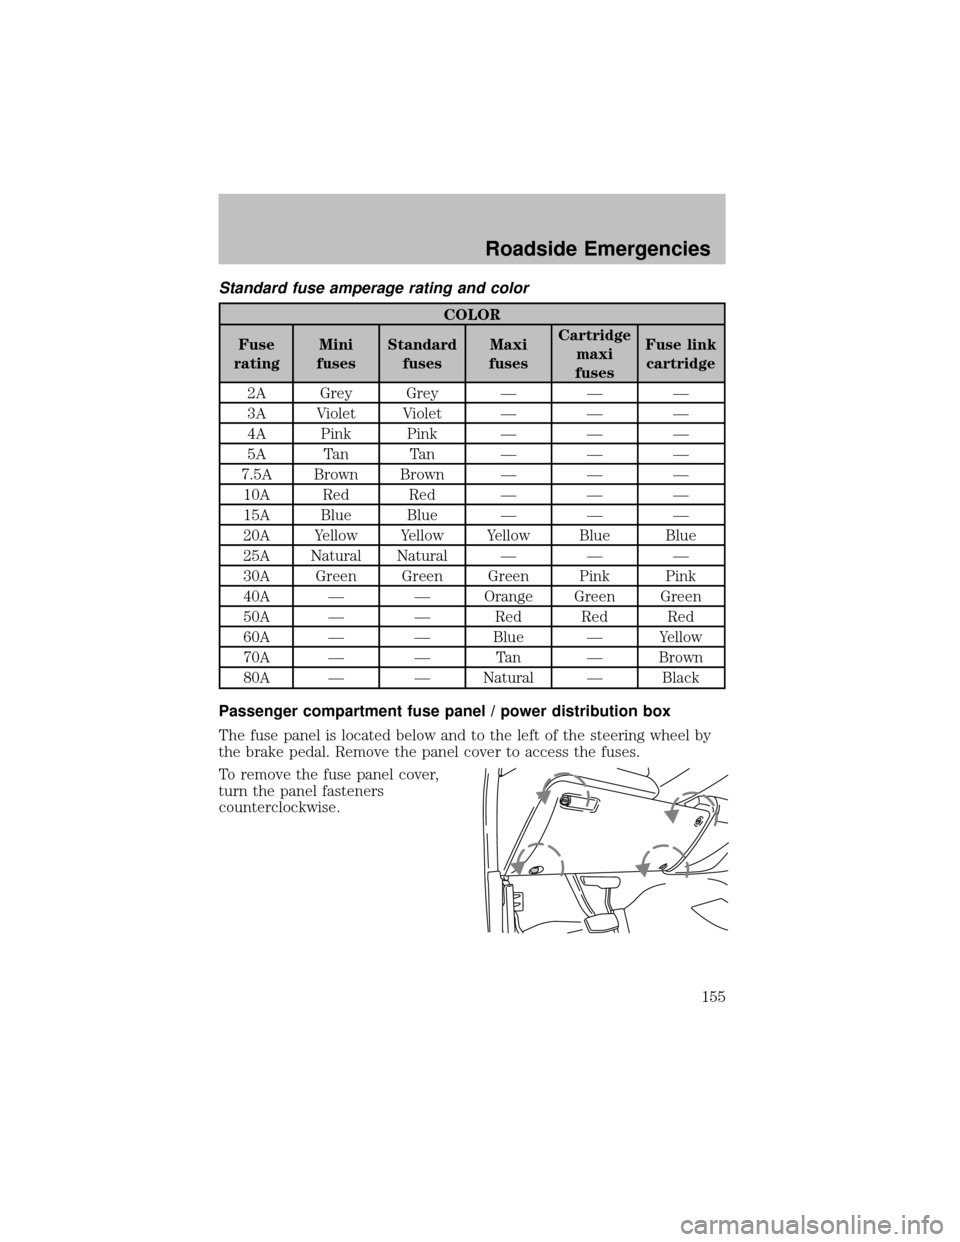
Standard fuse amperage rating and color
COLOR
Fuse
ratingMini
fusesStandard
fusesMaxi
fusesCartridge
maxi
fusesFuse link
cartridge
2A GreyGrey — — —
3A Violet Violet — — —
4A Pink Pink — — —
5A Tan Tan — — —
7.5A Brown Brown — — —
10A Red Red — — —
15A Blue Blue — — —
20A Yellow Yellow Yellow Blue Blue
25A Natural Natural — — —
30A Green Green Green Pink Pink
40A — — Orange Green Green
50A — — Red Red Red
60A — — Blue — Yellow
70A — — Tan — Brown
80A — — Natural — Black
Passenger compartment fuse panel / power distribution box
The fuse panel is located below and to the left of the steering wheel by
the brake pedal. Remove the panel cover to access the fuses.
To remove the fuse panel cover,
turn the panel fasteners
counterclockwise.
Roadside Emergencies
155