Page 1682 of 4378
3. If the copper links are not visible, mark one link on one end and one link on the other end, and
use as timing marks.
4. Install the timing chain guides.
5. Rotate the LH camshaft sprocket until the timing mark is approximately at the 12 o' clock position. Rotate the RH camshaft timing sprocket until the timing mark is approximately in the
11 o' clock position.
6. CAUTION: Unless otherwise instructed, at no time when the timing chains are �K�l�j . 4 �b�a
72003 Mustang Workshop Manual
17. 11. 2011file:///C:/Ford/2000 - 2004/tsocache/SHEF_4464/S3B~us~en~ ...
Page 1683 of 4378
removed and the cylinder heads are installed is the crankshaft or the camshaft to be
rotated. Severe piston and valve damage will occur.
CAUTION: Rotate the crankshaft counterclockwise only. Do not rotate past position
shown or severe piston or valve damage will occur.
Using the special tool, position the crankshaft.
7. Remove the special tool.
8. Install the crankshaft sprocket with the flange facing forward.
9. NOTE: LH timing chain shown; RH similar.
Install the LH timing chain onto the crankshaft sprocket, aligning the one copper link on the
timing chain with the slot on the crankshaft sprocket.
10. Verify the camshaft sprocket to copper link alignment. �K�l�j . 5 �b�a
72003 Mustang Workshop Manual
17. 11. 2011file:///C:/Ford/2000 - 2004/tsocache/SHEF_4464/S3B~us~en~ ...
Page 1695 of 4378
5. Remove the special tool.
6. Compress the tensioner and install a lock pin.
7. Remove the timing chain, the sprocket, and intake camshaft sprocket spacer.
8.
NOTE: LH shown; RH similar.
Remove the bolts. �K�l�j . 2 �b�a
72003 Mustang Workshop Manual
17. 11. 2011file:///C:/Ford/2000 - 2004/tsocache/SHEF_4464/S3B~us~en~ ...
Page 1698 of 4378
3. Install the bolts.
4.
CAUTION: Timing marks must be at 12 o'clock and indexed at 6 o'clock.
Install the camshaft sprockets and the chain as an assembly.
5. Remove the lockpin from the chain tensioner. �K�l�j . 5 �b�a
72003 Mustang Workshop Manual
17. 11. 2011file:///C:/Ford/2000 - 2004/tsocache/SHEF_4464/S3B~us~en~ ...
Page 1703 of 4378
IN-
VEHICLE REPAIR
Exhaust Manifold LH
Removal and Installation 1. Position the steering wheel straight ahead and lock the column.
2. Disconnect the battery ground cable. For additional information, refer to Section 414 - 01 .
3. Raise the vehicle. For additional information, refer to Section 100 - 02 .
4. Remove the dual converter Y- pipe. For additional information, refer to Section 309 - 00 .
5. Remove and discard the pinch bolt.
6. Separate the steering coupler.
7. Disconnect the exhaust gas recirculation (EGR) tube at the exhaust manifold.
SECTION 303-
01D: Engine — Mach I 4.6L (4V) 2003 Mustang Workshop Manual �K�l�j . 1 �b�a
32003 Mustang Workshop Manual
17. 11. 2011file:///C:/Ford/2000 - 2004/tsocache/SHEF_4464/S3B~us~en~ ...
Page 1714 of 4378

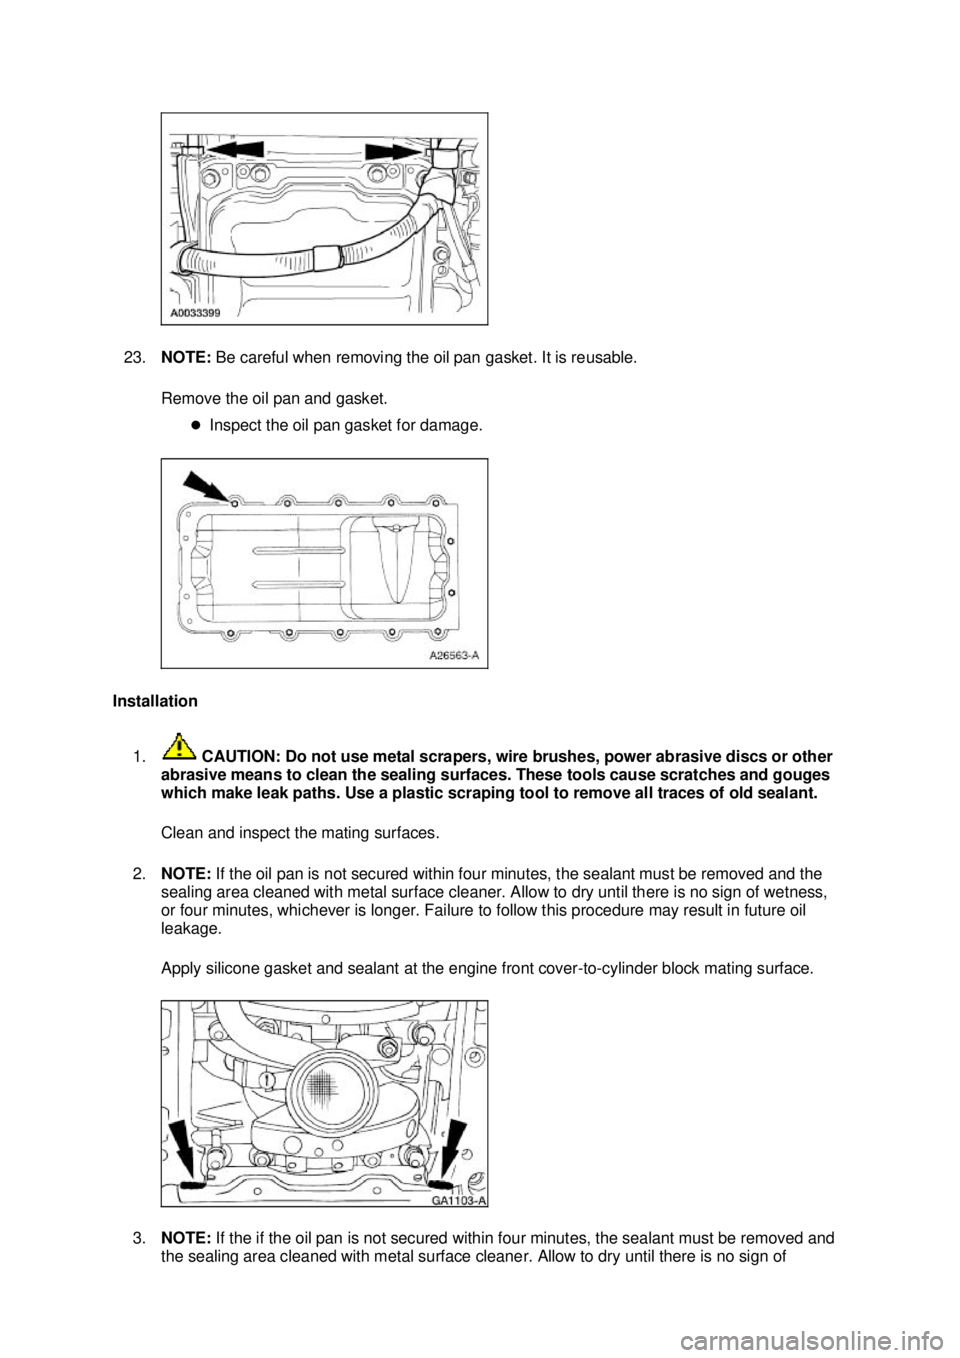
23.
NOTE: Be careful when removing the oil pan gasket. It is reusable.
Remove the oil pan and gasket. �zInspect the oil pan gasket for damage.
Installation 1. CAUTION: Do not use metal scrapers, wire brushes, power abrasive discs or other
abrasive means to clean the sealing surfaces. These tools cause scratches and gouges
which make leak paths. Use a plastic scraping tool to remove all traces of old sealant.
Clean and inspect the mating surfaces.
2. NOTE: If the oil pan is not secured within four minutes, the sealant must be removed and the
sealing area cleaned with metal surface cleaner. Allow to dry until there is no sign of wetness,
or four minutes, whichever is longer. Failure to follow this procedure may result in future oil
leakage.
Apply silicone gasket and sealant at the engine front cover- to-cylinder block mating surface.
3. NOTE: If the if the oil pan is not secured within four minutes, the sealant must be removed and
the sealing area cleaned with metal surface cleaner. Allow to dry until there is no sign of �K�l�j . 5 �b�a
112003 Mustang Workshop Manual
17. 11. 2011file:///C:/Ford/2000 - 2004/tsocache/SHEF_4464/S3B~us~en~ ...
Page 1715 of 4378
wetness, or four minutes, whichever is longer. Failure to follow this procedure may result in
future oil leakage.
Apply silicone gasket and sealant at the rear oil seal retainer-
to-cylinder block sealing surface.
4. Install the oil pan and gasket and loosely install the bolts.
5. Tighten the bolts in the sequence shown in three stages. �zStage 1: Tighten to 2 Nm (18 lb- in).
�z Stage 2: Tighten to 20 Nm (15 lb- ft).
�z Stage 3: Tighten an additional 60 degrees. �K�l�j . 6 �b�a
112003 Mustang Workshop Manual
17. 11. 2011file:///C:/Ford/2000 - 2004/tsocache/SHEF_4464/S3B~us~en~ ...
Page 1727 of 4378
IN-
VEHICLE REPAIR
Engine Mount
Removal
Both mounts 1. Disconnect the battery ground cable. For additional information, refer to Section 414 - 01 .
2. Remove the coolant bypass tube. For additional information, refer to Section 303 - 03A .
3. Rotate the drive belt tensioner clockwise and detach the drive belt from the generator pulley.
4. Disconnect the generator electrical connections.
SECTION 303-
01D: Engine — Mach I 4.6L (4V) 2003 Mustang Workshop Manual Special Tool(s)
Support Bracket, Engine
303-
639 3-
Bar Engine Support Kit
303- F072 Alignment Tool, Subframe
502-
004 �K�l�j . 1 �b�a
102003 Mustang Workshop Manual
17. 11. 2011file:///C:/Ford/2000 - 2004/tsocache/SHEF_4464/S3B~us~en~ ...