Page 49 of 106

At a glance
Controls
Driving tips
Mobility
Reference
49
4.Press button 1 repeatedly until the
required minutes are set
5.Press button 2 to confirm the settings.
The set time of day is transferred to the car
radio display or appears in the instrument
cluster display.
Display mode
In ignition key position 0:
Press button 1.
The time of day is displayed for several
seconds.
Computer*
Mode selection
With the ignition key in position 1 or higher,
you can use the button in the turn signal
lever to retrieve information from the com-
puter for display in the instrument cluster.
Every time you press the button briefly in
the direction of the steering column, a new
function is called up for display.
The displays appear in the following order:
time of day, outside temperature, average
fuel consumption, cruising range, average
vehicle speed.
With the ignition key in position 1 or higher,
the last active setting is displayed.
Outside temperature
To change the units of measure –
˚C/˚F
While the temperature display is active,
keep the button in the turn signal lever
pressed until the display changes.
Ice warning
If the outside temperature drops to approx.
377/+36, the computer automatically
switches to the outside temperature dis-
play.
In addition, a signal sounds and the display
flashes for a brief period.
Clock
Setting the 12-hour or 24-hour
mode*
If the vehicle is equipped with a computer,
you can have the time displayed in either a
12-hour or 24-hour mode.
While the time display is active, press the
computer button in the turn signal lever
until the display changes.
Page 50 of 106
Everything under control
50
Average fuel consumption
If you continue to press the button on the
turn signal lever, the average fuel con-
sumption last displayed is recalculated
from that point in time.
Any time spent when the vehicle is station-
ary and the engine shut off is ignored in the
calculation.
Cruising range
The computer bases its calculations of the
cruising range on the preceding driving
style and on the remaining fuel in the tank.
Average speed
If you continue to press the button on the
turn signal lever, the average fuel con-
sumption last displayed is recalculated
from that point in time.
Page 51 of 106

At a glance
Controls
Driving tips
Mobility
Reference
51
Technology for safety and driving
convenience
Dynamic Stability Control
DSC
The concept
DSC maintains vehicle stability, even in
critical driving situations.
The DSC is operational every time you start
the engine.
For additional details on the system
and the various functions, please
refer to the "Technology" brochure.<
Indicator lamps
The indicator lamps in the instrument clus-
ter go out shortly after you switch on the
ignition.
Dynamic Stability Control DSC indi-
cator lamp flashes:
The system is active and governs
drive torque and braking intervention.
The indicator lamp stays lit:
Dynamic Stability Control DSC and
Dynamic Traction Control DTC have been
switched off via the button.
Dynamic Traction Control DTC indi-
cator lamp lights up permanently:
DTC has been deactivated via the
DSC button.
Dynamic Stability Control DSC indi-
cator lamp flashes:
Dynamic Traction Control DTC indi-
cator lamp lights up permanently:
DTC is actively regulating drive
torque and braking intervention.
Interventions to increase stability are
being performed to a limited degree
only.
indicator lamp and yellow brake
warning lamp for Dynamic Brake
Control DBC light up continuously:
Dynamic Stability Control DSC,
Dynamic Traction Control DTC and
Dynamic Brake Control DBC are malfunc-
tioning.
Have the system repaired at your BMW
center.
Indicator and warning lamps for
Canadian models.
The vehicle remains completely oper-
ational without the DSC, DTC and
DBC functions.<
In the event of a malfunction, please see
your BMW center.
If the brake warning lamp comes on
together with the yellow indicator
lamps for the Antilock Brake Sys-
tem ABS and the Dynamic Stability
Control DSC:
The entire ABS and DSC control
system has failed. Continue driving
cautiously and defensively. Avoid
hard brake applications. Please have the
system checked by your BMW center as
soon as possible.
ABS and DSC indicator and warn-
ing lamps for Canadian models.
Page 52 of 106

Technology for safety and driving convenience
52 For more information on the various
systems, refer to the "Technology"
brochure.<
Switching off DSC/Activating DTC
Press the DSC button briefly. The DTC indi-
cator lamp comes on and stays on.
DSC has been switched off; DTC is in ready
mode.
In the following exceptional circumstances,
it may be effective to activate the DTC for a
short period:
>When rocking the vehicle or starting off
in deep snow or on loose surfaces
>When driving on snow-covered grades,
in deep snow, or on a snow-covered
surface that has been packed down
from being driven on
>When driving with snow chains.
The gain in traction is achieved by a reduc-
tion in stabilizing intervention.
Switching off DSC and DTC
Hold the DSC switch down for at least
3 seconds. The DSC indicator lamp stays
lit.
In this case, no interventions to increase
stability and traction for the engine and
brakes are carried out.
To maintain vehicle stability, drive
with the DSC switched on whenever
possible.<
Reactivating DSC and DTC
Press the button again.
The indicator lamp goes out.
The laws of physics cannot be
repealed with DSC. It will always be the driver's responsibility to drive in a man-
ner that matches road conditions. We
therefore urge you to avoid using the addi-
tional safety margin of the system as an
excuse for taking risks. Stabilizing interven-
tion is only performed to a limited degree
when the DTC is activated.
Do not make any modifications to the DSC
system. Allow only authorized technicians
to perform service procedures on the
DSC.<
Dynamic Brake Control DBC
If you step on the brake rapidly, this system
automatically produces maximum braking
force boost and thus helps to achieve the
shortest possible braking distance during
panic stops. All of the benefits of the ABS
system are exploited under these circum-
stances.
Do not reduce the pressure on the brake
pedal for the duration of the brake applica-
tion. When the brake pedal is released, the
DBC is deactivated.
For more information on the system, refer
to the "Technology" brochure.
Brake Force Display
The Brake Force Display indicates to the
road user behind you how hard you are
braking.
The display has two levels:
>Normal braking:
Brake lamp 1 lights up on both sides of
the vehicle together with the center
brake lamp.
Page 53 of 106

At a glance
Controls
Driving tips
Mobility
Reference
53
>Forceful braking and braking with ABS:
Brake lamps 1 and 2 light up on both
vehicle sides together with the center
brake lamp.
Antilock Brake System ABS
The concept
ABS keeps the wheels from locking during
braking, thereby enhancing active driving
safety.
Malfunction
If the yellow indicator lamps for the
Antilock Brake System ABS come
on together with the brake warning
lamp and the indicator lamp for the
Dynamic Stability Control DSC:
The entire ABS and DSC control
system has failed. Continue driving
cautiously and defensively. Avoid
hard brake applications. Please have the
system checked by your BMW center as
soon as possible.
ABS and DSC indicator and warn-
ing lamps for Canadian models.
Braking with ABS
If you are in a situation which requires full
braking, you will exploit the full benefits of
the ABS system if you apply maximum
brake pressure – panic stop.
Pulsation at the brake pedal combines with
sounds from the hydraulic circuits to indi-
cate to the driver that ABS is in its active
mode.
Flat Tire Monitor
The concept
The tire pressure is determined using the
signals of the ABS sensors.
The system provides an alert whenever the
tire pressure of one tire drops relative to
that of another.
Prerequisites
In order for the system to "learn" the cor-
rect tire inflation pressures, please do the
following:
>Check the inflation pressure in all tires
>Compare to the inflation pressure table
– refer to page 72 – and correct if nec-
essary
>Initialize the system.
Check the tire pressures regularly
and correct if necessary. Refer to
page 71.<
Indicator lamp
In the event of a flat tire
The indicator lamp lights up red; in
addition, an acoustic signal is
sounded:
Respond immediately by carefully reducing
vehicle speed to under 50 mph / 80 km/h.
Avoid hard brake applications and steering
maneuvers.
If your vehicle is equipped with
Run Flat tires, note the information on
page 75.<
The Flat Tire Monitor cannot alert you
to severe and sudden tire damage
caused by external factors. Another factor
which the Flat Tire Monitor does not recog-
nize is the even and very gradual pressure
loss that takes place in all tires over an
extended period of time.<
Page 54 of 106

Technology for safety and driving convenience
54
System malfunction
The indicator lamp lights up yellow:
There is a malfunction or fault in the
Flat Tire Monitor.
In the event of this, please contact your
BMW center.
Initializing the system
Initialize the system only when the inflation
pressure has been corrected or modified,
e.g. if a tire was changed.
1.Turn ignition key to position 2. Do not
start the engine
2.Press the button long enough for the
yellow indicator lamp in the instrument
cluster to light up for a few seconds
3.Start the engine.
After a few minutes' driving time, the Flat
Tire Monitor stores the current inflation
pressure in the tires as the target value to
be monitored.
The Flat Tire Monitor automatically func-
tions when the ignition key is in position 2
and thus operates whenever the vehicle is
being driven.
False alarms
Do not initialize the system when
snow chains are in use. When driving
with snow chains, false alarms can occur or
a drop in inflation pressure may go unde-
tected.<
The following situations may lead to
false alarms or to delays in the detec-
tion of inflation pressure drop:
>Driving on snowy or slippery roads
>Driving in a sporty manner – slipping
drive wheels, high lateral accelera-
tion.<
Page 55 of 106
At a glance
Controls
Driving tips
Mobility
Reference
55
Controlling the climate for pleasant
driving
Air conditioning
1Air onto the windshield and the side
windows
2Air for the upper body area56
3Air for the footwell
4Air distribution56
5Air conditioning566Outside-air/recirculated-air mode56
7Temperature adjustment56
8Air supply/blower56
9Rear window defroster56
Page 56 of 106

Controlling the climate for pleasant driving
56
Air distribution
You can direct airflow onto the
windows , toward the upper
body and into the footwell .
All intermediate settings are pos-
sible.
Air supply/blower
You can set the blower to 8 differ-
ent levels. Both heating and ven-
tilation become more effective as
the air supply rate is increased.
Temperature
In order to increase the tempera-
ture of the passenger compart-
ment, turn to the right – red zone.
Air conditioning
The air is cooled and dehumidi-
fied and – depending on the tem-
perature setting – rewarmed.
Depending on the weather, the
windshield may fog over briefly when the
engine is started.
Condensation forms during operation
of the air conditioning system, which
then exits under the vehicle. Traces of con-
densed water on the ground underneath
the vehicle are thus normal.<
Outside-air/recirculated-air mode
If there are unpleasant odors in
the outside air, you can tempo-
rarily block the supply of incom-
ing air. The system then recircu-
lates the air currently within the vehicle.
If the windows fog over in the recircu-
lated air mode, switch this mode off
and increase the air supply as required.<
Rear window defroster
The indicator lamp lights up when
the rear window defroster is
active. The rear window defroster
switches off automatically.
Ventilation
You can adjust the blower controls for the
upper body area to obtain the optimum air-
flow rates and directions for your personal
requirements:
1Rotary dials for opening and closing the
vents at any setting desired
2Lever for adjusting airflow direction
Particle filter
The built-in particle filter removes dust and
pollen from the incoming air and in the
recirculated air mode. Your BMW center
will replace this filter during the regularly
scheduled maintenance. A substantial
reduction in airflow indicates that the filter
needs to be replaced earlier.
To defrost windows and remove
condensation
1Turn the rotary control to
2Turn the rotary blower control for the air
supply completely to the right
3Turn the rotary temperature control
completely to the right
4To defrost the rear window, switch on
the rear window defroster
 1
1 2
2 3
3 4
4 5
5 6
6 7
7 8
8 9
9 10
10 11
11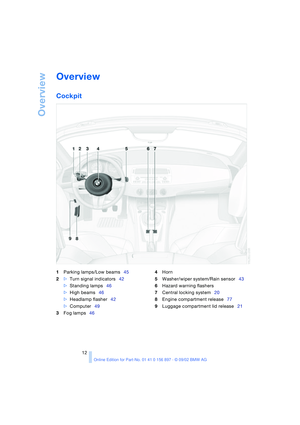 12
12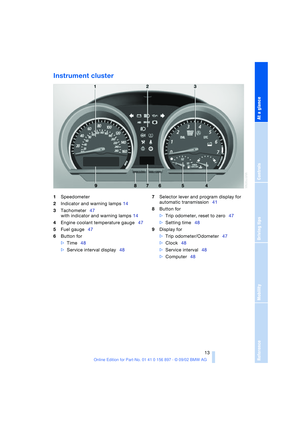 13
13 14
14 15
15 16
16 17
17 18
18 19
19 20
20 21
21 22
22 23
23 24
24 25
25 26
26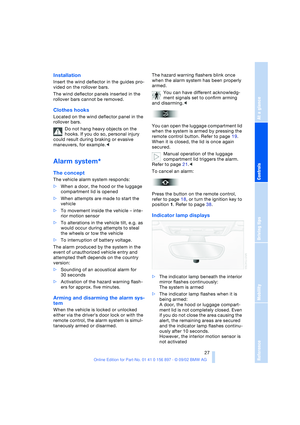 27
27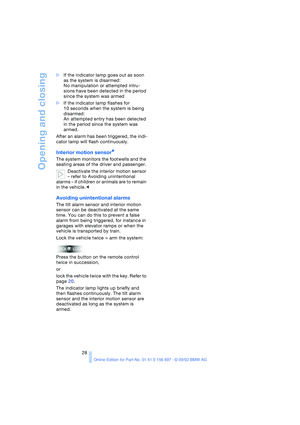 28
28 29
29 30
30 31
31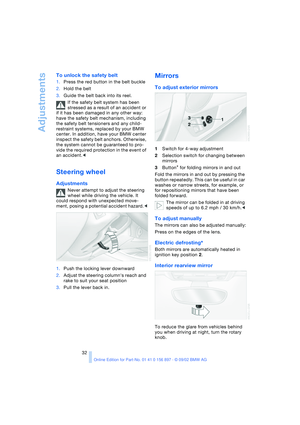 32
32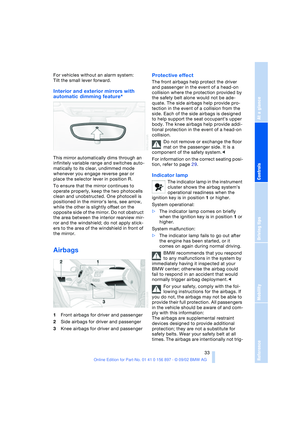 33
33 34
34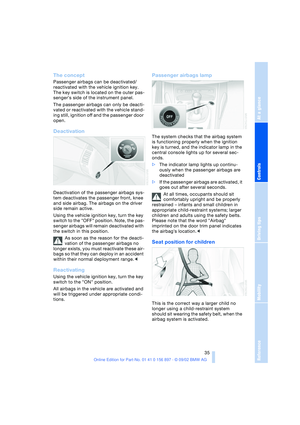 35
35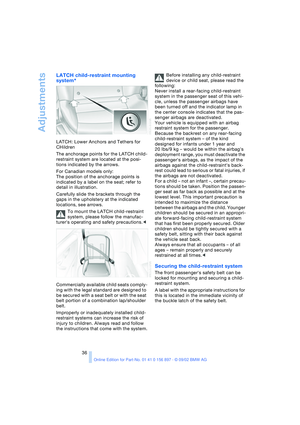 36
36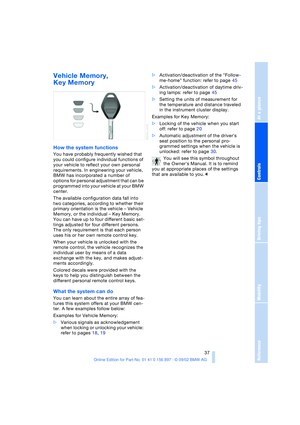 37
37 38
38 39
39 40
40 41
41 42
42 43
43 44
44 45
45 46
46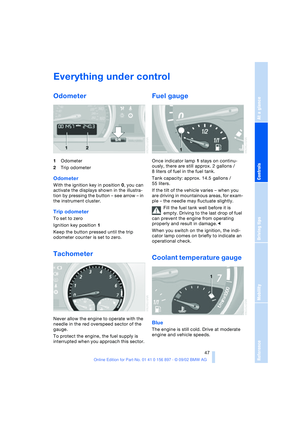 47
47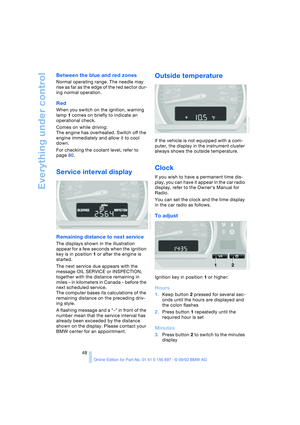 48
48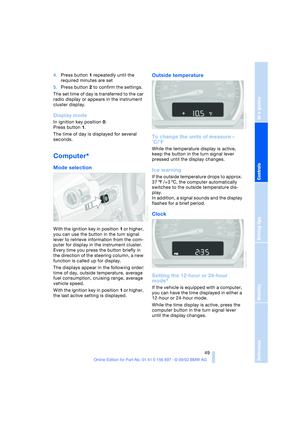 49
49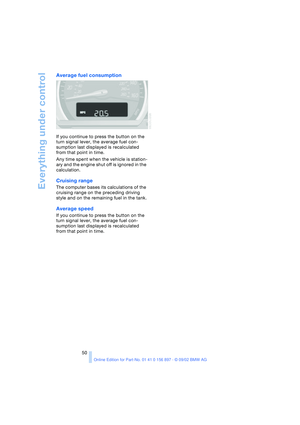 50
50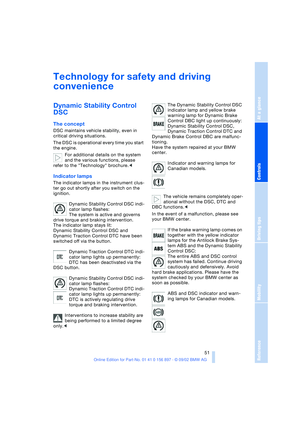 51
51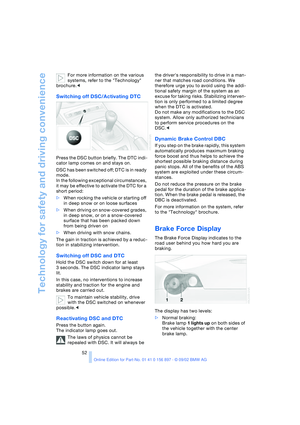 52
52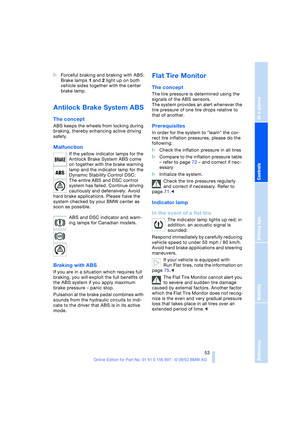 53
53 54
54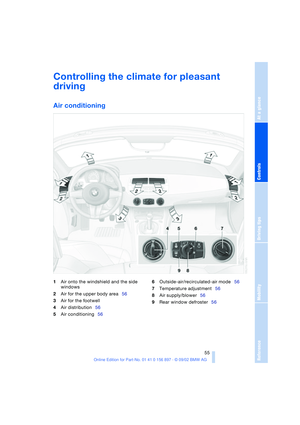 55
55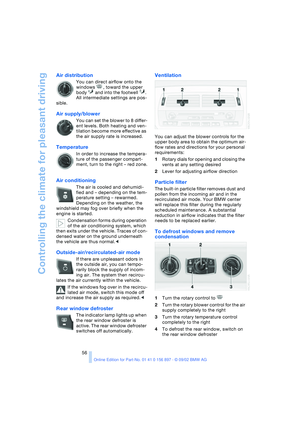 56
56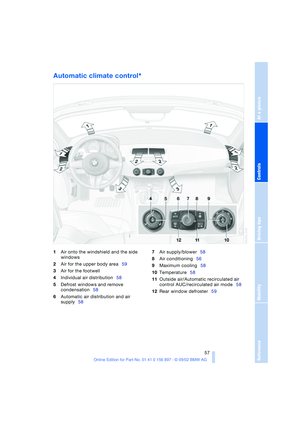 57
57 58
58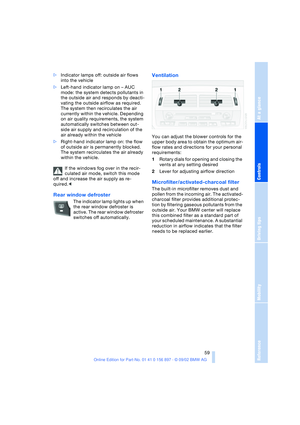 59
59 60
60 61
61 62
62 63
63 64
64 65
65 66
66 67
67 68
68 69
69 70
70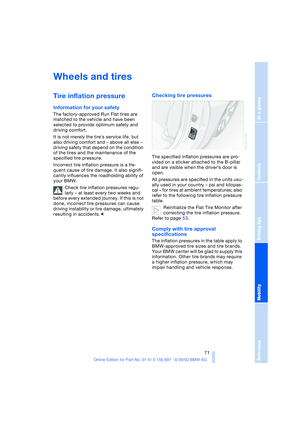 71
71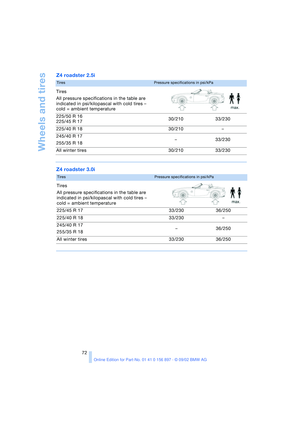 72
72 73
73 74
74 75
75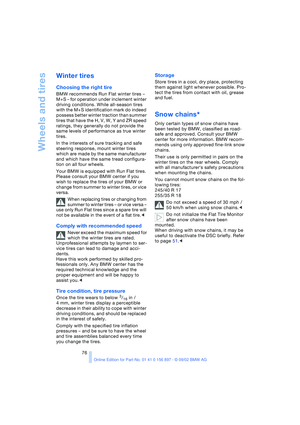 76
76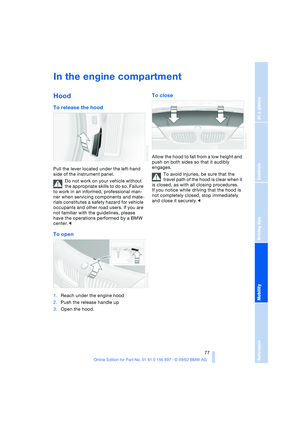 77
77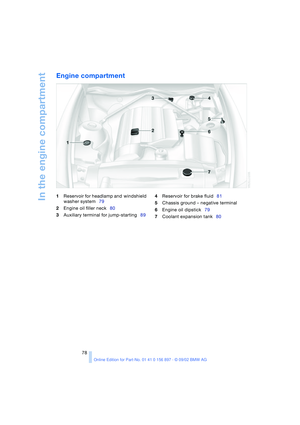 78
78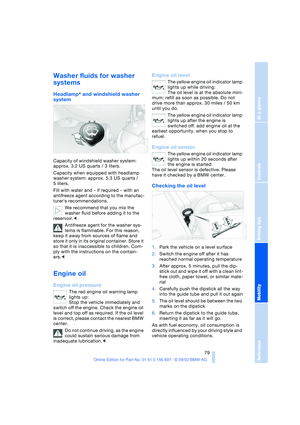 79
79 80
80 81
81 82
82 83
83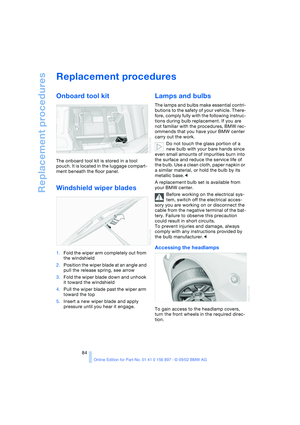 84
84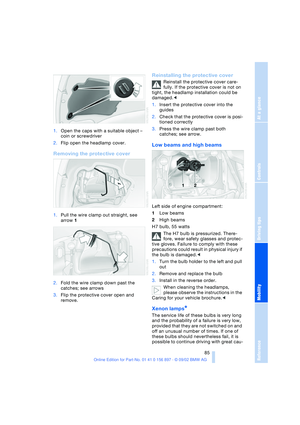 85
85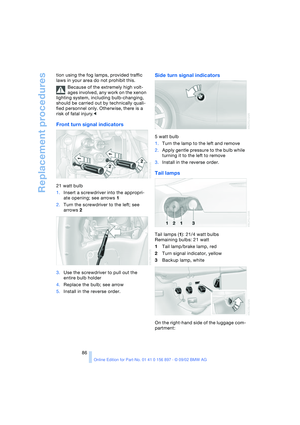 86
86 87
87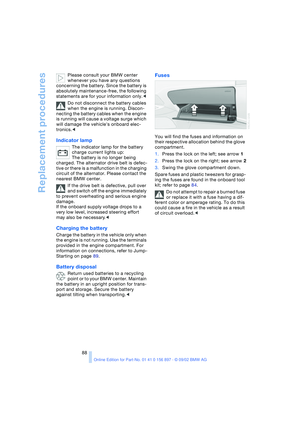 88
88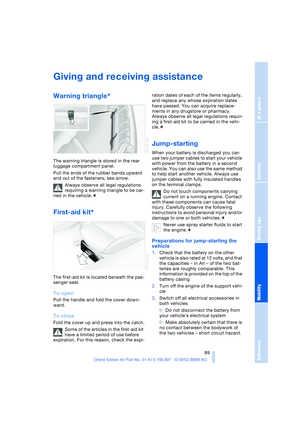 89
89 90
90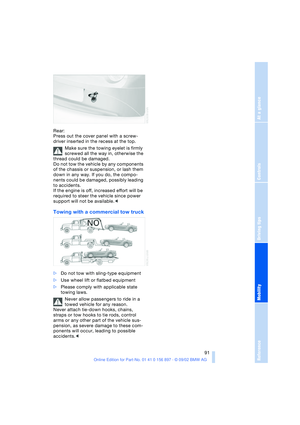 91
91 92
92 93
93 94
94 95
95 96
96 97
97 98
98 99
99 100
100 101
101 102
102 103
103 104
104 105
105
