Page 65 of 106

At a glance
Controls
Driving tips
Mobility
Reference
65
Driving notes
Parking the vehicle
Condensation forms in the air conditioner
system during operation, which then exits
under the vehicle. Traces of condensed
water on the ground underneath the vehi-
cle are thus normal.
Brakes
Do not drive with your foot resting on
the brake pedal. Even light but con-
sistent pedal pressure can lead to high
temperatures, brake wear and possibly
even brake failure.
Hydroplaning
When driving on wet or slushy roads,
reduce vehicle speed. If you do not, a
wedge of water may form between the tires
and the road surface. This phenomenon
can lead to partial or complete loss of trac-
tion, vehicle control and braking effective-
ness.<
Driving through water
Do not drive through water on the
road if it is deeper than 1 ft / 30 cm,
and then only at walking speed. Otherwise,
the vehicle's engine, the electrical systems
and the transmission may be damaged.<
High temperatures
High temperatures occur with every
vehicle equipped with a catalytic con-
verter. Heat shields are installed adjacent to
some sections of the exhaust system. Never
remove these shields; do not apply under-
coating to their surfaces. When driving,
standing at idle and parking the vehicle,
take care to avoid contact between the hot
exhaust system and flammable materials –
e.g. hay, leaves, grass, etc. Such contact
could lead to a fire, resulting in serious per-
sonal injury and property damage.<
Brake system
The brake warning lamp lights up
although the parking brake is not
engaged: check the brake fluid
level. It is very important that you follow the
instructions on page 81 before driving on.
Disc brakes
Corrosion
Limited vehicle use, extended periods with
the vehicle parked or in storage, and oper-
ating conditions in which braking is
restricted to gentle, low-pressure applica-
tions will all increase the tendency for cor-
rosion to form on the rotors and contamina-
tion to accumulate on the brake pads. This
occurs because the minimal pressure
which must be exerted by the pads to clean
the rotors by brake applications is not
reached.
If the brake rotors are corroded, they will
tend to respond to braking with a pulsating
effect which even extended application will
fail to cure.
Wet roads
When driving in heavy rain and on wet
roads, it is useful to apply light pressure
to the brake pedal every few miles. Watch
traffic conditions to ensure that this maneu-
ver does not endanger other road users.
The heat generated in this process helps
dry the pads and rotors to ensure that your
brake system will respond with undimin-
ished efficiency when you need it.
Inclines
Extended or steep mountain descents
should be driven in the gear or drive posi-
tion in which only minimal periodic brake
application is required. This helps avoid
placing excessive loads on the brake sys-
tem. Observe the maximum allowable
engine speed when doing so; refer to
page 47.
Do not coast with the clutch
depressed or with the transmission or
selector lever in Neutral. Do not coast with
Page 66 of 106

Special operating instructions
66 the engine switched off. Otherwise the
engine provides no braking effect and there
is no power-assist for braking or steering
when the engine is off.<
Brake pads
The yellow indicator lamp for the
brake pads lights up:
Have the condition of the brake
pads inspected.<
For your own safety: use brake pads
which the manufacturer has approved
for your specific vehicle model. The manu-
facturer cannot evaluate non-approved
brake pads to determine if they are suitable
for use, and therefore cannot ensure the
operating safety of the vehicle in the event
of their use.<
Cargo loading
Stowing cargo
>Load heavy cargo as far forward as
possible – directly behind the luggage
compartment partition – and as low as
possible
>Cover sharp edges and corners.
With the convertible top closed, you
can increase the space in your lug-
gage compartment. Refer to page 22.
We recommend that you always fold the
convertible top compartment panel down
as soon as you have removed your cargo
from the luggage compartment. This way,
you can be sure that you can always oper-
ate the convertible top at any time.
Conversely, when the convertible top is
closed, raise the convertible top compart-ment panel before stowing your cargo in
the luggage compartment to avoid any
damage to the convertible top compart-
ment or your load.<
If you stow cargo behind the seats of your
BMW Z4 roadster:
>Only stow light objects such as cloth-
ing, etc.
>Do not pile objects higher than the top
edge of the backrests.
To avoid damaging the rear of the
backrest or the rear interior trim
panel, do not stow heavy cargo or cargo
with sharp edges and corners behind the
seats.
In addition, large and bulky cargo stowed
behind the seats may prevent the backrest
from engaging properly. Ensure that the
backrest is securely locked by moving the
seat forward if necessary. Refer to
page 29.<
Always position and secure the load
correctly. If you do not, it can endan-
ger the passengers during braking or eva-
sive maneuvers.
Do not exceed the approved gross vehicle
weight or the specified maximum axle
loads. Refer to page 94. Otherwise the
vehicle's operating safety is no longer
assured and you are in violation of the law.
Do not stow heavy or hard objects in the
passenger compartment without first
securing them. Otherwise they would be
thrown around during braking and evasive
maneuvers and would endanger the occu-
pants.<
Page 67 of 106
At a glance
Controls
Driving tips
Mobility
Reference
67
Hardtop preparation*
Pull covers off; see arrow 1.
The brackets for attaching the hardtop
are located underneath the covers; see
arrow 2.
For instructions on how to install the
hardtop, please read the accompany-
ing assembly information.<
The hardtop is available from your
BMW center as a special option.<
Page 68 of 106
Page 69 of 106
Mobility
To ensure that you stay mobile,
the following chapter provides you with im-
portant information on fuels and fluids, tires
and wheels, maintenance procedures and
steps to take in the event of a breakdown.
Page 70 of 106

Refueling
70
Refueling
Fuel filler door
1.Open fuel filler door
2.Turn the filler cap in a counter-clock-
wise direction
3.Place the filler cap in the bracket on the
filler door.
Releasing manually
If an electrical malfunction occurs, you can
unlock the fuel filler door manually.
1.Remove the covers of the tail lamps by
turning the lock to the right; refer also to
page 87
2.Pull the luggage compartment trim
panel slightly toward the interior.
The green button with the fuel pump
symbol is revealed
3.Undo the adhesive strip and pull off
4.Pull on the knob
Fuel filler cap is released.
Fuel gas cap
Close the gas cap carefully after refu-
eling until a "click" is heard. While closing, be sure not to squeeze the strap
which is fastened to the cap. A loose or
missing cap will activate the "Check gas
cap" lamp.<
Check gas cap
This indicator lamp comes on when
the fuel gas cap is loose or missing.
Close the gas cap tightly as described
above.
Tank capacity: approx. 14.5 gallons /
55 liters, of which approx. 2.1 gallons /
8 liters are reserve capacity.
Simple and environmentally friendly
When handling fuels, comply with all
of the applicable safety precautions
posted at the service station.<
When refueling, insert the filler nozzle com-
pletely into the filler pipe. Pulling the nozzle
out of the pipe during refueling
>results in premature shutoff
>and will reduce the effect of the vapor
recovery system on the pump.
The fuel tank is full when the filler nozzle
shuts off the first time.
Fill the fuel tank before it is com-
pletely empty. Driving to the last drop
of fuel can prevent the engine from operat-
ing properly and result in damage.<
Fuel specifications
The engine uses lead-free gasoline only.
Required fuel:
>Premium Unleaded Gasoline,
min. 91 AKI.
AKI = Anti Knock Index.
Do not use leaded fuels. The use of
leaded fuels will cause permanent
damage to the system's oxygen sensor and
the catalytic converter.<
Page 71 of 106

At a glance
Controls
Driving tips
Mobility
Reference
71
Wheels and tires
Tire inflation pressure
Information for your safety
The factory-approved Run Flat tires are
matched to the vehicle and have been
selected to provide optimum safety and
driving comfort.
It is not merely the tire's service life, but
also driving comfort and – above all else –
driving safety that depend on the condition
of the tires and the maintenance of the
specified tire pressure.
Incorrect tire inflation pressure is a fre-
quent cause of tire damage. It also signifi-
cantly influences the roadholding ability of
your BMW.
Check tire inflation pressures regu-
larly – at least every two weeks and
before every extended journey. If this is not
done, incorrect tire pressures can cause
driving instability or tire damage, ultimately
resulting in accidents.<
Checking tire pressures
The specified inflation pressures are pro-
vided on a sticker attached to the B-pillar
and are visible when the driver's door is
open.
All pressures are specified in the units usu-
ally used in your country – psi and kilopas-
cal – for tires at ambient temperatures; also
refer to the following tire inflation pressure
table.
Reinitialize the Flat Tire Monitor after
correcting the tire inflation pressure.
Refer to page 53.
Comply with tire approval
specifications
The inflation pressures in the table apply to
BMW-approved tire sizes and tire brands.
Your BMW center will be glad to supply this
information. Other tire brands may require
a higher inflation pressure, which may
impair handling and vehicle response.
Page 72 of 106
Wheels and tires
72
Z4 roadster 2.5i
Z4 roadster 3.0i
TiresPressure specifications in psi/kPa
Tires
All pressure specifications in the table are
indicated in psi/kilopascal with cold tires –
cold = ambient temperature
225/50 R 16
225/45 R 17 30/210 33/230
225/40 R 18 30/210 –
245/40 R 17
255/35 R 18 –33/230
All winter tires 30/210 33/230
TiresPressure specifications in psi/kPa
Tires
All pressure specifications in the table are
indicated in psi/kilopascal with cold tires –
cold = ambient temperature
225/45 R 17 33/230 36/250
225/40 R 18 33/230 –
245/40 R 17
255/35 R 18 –36/250
All winter tires 33/230 36/250
 1
1 2
2 3
3 4
4 5
5 6
6 7
7 8
8 9
9 10
10 11
11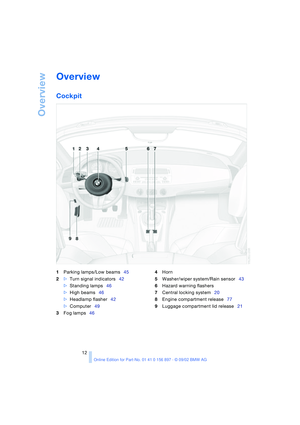 12
12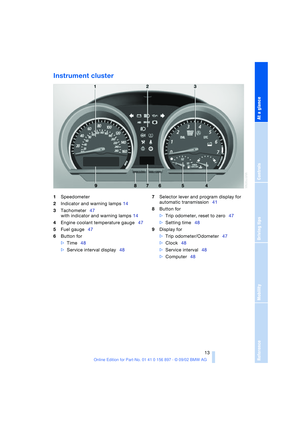 13
13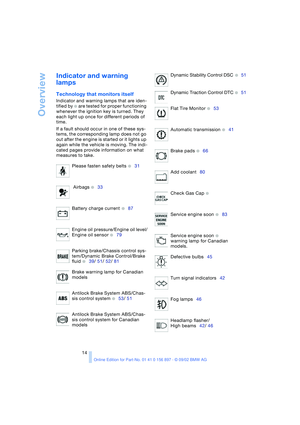 14
14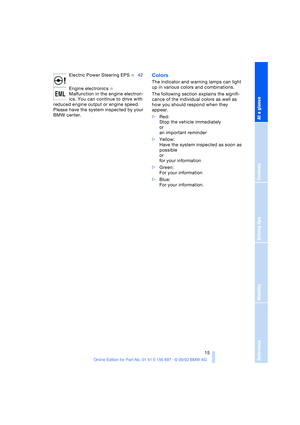 15
15 16
16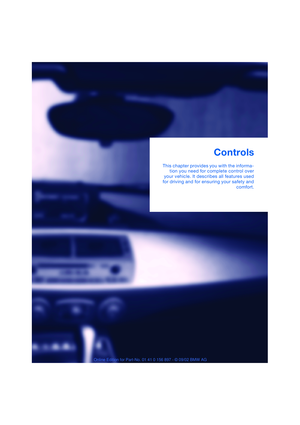 17
17 18
18 19
19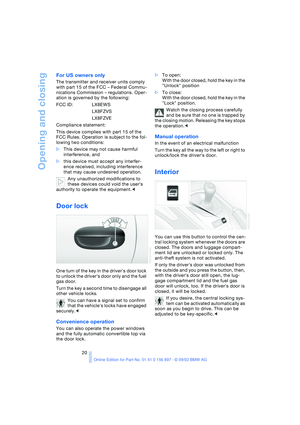 20
20 21
21 22
22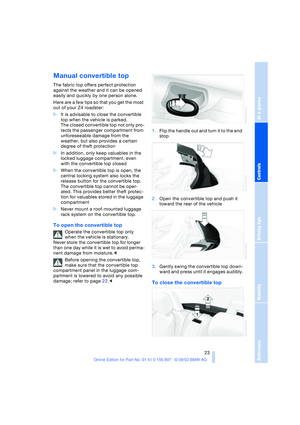 23
23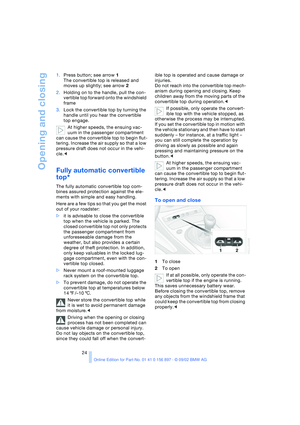 24
24 25
25 26
26 27
27 28
28 29
29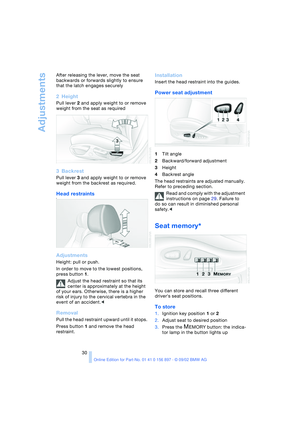 30
30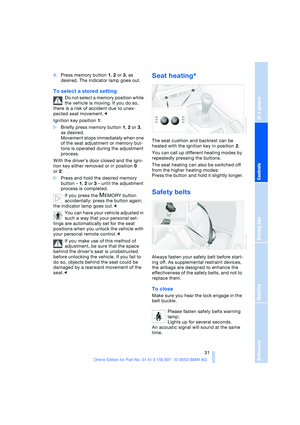 31
31 32
32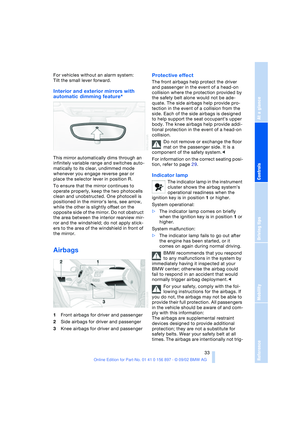 33
33 34
34 35
35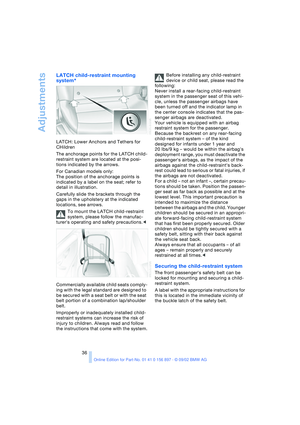 36
36 37
37 38
38 39
39 40
40 41
41 42
42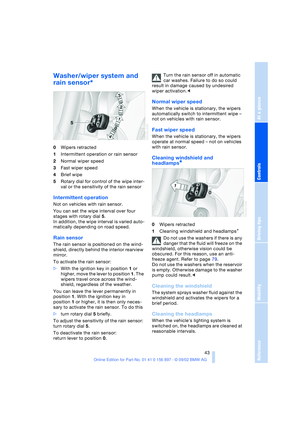 43
43 44
44 45
45 46
46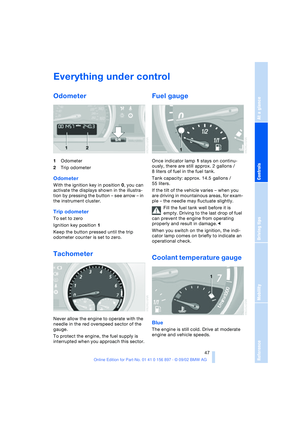 47
47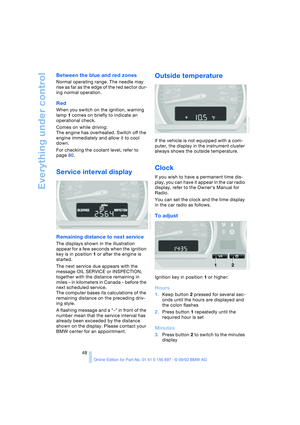 48
48 49
49 50
50 51
51 52
52 53
53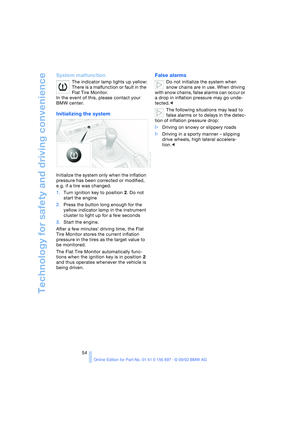 54
54 55
55 56
56 57
57 58
58 59
59 60
60 61
61 62
62 63
63 64
64 65
65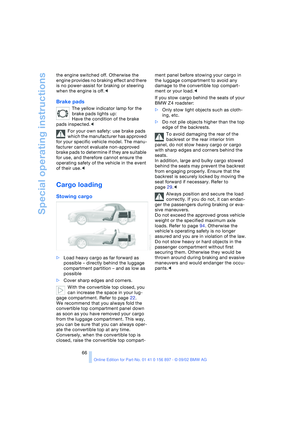 66
66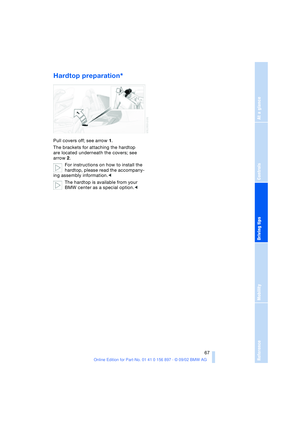 67
67 68
68 69
69 70
70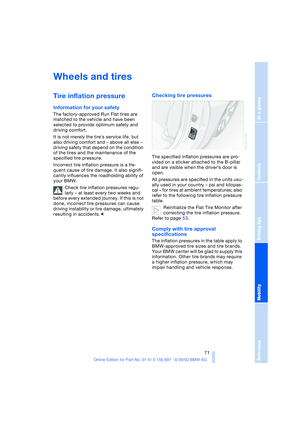 71
71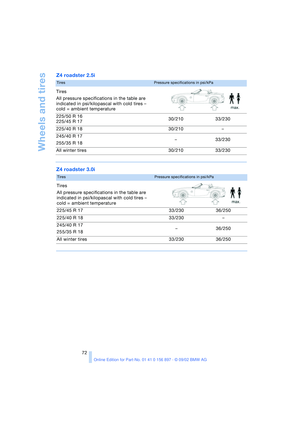 72
72 73
73 74
74 75
75 76
76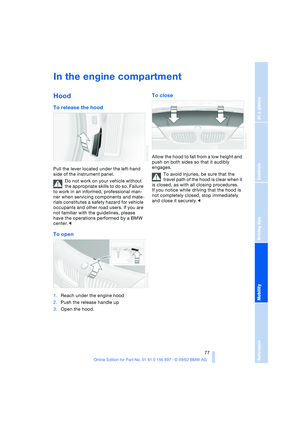 77
77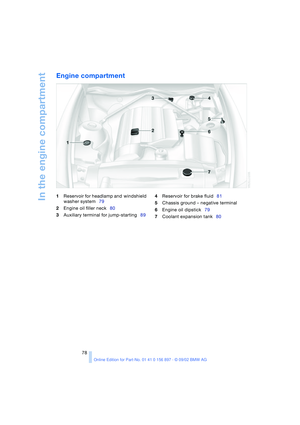 78
78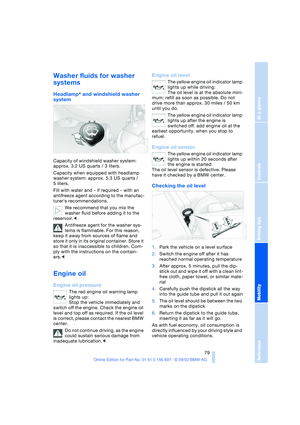 79
79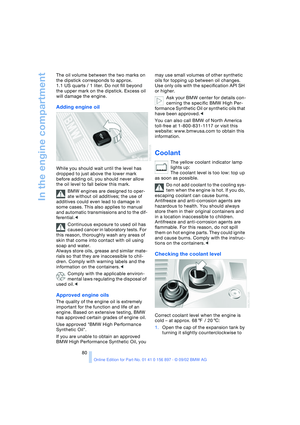 80
80 81
81 82
82 83
83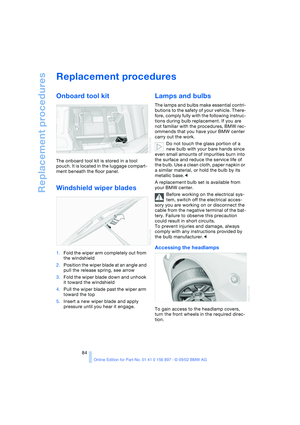 84
84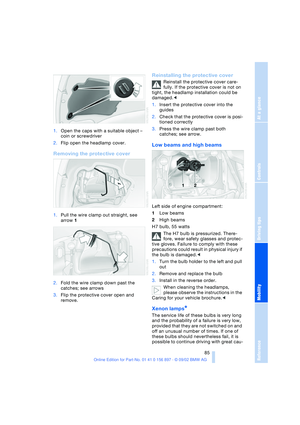 85
85 86
86 87
87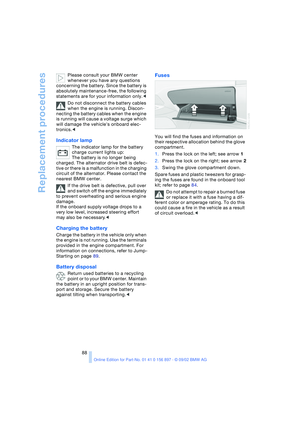 88
88 89
89 90
90 91
91 92
92 93
93 94
94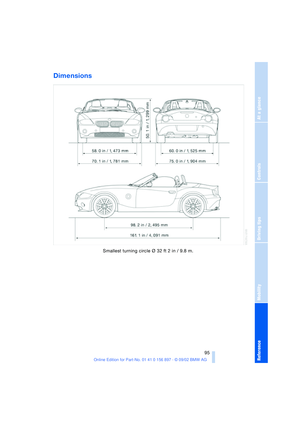 95
95 96
96 97
97 98
98 99
99 100
100 101
101 102
102 103
103 104
104 105
105


