2003 BMW 760LI SEDAN steering
[x] Cancel search: steeringPage 54 of 229
Adjustments
52
Rear
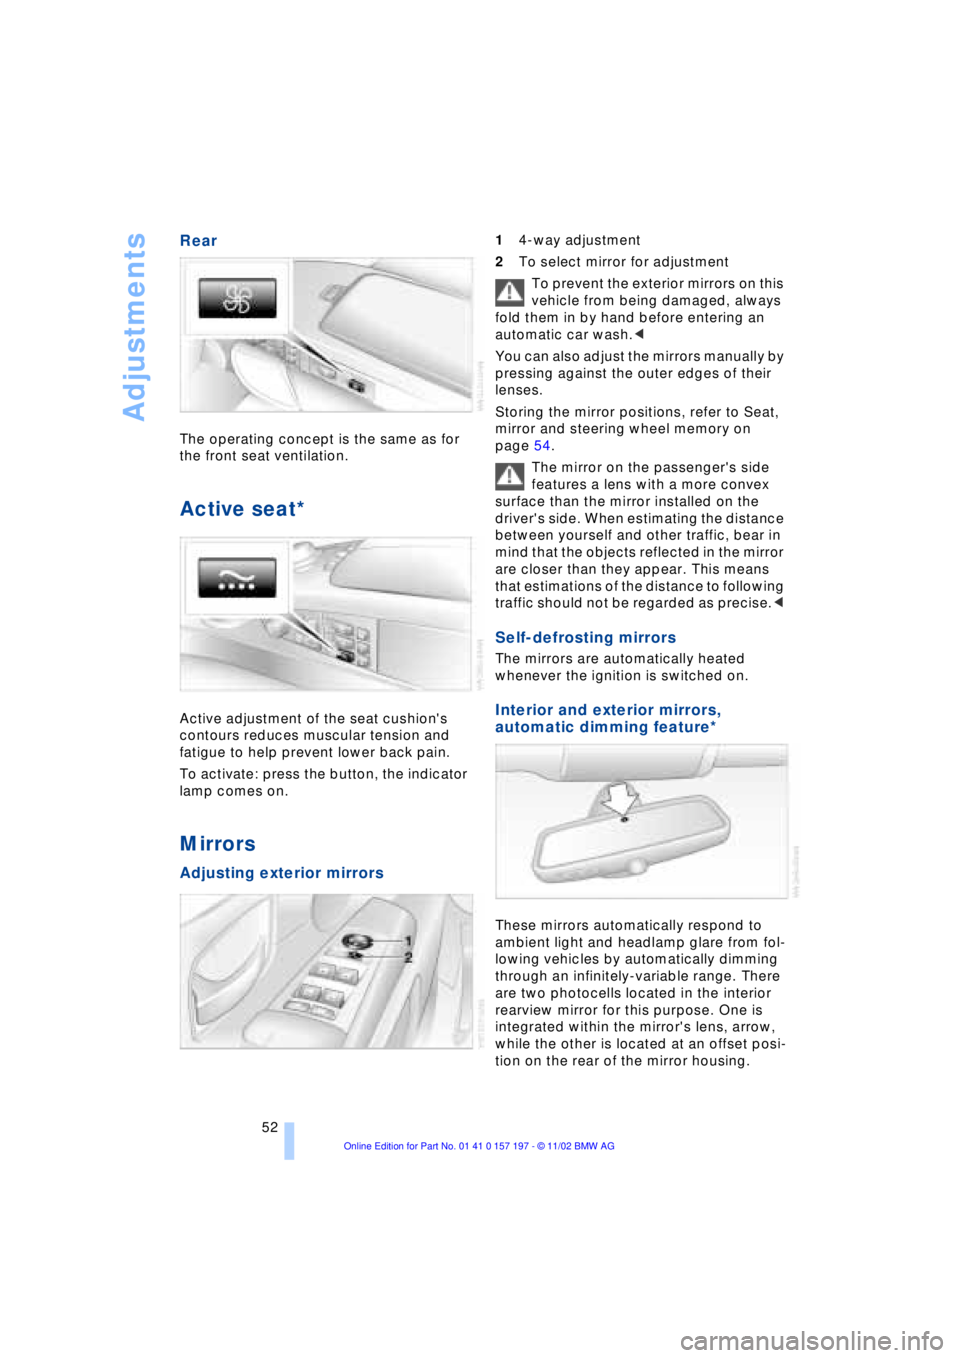
The operating concept is the same as for
the front seat ventilation.
Active seat*
Active adjustment of the seat cushion's
contours reduces muscular tension and
fatigue to help prevent lower back pain.
To activate: press the button, the indicator
lamp comes on.
Mirrors
Adjusting exterior mirrors
14-way adjustment
2To select mirror for adjustment
To prevent the exterior mirrors on this
vehicle from being damaged, always
fold them in by hand before entering an
automatic car wash.<
You can also adjust the mirrors manually by
pressing against the outer edges of their
lenses.
Storing the mirror positions, refer to Seat,
mirror and steering wheel memory on
page 54.
The mirror on the passenger's side
features a lens with a more convex
surface than the mirror installed on the
driver's side. When estimating the distance
between yourself and other traffic, bear in
mind that the objects reflected in the mirror
are closer than they appear. This means
that estimations of the distance to following
traffic should not be regarded as precise.<
Self-defrosting mirrors
The mirrors are automatically heated
whenever the ignition is switched on.
Interior and exterior mirrors,
automatic dimming feature*
These mirrors automatically respond to
ambient light and headlamp glare from fol-
lowing vehicles by automatically dimming
through an infinitely-variable range. There
are two photocells located in the interior
rearview mirror for this purpose. One is
integrated within the mirror's lens, arrow,
while the other is located at an offset posi-
tion on the rear of the mirror housing.
Page 55 of 229
At a glance
Controls
Driving tips
Communications
Navigation
Entertainment
Mobility
Reference
53
The mirrors automatically revert to their
clear, undimmed mode whenever you
place the selector lever into reverse.
For trouble-free operation, keep the
photocells clean and do not cover the
area between the interior rearview mirror
and the windshield. Do not attach any kind
of stickers on the windshield in front of the
mirror, either.<
Illuminated vanity mirror in the rear
1.Press button 1. The vanity mirror folds
down
2.Pull the mirror down slightly before pro-
ceeding to turn it or tilt it into the
desired position
3.Press the vanity mirror back up before
folding it back in.
Steering wheel adjustment
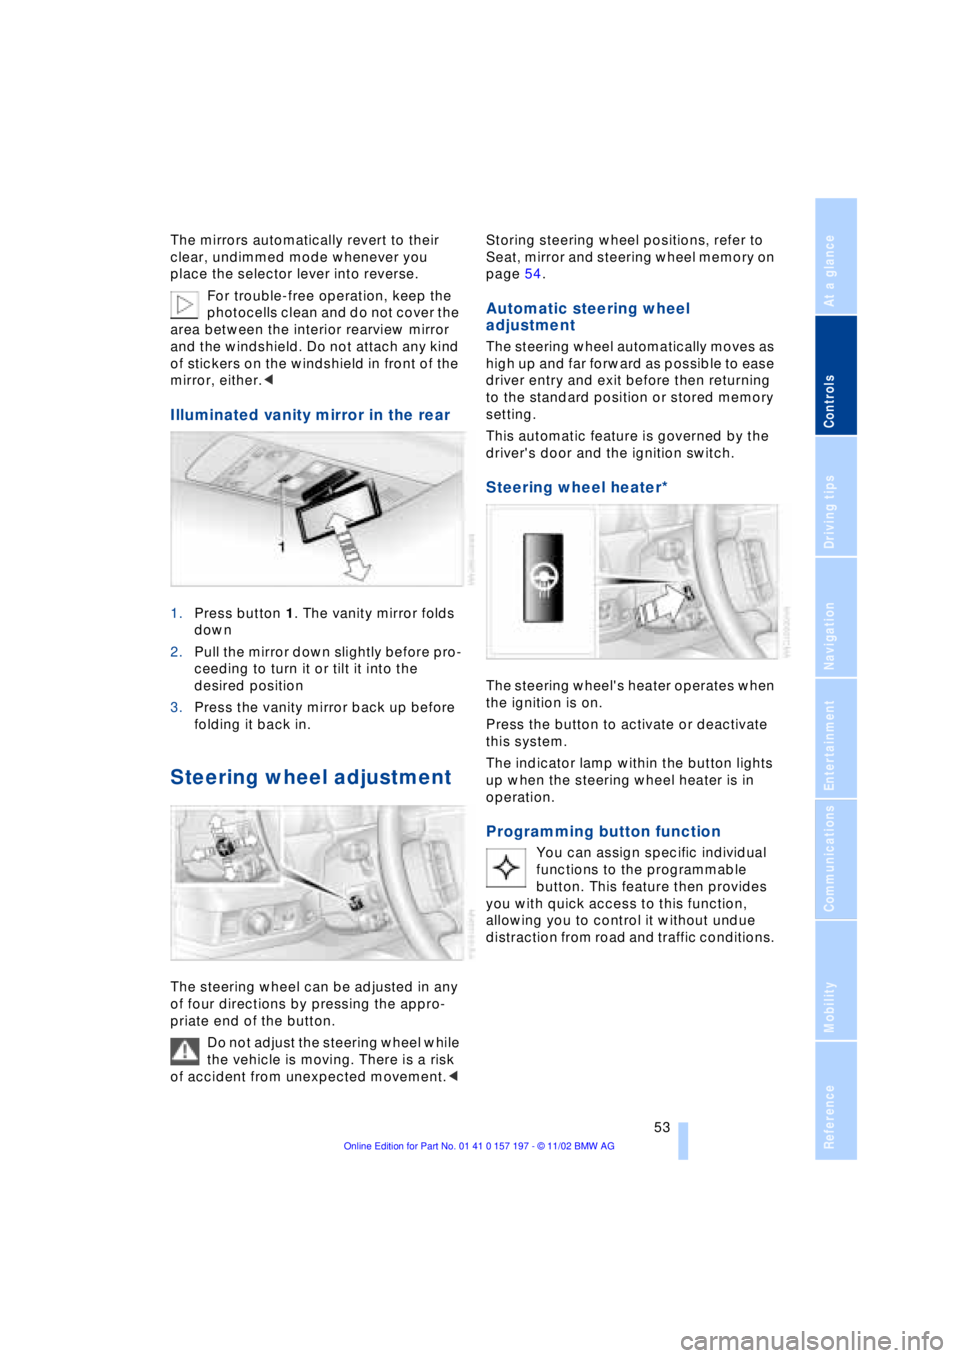
The steering wheel can be adjusted in any
of four directions by pressing the appro-
priate end of the button.
Do not adjust the steering wheel while
the vehicle is moving. There is a risk
of accident from unexpected movement.< Storing steering wheel positions, refer to
Seat, mirror and steering wheel memory on
page 54.
Automatic steering wheel
adjustment
The steering wheel automatically moves as
high up and far forward as possible to ease
driver entry and exit before then returning
to the standard position or stored memory
setting.
This automatic feature is governed by the
driver's door and the ignition switch.
Steering wheel heater*
The steering wheel's heater operates when
the ignition is on.
Press the button to activate or deactivate
this system.
The indicator lamp within the button lights
up when the steering wheel heater is in
operation.
Programming button function
You can assign specific individual
functions to the programmable
button. This feature then provides
you with quick access to this function,
allowing you to control it without undue
distraction from road and traffic conditions.
Page 56 of 229
Adjustments
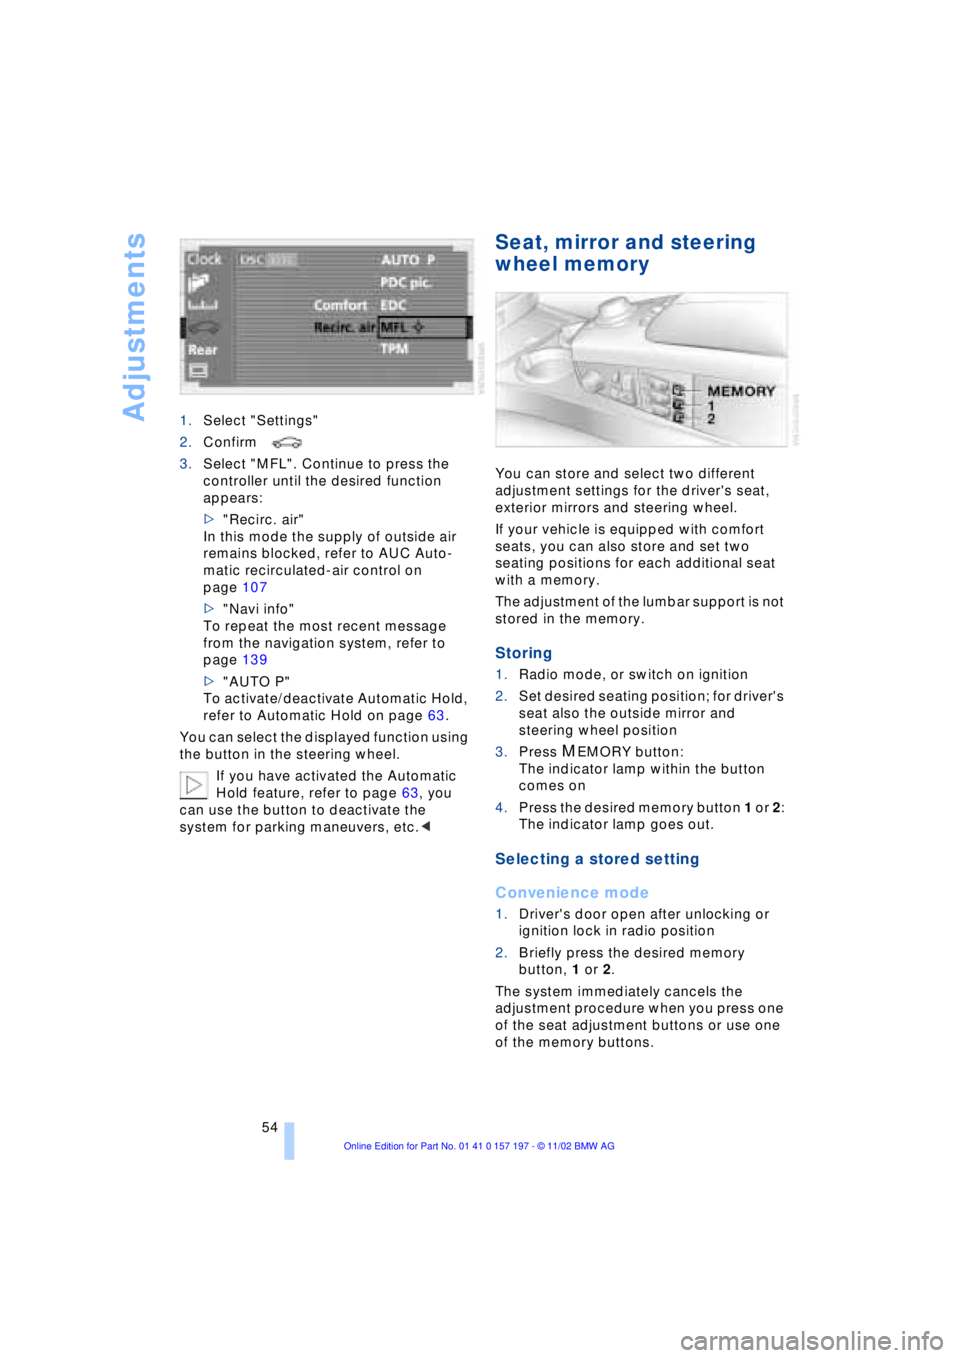
54 1.Select "Settings"
2.Confirm
3.Select "MFL". Continue to press the
controller until the desired function
appears:
>"Recirc. air"
In this mode the supply of outside air
remains blocked, refer to AUC Auto-
matic recirculated-air control on
page 107
>"Navi info"
To repeat the most recent message
from the navigation system, refer to
page 139
>"AUTO P"
To activate/deactivate Automatic Hold,
refer to Automatic Hold on page 63.
You can select the displayed function using
the button in the steering wheel.
If you have activated the Automatic
Hold feature, refer to page 63, you
can use the button to deactivate the
system for parking maneuvers, etc.<
Seat, mirror and steering
wheel memory
You can store and select two different
adjustment settings for the driver's seat,
exterior mirrors and steering wheel.
If your vehicle is equipped with comfort
seats, you can also store and set two
seating positions for each additional seat
with a memory.
The adjustment of the lumbar support is not
stored in the memory.
Storing
1.Radio mode, or switch on ignition
2.Set desired seating position; for driver's
seat also the outside mirror and
steering wheel position
3.Press
MEMORY button:
The indicator lamp within the button
comes on
4.Press the desired memory button 1 or 2:
The indicator lamp goes out.
Selecting a stored setting
Convenience mode
1.Driver's door open after unlocking or
ignition lock in radio position
2.Briefly press the desired memory
button, 1 or 2.
The system immediately cancels the
adjustment procedure when you press one
of the seat adjustment buttons or use one
of the memory buttons.
Page 57 of 229
At a glance
Controls
Driving tips
Communications
Navigation
Entertainment
Mobility
Reference
55
Safety feature
1.Driver's door closed and ignition
switched either on or off
2.Press memory button 1 or 2 and main-
tain pressure until the adjustment pro-
cess has been completed.
If you press the
MEMORY button acciden-
tally:
Press the button again; the indicator lamp
goes out.
Do not call up a position from the
memory while the vehicle is moving.
There is a risk of accident from unexpected
movement of the seat or steering wheel.<
You can have your vehicle pro-
grammed to automatically dial in your
own individual adjustment settings for the
seat, mirrors and steering wheel whenever
you use your personal remote control unit
to unlock the vehicle.<
When using the Key Memory feature
always make sure that the footwell
behind the driver's seat is empty and unob-
structed. If you fail to do so, any persons or
objects behind the seat could be injured or
damaged by a rearward movement of the
seat.<
Passenger-side exterior mirror tilt
function
Automatic curb monitor
1.Select the driver's door mirror with the
switch
2.When you select the transmission posi-
tion R, the door mirror on the front pas-
senger side tilts downward slightly. This
allows the driver to see the area imme-
diately adjacent to the vehicle Ð such as
a curb Ð when parking, etc.
You can deactivate this automatic feature:
Slide the mirror selection switch to the pas-
senger's side position.
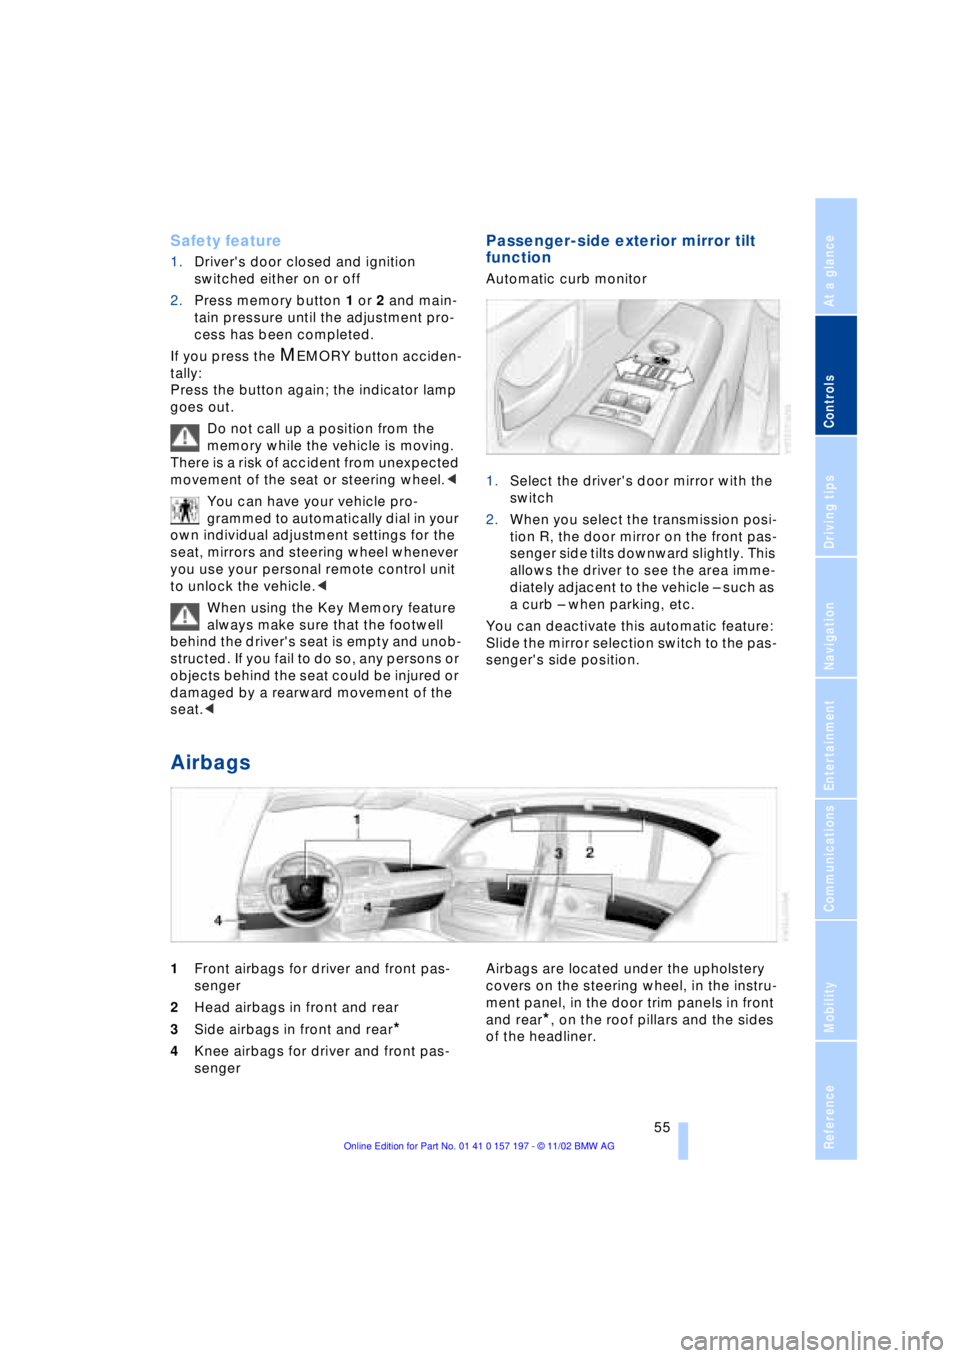
Airbags
1Front airbags for driver and front pas-
senger
2Head airbags in front and rear
3Side airbags in front and rear
*
4Knee airbags for driver and front pas-
senger Airbags are located under the upholstery
covers on the steering wheel, in the instru-
ment panel, in the door trim panels in front
and rear*, on the roof pillars and the sides
of the headliner.
Page 58 of 229
Adjustments
56
Protective effect
The front airbags help protect the front
passengers by responding to frontal
impacts in which safety belts alone cannot
provide adequate restraint. When needed,
the head and side airbags help provide
protection in the event of side impact. The
side airbags help restrain the side of the
occupant's upper torso, and the head air-
bags help support the head while also
helping provide protection against any
objects penetrating into the passenger
compartment. The knee airbags help pro-
tect the legs against impact against the
cockpit.
The side airbags in the rear pas-
senger area of your vehicle may
already have been deactivated either at the
time of manufacture or by a BMW center.
You may have them activated if you desire
to do so. Please contact your BMW center
for additional information.<
For information on the correct sitting posi-
tion, refer to page 45.
The airbags do not deploy in
response to minor accidents or rear
collisions, nor do they respond to certain
kinds of vehicle rollover.<
Even when all safety guidelines are
observed, there is a small residual risk that
passengers will sustain facial, hand or arm
injuries in isolated instances. The ignition
and inflation noise may provoke a mild Ð
usually temporary Ð hearing loss in
extremely sensitive individuals.
Important safety notes
Do not apply adhesive materials to
the cover panels of the airbags, cover
them or modify them in any other way.
Do not attempt to remove the airbag
restraint system from the vehicle. If you
note any indication of system malfunction,
if you desire to have an airbag deactivated,
or if the airbags are triggered in response
to an accident, you should always entrust
all inspection, repair and dismantling oper-
ations to your BMW center.
Never modify or tamper with either the wiring or the individual components in the
airbag system. This category includes the
upholstery in the center of the steering
wheel, on the instrument panel, the side
trim panels on the front or rear doors, and
the roof pillars along with the sides of the
headliner. Do not attempt to remove or dis-
mantle the steering wheel.
To ensure compliance with official safety
regulations, entrust disposal of airbag gen-
erators only to a BMW center.
Unprofessional attempts to service the
system could lead to failure in an emer-
gency or undesired airbag activation, either
of which could result in personal injury.
Do not touch the individual components
directly after the system has been trig-
gered, because there is a danger of
burns.<
At all times, occupants should sit
upright and be properly restrained Ð
infants and small children in appropriate
child-restraint systems; larger children and
adults using the safety belts. Never let an
occupant's head rest near or on a side
airbag because the inflating airbag could
cause a serious or fatal injury. Please note
that the word Airbag imprinted on the door
trim panel indicates the airbag's location.
Never install a rearward-facing child-
restraint system on the front passenger
seat. If you do so, the child could be
severely injured when the airbag is trig-
gered.
Children under 13 years of age and chil-
dren less than 5 ft (150 cm) tall should
always ride in the rear and the restraint sys-
tems should be secured with the vehicle's
safety belts.
Accident research shows that the safest
place for children in an automobile is in the
rear seat. However, a child sitting in the
rear seat and not properly restrained may
place his or her head on or near the airbag,
if so equipped.
For example, a child Ñ even though belted
Ñ may fall asleep with his or her head
against the side airbag. It may be difficult
for a driver to ensure that children in the
rear seat will remain properly positioned at
all times and do not place their heads on or
Page 66 of 229
Driving
64 and-go traffic, etc. As the vehicle then no
longer tends to creep when the transmis-
sion is engaged, it is no longer necessary
to hold the vehicle by depressing the brake
pedal.
It prevents the vehicle from rolling back-
ward during uphill starts.
The parking brake also engages automati-
cally when you switch off the engine after
stopping the vehicle.
You can activate and deactivate the Auto-
matic Hold feature by selecting the "Set-
tings" menu in the Control Center.
A description of the Control Center is pro-
vided on page 19.
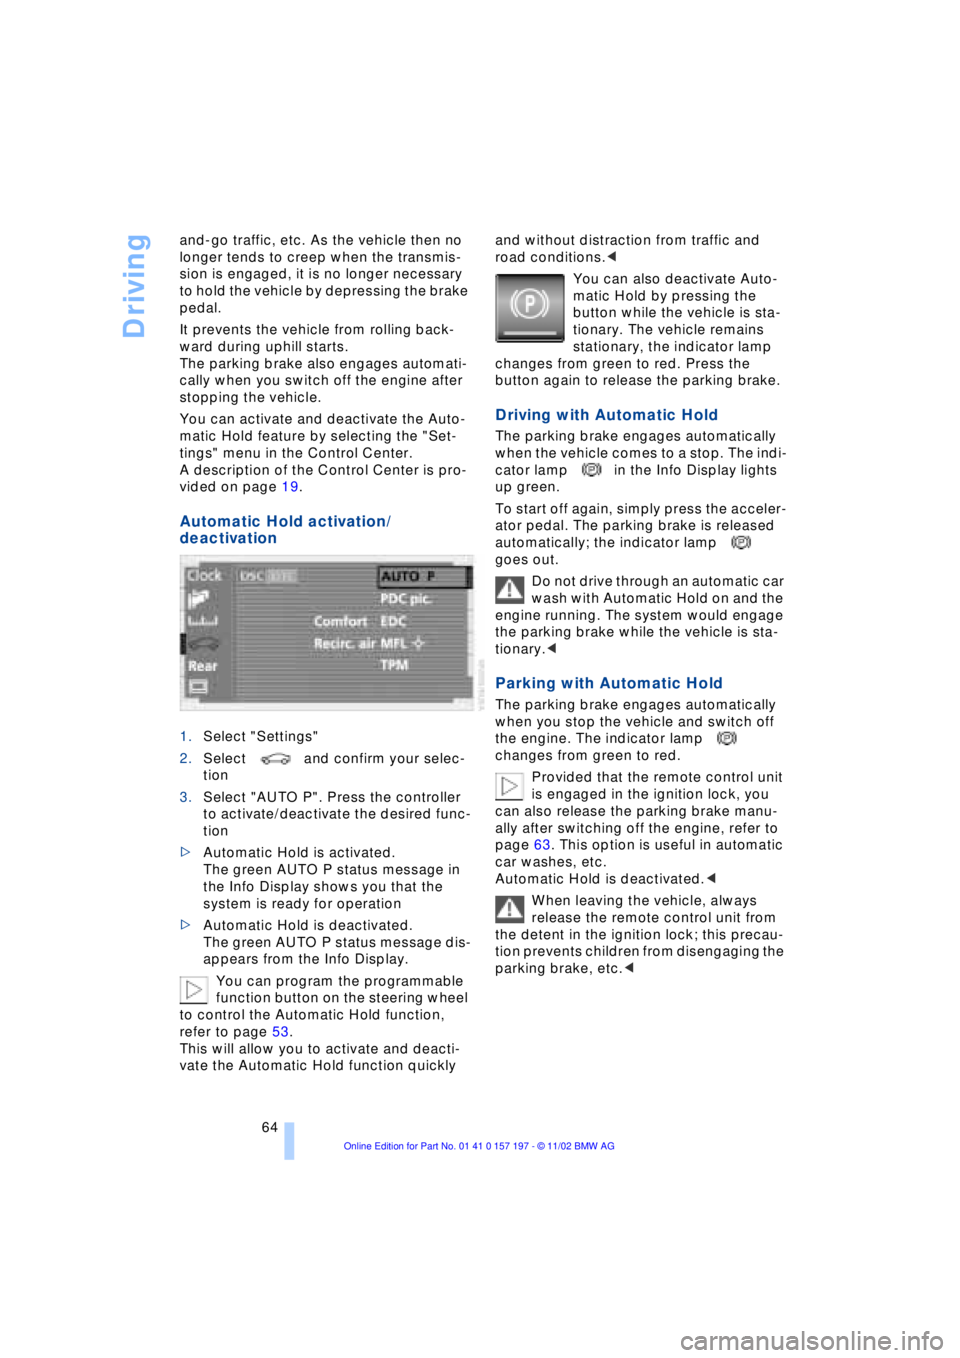
Automatic Hold activation/
deactivation
1.Select "Settings"
2.Select and confirm your selec-
tion
3.Select "AUTO P". Press the controller
to activate/deactivate the desired func-
tion
>Automatic Hold is activated.
The green AUTO P status message in
the Info Display shows you that the
system is ready for operation
>Automatic Hold is deactivated.
The green AUTO P status message dis-
appears from the Info Display.
You can program the programmable
function button on the steering wheel
to control the Automatic Hold function,
refer to page 53.
This will allow you to activate and deacti-
vate the Automatic Hold function quickly and without distraction from traffic and
road conditions.<
You can also deactivate Auto-
matic Hold by pressing the
button while the vehicle is sta-
tionary. The vehicle remains
stationary, the indicator lamp
changes from green to red. Press the
button again to release the parking brake.
Driving with Automatic Hold
The parking brake engages automatically
when the vehicle comes to a stop. The indi-
cator lamp in the Info Display lights
up green.
To start off again, simply press the acceler-
ator pedal. The parking brake is released
automatically; the indicator lamp
goes out.
Do not drive through an automatic car
wash with Automatic Hold on and the
engine running. The system would engage
the parking brake while the vehicle is sta-
tionary.<
Parking with Automatic Hold
The parking brake engages automatically
when you stop the vehicle and switch off
the engine. The indicator lamp
changes from green to red.
Provided that the remote control unit
is engaged in the ignition lock, you
can also release the parking brake manu-
ally after switching off the engine, refer to
page 63. This option is useful in automatic
car washes, etc.
Automatic Hold is deactivated.<
When leaving the vehicle, always
release the remote control unit from
the detent in the ignition lock; this precau-
tion prevents children from disengaging the
parking brake, etc.<
Page 69 of 229
At a glance
Controls
Driving tips
Communications
Navigation
Entertainment
Mobility
Reference
67
Automatic transmission
with L mode
While you can drive as with a conventional
automatic transmission, you also have the
option of retaining your current gear selec-
tion with the L/D button on the steering
wheel, refer to page 68.
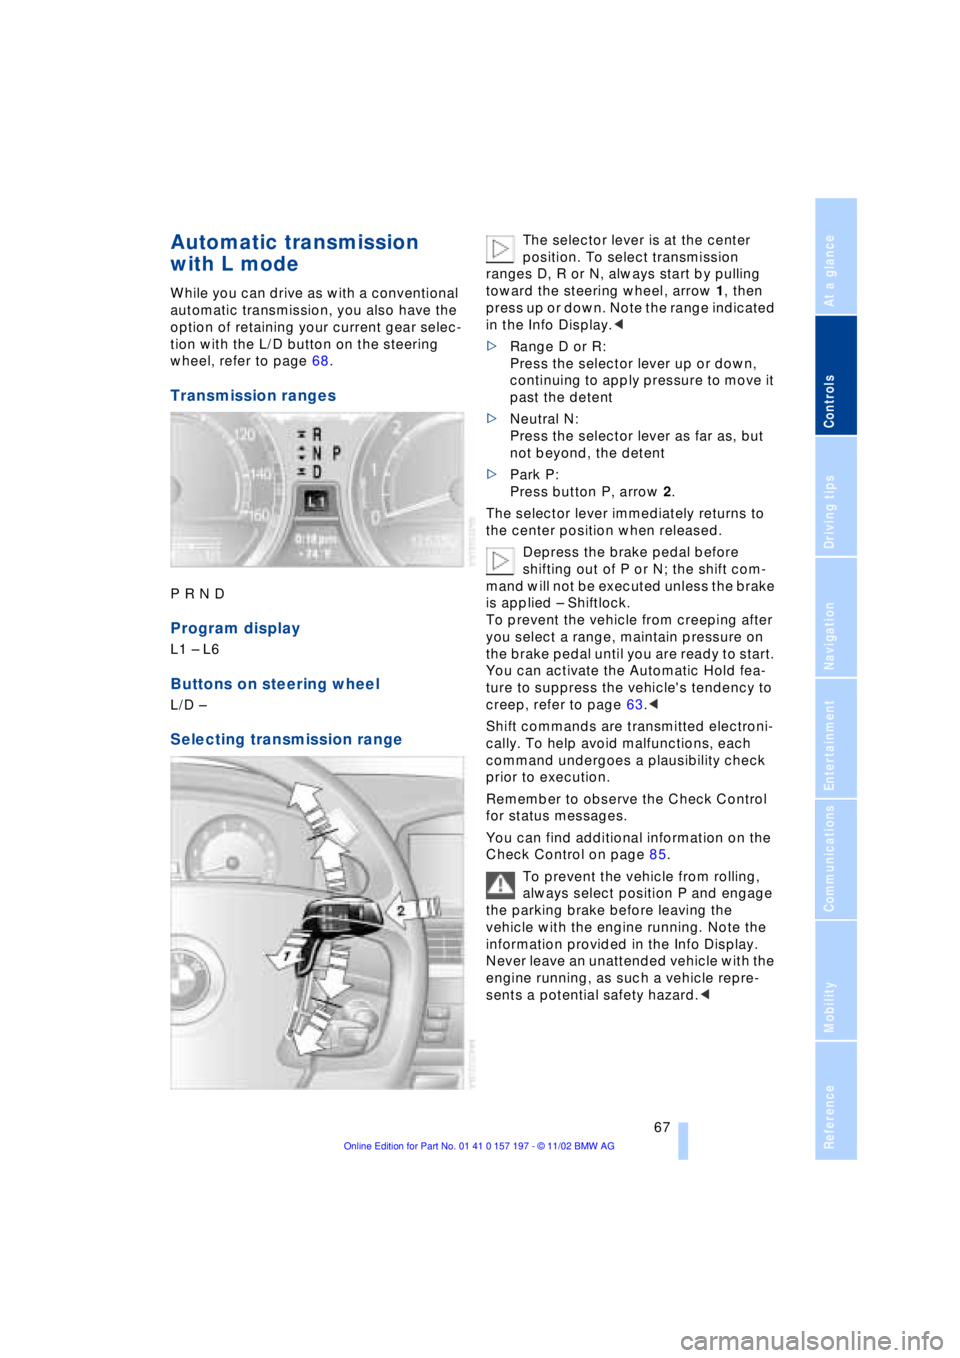
Transmission ranges
P R N D
Program display
L1 Ð L6
Buttons on steering wheel
L/D Ð
Selecting transmission range
The selector lever is at the center
position. To select transmission
ranges D, R or N, always start by pulling
toward the steering wheel, arrow 1, then
press up or down. Note the range indicated
in the Info Display.<
>Range D or R:
Press the selector lever up or down,
continuing to apply pressure to move it
past the detent
>Neutral N:
Press the selector lever as far as, but
not beyond, the detent
>Park P:
Press button P, arrow 2.
The selector lever immediately returns to
the center position when released.
Depress the brake pedal before
shifting out of P or N; the shift com-
mand will not be executed unless the brake
is applied Ð Shiftlock.
To prevent the vehicle from creeping after
you select a range, maintain pressure on
the brake pedal until you are ready to start.
You can activate the Automatic Hold fea-
ture to suppress the vehicle's tendency to
creep, refer to page 63.<
Shift commands are transmitted electroni-
cally. To help avoid malfunctions, each
command undergoes a plausibility check
prior to execution.
Remember to observe the Check Control
for status messages.
You can find additional information on the
Check Control on page 85.
To prevent the vehicle from rolling,
always select position P and engage
the parking brake before leaving the
vehicle with the engine running. Note the
information provided in the Info Display.
Never leave an unattended vehicle with the
engine running, as such a vehicle repre-
sents a potential safety hazard.<
Page 70 of 229
Driving
68
P Ñ Park
Press the button.
Select only when the vehicle is stationary.
The transmission lockout prevents the rear
wheels from turning. The lockout disen-
gages when you press the selector lever
toward D, N or R while the engine is run-
ning.
P is automatically engaged when you
remove the remote control unit from
the ignition lock after parking the vehicle.<
R Ñ Reverse
Press the selector lever upward, con-
tinuing to apply pressure to move it past
the detent. Select R only when the vehicle
is stationary.
N Ð Neutral
Press the selector lever as far as the
detent, but no further. Select N only if your
journey is interrupted for a long period.
>From D press the selector lever up
>From R press the selector lever down.
Note the arrows indicating direction in the
range display.
N is selected automatically whenever
the remote control unit remains
locked in the ignition lock after the ignition
is switched off. This function is useful in
automatic car washes, etc.
After approx. 30 minutes the system auto-
matically engages P. Remember to
observe the Check Control for status mes-
sages.<
D Drive Ð Automatic
Press the selector lever down, con-
tinuing beyond the detent. This is the range
recommended for normal vehicle opera-
tion. All forward gears are available.
Under normal operating conditions, fuel
consumption is lowest when driving in
position D.
Kickdown
The kickdown mode provides maximum
acceleration.
Press the accelerator pedal beyond full-
throttle detent point.
L mode
We recommend the L mode for times when
you wish to suppress certain shifts, for
instance, when ascending or descending
steep grades.
When the L mode is activated the transmis-
sion remains in your current gear, which
also appears in the Info Display, refer to
page 67. The transmission continues to
shift through the available ratios, but does
not proceed beyond the gear in the display.
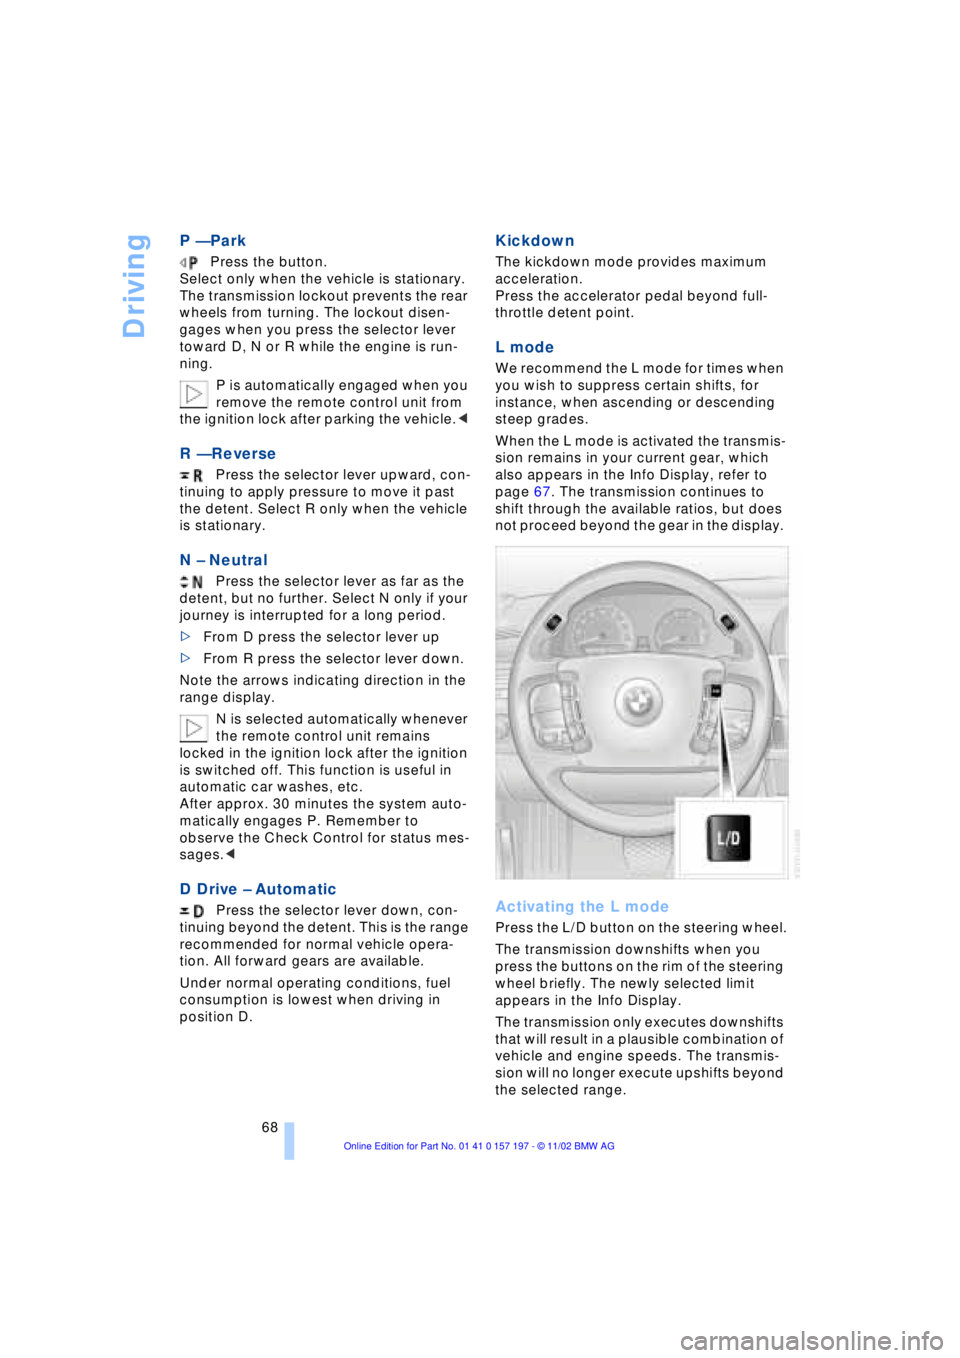
Activating the L mode
Press the L/D button on the steering wheel.
The transmission downshifts when you
press the buttons on the rim of the steering
wheel briefly. The newly selected limit
appears in the Info Display.
The transmission only executes downshifts
that will result in a plausible combination of
vehicle and engine speeds. The transmis-
sion will no longer execute upshifts beyond
the selected range.