2003 BMW 760LI SEDAN key
[x] Cancel search: keyPage 40 of 229
Opening and closing
38 You can also have the system pro-
grammed to activate the central
locking system automatically whenever the
vehicle is set in motion, or when a specific
interval elapses after it is unlocked, pro-
vided that neither the doors nor the lug-
gage compartment lid are opened in the
meantime. This can be adjusted to be key-
specific.<
Unlocking and opening the doors
>Either unlock the doors together with
the button for the central locking
system and then pull the release handle
above the armrest or
>pull the release handle for each door
twice: the first pull unlocks the door,
and the second one opens it.
When the low beams are switched on,
the interior door handles are also
lighted. The intensity of the lighting is
adjusted using the instrument lighting, refer
to page 103.<
Engaging the locks
>Use the central locking button to lock all
of the doors simultaneously,
or
>press the individual safety lock buttons
down. To prevent the driver from being
inadvertently locked out of the vehicle,
the lock button on the driver's door
automatically extends again after a brief
period if the door remains open.
Do not use the safety lock buttons to
engage the locks during driving, as
they would then fail to disengage automat-
ically in the event of an accident.
Because any persons or animals left unat-
tended in a parked vehicle could lock the
doors from the inside, you should always
keep the remote control unit with you; this
precaution ensures that you will remain
able to unlock the vehicle from the outside
at all times. <
Doors
Soft Close Automatic*
Apply gentle pressure to the door to close
it. The closing process will then be carried
out automatically.
To avoid injuries, ensure that the
door's travel path is completely free
and clear before closing.<
Luggage compartment lid
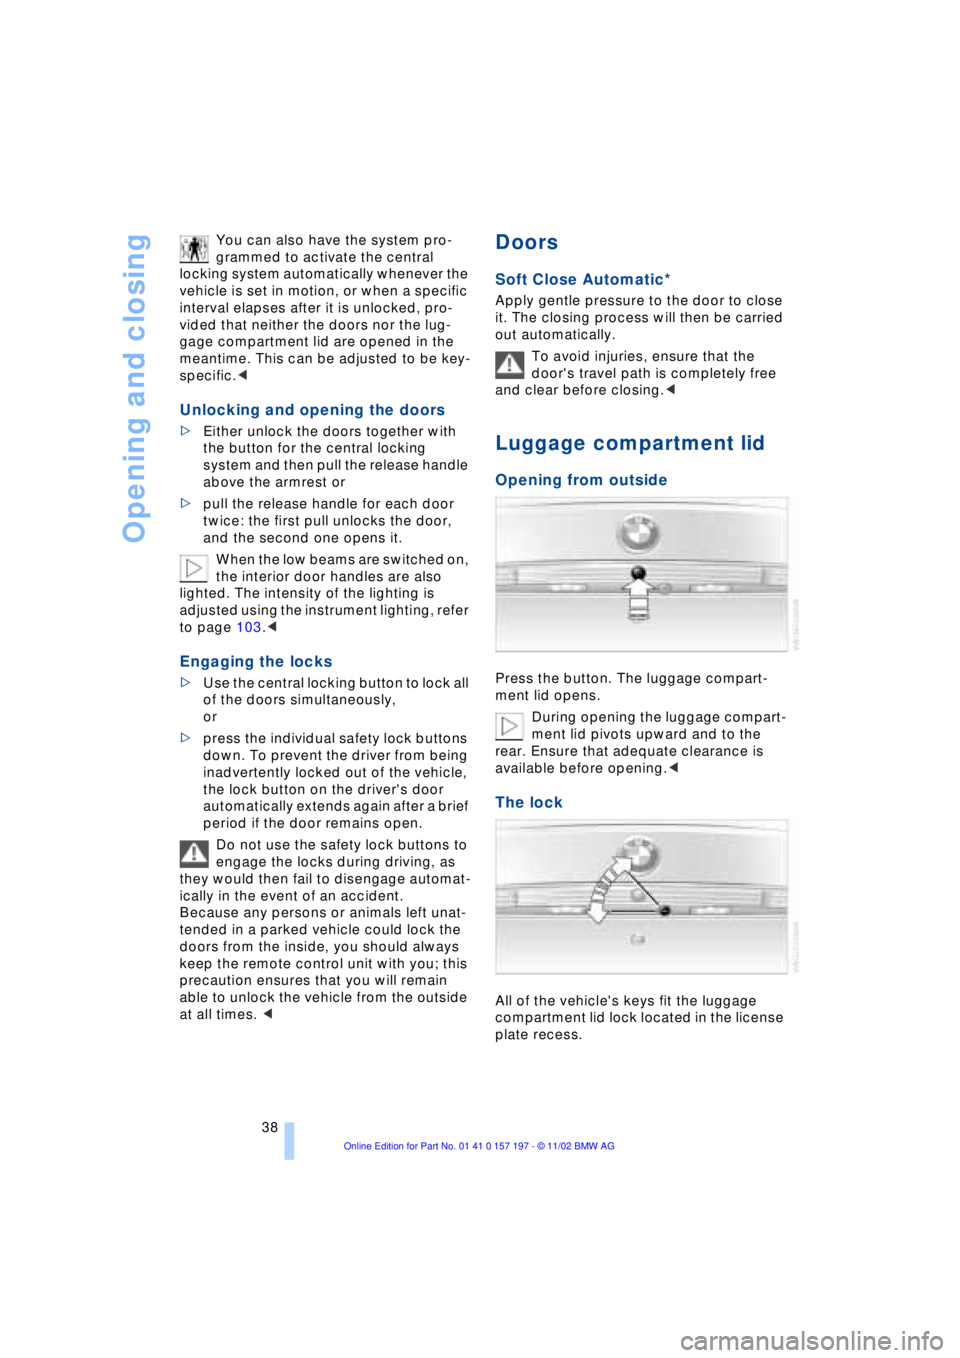
Opening from outside
Press the button. The luggage compart-
ment lid opens.
During opening the luggage compart-
ment lid pivots upward and to the
rear. Ensure that adequate clearance is
available before opening.<
The lock
All of the vehicle's keys fit the luggage
compartment lid lock located in the license
plate recess.
Page 41 of 229
At a glance
Controls
Driving tips
Communications
Navigation
Entertainment
Mobility
Reference
39
Opening separately
Insert the key in the luggage compartment
lid's lock and turn it all the way to the right
Ð the lid opens.
To avoid being locked out inadvert-
ently, avoid laying the remote control
unit down in the luggage compartment. The
luggage compartment is locked again as
soon as you close the lid.
If you use the key to unlock the luggage
compartment lid while the alarm system is
armed, the alarm will be triggered. To
deactivate the alarm,
>unlock the vehicle using the remote
control, refer to page 36, or
>insert the remote control all the way into
the ignition lock, engaging the detent.<
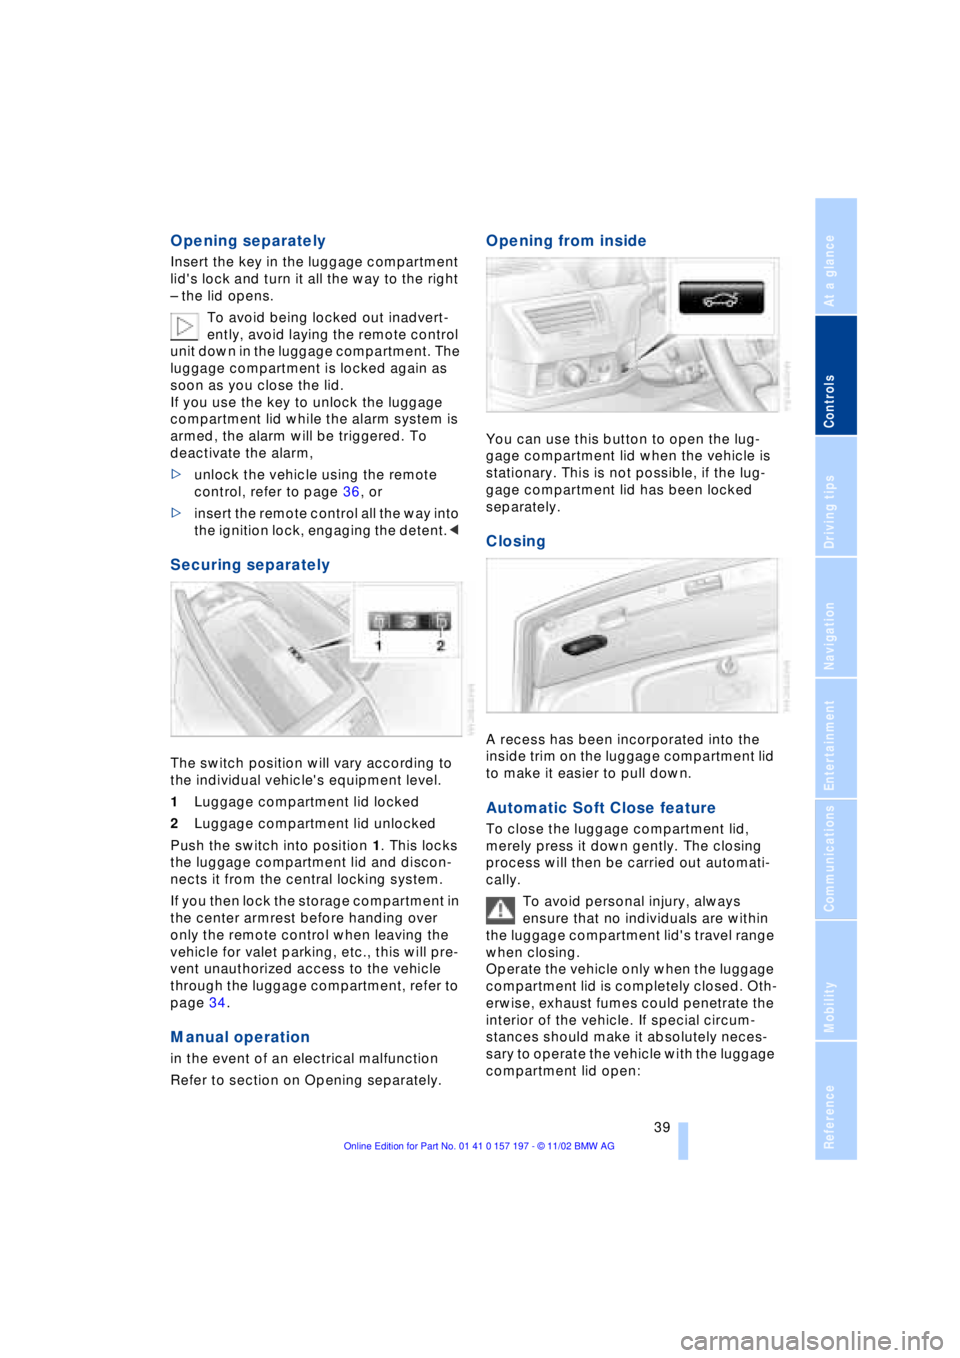
Securing separately
The switch position will vary according to
the individual vehicle's equipment level.
1Luggage compartment lid locked
2Luggage compartment lid unlocked
Push the switch into position 1. This locks
the luggage compartment lid and discon-
nects it from the central locking system.
If you then lock the storage compartment in
the center armrest before handing over
only the remote control when leaving the
vehicle for valet parking, etc., this will pre-
vent unauthorized access to the vehicle
through the luggage compartment, refer to
page 34.
Manual operation
in the event of an electrical malfunction
Refer to section on Opening separately.
Opening from inside
You can use this button to open the lug-
gage compartment lid when the vehicle is
stationary. This is not possible, if the lug-
gage compartment lid has been locked
separately.
Closing
A recess has been incorporated into the
inside trim on the luggage compartment lid
to make it easier to pull down.
Automatic Soft Close feature
To close the luggage compartment lid,
merely press it down gently. The closing
process will then be carried out automati-
cally.
To avoid personal injury, always
ensure that no individuals are within
the luggage compartment lid's travel range
when closing.
Operate the vehicle only when the luggage
compartment lid is completely closed. Oth-
erwise, exhaust fumes could penetrate the
interior of the vehicle. If special circum-
stances should make it absolutely neces-
sary to operate the vehicle with the luggage
compartment lid open:
Page 42 of 229
Opening and closing
40 >Close all windows. Shut the sliding/tilt
sunroof
>Adjust the automatic climate control's
blower to supply a high rate of airflow,
refer to page 107.<
Automatic luggage compartment lid
operation*
Opening
The luggage compartment lid opens all the
way, when you
>press the button next to the steering
column
>press the button on the outside of the
luggage compartment lid, refer to
page 38
>press button 3on the remote
control unit, refer to page 36.
During opening the luggage compart-
ment lid pivots upward and to the
rear. Ensure that adequate clearance is
available before opening.<
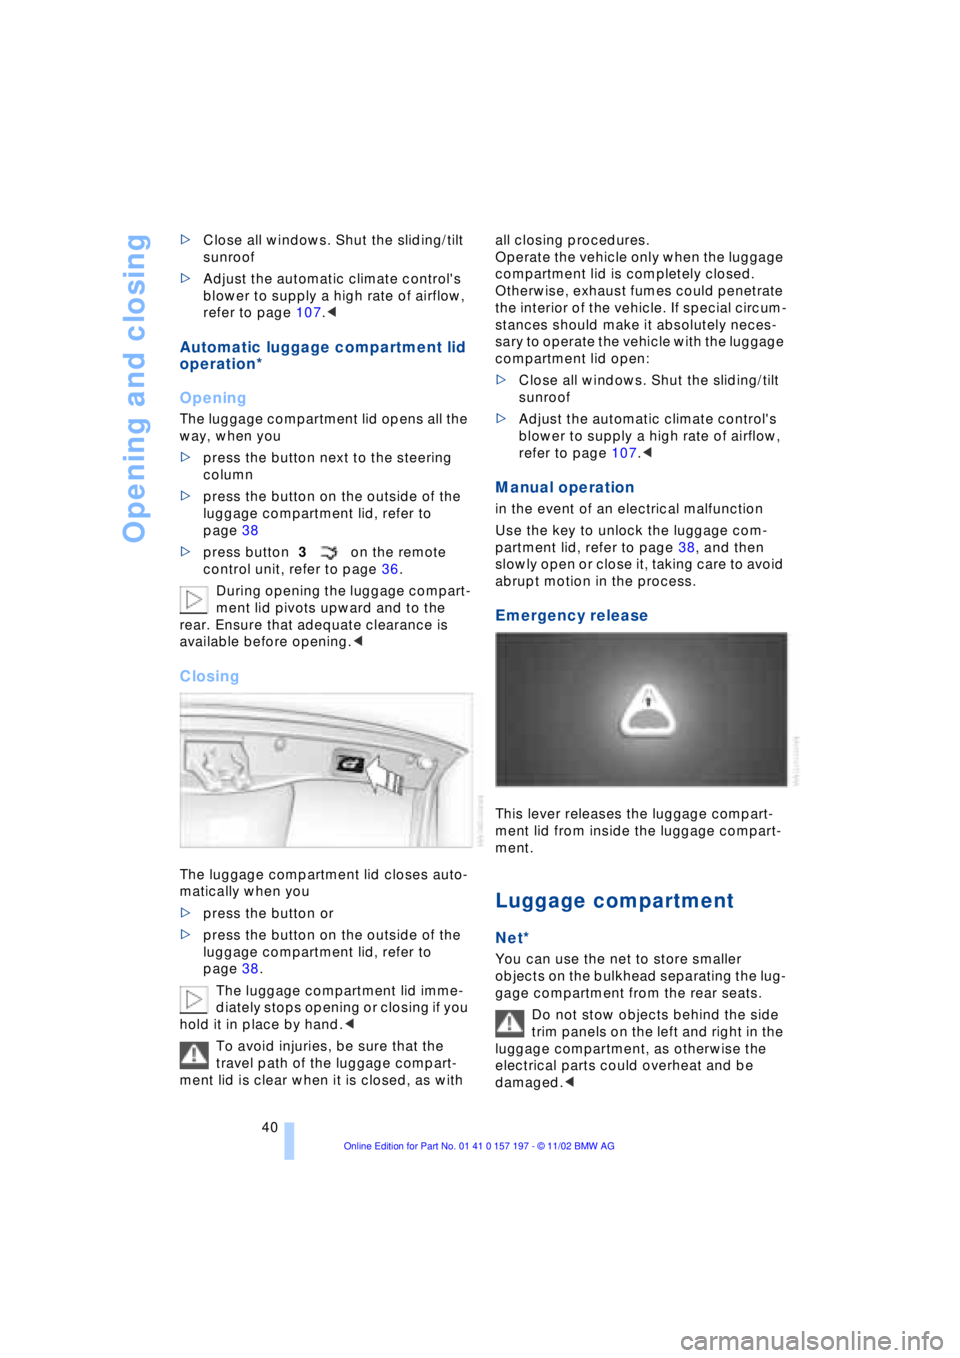
Closing
The luggage compartment lid closes auto-
matically when you
>press the button or
>press the button on the outside of the
luggage compartment lid, refer to
page 38.
The luggage compartment lid imme-
diately stops opening or closing if you
hold it in place by hand.<
To avoid injuries, be sure that the
travel path of the luggage compart-
ment lid is clear when it is closed, as with all closing procedures.
Operate the vehicle only when the luggage
compartment lid is completely closed.
Otherwise, exhaust fumes could penetrate
the interior of the vehicle. If special circum-
stances should make it absolutely neces-
sary to operate the vehicle with the luggage
compartment lid open:
>Close all windows. Shut the sliding/tilt
sunroof
>Adjust the automatic climate control's
blower to supply a high rate of airflow,
refer to page 107.<
Manual operation
in the event of an electrical malfunction
Use the key to unlock the luggage com-
partment lid, refer to page 38, and then
slowly open or close it, taking care to avoid
abrupt motion in the process.
Emergency release
This lever releases the luggage compart-
ment lid from inside the luggage compart-
ment.
Luggage compartment
Net*
You can use the net to store smaller
objects on the bulkhead separating the lug-
gage compartment from the rear seats.
Do not stow objects behind the side
trim panels on the left and right in the
luggage compartment, as otherwise the
electrical parts could overheat and be
damaged.<
Page 44 of 229
Opening and closing
42 Lock, i.e. arm by pressing twice; press
button 2of the remote control
twice in succession, refer to page 36, or
lock twice with the key, refer to page 37.
The indicator lamp lights up briefly and
then flashes continuously. The tilt alarm
sensor and the interior motion sensor are
switched off as long as the system is
armed.
If you desire, the
>tilt alarm sensor
>interior motion sensor
can be switched off permanently. Please
contact your BMW center for assistance.<
Interior motion sensor
In order for the interior motion sensor to
function properly, the windows and sliding/
tilt sunroof must be completely closed.
Be sure to deactivate the interior motion
sensor, refer to section on Avoiding unin-
tentional alarms, when you wish to leave
the windows or sliding/tilt sunroof open.
Electric power windows
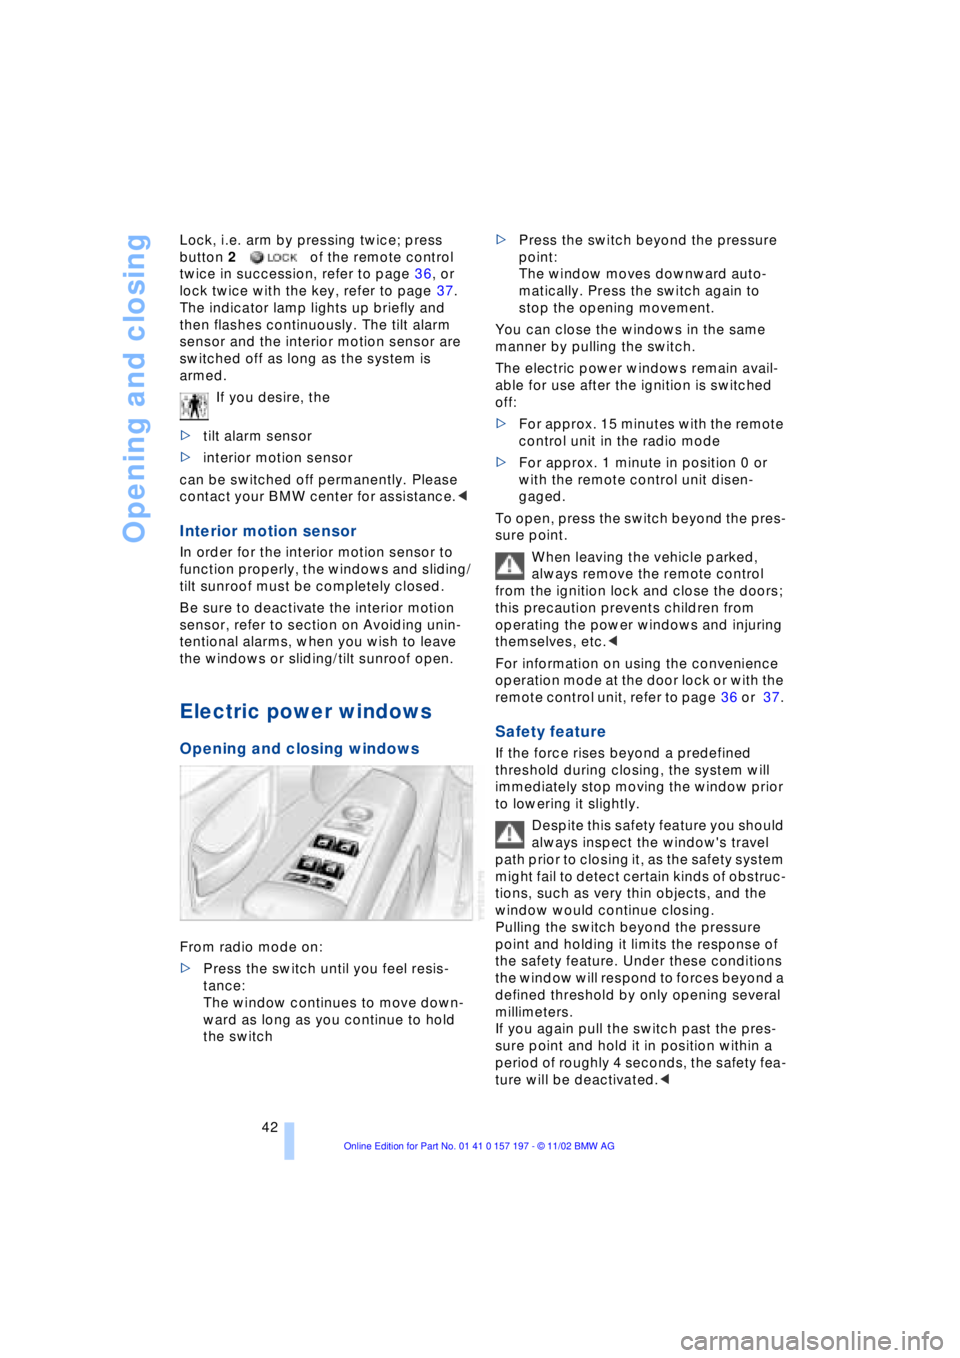
Opening and closing windows
From radio mode on:
>Press the switch until you feel resis-
tance:
The window continues to move down-
ward as long as you continue to hold
the switch >Press the switch beyond the pressure
point:
The window moves downward auto-
matically. Press the switch again to
stop the opening movement.
You can close the windows in the same
manner by pulling the switch.
The electric power windows remain avail-
able for use after the ignition is switched
off:
>For approx. 15 minutes with the remote
control unit in the radio mode
>For approx. 1 minute in position 0 or
with the remote control unit disen-
gaged.
To open, press the switch beyond the pres-
sure point.
When leaving the vehicle parked,
always remove the remote control
from the ignition lock and close the doors;
this precaution prevents children from
operating the power windows and injuring
themselves, etc.<
For information on using the convenience
operation mode at the door lock or with the
remote control unit, refer to page 36 or 37.
Safety feature
If the force rises beyond a predefined
threshold during closing, the system will
immediately stop moving the window prior
to lowering it slightly.
Despite this safety feature you should
always inspect the window's travel
path prior to closing it, as the safety system
might fail to detect certain kinds of obstruc-
tions, such as very thin objects, and the
window would continue closing.
Pulling the switch beyond the pressure
point and holding it limits the response of
the safety feature. Under these conditions
the window will respond to forces beyond a
defined threshold by only opening several
millimeters.
If you again pull the switch past the pres-
sure point and hold it in position within a
period of roughly 4 seconds, the safety fea-
ture will be deactivated.<
Page 57 of 229
At a glance
Controls
Driving tips
Communications
Navigation
Entertainment
Mobility
Reference
55
Safety feature
1.Driver's door closed and ignition
switched either on or off
2.Press memory button 1 or 2 and main-
tain pressure until the adjustment pro-
cess has been completed.
If you press the
MEMORY button acciden-
tally:
Press the button again; the indicator lamp
goes out.
Do not call up a position from the
memory while the vehicle is moving.
There is a risk of accident from unexpected
movement of the seat or steering wheel.<
You can have your vehicle pro-
grammed to automatically dial in your
own individual adjustment settings for the
seat, mirrors and steering wheel whenever
you use your personal remote control unit
to unlock the vehicle.<
When using the Key Memory feature
always make sure that the footwell
behind the driver's seat is empty and unob-
structed. If you fail to do so, any persons or
objects behind the seat could be injured or
damaged by a rearward movement of the
seat.<
Passenger-side exterior mirror tilt
function
Automatic curb monitor
1.Select the driver's door mirror with the
switch
2.When you select the transmission posi-
tion R, the door mirror on the front pas-
senger side tilts downward slightly. This
allows the driver to see the area imme-
diately adjacent to the vehicle Ð such as
a curb Ð when parking, etc.
You can deactivate this automatic feature:
Slide the mirror selection switch to the pas-
senger's side position.
Airbags
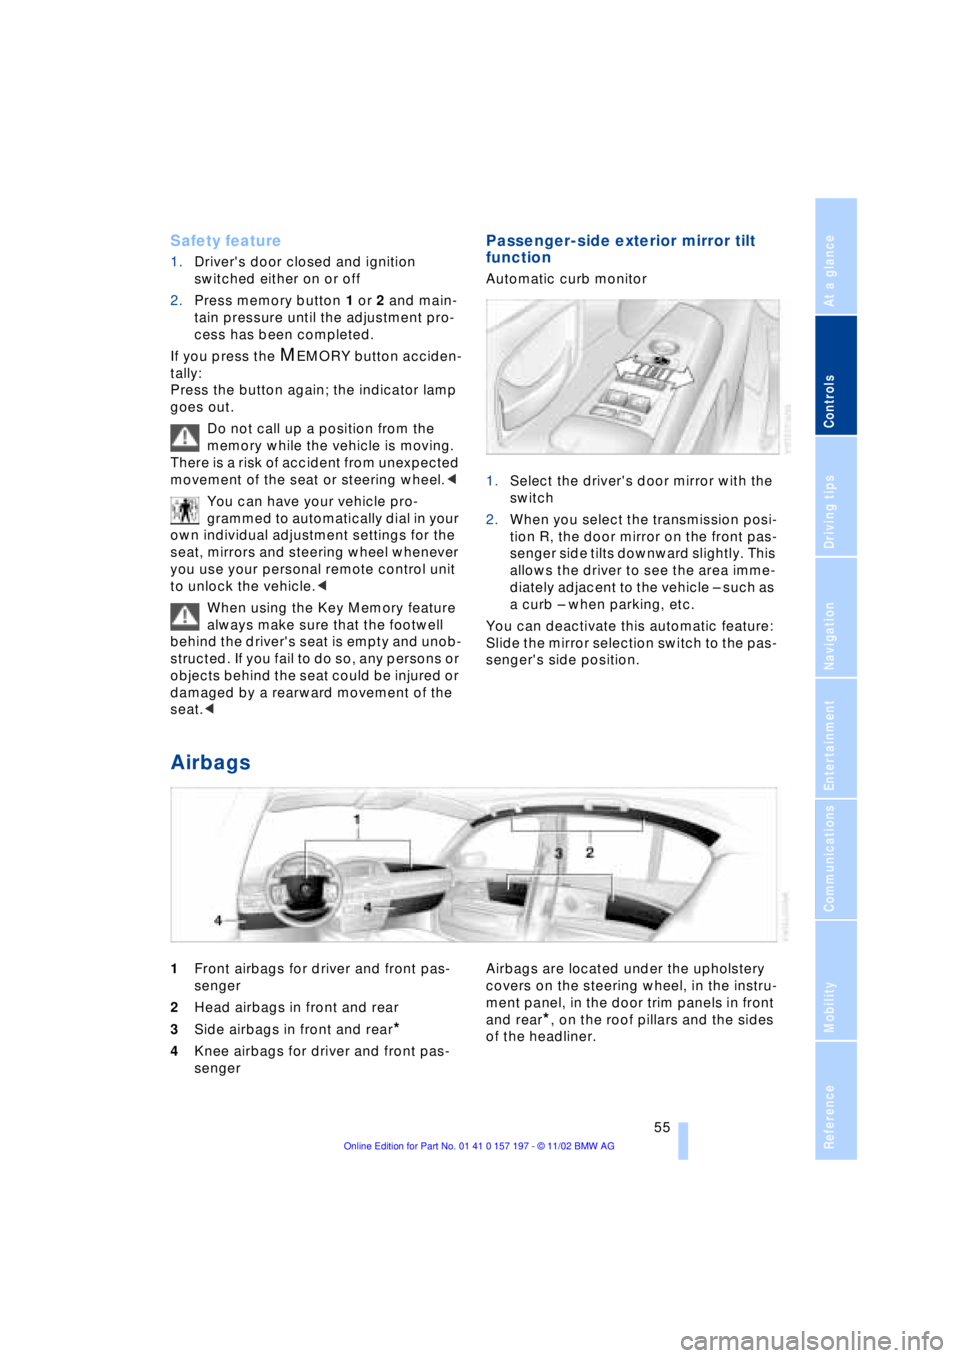
1Front airbags for driver and front pas-
senger
2Head airbags in front and rear
3Side airbags in front and rear
*
4Knee airbags for driver and front pas-
senger Airbags are located under the upholstery
covers on the steering wheel, in the instru-
ment panel, in the door trim panels in front
and rear*, on the roof pillars and the sides
of the headliner.
Page 62 of 229
Adjustments
60
Vehicle Memory, Key
Memory
How the system functions
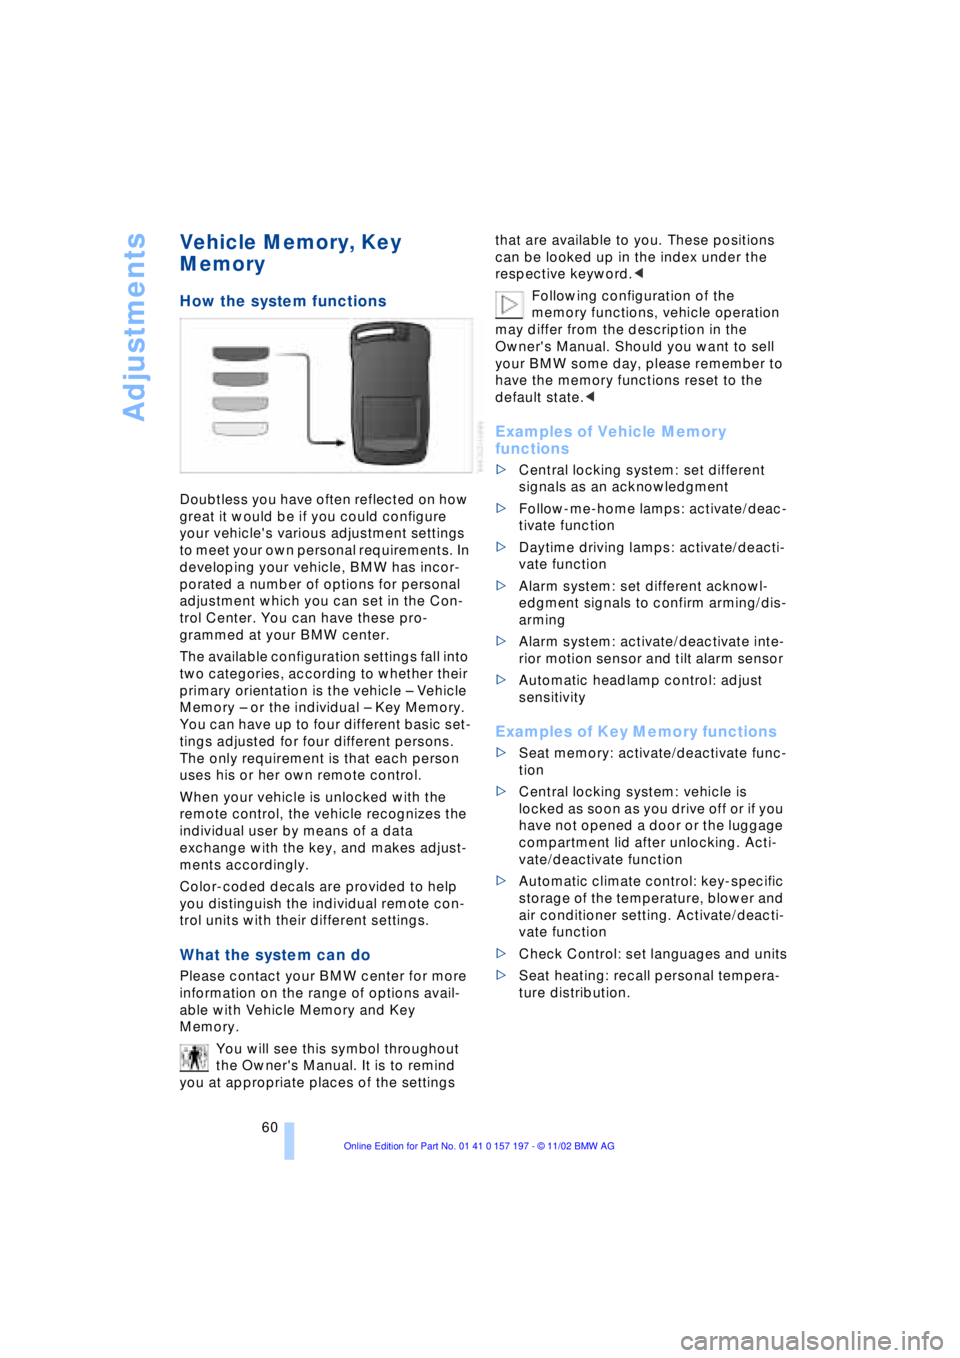
Doubtless you have often reflected on how
great it would be if you could configure
your vehicle's various adjustment settings
to meet your own personal requirements. In
developing your vehicle, BMW has incor-
porated a number of options for personal
adjustment which you can set in the Con-
trol Center. You can have these pro-
grammed at your BMW center.
The available configuration settings fall into
two categories, according to whether their
primary orientation is the vehicle Ð Vehicle
Memory Ð or the individual Ð Key Memory.
You can have up to four different basic set-
tings adjusted for four different persons.
The only requirement is that each person
uses his or her own remote control.
When your vehicle is unlocked with the
remote control, the vehicle recognizes the
individual user by means of a data
exchange with the key, and makes adjust-
ments accordingly.
Color-coded decals are provided to help
you distinguish the individual remote con-
trol units with their different settings.
What the system can do
Please contact your BMW center for more
information on the range of options avail-
able with Vehicle Memory and Key
Memory.
You will see this symbol throughout
the Owner's Manual. It is to remind
you at appropriate places of the settings that are available to you. These positions
can be looked up in the index under the
respective keyword.<
Following configuration of the
memory functions, vehicle operation
may differ from the description in the
Owner's Manual. Should you want to sell
your BMW some day, please remember to
have the memory functions reset to the
default state.<
Examples of Vehicle Memory
functions
>Central locking system: set different
signals as an acknowledgment
>Follow-me-home lamps: activate/deac-
tivate function
>Daytime driving lamps: activate/deacti-
vate function
>Alarm system: set different acknowl-
edgment signals to confirm arming/dis-
arming
>Alarm system: activate/deactivate inte-
rior motion sensor and tilt alarm sensor
>Automatic headlamp control: adjust
sensitivity
Examples of Key Memory functions
>Seat memory: activate/deactivate func-
tion
>Central locking system: vehicle is
locked as soon as you drive off or if you
have not opened a door or the luggage
compartment lid after unlocking. Acti-
vate/deactivate function
>Automatic climate control: key-specific
storage of the temperature, blower and
air conditioner setting. Activate/deacti-
vate function
>Check Control: set languages and units
>Seat heating: recall personal tempera-
ture distribution.
Page 72 of 229
Driving
70 To obtain maximum acceleration, for
passing maneuvers, etc., during
operation in the manual mode, use the
kickdown or downshift manually.<
Malfunctions
A status report will appear in the Check
Control to alert you to any malfunctions in
the transmission-control system. Please
note any supplementary information that
appears in the Control Display. The direc-
tional arrows also start to flash in the Info
Display.
While it will remain still possible to move
the selector lever to any desired position,
the transmission will revert to operation in
its default mode with only a limited number
of forward gears.
Some types of malfunction will make it
impossible to engage all gears.
The engine may respond with reduced
output when accelerating from a standing
start.
If this happens, avoid extreme engine loads
and consult the nearest BMW center.
If no status messages appear in the
Info Display you should accelerate
carefully to confirm that you are driving in
the desired direction.
Never work in the engine compartment
with any of the forward or reverse gears
engaged, as the vehicle could start to
move. Engage the parking brake, refer to
page 62.<
Releasing transmission lockout
manually
You can respond to any interruptions in the
supply of electrical power, for instance, if
the battery is discharged or disconnected,
by releasing the transmission lockout man-
ually.
To prevent the drive wheels from
locking up and sliding, the transmis-
sion lockout must always be released man-
ually before the vehicle is towed.< Press the brake pedal before
releasing the transmission lockout
manually. If the brakes are not applied, the
vehicle could start to roll if parked on a
steep slope.
The transmission lockout should only be
released for towing. Remember to engage
the transmission lockout when you repark
the vehicle after moving it.
Should it also be necessary to release the
parking brake manually, owing to a dis-
charged battery, etc., always adhere to the
following sequence:
1.Start by manually releasing the parking
brake, refer to page 65
2.Then proceed to manually release the
transmission lockout.<
Jump-starting and towing, refer to
pages 202 and 203.
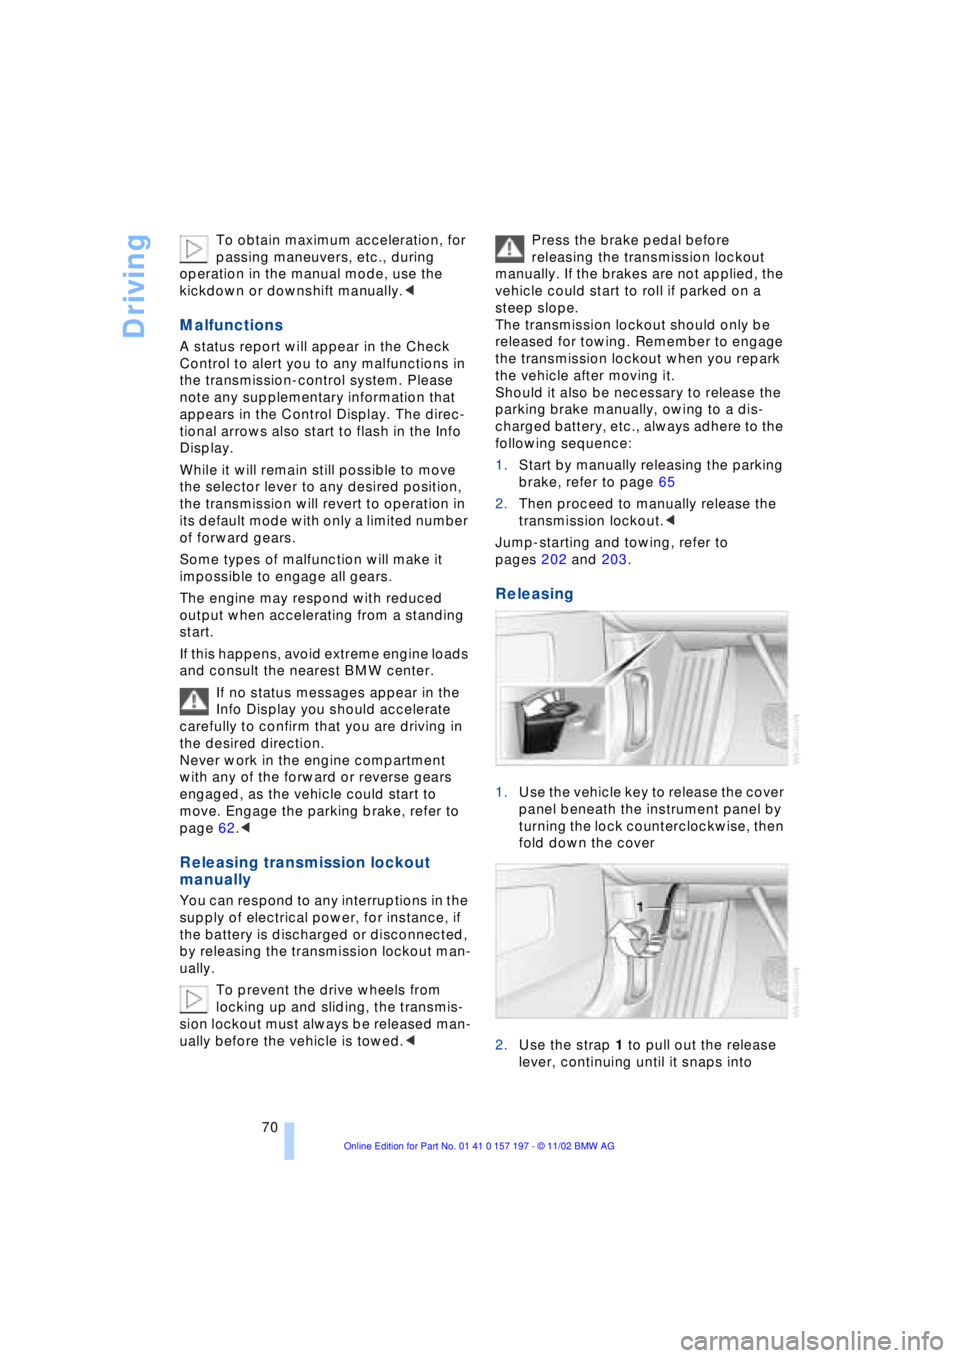
Releasing
1.Use the vehicle key to release the cover
panel beneath the instrument panel by
turning the lock counterclockwise, then
fold down the cover
2.Use the strap 1 to pull out the release
lever, continuing until it snaps into
Page 73 of 229
At a glance
Controls
Driving tips
Communications
Navigation
Entertainment
Mobility
Reference
71
place Ð the transmission lockout is
released.
Re-engage the transmission lockout
after parking the vehicle at its destina-
tion. Otherwise there is a danger that the
vehicle could start to roll if parked on a
steep slope.<
Engaging again
1.Disengage the release lever by pressing
it together with the red detent lever,
arrow 1
2.Guide the release lever all the way back
into its original position Ð the transmis-
sion lockout is again engaged
3.Fold up and lock the cover panel. Now Ð
and not before Ð the key may be
removed.
Once the transmission lockout has
been re-engaged, the warning in the
Check Control should disappear, and the
symbol in the Info Display should change
from N to P. Should this fail to happen,
there is a danger that the vehicle could
start to roll.<
Information on jump-starting, tow-starting
and towing begins on page 202.
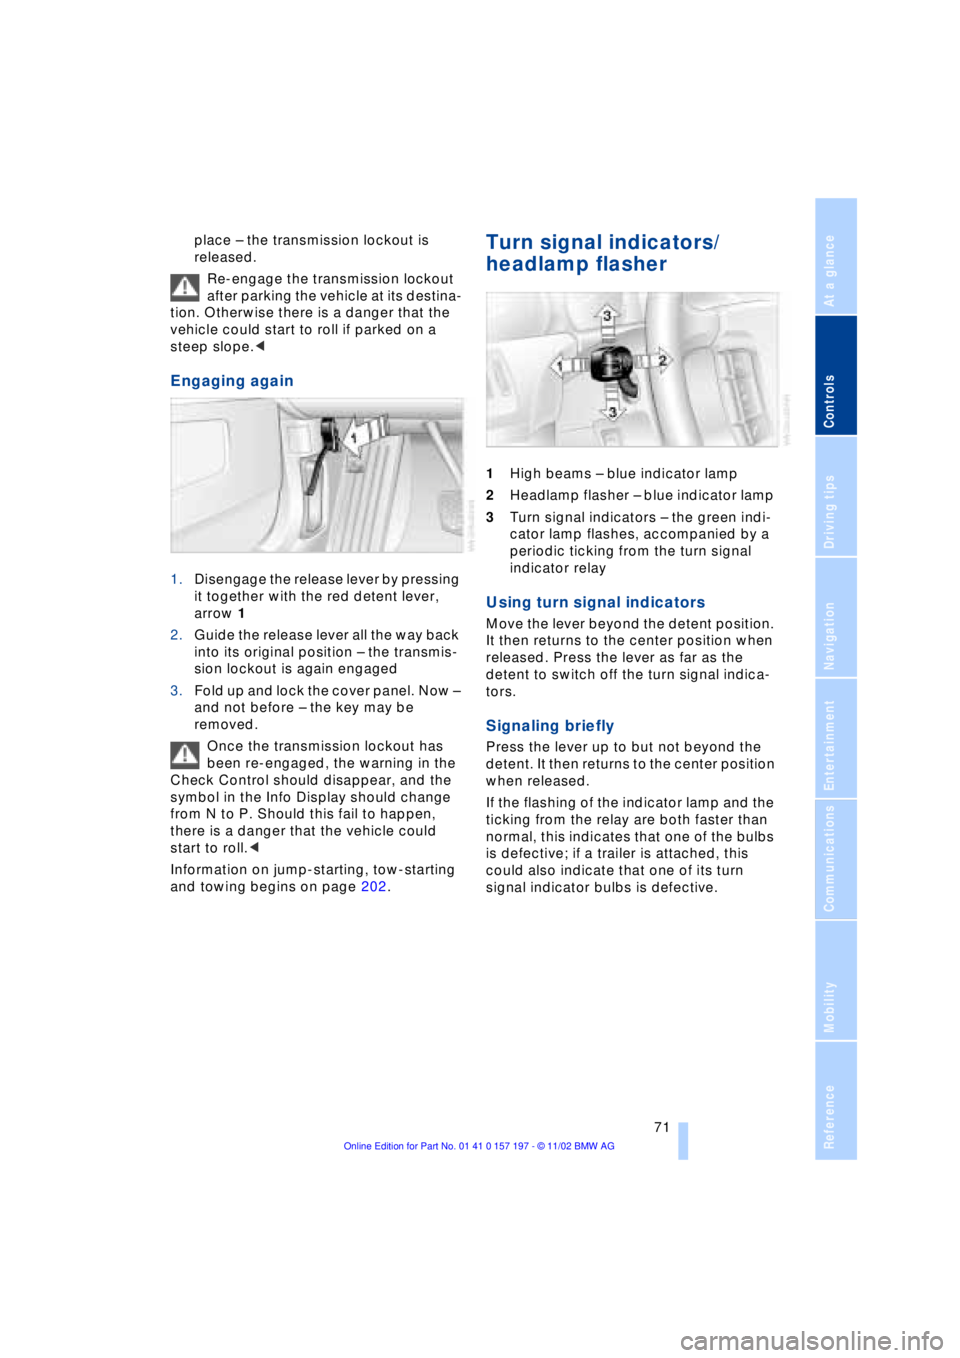
Turn signal indicators/
headlamp flasher
1High beams Ð blue indicator lamp
2Headlamp flasher Ð blue indicator lamp
3Turn signal indicators Ð the green indi-
cator lamp flashes, accompanied by a
periodic ticking from the turn signal
indicator relay
Using turn signal indicators
Move the lever beyond the detent position.
It then returns to the center position when
released. Press the lever as far as the
detent to switch off the turn signal indica-
tors.
Signaling briefly
Press the lever up to but not beyond the
detent. It then returns to the center position
when released.
If the flashing of the indicator lamp and the
ticking from the relay are both faster than
normal, this indicates that one of the bulbs
is defective; if a trailer is attached, this
could also indicate that one of its turn
signal indicator bulbs is defective.