2003 BMW 3.0i ROADSTER key
[x] Cancel search: keyPage 45 of 106

At a glance
Controls
Driving tips
Mobility
Reference
45
Lamps
Parking lamps/Low beams
Parking lamps
The front, rear and side vehicle
lighting is switched on. You can use
the parking lamps to signal the
position of the vehicle when it is parked.
For information on lighting on one side of
the vehicle for parking, which is available
as an additional feature, refer to page 46.
Low beams
When you switch off the ignition
with the low beam headlamps on,
only the parking lamps will remain
on.
Follow me home lamps:
When you activate the headlamp flasher
after parking the vehicle and switching off
the lights, the low beams will come on for a
brief period.
You can also have this function acti-
vated/deactivated if you wish.<
Defective bulbs
The defective bulb indicator lamp
lights up:
At least one bulb of the vehicle's
exterior lighting has failed.
For replacing bulbs: refer to page 84.
LIGHTS ON warning
Whenever you open the driver's door after
having turned the ignition key to position 0,
you will hear an acoustic signal for a few seconds to remind you that the lamps have
not been switched off
.
Daytime driving lamps*
If you wish, the light switch can be left in
the second position. When the ignition is
switched off, the external lighting is also
switched off.
You can have the activation settings
for the daytime driving lamps pro-
grammed on your vehicle.<
Automatic headlamp control*
When the switch is set to this posi-
tion, the system automatically
switches the low beams on and off
in response to changes in ambient light – in
tunnels, at dusk, etc. – as well as to rain and
snow.
The vehicle's external lights remain
on constantly when you switch on the
front fog lamps after the headlights have
come on automatically.<
Automatic headlamp control cannot
serve as a substitute for the driver's
judgement in determining when the vehicle
lights should be switched on. For example,
the sensors are not able to detect fog. To
avoid safety risks, you should respond to
these kinds of low-visibility situations by
switching the headlights on manually.<
You can have the sensitivity of your
vehicle's automatic headlamp control
adjusted.<
Page 46 of 106
Lamps
46
High beams/Standing
lamps
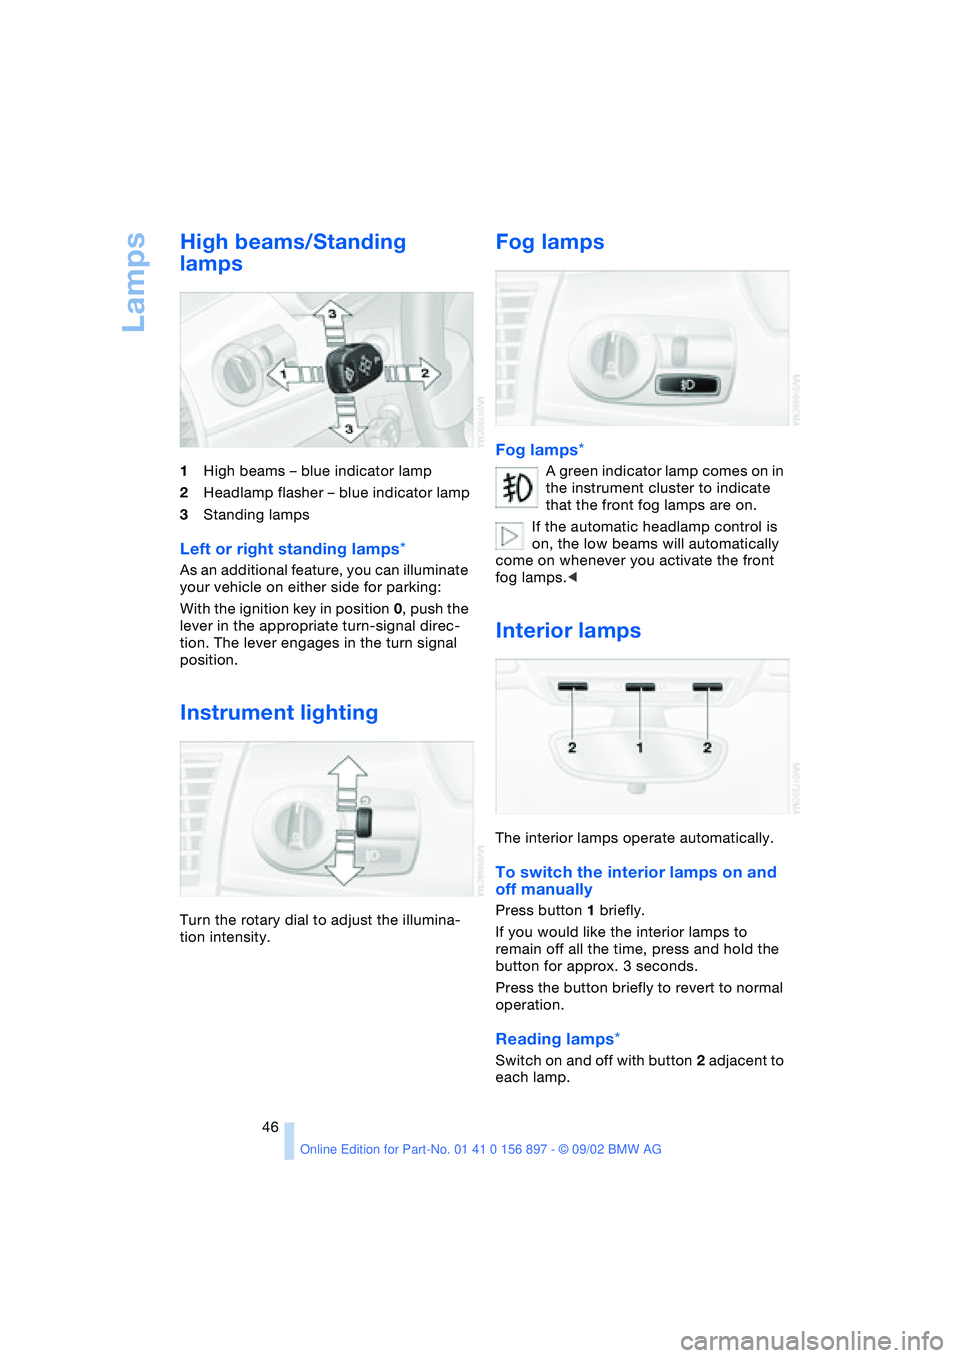
1High beams – blue indicator lamp
2Headlamp flasher – blue indicator lamp
3Standing lamps
Left or right standing lamps*
As an additional feature, you can illuminate
your vehicle on either side for parking:
With the ignition key in position 0, push the
lever in the appropriate turn-signal direc-
tion. The lever engages in the turn signal
position.
Instrument lighting
Turn the rotary dial to adjust the illumina-
tion intensity.
Fog lamps
Fog lamps*
A green indicator lamp comes on in
the instrument cluster to indicate
that the front fog lamps are on.
If the automatic headlamp control is
on, the low beams will automatically
come on whenever you activate the front
fog lamps.<
Interior lamps
The interior lamps operate automatically.
To switch the interior lamps on and
off manually
Press button 1 briefly.
If you would like the interior lamps to
remain off all the time, press and hold the
button for approx. 3 seconds.
Press the button briefly to revert to normal
operation.
Reading lamps*
Switch on and off with button 2 adjacent to
each lamp.
Page 47 of 106

At a glance
Controls
Driving tips
Mobility
Reference
47
Everything under control
Odometer
1Odometer
2Trip odometer
Odometer
With the ignition key in position 0, you can
activate the displays shown in the illustra-
tion by pressing the button – see arrow – in
the instrument cluster.
Trip odometer
To set to zero
Ignition key position 1
Keep the button pressed until the trip
odometer counter is set to zero.
Tachometer
Never allow the engine to operate with the
needle in the red overspeed sector of the
gauge.
To protect the engine, the fuel supply is
interrupted when you approach this sector.
Fuel gauge
Once indicator lamp 1 stays on continu-
ously, there are still approx. 2 gallons /
8 liters of fuel in the fuel tank.
Tank capacity: approx. 14.5 gallons /
55 liters.
If the tilt of the vehicle varies – when you
are driving in mountainous areas, for exam-
ple – the needle may fluctuate slightly.
Fill the fuel tank well before it is
empty. Driving to the last drop of fuel
can prevent the engine from operating
properly and result in damage.<
When you switch on the ignition, the indi-
cator lamp comes on briefly to indicate an
operational check.
Coolant temperature gauge
Blue
The engine is still cold. Drive at moderate
engine and vehicle speeds.
Page 48 of 106
Everything under control
48
Between the blue and red zones
Normal operating range. The needle may
rise as far as the edge of the red sector dur-
ing normal operation.
Red
When you switch on the ignition, warning
lamp 1 comes on briefly to indicate an
operational check.
Comes on while driving:
The engine has overheated. Switch off the
engine immediately and allow it to cool
down.
For checking the coolant level, refer to
page 80.
Service interval display
Remaining distance to next service
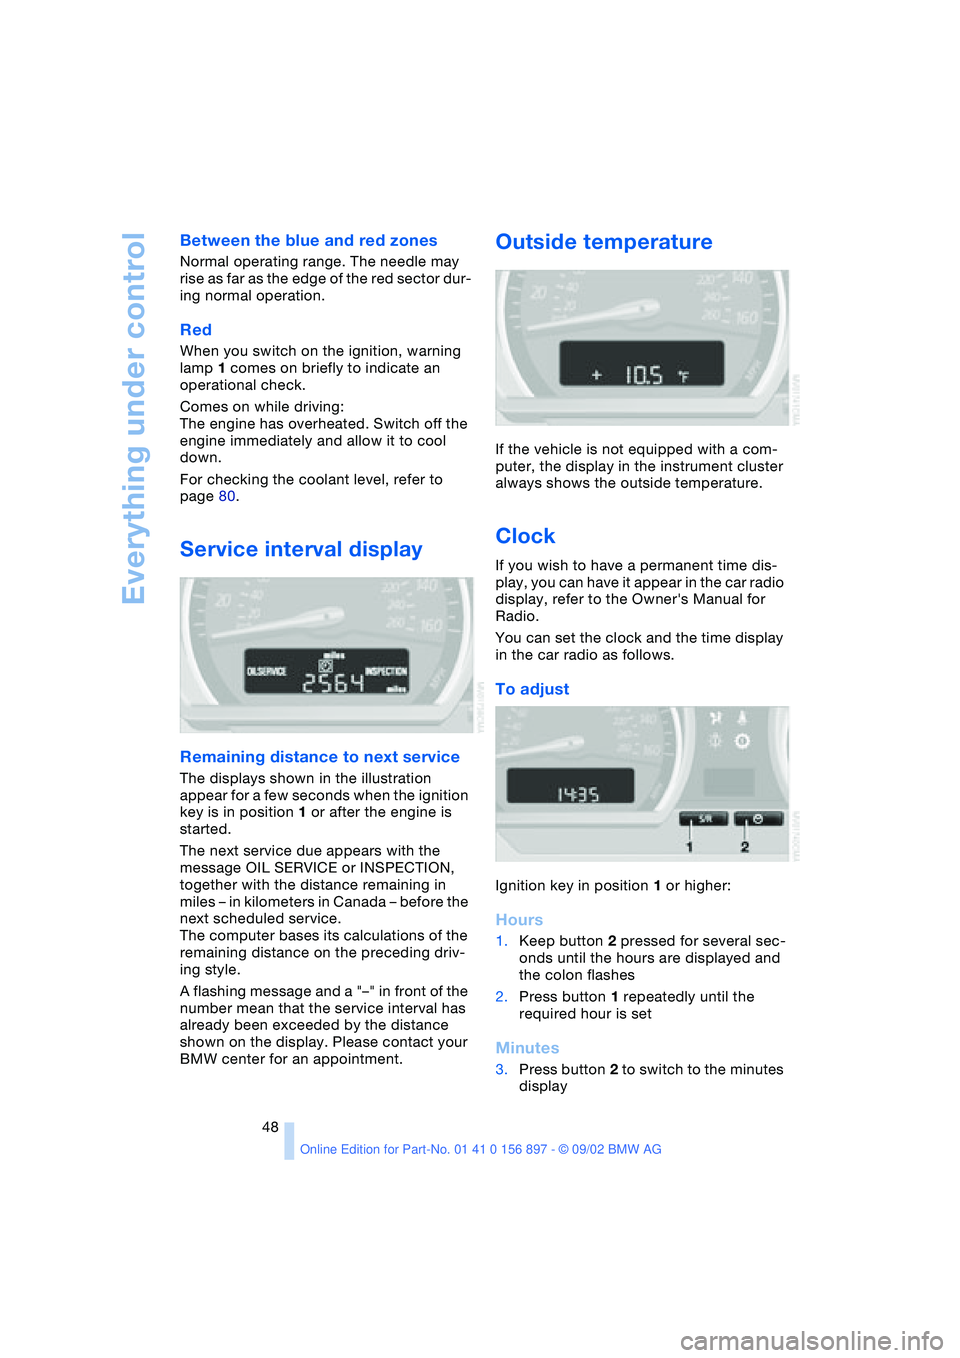
The displays shown in the illustration
appear for a few seconds when the ignition
key is in position 1 or after the engine is
started.
The next service due appears with the
message OIL SERVICE or INSPECTION,
together with the distance remaining in
miles – in kilometers in Canada – before the
next scheduled service.
The computer bases its calculations of the
remaining distance on the preceding driv-
ing style.
A flashing message and a "–" in front of the
number mean that the service interval has
already been exceeded by the distance
shown on the display. Please contact your
BMW center for an appointment.
Outside temperature
If the vehicle is not equipped with a com-
puter, the display in the instrument cluster
always shows the outside temperature.
Clock
If you wish to have a permanent time dis-
play, you can have it appear in the car radio
display, refer to the Owner's Manual for
Radio.
You can set the clock and the time display
in the car radio as follows.
To adjust
Ignition key in position 1 or higher:
Hours
1.Keep button 2 pressed for several sec-
onds until the hours are displayed and
the colon flashes
2.Press button 1 repeatedly until the
required hour is set
Minutes
3.Press button 2 to switch to the minutes
display
Page 49 of 106
At a glance
Controls
Driving tips
Mobility
Reference
49
4.Press button 1 repeatedly until the
required minutes are set
5.Press button 2 to confirm the settings.
The set time of day is transferred to the car
radio display or appears in the instrument
cluster display.
Display mode
In ignition key position 0:
Press button 1.
The time of day is displayed for several
seconds.
Computer*
Mode selection
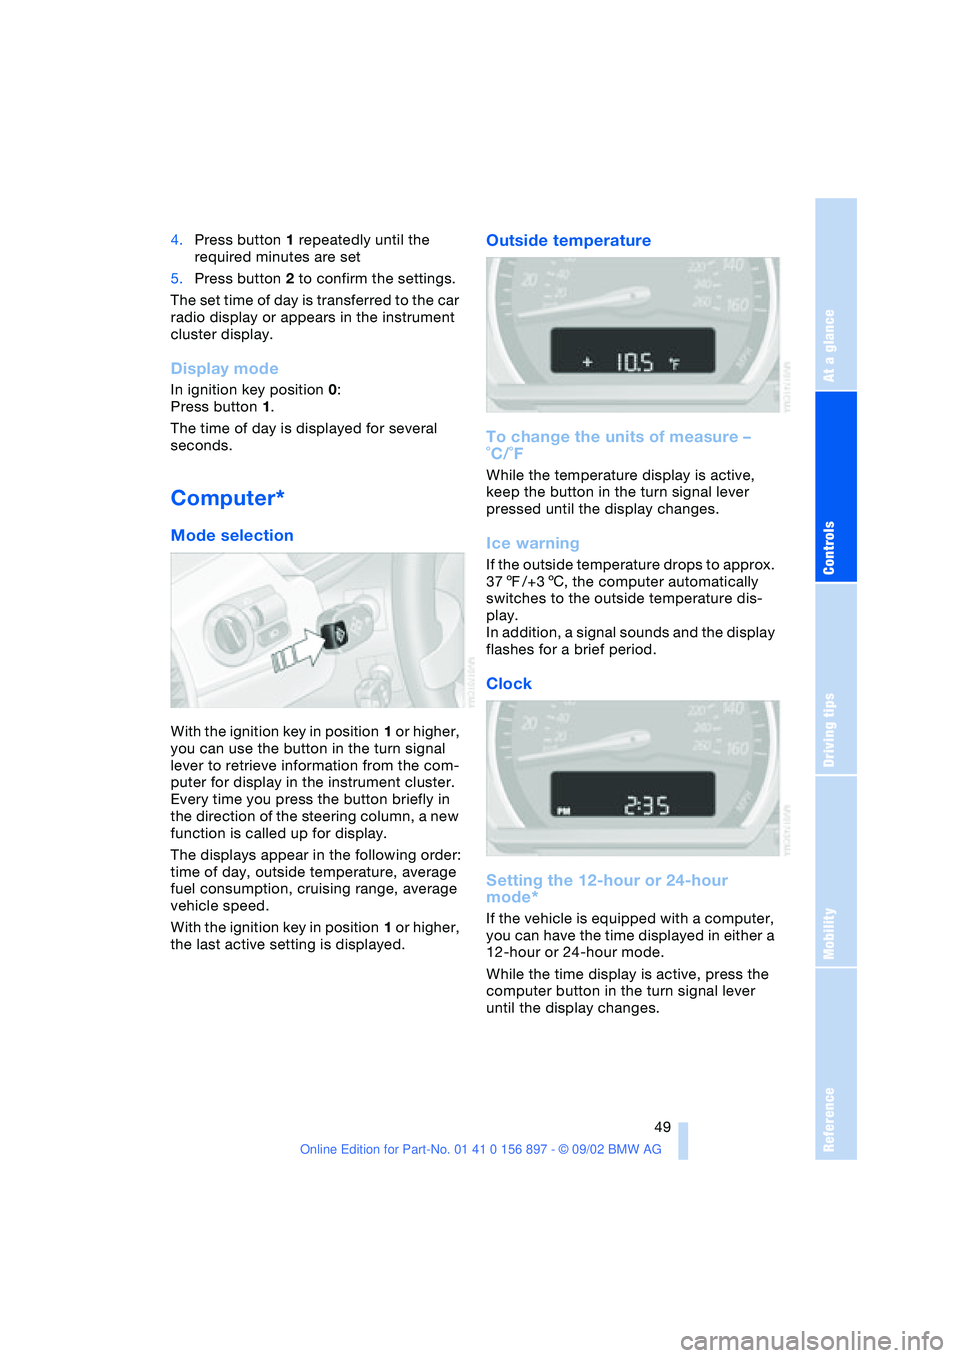
With the ignition key in position 1 or higher,
you can use the button in the turn signal
lever to retrieve information from the com-
puter for display in the instrument cluster.
Every time you press the button briefly in
the direction of the steering column, a new
function is called up for display.
The displays appear in the following order:
time of day, outside temperature, average
fuel consumption, cruising range, average
vehicle speed.
With the ignition key in position 1 or higher,
the last active setting is displayed.
Outside temperature
To change the units of measure –
˚C/˚F
While the temperature display is active,
keep the button in the turn signal lever
pressed until the display changes.
Ice warning
If the outside temperature drops to approx.
377/+36, the computer automatically
switches to the outside temperature dis-
play.
In addition, a signal sounds and the display
flashes for a brief period.
Clock
Setting the 12-hour or 24-hour
mode*
If the vehicle is equipped with a computer,
you can have the time displayed in either a
12-hour or 24-hour mode.
While the time display is active, press the
computer button in the turn signal lever
until the display changes.
Page 54 of 106
Technology for safety and driving convenience
54
System malfunction
The indicator lamp lights up yellow:
There is a malfunction or fault in the
Flat Tire Monitor.
In the event of this, please contact your
BMW center.
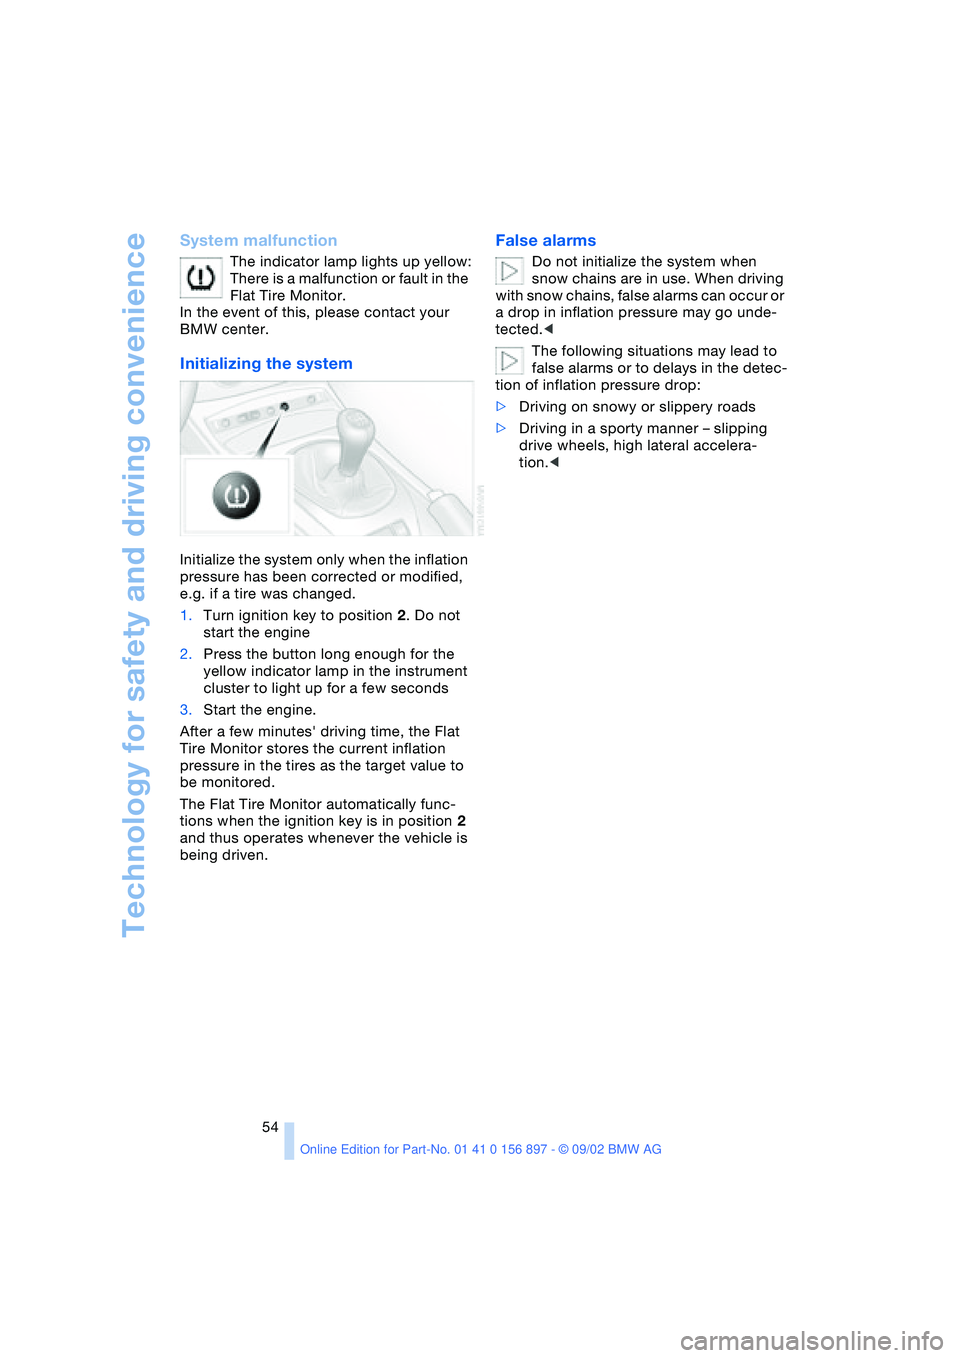
Initializing the system
Initialize the system only when the inflation
pressure has been corrected or modified,
e.g. if a tire was changed.
1.Turn ignition key to position 2. Do not
start the engine
2.Press the button long enough for the
yellow indicator lamp in the instrument
cluster to light up for a few seconds
3.Start the engine.
After a few minutes' driving time, the Flat
Tire Monitor stores the current inflation
pressure in the tires as the target value to
be monitored.
The Flat Tire Monitor automatically func-
tions when the ignition key is in position 2
and thus operates whenever the vehicle is
being driven.
False alarms
Do not initialize the system when
snow chains are in use. When driving
with snow chains, false alarms can occur or
a drop in inflation pressure may go unde-
tected.<
The following situations may lead to
false alarms or to delays in the detec-
tion of inflation pressure drop:
>Driving on snowy or slippery roads
>Driving in a sporty manner – slipping
drive wheels, high lateral accelera-
tion.<
Page 61 of 106
At a glance
Controls
Driving tips
Mobility
Reference
61
Beverage holder
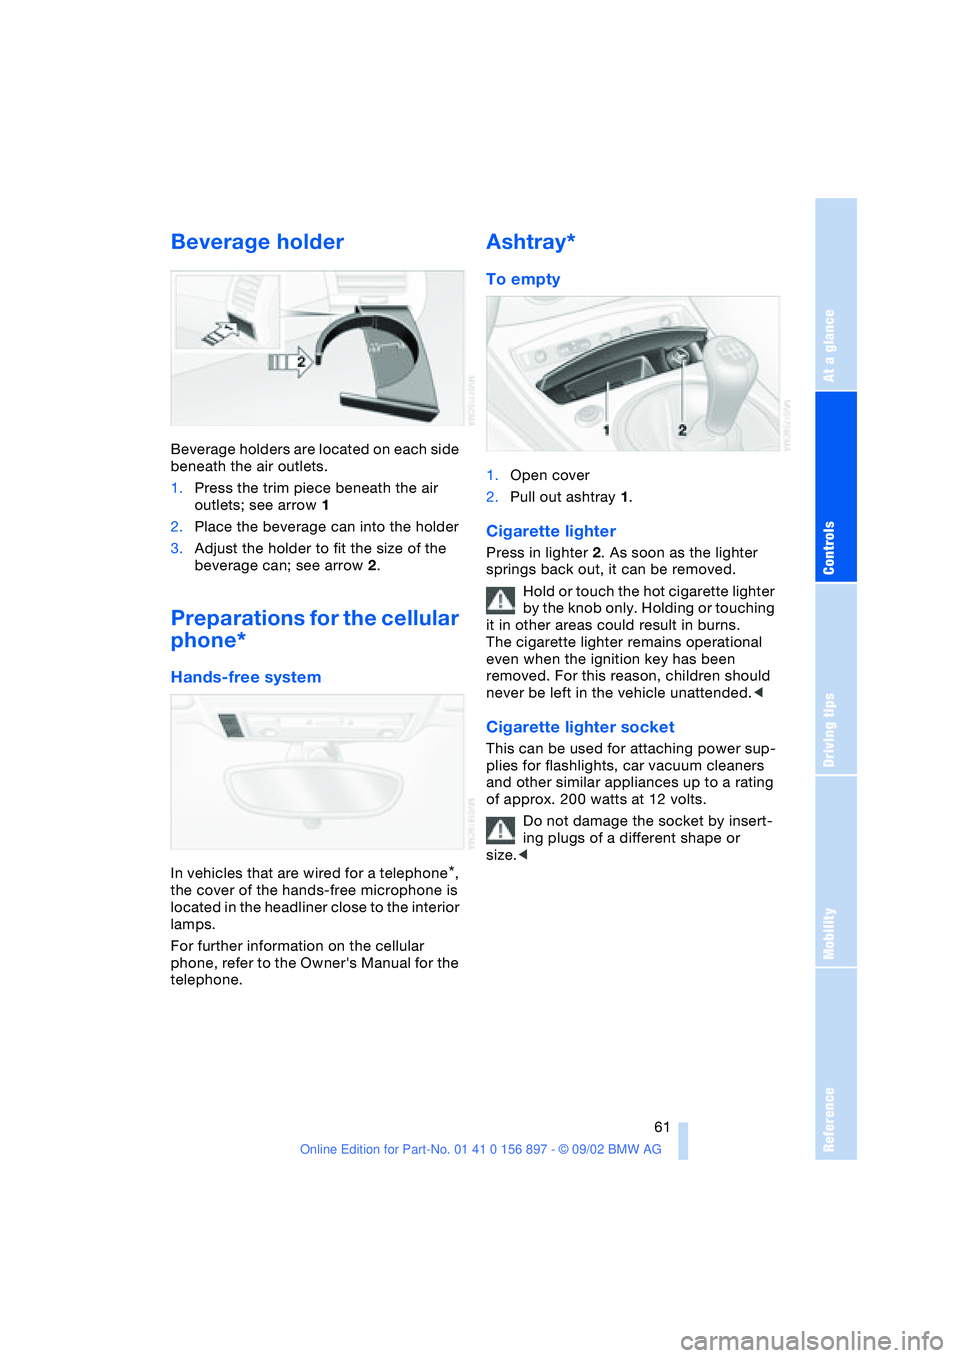
Beverage holders are located on each side
beneath the air outlets.
1.Press the trim piece beneath the air
outlets; see arrow 1
2.Place the beverage can into the holder
3.Adjust the holder to fit the size of the
beverage can; see arrow 2.
Preparations for the cellular
phone*
Hands-free system
In vehicles that are wired for a telephone*,
the cover of the hands-free microphone is
located in the headliner close to the interior
lamps.
For further information on the cellular
phone, refer to the Owner's Manual for the
telephone.
Ashtray*
To empty
1.Open cover
2.Pull out ashtray 1.
Cigarette lighter
Press in lighter 2. As soon as the lighter
springs back out, it can be removed.
Hold or touch the hot cigarette lighter
by the knob only. Holding or touching
it in other areas could result in burns.
The cigarette lighter remains operational
even when the ignition key has been
removed. For this reason, children should
never be left in the vehicle unattended.<
Cigarette lighter socket
This can be used for attaching power sup-
plies for flashlights, car vacuum cleaners
and other similar appliances up to a rating
of approx. 200 watts at 12 volts.
Do not damage the socket by insert-
ing plugs of a different shape or
size.<
Page 98 of 106
Everything from A - Z
98 Brake system 65
– brake fluid level 81
– brake pads 66
– break-in procedures 64
– disc brakes 65
Brakes
– driving notes 65
Break-in procedures 64
– brake system 64
– clutch 64
– differential 64
– engine 64
– tires 64
Bulb
– defective 45
– replacement 84
C
California Proposition 65
warning 83
Can holder 61
Capacities 94, 96
– luggage
compartment 22, 94
Car battery 87
Car radio, refer to the
Owner's Manual for Radio
Car wash, refer to the Car-
ing for your vehicle bro-
chure
Cargo loading 66
Cassette player operation,
refer to the Owner's Man-
ual for Radio
Catalytic converter, refer to
High temperatures 65
CD player operation, refer
to the Owner's Manual for
Radio
Cellular phone
preparation 61
Cellular phone, refer to the
separate Owner's Manual
Center high-mount brake
lamp 87
Central locking system 18
– button 20
– interior 20
Charge indicator
lamp 14, 88Check gas cap 70
– indicator lamp 14
Child seat 34
Child-restraint mounting
system (LATCH) 36
Child-restraint systems 34
Cigarette lighter 61
Cleaning the headlamps 43
Cleaning the windshield 43
Clock
– 12/24-hour mode 49
– adjusting, refer also to the
radio or onboard com-
puter Owner's Manual
Clothes hooks 27
Cluster 13
Clutch
– break-in procedure 64
Cockpit 12
Code, refer to the Owner's
Manual for Radio
Combination switch, refer
to Turn signal indicators/
Headlamp flasher 42
Compartments 60
Compression ratio 94
Computer 49
– average fuel
consumption 50
– average speed 50
– clock, 12/24-hour
mode 49
– cruising range 50
– outside temperature 49
Condensation
– removing from
windows 56, 58
Configuring adjustments,
refer to Vehicle Memory,
Key Memory 37
Consumption 50
Convenience operation
– convertible top 20
– windows 20
Convertible top 23
– convenience operation 20
– electrical fault 25
– emergency operation 25
– malfunction 25
– manual operation 23
– mechanical 23Convertible top compart-
ment panel 22
Coolant 80, 96
– indicator lamp 14
Coolant thermometer 47
Cooling system 96
Cooling, maximum 58
Copyright 4, 6
Cruise control 44
Cruising range 50
Cup holder, refer to Bever-
age holder 61
Curb weight 94
Cylinders 94
D
Data 94
– engine 94
– filling capacities 96
– weights 94
Daytime driving lamps 45
DBC Dynamic Brake
Control 52
Defects 8
Deflector for wind 26
Defrost setting 56, 58
Defroster, rear window
– air conditioning 56
– automatic climate
control 59
Defrosting
– windows 56, 58
Differential
– break-in procedures 64
Digital clock
Dimensions 95
Dimming mirror 33
Dipstick, engine oil 79
Disc brakes 65
Displacement 94
Displays, refer to Instru-
ment cluster 13
Door lock 20
Door lock buttons 21
Doors
– emergency operation 20
– locking 19
– unlocking 19
DOT quality grades 73
Drivelogic 42