Page 34 of 122

30
UN054
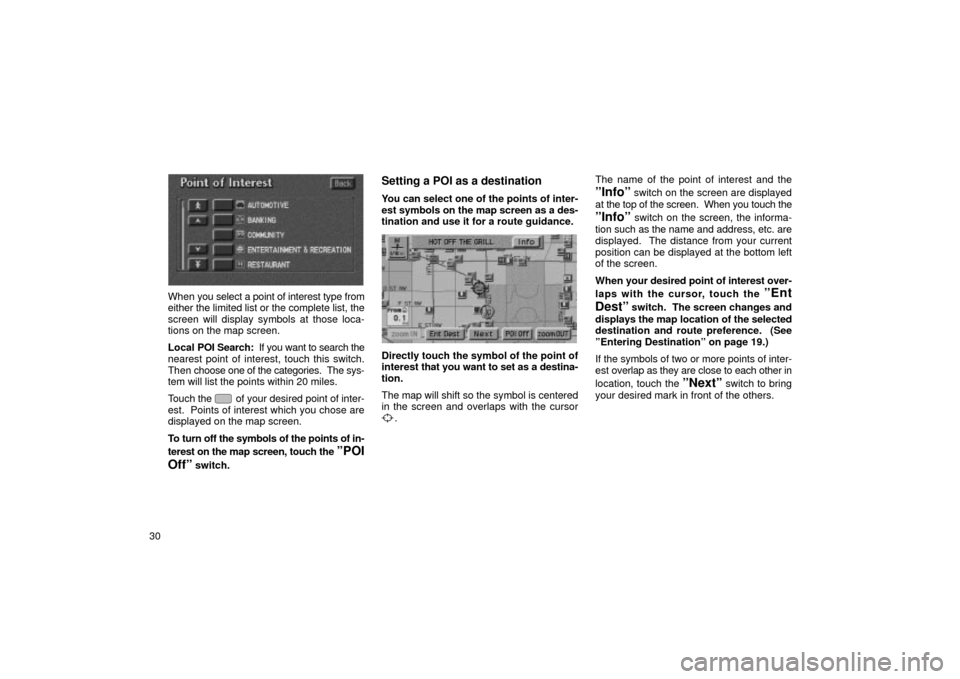
When you select a point of interest type from
either the limited list or the complete list, the
screen will display symbols at those loca-
tions on the map screen.
Local POI Search: If you want to search the
nearest point of interest, touch this switch.
Then choose one of the categories. The sys-
tem will list the points within 20 miles.
Touch the
of your desired point of inter-
est. Points of interest which you chose are
displayed on the map screen.
To turn off the symbols of the points of in-
terest on the map screen, touch the
ºPOI
Offº
switch.
Setting a POI as a destination
You can select one of the points of inter-
est symbols on the map screen as a des-
tination and use it for a route guidance.
UN304
Directly touch the symbol of the point of
interest that you want to set as a destina-
tion.
The map will shift so the symbol is centered
in the screen and overlaps with the cursor
. The name of the point of interest and the
ºInfoº switch on the screen are displayed
at the top of the screen. When you touch the
ºInfoº switch on the screen, the informa-
tion such as the name and address, etc. are
displayed. The distance from your current
position can be displayed at the bottom left
of the screen.
When your desired point of interest over-
laps with the cursor, touch the
ºEnt
Destº
switch. The screen changes and
displays the map location of the selected
destination and route preference. (See
ºEntering Destinationº on page 19.)
If the symbols of two or more points of inter-
est overlap as they are close to each other in
location, touch the
ºNextº switch to bring
your desired mark in front of the others.
Page 35 of 122
31
You can change from the map screen to
a ºTurn Listº screen that displays the list
of the roads up to your destination. This
list can be used for a route guidance.
UN056
1. Push the ºMENUº button on the bezel
to display the menu screen and touch the
ºRoute Informationº switch.
UN057
2. The screen will change to the Entire
Route Map screen where you can touch
the
ºTurn Listº switch.
UN058
You can scroll through the list of roads by
touching
. However, not all road
names in the route may appear on the list.
If a road changes its name without requiring
a turn (such as on a street that runs through
two or more cities), the name change will not
appear on the list. The street name closest
to the starting point will be displayed with a
mileage to the next turn.
These marks indicate the direction
which you should turn at an inter-
section.
Turn List
Page 36 of 122

32
INFORMATION
�The current vehicle position markappears at the bottom of the screennext to the name of the street you are
driving on. The mark does not move.
�If you leave the guidance route, the name of the street you are on is notshown on the list next to the currentvehicle position mark.
�If the road type you are on changesbetween a highway, a main street ora residential street (at an inter-
change or fork), it will appear on theturn list.
�If a long route has been selected, itmay take a long time to display theturn list.
�Push the ºMAP/VOICEº button on
the bezel to return to the map display with a route guidance.
You can change half of the screen to the
Guidance Screen by touching the
ºMap/
Guideº
switch while the map screen is
displayed. You can choose one out of
two types of Guidance Screen.
UN059
1. Push the ºMENUº button on the bezel
to display the menu screen and touch the
ºGuidance Setupº switch.
UN065
2. The screen will change to the Guidance
setup screen and you can select the
ºGuidance Screen Typeº.
To display Arrow Screen
To display Turn List Screen
Guidance Screen
Page 37 of 122
33
Arrow Screen
UN066
This screen shows the current road name
and the distance to the next corner.
Turn List Screen
UN067
The screen shows the Turn List. You cannot
scroll through the list of roads.
UN063
Touch the ºzoom INº switch or the
ºzoom OUTº switch to change the scale
of the map display. The scale bar and indica-
tor at the bottom of the screen indicates the
map scale menu. The scale runs from 1/16th
of a mile to 64 miles. T ouch the
ºzoom INº
switch or the ºzoom OUTº switch until
the scale bar changes normally. If you con-
tinue to hold your finger on the switch, the
scale bar changes smoothly.
You can change the scale of the map display
by touching the scale bar directly. It is not
available during driving.
Map Scale
Page 38 of 122

34The map scale is displayed under the North-
up symbol or Heading-up symbol at the top
left of the screen.
INFORMATION
When
the map scale is at the maximum
range of 64 miles, the ºzoom OUTº switch is di mmed. When the map scale
is at the minimum range of 1/16th mile, the ºzoom INº switch is dimmed.
UN064
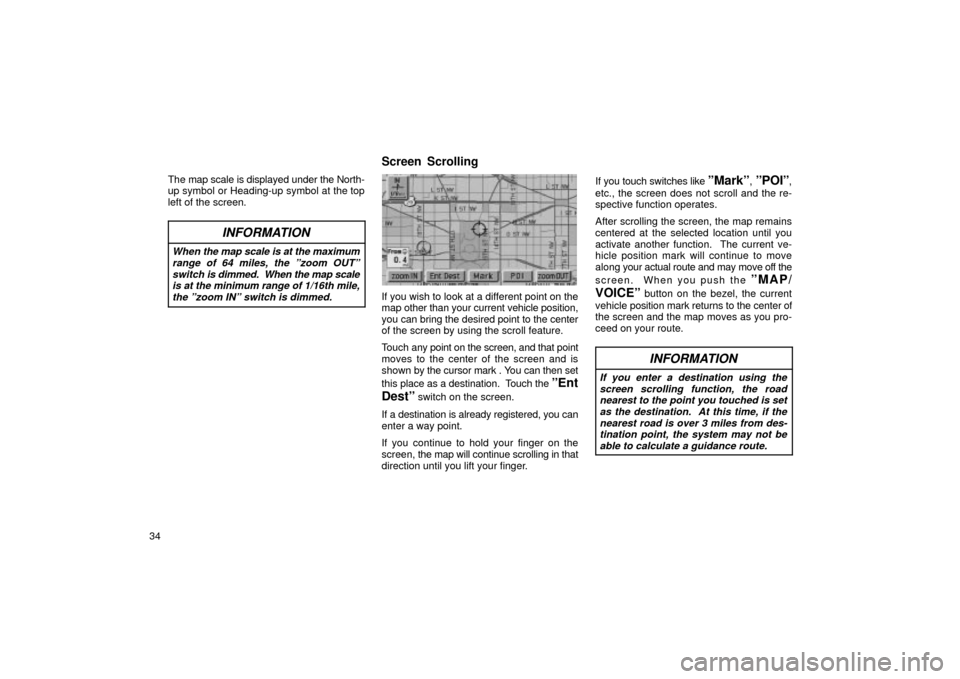
If you wish to look at a different point on the
map other than your current vehicle position,
you can bring the desired point to the center
of the screen by using the scroll feature.
Touch any point on the screen, and that point
moves to the center of the screen and is
shown by the cursor mark . You can then set
this place as a destination. Touch the
ºEnt
Destº
switch on the screen.
If a destination is already registered, you can
enter a way point.
If you continue to hold your finger on the
screen, the map will continue scrolling in that
direction until you lift your finger. If you touch switches like
ºMarkº, ºPOIº,
etc., the screen does not scroll and the re-
spective function operates.
After scrolling the screen, the map remains
centered at the selected location until you
activate another function. The current ve-
hicle position mark will continue to move
along your actual route and may move off the
screen. When you push the
ºMAP/
VOICEº
button on the bezel, the current
vehicle po sition mark returns to the center of
the screen and the map moves as you pro-
ceed on your route.
INFORMATION
If you enter a destination using the
screen scrolling function, the roadnearest to the point you touched is setas the destination. At this time, if thenearest road is over 3 miles from des-tination point, the system may not beable to calculate a guidance route.
Screen Scrolling
Page 40 of 122

36
When your vehicle is receiving signals from
the satellites, the ºGPSº mark appears at the
top left of the screen.
The GPS signal may be physically ob-
structed, leading to inaccurate vehicle posi-
tion on the map display. Tunnels, tall build-
ings, trucks, or even the placement of
objects on the instrument panel may obstruct
the GPS signals.
The installation of window tinting may also
obstruct the GPS signals. Most window tint-
ing contains some metallic content that will
interfere with the GPS signal reception. We
recommend not to use window tinting on ve-
hicles equipped with navigation systems. The GPS satellites may not send signals due
to repairs or improvements being made to
them.
Even when the navigation system is receiv-
ing good GPS signals, the vehicle position
may not be shown accurately or inappropri-
ate route guidance may occur in some
cases.
�
When driving on a small angled Y-
shaped road.
� When driving on a spiral road.
� When driving on a slippery road such as
in sand, gravel, snow, etc.
� When driving on a long straight road.
� When freeway and surface streets run in
parallel.
� After moving by ferry or vehicle carrier.
� When a long route is searched during high
speed driving.
� When driving without setting the current
position calibration correctly.
� After repeating a change of directions by
going forward and backward, or turning
on a turntable in the parking lot.
� When leaving a covered parking lot or
parking garage.
� When a roof carrier is installed.
� When driving with the tire chains installed.
(a) Accurate current vehicle
position may not be shown in
the following cases:
Page 41 of 122

37
�
When the tires are worn.
� After replacing a tire or tires.
� When using tires that are smaller or larger
than the factory specifications.
� When the tire pressure in any of the four
tires is not correct.
INFORMATION
If your vehicle cannot receive GPS sig-
nals, you can correct the current posi-tion manually. For the information onsetting the current position calibration,see page 59.
� When turning at a wrong intersection off
the designated route guidance.
� If you are heading for a destination with-
out passing through a set way point, auto-
matic rerouting may display a route re-
turning to the set way point.
� When turning at an intersection, there is
no route guidance.
� When passing through the intersection,
there is no route guidance.
� During automatic rerouting, the route
guidance may not be available for the next
turn to the right or left.
� It may take a long time to operate auto-
matic rerouting during high speed driving.
In automatic rerouting, a detour route may
be shown.
� During aut omatic rerouting, the route may
not be changed.
� The route in a U-turn may be shown or
announced.
� A location may have multiple names and
the system will announce one or more. �
Some routes may not be searched.
� If the route to your destination includes
gravel, unpaved roads or alleys, the route
guidance may not be shown.
� Your destination point might be shown on
the opposite side of the street.
� When a portion of the route has regula-
tions prohibiting the entry of the vehicle
that vary by time or season or other rea-
son.
� The road and map data stored in your
navigation system may not be complete
or may not be the latest release.
When replacing the tire(s), contact your
dealer.
This navigation system uses the tire turning
data and is designed to work with factory-
specified tires for your T oyota. Installing tires
that are larger or smaller than the originally
equipped diameter may cause inaccurate
display of the vehicle's position. The tire
pressure also affects the diameter of the tires
so please make sure the tire pressure of all
four tires is correct.
(b) Inappropriate route guidance
may occur in the following
cases
:
Page 43 of 122
49
You can register and keep your own
marked
points of interest list (like restau-
rants, sports facilities, etc.) and use the
marked points to input a destination.
UN078
1. Push the ºMENUº button on the bez-
el to display the menu screen and touch
the
ºMarked Pointº switch.
UN079
2. Touch the ºRegisterº switch of the
Marked Point.
UN080
A screen similar to that for destination input
appears. Input the address of the marked
point in the same way as any destination in-
put. See page 6 through 19.
Marked Points (a) Registering marked points