Page 319 of 1690
B69067
Butyl Tape
B66981
B68929
B61431
75±10
±
ENGINE HOOD/DOOR FRONT DOOR
AVENSIS REPAIR MANUAL (RM1018E)
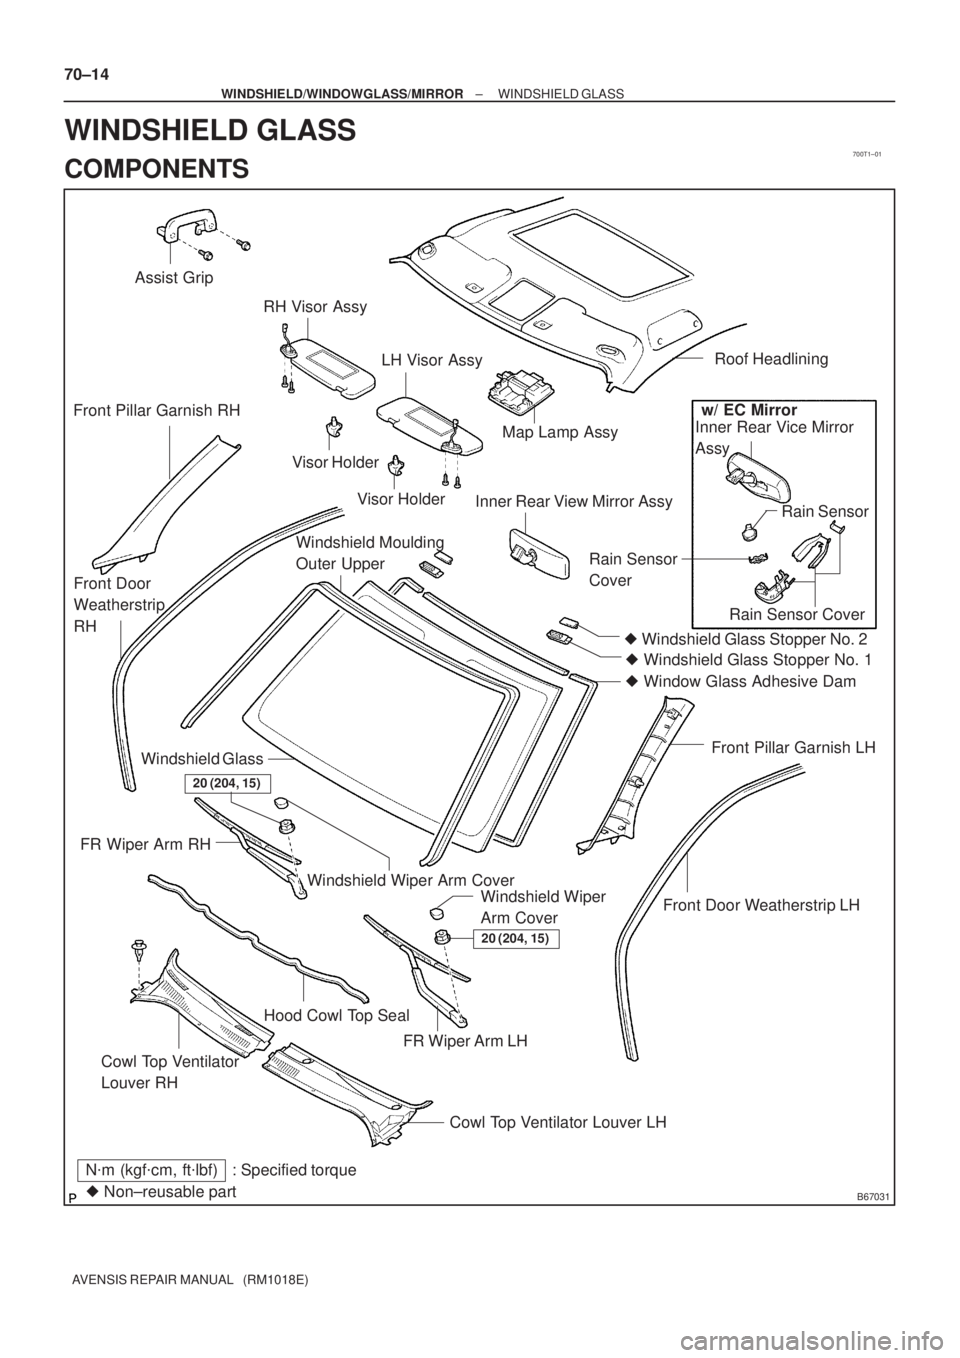
8.REMOVE FRONT DOOR SERVICE HOLE COVER
(a)Remove the service hole cover.
NOTICE:
Remove the tape remaining on the door side.
(b)Remove the lower frame seal.
9.REMOVE OUTER REAR VIEW MIRROR ASSY LH
(a)Disconnect the mirror connector.
(b)Remove the 3 screws and mirror.
NOTICE:
When the screws are removed, the mirror may fall and be-
come deformed.
10.REMOVE FRONT NO.1 SPEAKER ASSY (W/ SPEAKER)
(a)Using a drill of less than ù 4 mm (0.16 in.), drill out the 3 rivets heads and remove the speaker.
NOTICE:
�Prizing the hole with a drill can lead to damage to the
rivet hole or breaking the drill.
�Be careful with the cut rivet, because it is hot.
(b)Even if the flange is taken off, continue drilling and push out the remaining fragments using the drill.
(c)Using a vacuum cleaner, remove the drilled rivet and dust from the inside of the door.
11.REMOVE FRONT DOOR BELT MOULDING ASSY LH (See page 76±23)
12. REMOVE FRONT DOOR STIFFENER CUSHION NO.1
(a) Using a screwdriver, disengage the 2 claws and remove the cushion.
13. REMOVE FRONT DOOR SPACER LH
(a) Using a screwdriver, disengage the 2 claws and remove the spacer.
Page 1649 of 1690
700T1±01
B67031
Assist Grip
RH Visor Assy
LH Visor Assy
Map Lamp AssyRoof Headlining
Rain Sensor
Cover
Rain Sensor Cover Front Pillar Garnish RH
Front Door
Weatherstrip
RHWindshield Moulding
Outer Upper Visor Holder
Visor Holder
Inner Rear View Mirror Assy
� Windshield Glass Stopper No. 1
Front Door Weatherstrip LHFront Pillar Garnish LH
Windshield Wiper Arm Cover
FR Wiper Arm LH
Cowl Top Ventilator
Louver RHWindshield Glass
FR Wiper Arm RH� Windshield Glass Stopper No. 2
Hood Cowl Top Seal
Cowl Top Ventilator Louver LHRain Sensor
w/ EC Mirror
Inner Rear Vice Mirror
Assy
: Specified torqueN�m (kgf�cm, ft�lbf)
� Non±reusable part
20 (204, 15)
20 (204, 15)
� Window Glass Adhesive Dam
Windshield Wiper
Arm Cover
70±14
± WINDSHIELD/WINDOWGLASS/MIRRORWINDSHIELD GLASS
AVENSIS REPAIR MANUAL (RM1018E)
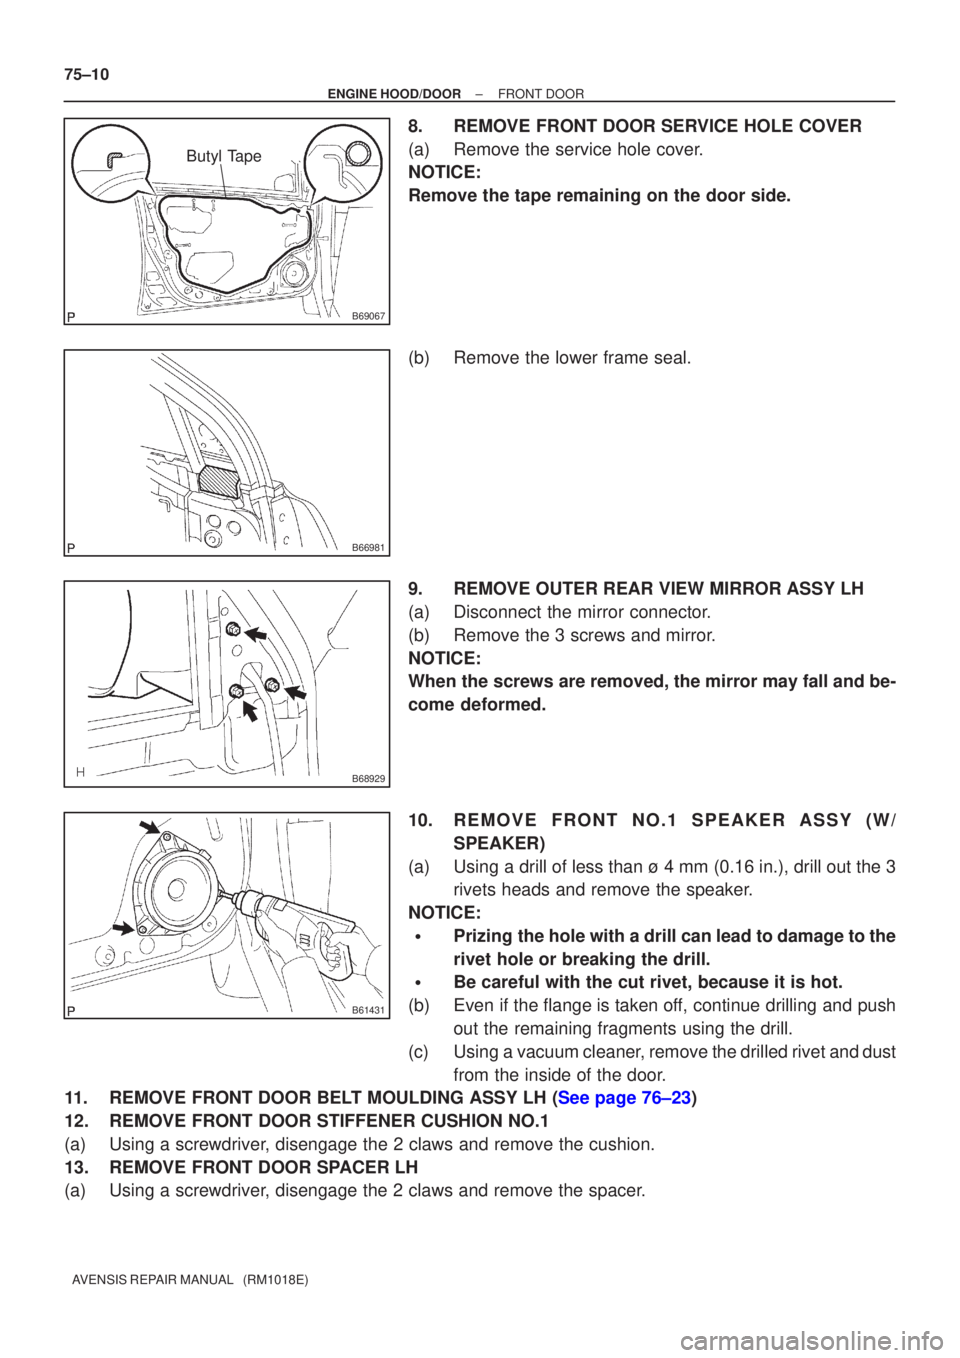
WINDSHIELD GLASS
COMPONENTS
Page 1650 of 1690
700T2±01
B50448
CutCut
Moulding
WindshieldBody
B67281
±
WINDSHIELD/WINDOWGLASS/MIRROR WINDSHIELD GLASS
70±15
AVENSIS REPAIR MANUAL (RM1018E)
REPLACEMENT
HINT:
The installation is in the reverse order of the removal. However, when there is a special point concerning
the installation, it is indicated.
1. REMOVE ROOF HEADLINING ASSY ( See page 76±36 or 76±45 or 76±54 )
(a) Remove the front door weatherstrip LH.
(b) Remove the front door weatherstrip RH.
(c) Remove the front pillar garnish LH.
(d) Remove the front pillar garnish RH.
(e) Remove the LH visor.
(f) Remove the RH visor.
(g) Remove the assist grip.
(h) Remove the 2 visor holders.
(i) Remove the map lamp assy.
(j) Do not remove the roof headlining assy completely partially so that the \
windshield glass can be re- moved.
2 . REMOVE INNER REAR VIEW MIRROR ASSY ( See page 70±64)
3 . REMOVE RAIN SENSOR ( See page 66±26)
4 . REMOVE COWL T OP VENTIL ATOR LOUVER ( See page66±13 )
(a) Remove the 2 windshield wiper arm covers.
(b) Remove the FR wiper arm LH.
(c) Remove the FR wiper arm RH.
(d) Remove the hood to cowl top seal.
(e) Remove the cowl top ventilator louver LH.
(f) Remove the cowl top ventilator louver RH.
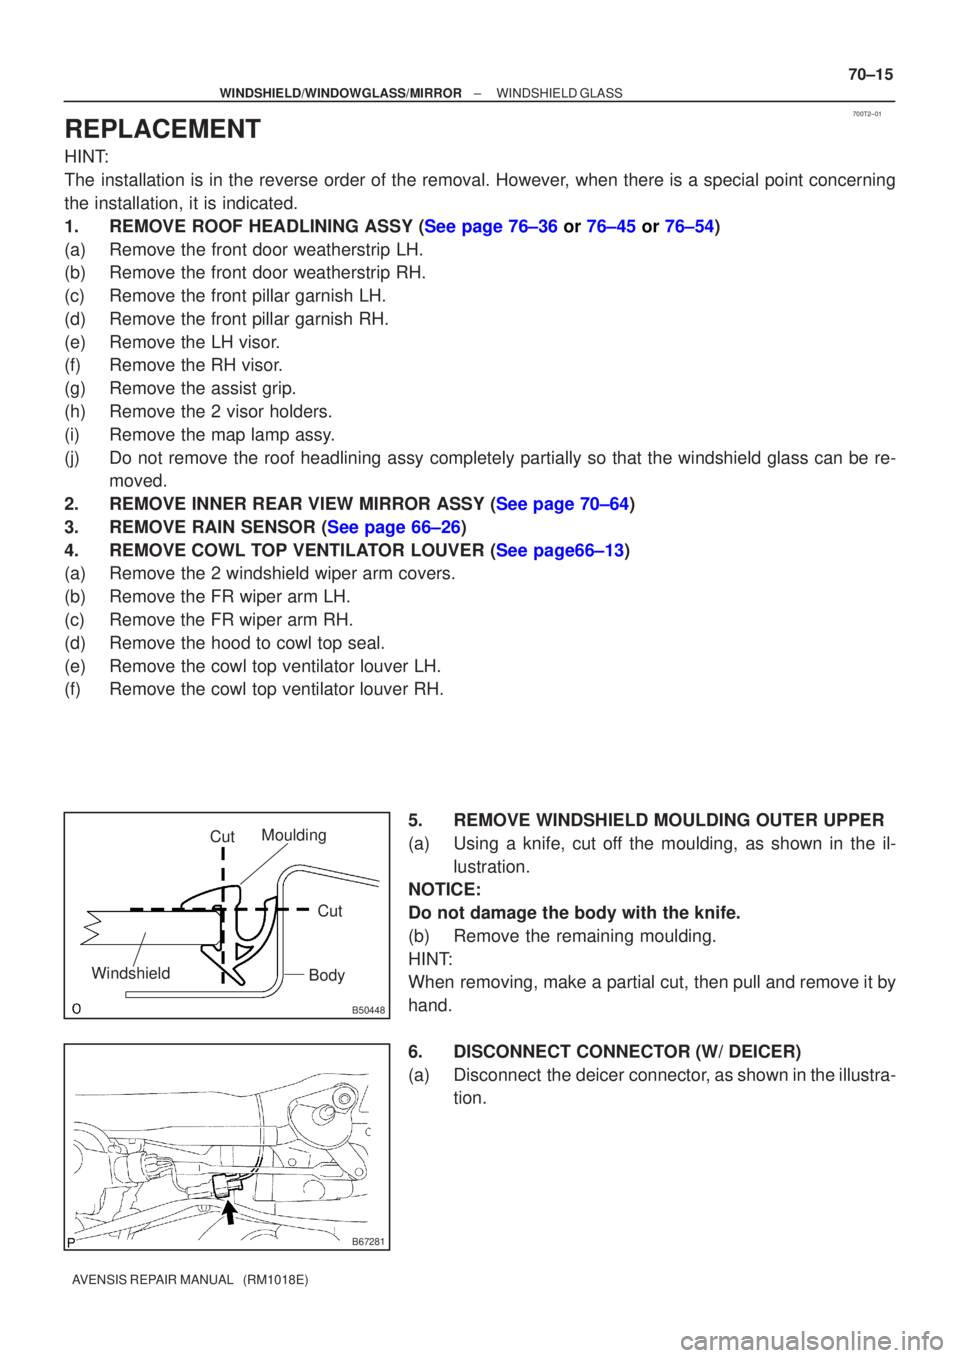
5. REMOVE WINDSHIELD MOULDING OUTER UPPER
(a) Using a knife, cut off the moulding, as shown in the il-lustration.
NOTICE:
Do not damage the body with the knife.
(b) Remove the remaining moulding.
HINT:
When removing, make a partial cut, then pull and remove it by
hand.
6. DISCONNECT CONNECTOR (W/ DEICER)
(a) Disconnect the deicer connector, as shown in the illustra- tion.