Page 49 of 312

objects may fall down into the defroster outlets and block airflow, in
addition to damaging the climate control system.
To aide in side window defogging/demisting in cold weather conditions:
1. Select
2. Set the temperature control to full heat
3. Select A/C
4. Set the fan speed to High
5. Direct the outer panel vents towards the side windows
In order to increase the airflow to the outer panel vents, close the
central panel vents.
Do not place objects on top of the instrument panel, as these
objects may become projectiles in a collision or sudden stop.
Auxiliary climate controls (if equipped)
Your vehicle may be equipped with auxiliary climate controls which are
located in the overhead console of the first row and in the headliner for
second row seating. The auxiliary climate control feature provides
increased capacity to quickly heat or cool your vehicle.
If your vehicle is equipped with a manual heating and air conditioning
system, the auxiliary climate controls are dependent on the main climate
control system. If the main climate control system is in the OFF position,
the auxiliary climate controls will not work.
If your vehicle is equipped with a DEATC system, the auxiliary climate
controls are independent of the main climate control system. If the main
climate control system is in the OFF position, the auxiliary climate
controls will still work. However, the A/C function will not operate unless
the A/C control has been selected on the main climate control system.
Controls and features
49
Page 50 of 312
Frontauxiliary control
For the rear auxiliary climate
controls to function, the front
auxiliary climate control must be set
to REAR.
To control the auxiliary climate
control system from the front
controls, turn the fan speed control
knob to the desired speed.
Turn the temperature control to
regulate the air temperature.
Press the mode selector once to
select air distribution through the
overhead vents. The
icon will
illuminate on the temperature
selector.
Press the mode selector again to select air distribution through the floor
vents. The
icon will illuminate on the temperature selector. Only the
auxiliary control head (front or rear) that is active will have the indicator
lights functioning.
4 3 2
REAR0
Controls and features
50
Page 51 of 312
Rear auxiliary climate controls (if equipped)
The rear auxiliary climate controls
are located in the headliner of the
second row seating.
Ensure that the front auxiliary
control is turned to REAR to enable
the rear climate controls.
Turn the fan speed control to the
desired fan speed.
Turn the temperature control to
regulate the air temperature.
Press the mode selector once to
select air distribution through the
overhead vents. The
icon will
illuminate on the temperature
selector.
4 3 2 1 0
Controls and features
51
Page 52 of 312
Press the mode selector again to select air distribution through the floor
vents. The
icon will illuminate on the temperature selector. Only the
auxiliary control head (front or rear) that is active will have the indicator
lights functioning.
Floor console climate controls (if equipped)
Depending on the equipment package, your vehicle may be equipped
with floor console climate control capabilities.
The floor console climate control system allows the rear passengers to
select a mode of airflow distribution through the floor console. However,
air temperature and fan speed are controlled by the main climate control
system.
Controls and features
52
Page 53 of 312
Mode selector control
Controls the direction of the airflow
to the rear of the vehicle.
To select air flow from the panel registers of the console, slide the
control to
. To select airflow from the registers of the floor console,
slide the control to
.
To stop the air from flowing through the floor console:
1. slide the mode selector control to
.
2. manually close the registers (rotate down).
REAR WINDOW DEFROSTER
The rear defroster control is located
on the instrument panel.
Press the rear defroster control to
clear the rear window of thin ice
and fog.
•A small LED will illuminate when
the rear defroster is activated.
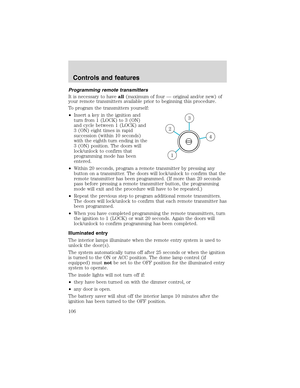
The ignition must be in the ON position to operate the rear window
defroster.
The defroster turns off automatically after 10 minutes or when the
ignition is turned to the OFF position. To manually turn off the defroster
before 10 minutes have passed, push the control again.
R
Controls and features
53
Page 54 of 312
USINGYOURAUDIOSYSTEM
PremiumAM/FM Stereo/Cassette/Single CD
Volume/power control
Press the control to turn the audio
system on or off.
Audio power can also be turned on
by pressing the AM/FM select
control or the TAPE/CD select
control.
Turn control to raise or lower
volume.
If the volume is set above a certain level and the ignition is turned off,
the volume will come back on at a“nominal”listening level when the
ignition switch is turned back on.
FM 1
AMC
BL RF
REW FFSCAN
BASS TREB SEL BALTAPE DISC
EJ CD
FADEAUTO
CLK
SIDE 1-2 COMP SHUFFLEEJ
MUTE
VOL PUSH ON
SEEK
TUNE AM FM
12 3456
DOLBY B NR
ST
VOL - PUSH ON
VOL - PUSH ON
Controls and features
54
Page 55 of 312

AM/FM select
The AM/FM select control works in
radio, tape and CD modes.
AM/FM select in radio mode
This control allows you to select AM or FM frequency bands. Press the
control to switch between AM, FM1 or FM2 memory preset stations.
AM/FM select in tape mode
Press this control to stop tape play and begin radio play.
AM/FM select in CD mode
Press this control to stop CD play and begin radio play.
Tune adjust
The tune control works in radio mode.
Tune adjust in radio mode
•Press
to move to the next
frequency down the band
(whether or not a listenable
station is located there). Hold the control to move through the
frequencies quickly.
•Press
to move to the next frequency up the band (whether or not
a listenable station is located there). Hold for quick movement.
Seek function
The seek function control works in radio, tape or CD mode.
Seek function in radio mode
•Press
to find the next
listenable station down the
frequency band.
•Press
to find the next listenable station up the frequency band.
Seek function in tape mode
•Press
to listen to the previous selection on the tape.
•Press
to listen to the next selection on the tape.
AM FM
Controls and features
55
Page 56 of 312

Seek function in CD mode
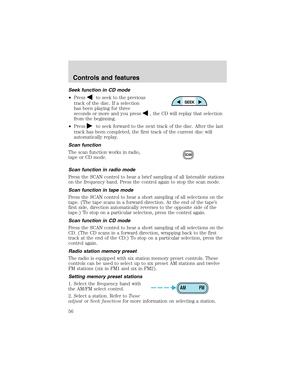
•Press
to seek to the previous
track of the disc. If a selection
has been playing for three
seconds or more and you press
, the CD will replay that selection
from the beginning.
•Press
to seek forward to the next track of the disc. After the last
track has been completed, the first track of the current disc will
automatically replay.
Scan function
The scan function works in radio,
tape or CD mode.
Scan function in radio mode
Press the SCAN control to hear a brief sampling of all listenable stations
on the frequency band. Press the control again to stop the scan mode.
Scan function in tape mode
Press the SCAN control to hear a short sampling of all selections on the
tape. (The tape scans in a forward direction. At the end of the tape’s
first side, direction automatically reverses to the opposite side of the
tape.) To stop on a particular selection, press the control again.
Scan function in CD mode
Press the SCAN control to hear a short sampling of all selections on the
CD. (The CD scans in a forward direction, wrapping back to the first
track at the end of the CD.) To stop on a particular selection, press the
control again.
Radio station memory preset
The radio is equipped with six station memory preset controls. These
controls can be used to select up to six preset AM stations and twelve
FM stations (six in FM1 and six in FM2).
Setting memory preset stations
1. Select the frequency band with
the AM/FM select control.
2. Select a station. Refer toTune
adjustorSeek functionfor more information on selecting a station.
SCAN
AM FM
Controls and features
56