Page 1153 of 1672
EXTERIOR FITTINGS
76-2-16 REPAIRS
Grille - front - up to 03MY
$% 76.55.03
Remove
1.Remove repeater lamps.
+ LIGHTING, REPAIRS, Lamp - front
repeater.
2.Via access hole in wheel arch liners, remove
screws securing headlamp finishers.
3.Remove headlamp finishers from grille.
4.Remove 2 screws securing lower corners of
grille.
5.Remove 3 scrivets and remove grille.
Refit
1.Fit grille and secure with scrivets and screws.
2.Fit headlamp finishers and secure with screws.
3.Fit repeater lamps.
+ LIGHTING, REPAIRS, Lamp - front
repeater.
Grille - front - from 03MY
$% 76.55.03
Remove
1.Remove 3 scrivets securing front grille to
bonnet locking platform.
2.Remove front grille.
NOTE: Do not carry out further dismantling if
component is removed for access only.
3.Remove motif from front grille.
Refit
1.Clean front grille to motif mating face.
2.Fit and secure motif to front grille.
3.Fit front grille and secure with scrivets.
Page 1168 of 1672
INTERIOR TRIM COMPONENTS
REPAIRS 76-3-15
Louvre panel assembly - centre fascia
$% 76.46.42
Remove
1.Remove radio cassette player from fascia.
+ IN CAR ENTERTAINMENT,
REPAIRS, Radio cassette player.
2.Carefully release and remove radio DIN socket
from louvre panel.
3.Remove screw cover from radio aperture.
4.Remove drink tray assembly.
+ INTERIOR TRIM COMPONENTS,
REPAIRS, Drink tray assembly - centre
fascia.
5.Carefully release clock assembly from louvre
panel.
6.Disconnect multiplugs from clock and door
locking switch. Remove clock assembly.7.Carefully release switch pack from louvre
panel.
8.Disconnect multiplugs from switches and
remove switch pack.
9. Models without A/C: Carefully remove blower
speed and heater control knobs.
10. Models without A/C: Remove 2 screws
securing heater control panel graphic plate and
remove graphic plate.
Page 1169 of 1672

INTERIOR TRIM COMPONENTS
76-3-16 REPAIRS
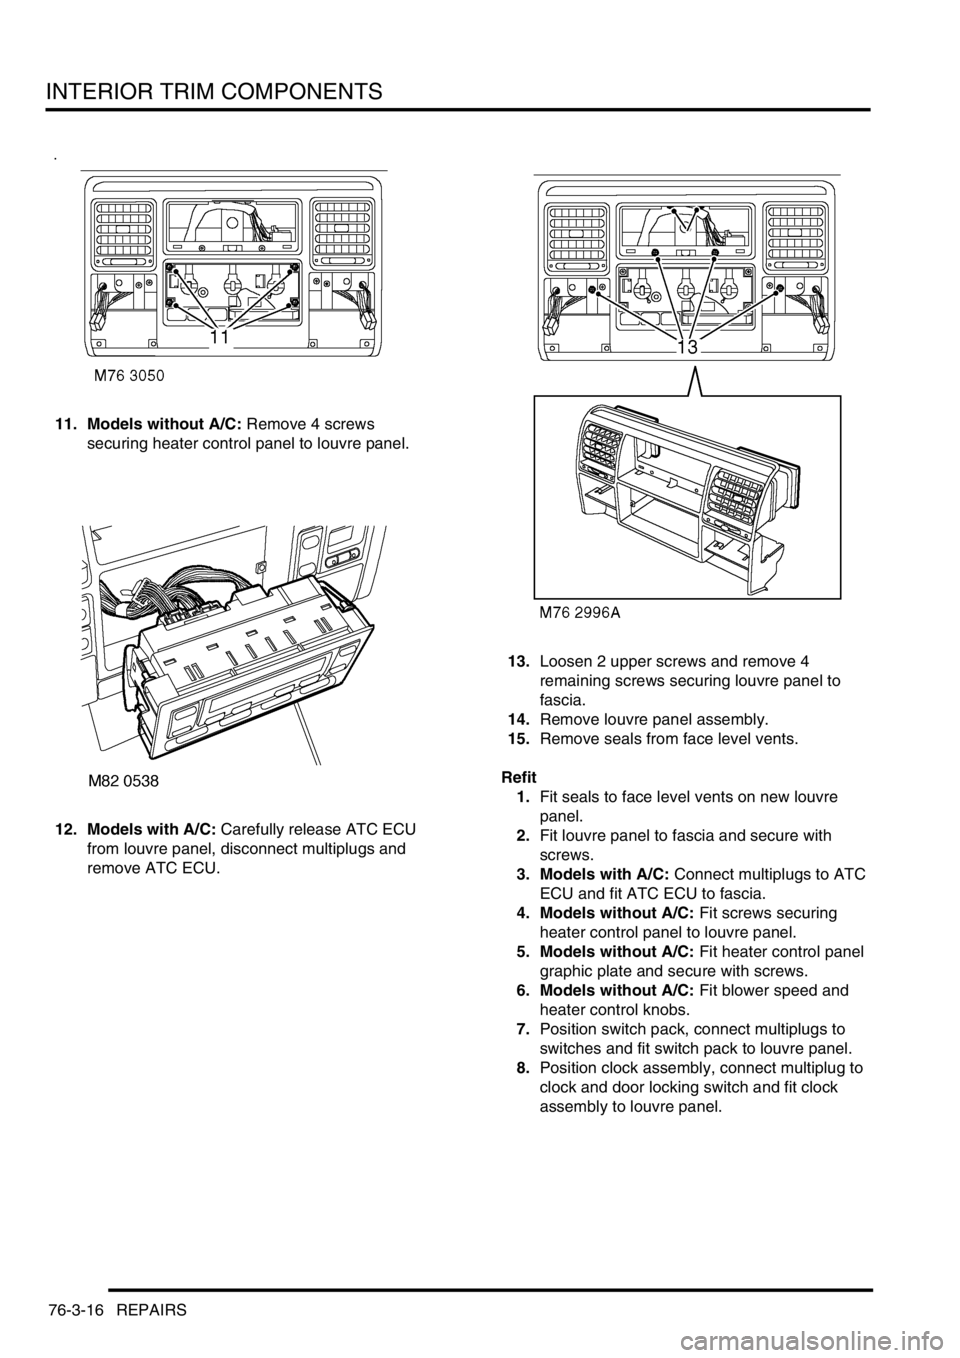
11. Models without A/C: Remove 4 screws
securing heater control panel to louvre panel.
12. Models with A/C: Carefully release ATC ECU
from louvre panel, disconnect multiplugs and
remove ATC ECU.13.Loosen 2 upper screws and remove 4
remaining screws securing louvre panel to
fascia.
14.Remove louvre panel assembly.
15.Remove seals from face level vents.
Refit
1.Fit seals to face level vents on new louvre
panel.
2.Fit louvre panel to fascia and secure with
screws.
3. Models with A/C: Connect multiplugs to ATC
ECU and fit ATC ECU to fascia.
4. Models without A/C: Fit screws securing
heater control panel to louvre panel.
5. Models without A/C: Fit heater control panel
graphic plate and secure with screws.
6. Models without A/C: Fit blower speed and
heater control knobs.
7.Position switch pack, connect multiplugs to
switches and fit switch pack to louvre panel.
8.Position clock assembly, connect multiplug to
clock and door locking switch and fit clock
assembly to louvre panel.
Page 1180 of 1672

SCREENS
REPAIRS 76-4-3
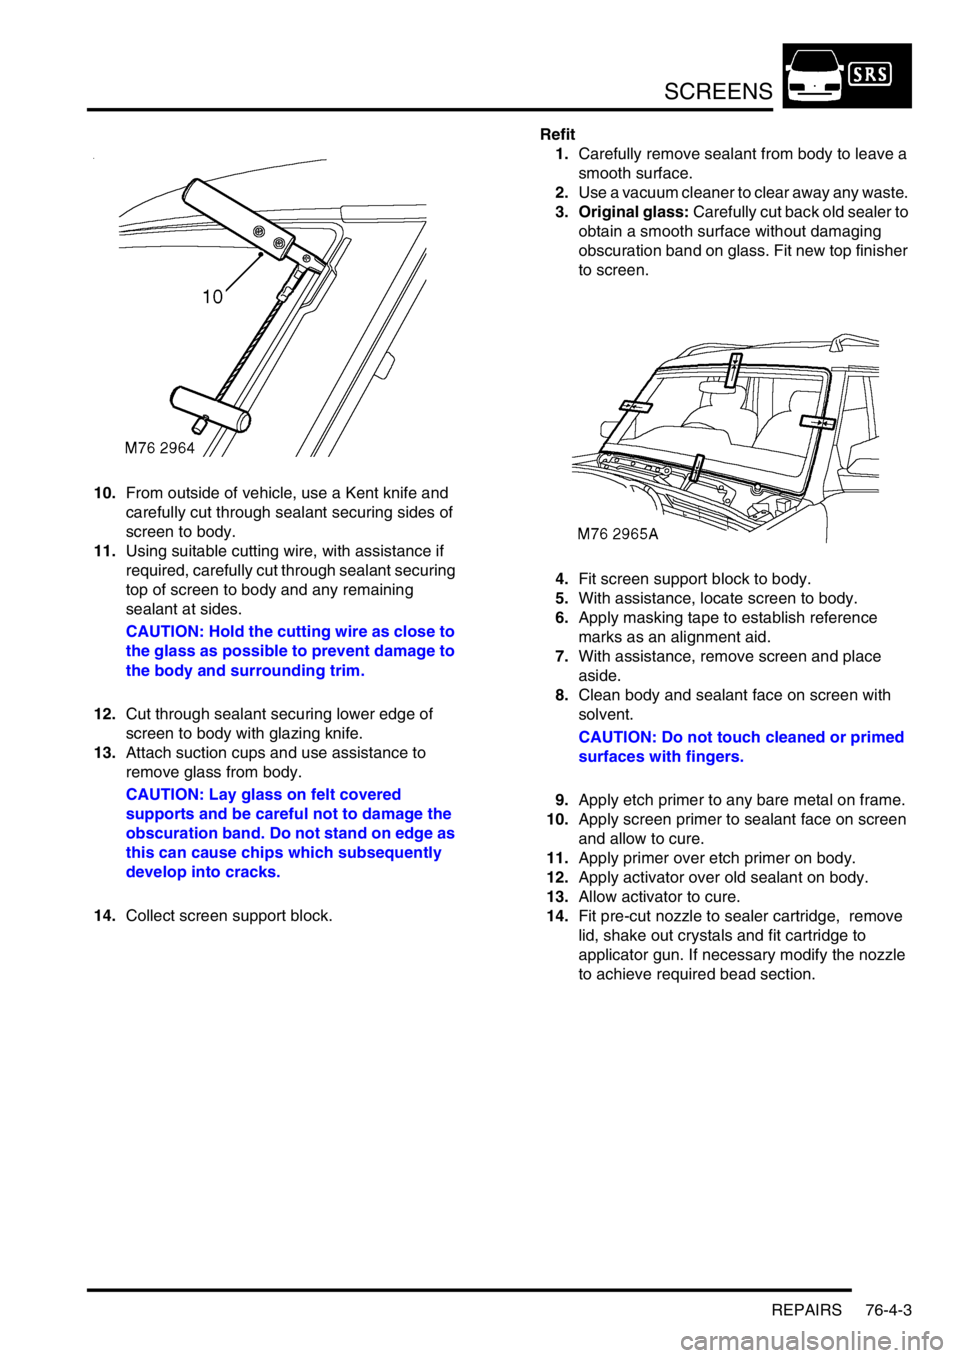
10.From outside of vehicle, use a Kent knife and
carefully cut through sealant securing sides of
screen to body.
11.Using suitable cutting wire, with assistance if
required, carefully cut through sealant securing
top of screen to body and any remaining
sealant at sides.
CAUTION: Hold the cutting wire as close to
the glass as possible to prevent damage to
the body and surrounding trim.
12.Cut through sealant securing lower edge of
screen to body with glazing knife.
13.Attach suction cups and use assistance to
remove glass from body.
CAUTION: Lay glass on felt covered
supports and be careful not to damage the
obscuration band. Do not stand on edge as
this can cause chips which subsequently
develop into cracks.
14.Collect screen support block. Refit
1.Carefully remove sealant from body to leave a
smooth surface.
2.Use a vacuum cleaner to clear away any waste.
3. Original glass: Carefully cut back old sealer to
obtain a smooth surface without damaging
obscuration band on glass. Fit new top finisher
to screen.
4.Fit screen support block to body.
5.With assistance, locate screen to body.
6.Apply masking tape to establish reference
marks as an alignment aid.
7.With assistance, remove screen and place
aside.
8.Clean body and sealant face on screen with
solvent.
CAUTION: Do not touch cleaned or primed
surfaces with fingers.
9.Apply etch primer to any bare metal on frame.
10.Apply screen primer to sealant face on screen
and allow to cure.
11.Apply primer over etch primer on body.
12.Apply activator over old sealant on body.
13.Allow activator to cure.
14.Fit pre-cut nozzle to sealer cartridge, remove
lid, shake out crystals and fit cartridge to
applicator gun. If necessary modify the nozzle
to achieve required bead section.
Page 1187 of 1672
SEATS
76-5-2 DESCRIPTION AND OPERATION
Electric seat block diagram
Page 1195 of 1672
SEATS
76-5-10 DESCRIPTION AND OPERATION
Heated seat block diagram (electric
seats)
1Passenger compartment fuse box
2Left seat heater switch
3Left seat heater module
4Left seat cushion heater element
5Left seat squab heater element
6Right seat heater switch
7Right seat heater module
8Right seat cushion heater element
9Right seat squab heater element
Page 1210 of 1672
SEATS
REPAIRS 76-5-25
Cover - squab - front seat
$% 78.90.08/81
Remove
1.Remove front seat.
+ SEATS, REPAIRS, Seat - front.
2.Place seat on a suitable work bench.
3.Tighten arm rest adjuster fully clockwise and
remove screw cover.
4.Remove screw securing arm rest to seat and
remove arm rest.
5.Remove 2 screws securing outer edge trim
casing to seat frame.
6.Remove trim casing.
7.Release inner edge of trim casing from seat
frame.
8.Remove trim casing. 9.Position seat upside down on table.
10.Release clip securing lower edge of squab
cover to seat frame.
11.Remove 2 clips securing either end of cover to
squab frame.
12.Position seat in upright position.
13.Raise headrest to maximum height.
14.Turn both guides through 90
°.
15.Remove headrest from seat.
16.Remove screws securing grab handles to seat
frame and remove grab handles.
Page 1219 of 1672
SUNROOF
76-6-4 DESCRIPTION AND OPERATION
System block diagram
1Passenger compartment fuse box
2BCU
3Sunroof ECU
4Front sunroof switch
5Front sunroof motor and microswitch
6Rear sunroof - front switch
7Rear sunroof isolation switch
8Rear sunroof - rear switch
9Rear sunroof motor and microswitch