2002 Hyundai Grandeur headlights
[x] Cancel search: headlightsPage 54 of 230
FEATURES OF YOUR HYUNDAI 1- 41
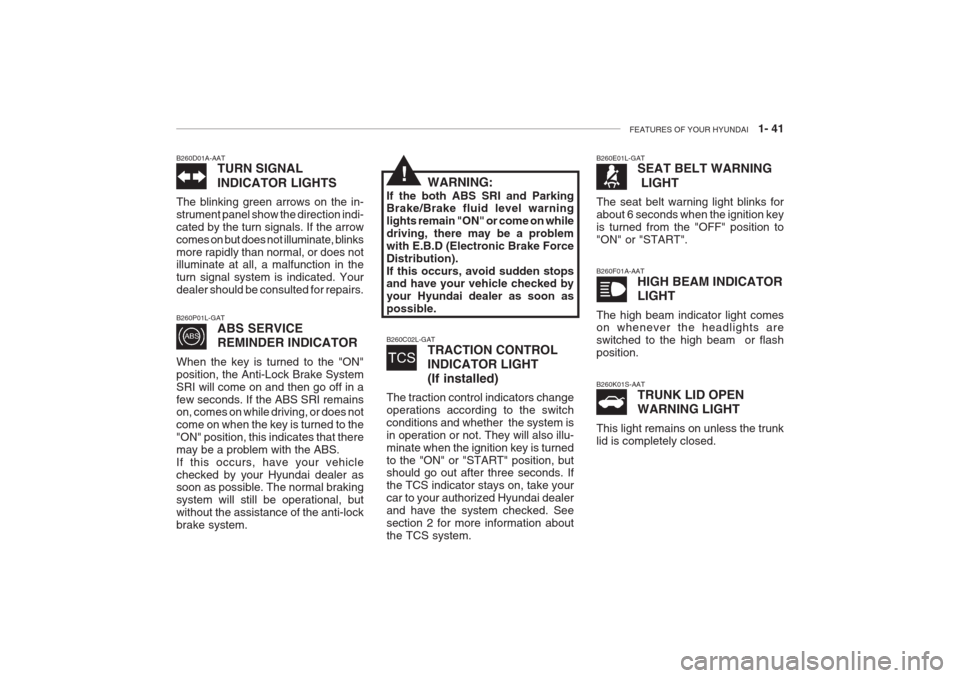
B260C02L-GAT
TRACTION CONTROL INDICATOR LIGHT(If installed)
The traction control indicators change operations according to the switchconditions and whether the system isin operation or not. They will also illu-minate when the ignition key is turnedto the "ON" or "START" position, but should go out after three seconds. If the TCS indicator stays on, take yourcar to your authorized Hyundai dealerand have the system checked. Seesection 2 for more information aboutthe TCS system.
B260D01A-AAT TURN SIGNAL INDICATOR LIGHTS
The blinking green arrows on the in- strument panel show the direction indi-cated by the turn signals. If the arrowcomes on but does not illuminate, blinksmore rapidly than normal, or does not illuminate at all, a malfunction in the turn signal system is indicated. Yourdealer should be consulted for repairs. B260F01A-AAT
HIGH BEAM INDICATOR LIGHT
The high beam indicator light comes on whenever the headlights are switched to the high beam or flashposition.
B260E01L-GAT
SEAT BELT WARNING LIGHT
The seat belt warning light blinks for about 6 seconds when the ignition keyis turned from the "OFF" position to"ON" or "START". B260K01S-AAT TRUNK LID OPEN WARNING LIGHT
This light remains on unless the trunk lid is completely closed.
B260P01L-GAT
ABS SERVICE REMINDER INDICATOR
When the key is turned to the "ON" position, the Anti-Lock Brake SystemSRI will come on and then go off in afew seconds. If the ABS SRI remains on, comes on while driving, or does not come on when the key is turned to the"ON" position, this indicates that theremay be a problem with the ABS.If this occurs, have your vehiclechecked by your Hyundai dealer as soon as possible. The normal braking system will still be operational, butwithout the assistance of the anti-lockbrake system. WARNING:
If the both ABS SRI and Parking Brake/Brake fluid level warning lights remain "ON" or come on whiledriving, there may be a problem
with E.B.D (Electronic Brake Force
Distribution).If this occurs, avoid sudden stops and have your vehicle checked by your Hyundai dealer as soon aspossible.
!
Page 61 of 230
1- 48 FEATURES OF YOUR HYUNDAI
To turn on the rear fog lights, push the switch. They will come on when theheadlight switch is in the second posi-tion and the key is in the "ON" position.
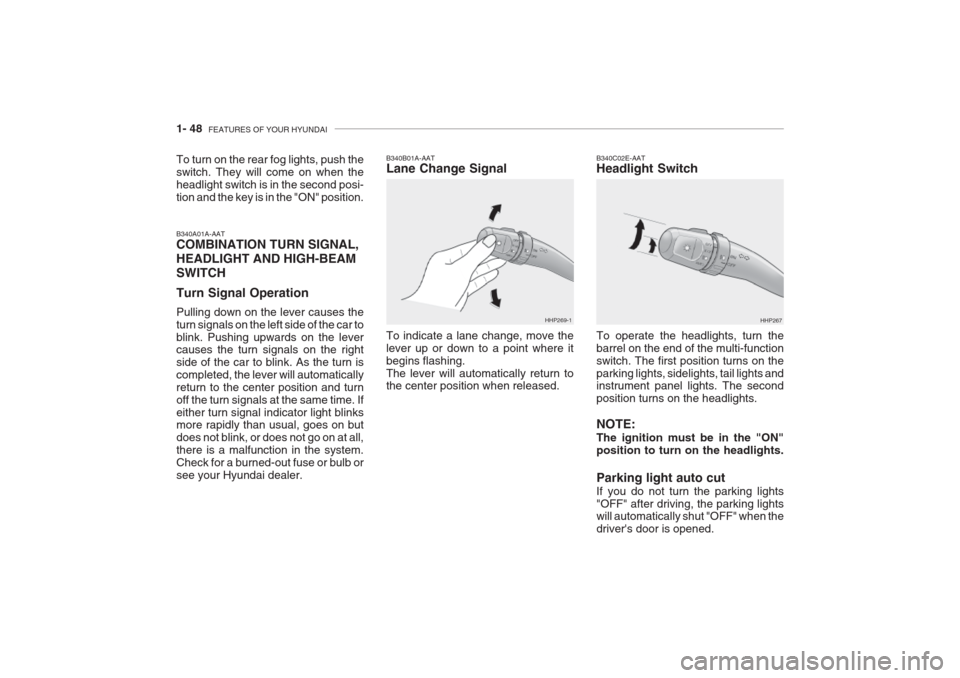
B340A01A-AAT COMBINATION TURN SIGNAL, HEADLIGHT AND HIGH-BEAMSWITCH Turn Signal Operation Pulling down on the lever causes the turn signals on the left side of the car toblink. Pushing upwards on the lever causes the turn signals on the right side of the car to blink. As the turn iscompleted, the lever will automaticallyreturn to the center position and turnoff the turn signals at the same time. Ifeither turn signal indicator light blinks more rapidly than usual, goes on but does not blink, or does not go on at all,there is a malfunction in the system.Check for a burned-out fuse or bulb orsee your Hyundai dealer. B340B01A-AAT Lane Change Signal To indicate a lane change, move the lever up or down to a point where itbegins flashing.The lever will automatically return to the center position when released.
HHP269-1
B340C02E-AAT Headlight Switch To operate the headlights, turn the barrel on the end of the multi-functionswitch. The first position turns on the
parking lights, sidelights, tail lights and instrument panel lights. The second position turns on the headlights. NOTE: The ignition must be in the "ON" position to turn on the headlights. Parking light auto cut If you do not turn the parking lights "OFF" after driving, the parking lights will automatically shut "OFF" when the driver's door is opened. HHP267
Page 62 of 230
FEATURES OF YOUR HYUNDAI 1- 49
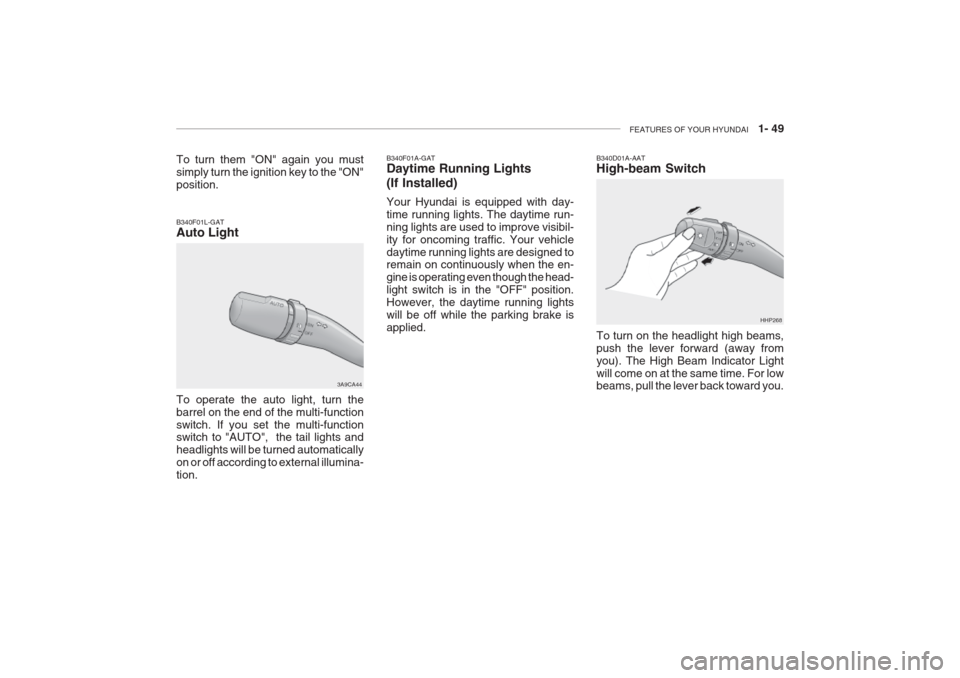
B340F01L-GAT Auto Light
3A9CA44
To operate the auto light, turn the barrel on the end of the multi-functionswitch. If you set the multi-function switch to "AUTO", the tail lights and headlights will be turned automaticallyon or off according to external illumina-tion. B340D01A-AAT High-beam Switch To turn on the headlight high beams, push the lever forward (away fromyou). The High Beam Indicator Lightwill come on at the same time. For low beams, pull the lever back toward you.
HHP268
B340F01A-GAT Daytime Running Lights (If Installed) Your Hyundai is equipped with day- time running lights. The daytime run-ning lights are used to improve visibil-ity for oncoming traffic. Your vehicledaytime running lights are designed to remain on continuously when the en- gine is operating even though the head-light switch is in the "OFF" position.However, the daytime running lightswill be off while the parking brake isapplied.
To turn them "ON" again you mustsimply turn the ignition key to the "ON"position.
Page 63 of 230
1- 50 FEATURES OF YOUR HYUNDAI
HHP269
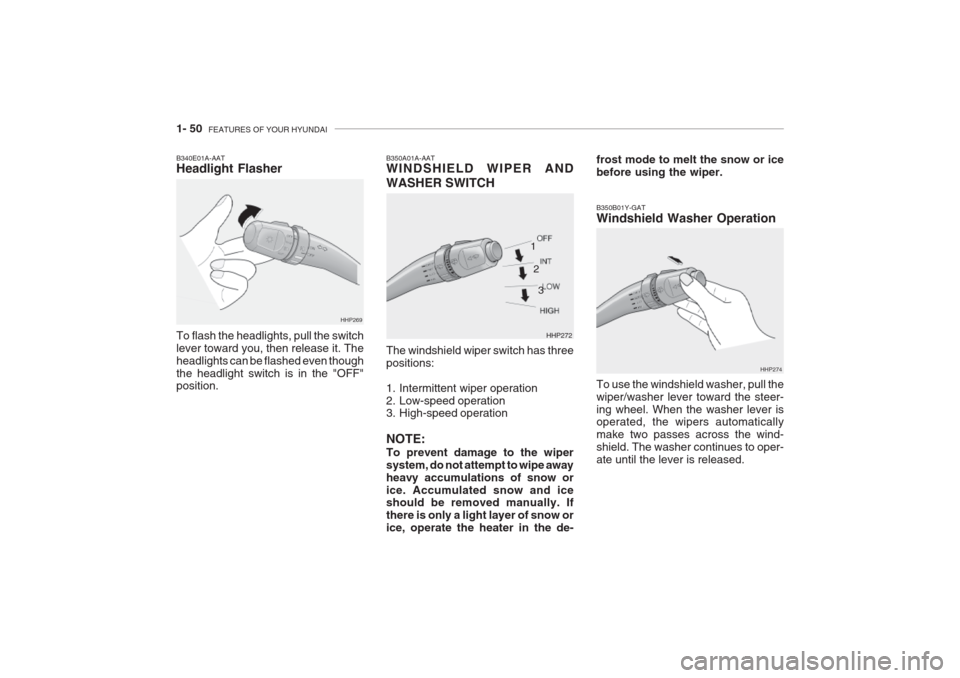
B340E01A-AAT Headlight Flasher To flash the headlights, pull the switch lever toward you, then release it. Theheadlights can be flashed even thoughthe headlight switch is in the "OFF" position.
B350A01A-AAT WINDSHIELD WIPER AND WASHER SWITCH The windshield wiper switch has three positions:
1. Intermittent wiper operation
2. Low-speed operation
3. High-speed operation NOTE: To prevent damage to the wiper system, do not attempt to wipe awayheavy accumulations of snow orice. Accumulated snow and ice should be removed manually. If there is only a light layer of snow orice, operate the heater in the de- HHP272
1
2 3
B350B01Y-GAT Windshield Washer Operation To use the windshield washer, pull the wiper/washer lever toward the steer-ing wheel. When the washer lever is operated, the wipers automatically make two passes across the wind-shield. The washer continues to oper-ate until the lever is released. HHP274
frost mode to melt the snow or icebefore using the wiper.
Page 76 of 230
FEATURES OF YOUR HYUNDAI 1- 63
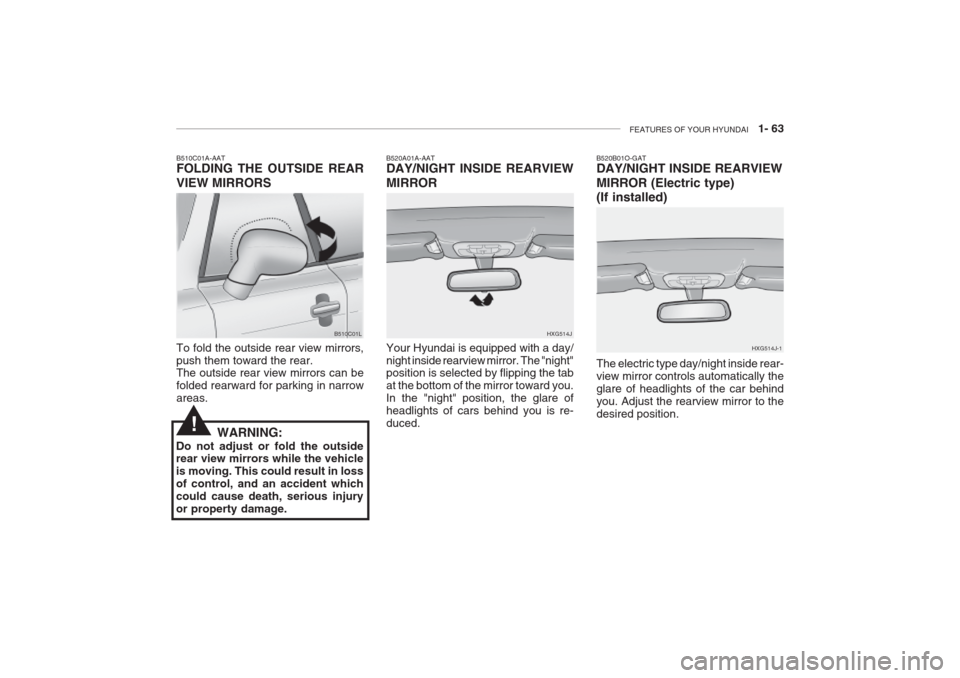
B510C01A-AAT FOLDING THE OUTSIDE REAR VIEW MIRRORS To fold the outside rear view mirrors, push them toward the rear. The outside rear view mirrors can be folded rearward for parking in narrowareas. B510C01LB520A01A-AAT DAY/NIGHT INSIDE REARVIEW MIRROR Your Hyundai is equipped with a day/ night inside rearview mirror. The "night" position is selected by flipping the tab at the bottom of the mirror toward you.In the "night" position, the glare ofheadlights of cars behind you is re-duced. HXG514J
!WARNING:
Do not adjust or fold the outside rear view mirrors while the vehicle is moving. This could result in lossof control, and an accident whichcould cause death, serious injuryor property damage.
B520B01O-GAT DAY/NIGHT INSIDE REARVIEW MIRROR (Electric type) (If installed) The electric type day/night inside rear- view mirror controls automatically theglare of headlights of the car behindyou. Adjust the rearview mirror to thedesired position. HXG514J-1
Page 147 of 230

2- 18 DRIVING YOUR HYUNDAI
C190C01Y-GAT Trailer Brakes If your trailer is equipped with a braking system, make sure it conforms to fed-eral and/or local regulations and that it
is properly installed and operating cor-rectly. NOTE: If you tow a trailer or vehicle, your car will require more frequent main-tenance due to the additional load.See "Maintenance Under SevereUsage Conditions" on page 5-6.
CAUTION:
o Never connect a trailer brake sys- tem directly to the vehicle brakesystem.
o When towing a trailer on steep grades (in excess of 12%) pay
close attention to the engine cool- ant temperature gauge to ensure
the engine does not overheat. Ifthe needle of the coolant tem-
perature gauge moves across thedial towards "H" (HOT), pull over and stop as soon as it is safe to
C190B01S-AATTrailer Hitches Select the proper hitch and ball combi- nation, making sure that it's location is compatible with that of the trailer or vehicle being towed.Use a quality non-equalizing hitch whichdistributes the tongue load uniformlythroughout the chassis. The hitch should be bolted securely to the car and installed by a qualifiedtechnician. DO NOT USE A HITCHDESIGNED FOR TEMPORARY IN-STALLATION AND NEVER USE ONETHAT ATTACHES ONLY TO THE BUMPER.
C180A01A-AAT USE OF LIGHTS Check your lights regularly for correct operation and always keep them clean.When driving during the day in condi-tions of poor visibility, it is helpful todrive with headlights on low beam. This enables you to be seen as well as to see. C190A01A-GAT TRAILER OR VEHICLE TOWING If you are considering towing with your car, you should first check with your Province Department of Motor Vehiclesto determine their legal requirements.Since laws vary from province to prov-ince the requirements for towing trail- ers, cars, or other types of vehicles or apparatus may differ. Ask your Hyundaidealer for further details before towing.
CAUTION:
Do not do any towing with your carduring its first 2,000 km (1,200 miles)in order to allow the engine to prop-erly break in. Failure to heed thiscaution may result in serious en- gine or transaxle damage.
!
!
Page 202 of 230
DO-IT-YOURSELF MAINTENANCE 6- 25
G290A02L-GAT
HEADLIGHT AIMING ADJUST- MENT
HID Type (If installed)
WARNING:
If you need headlight aiming ad- justment, have your vehicle in- spected by your Hyundai Dealer. Don't attempt to replace or inspect the HID headlight bulb to prevent danger of an electric shock.
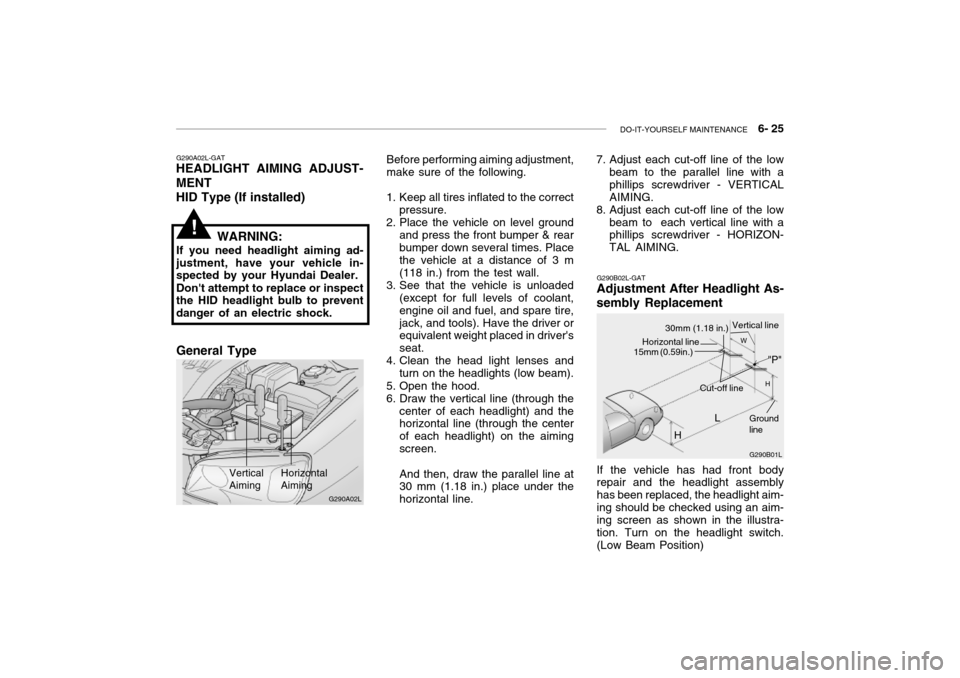
Vertical Aiming HorizontalAiming
Before performing aiming adjustment, make sure of the following.
1. Keep all tires inflated to the correct pressure.
2. Place the vehicle on level ground
and press the front bumper & rear bumper down several times. Place the vehicle at a distance of 3 m (118 in.) from the test wall.
3. See that the vehicle is unloaded (except for full levels of coolant,engine oil and fuel, and spare tire,jack, and tools). Have the driver or equivalent weight placed in driver's seat.
4. Clean the head light lenses and
turn on the headlights (low beam).
5. Open the hood.
6. Draw the vertical line (through the center of each headlight) and the horizontal line (through the center of each headlight) on the aimingscreen. And then, draw the parallel line at 30 mm (1.18 in.) place under the horizontal line.
!
G290B02L-GAT
Adjustment After Headlight As- sembly Replacement
G290B01L
LW
H
H Cut-off line
Ground line
If the vehicle has had front body repair and the headlight assembly has been replaced, the headlight aim-ing should be checked using an aim- ing screen as shown in the illustra- tion. Turn on the headlight switch.(Low Beam Position)
"P"
Horizontal line15mm (0.59in.)
30mm (1.18 in.) Vertical line
7. Adjust each cut-off line of the low
beam to the parallel line with a phillips screwdriver - VERTICALAIMING.
8. Adjust each cut-off line of the low
beam to each vertical line with a phillips screwdriver - HORIZON- TAL AIMING.
G290A02L
General Type
Page 203 of 230
6- 26 DO-IT-YOURSELF MAINTENANCE
Replacement instructions:
1. Allow the bulb to cool. Wear eye protection.
2. Always grasp the bulb by its plastic base, avoid touching the glass.
G260A01L-GAT
REPLACEMENT OF LIGHT BULBS
Before attempting to replace a light
bulb, be sure the switch is turned to the "OFF" position. The next paragraph shows how to
reach the light bulbs so they may be changed. Be sure to replace the burned-out bulb with one of the samenumber and wattage rating. See page 6-33 for the wattage de-
scriptions.
G270A03L
G270A01L-GAT
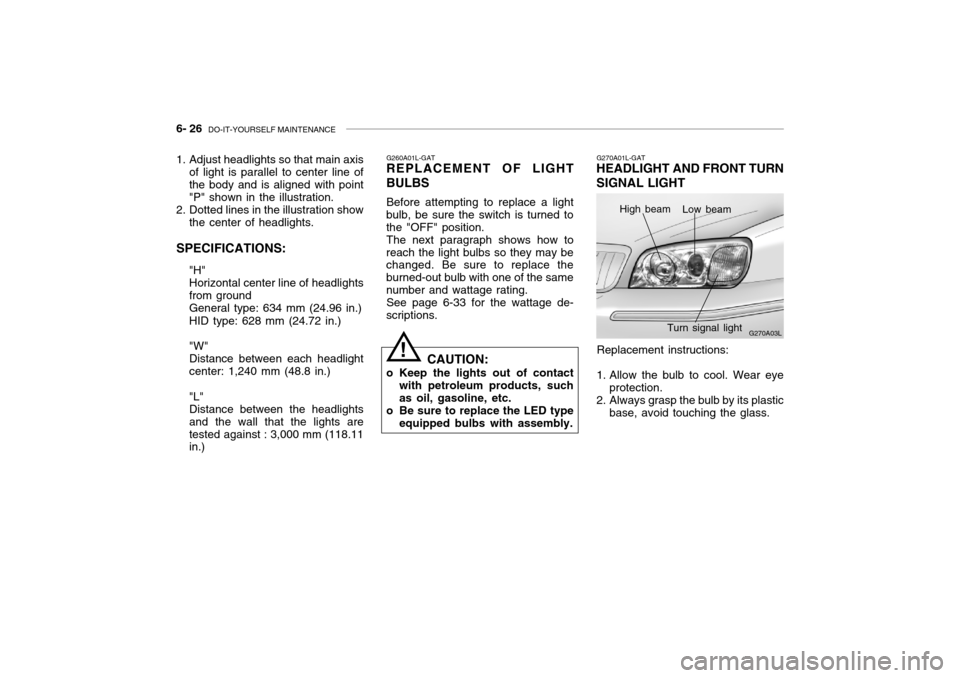
HEADLIGHT AND FRONT TURN SIGNAL LIGHT
High beam Low beam
Turn signal light
! CAUTION:
o Keep the lights out of contact with petroleum products, such as oil, gasoline, etc.
o Be sure to replace the LED type equipped bulbs with assembly.
1. Adjust headlights so that main axis
of light is parallel to center line ofthe body and is aligned with point"P" shown in the illustration.
2. Dotted lines in the illustration show
the center of headlights.
SPECIFICATIONS: "H"Horizontal center line of headlightsfrom groundGeneral type: 634 mm (24.96 in.) HID type: 628 mm (24.72 in.) "W" Distance between each headlightcenter: 1,240 mm (48.8 in.) "L" Distance between the headlightsand the wall that the lights aretested against : 3,000 mm (118.11 in.)