2002 Hyundai Grandeur coolant
[x] Cancel search: coolantPage 185 of 230

6- 8 DO-IT-YOURSELF MAINTENANCE
4. When the oil has stopped draining,
replace the drain plug using a new washer and retighten by turning itclockwise. Oil pan drain plug tightening torque : 3.5 ~4.0 kgf.m
5. Remove the oil filter by turning it counterclockwise with a oil filter wrench of the proper size. A cer- tain amount of oil will come out when you remove the filter. So besure to have your drain pan in place underneath it.
6. Install a new oil filter in accordance with the instructions on the carton or on the filter itself. Do not over-tighten. Oil filter tightening torque : 1.2 ~ 1.6 kgf.m Be sure that the mounting surface on the engine is clean and that theold gasket is removed completely. Lubricate the new gasket on the filter with clean engine oil beforeinstallation. 7. Refill the crankcase with the rec-
ommended engine oil. Refer to thespecification in chapter 9 for en-gine oil capacity.
8. Start the engine and check to be sure no oil is leaking from the drain plug or oil filter.
9. Shut off the engine and recheck the oil level.
NOTE: Always dispose of used engine oil
in an environmentally acceptable manner. It is suggested that it beplaced in a sealed container and taken to a service station for recla- mation. Do not pour the oil on theground or put it in with the house- hold trash.
WARNING:
Used motor oil may cause irrita-
tion or cancer of the skin if left in contact with the skin for prolongedperiods of time. Wash your hands thoroughly with soap and warm water as soon as possible afterhandling used oil. G050A01A-AAT
CHECKING AND CHANGING THE ENGINE COOLANT
WARNING:
Do not remove the radiator cap
when the engine is hot. When the engine is hot, the engine coolantis under pressure and may erupt through the opening if the cap is removed. You could be seriouslyburned if you do not observe this precaution. Do not remove the ra- diator cap until the radiator is coolto the touch.
!
!
Page 186 of 230
DO-IT-YOURSELF MAINTENANCE 6- 9
G050D02A-AAT To Change the Engine Coolant The engine coolant should be changed at those intervals specified in the ve- hicle maintenance schedule in Sec-tion 5.
CAUTION:
Engine coolant can damage thefinish of your car. If you spill en- gine coolant on the car, wash it off thoroughly with clean water.
1. Park the car on level ground, set the parking brake and remove the radiator cap when cool.
2. Be sure your drain receptacle is in place. Open the drain cock on theradiator. Allow all the engine coolant to drain from the cooling system,then securely close the drain cock.
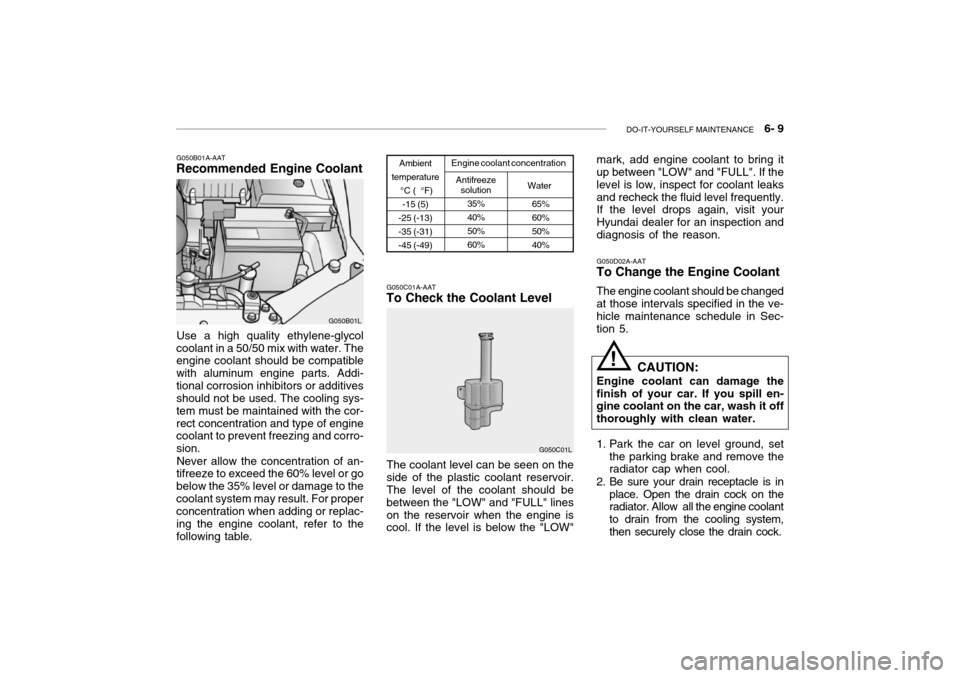
Use a high quality ethylene-glycol
coolant in a 50/50 mix with water. The engine coolant should be compatible with aluminum engine parts. Addi-tional corrosion inhibitors or additives should not be used. The cooling sys- tem must be maintained with the cor-rect concentration and type of engine coolant to prevent freezing and corro- sion.
Never allow the concentration of an-
tifreeze to exceed the 60% level or gobelow the 35% level or damage to thecoolant system may result. For proper concentration when adding or replac- ing the engine coolant, refer to thefollowing table.
Ambient
temperature °C ( °F)-15 (5)
-25 (-13) -35 (-31)-45 (-49) Engine coolant concentration
Antifreeze solution
Water
G050C01A-AAT
To Check the Coolant Level
The coolant level can be seen on the side of the plastic coolant reservoir. The level of the coolant should be between the "LOW" and "FULL" lineson the reservoir when the engine is cool. If the level is below the "LOW" G050C01L
65% 60%50%40%
35%40%50%60%
G050B01A-AAT
Recommended Engine Coolant
G050B01L mark, add engine coolant to bring it up between "LOW" and "FULL". If the level is low, inspect for coolant leaksand recheck the fluid level frequently. If the level drops again, visit your Hyundai dealer for an inspection anddiagnosis of the reason.
!
Page 187 of 230
6- 10 DO-IT-YOURSELF MAINTENANCE
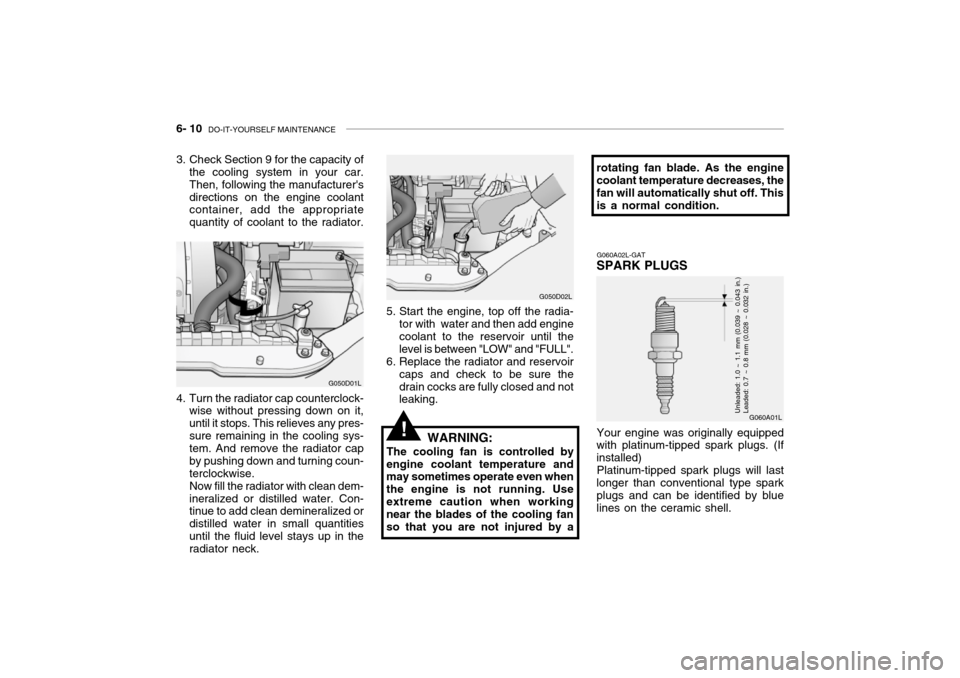
4. Turn the radiator cap counterclock-
wise without pressing down on it, until it stops. This relieves any pres-sure remaining in the cooling sys- tem. And remove the radiator cap by pushing down and turning coun-terclockwise.Now fill the radiator with clean dem-ineralized or distilled water. Con- tinue to add clean demineralized or distilled water in small quantitiesuntil the fluid level stays up in the radiator neck. G050D01L
G050D02L
5. Start the engine, top off the radia- tor with water and then add enginecoolant to the reservoir until the level is between "LOW" and "FULL".
6. Replace the radiator and reservoir
caps and check to be sure thedrain cocks are fully closed and not leaking.
WARNING:
The cooling fan is controlled by
engine coolant temperature andmay sometimes operate even when the engine is not running. Useextreme caution when working near the blades of the cooling fan so that you are not injured by a
3. Check Section 9 for the capacity of
the cooling system in your car.Then, following the manufacturer'sdirections on the engine coolant container, add the appropriate quantity of coolant to the radiator. rotating fan blade. As the engine coolant temperature decreases, the fan will automatically shut off. Thisis a normal condition.
G060A01L
G060A02L-GAT
SPARK PLUGS
Your engine was originally equipped
with platinum-tipped spark plugs. (If installed)
Platinum-tipped spark plugs will last
longer than conventional type sparkplugs and can be identified by blue lines on the ceramic shell.Unleaded: 1.0 ~ 1.1 mm (0.039 ~ 0.043 in.) Leaded: 0.7 ~ 0.8 mm (0.028 ~ 0.032 in.)
!
Page 192 of 230
DO-IT-YOURSELF MAINTENANCE 6- 15
G120A01A-AAT
CHECKING THE BRAKES
CAUTION:
Because brakes are essential to
the safe operation of the car, it is suggested that they be checked and inspected by your Hyundaidealer. The brakes should be checked and inspected for wear at those intervals specified in thevehicle maintenance schedule in Section 5.
G120B01A-A AT
Checking the Brake Fluid Level
WARNING:
Use caution when handling brakefluid. It can damage your vision if it gets into your eyes. It will alsodamage your vehicle's paint if spilled on it and not removed im- mediately.
G110D03Y
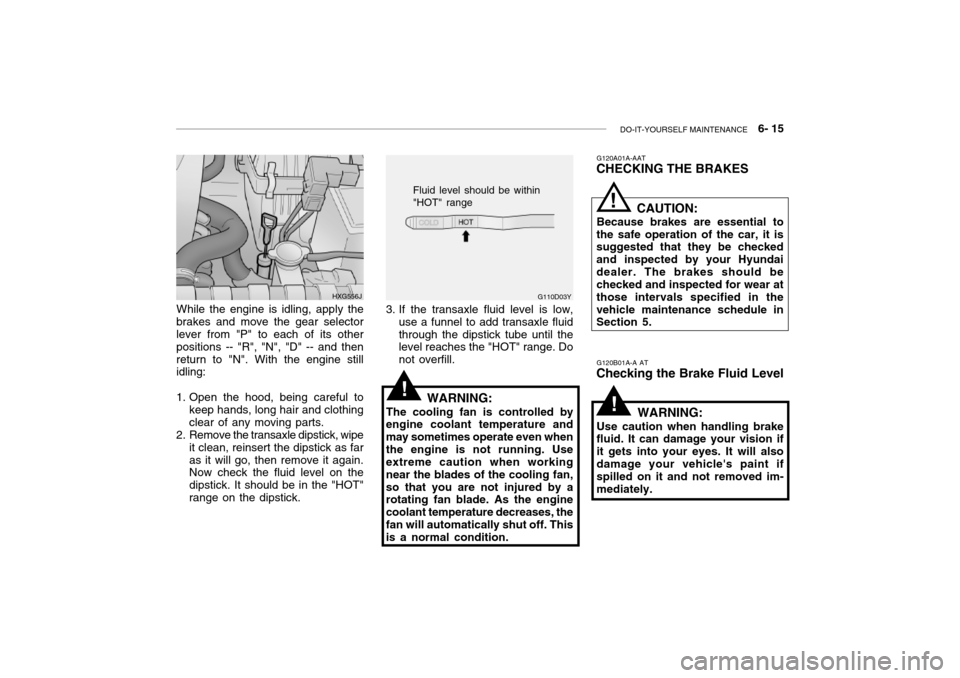
Fluid level should be within "HOT" range
3. If the transaxle fluid level is low, use a funnel to add transaxle fluid through the dipstick tube until the level reaches the "HOT" range. Do not overfill.
WARNING:
The cooling fan is controlled by
engine coolant temperature andmay sometimes operate even whenthe engine is not running. Use extreme caution when working near the blades of the cooling fan,so that you are not injured by a rotating fan blade. As the engine coolant temperature decreases, thefan will automatically shut off. This is a normal condition.
While the engine is idling, apply the
brakes and move the gear selector lever from "P" to each of its other positions -- "R", "N", "D" -- and then return to "N". With the engine still idling:
1. Open the hood, being careful to keep hands, long hair and clothing clear of any moving parts.
2. Remove the transaxle dipstick, wipe it clean, reinsert the dipstick as faras it will go, then remove it again. Now check the fluid level on the dipstick. It should be in the "HOT"range on the dipstick. HXG556J
!
!
!
Page 201 of 230
6- 24 DO-IT-YOURSELF MAINTENANCE
G240A01A-AAT
POWER STEERING HOSES
It is suggested that you check the
power steering hose connections for fluid leakage at regular intervals.
The power steering hoses should be
replaced if there is severe surface cracking, scuffing or worn spots. De- terioration of the hose could causepremature failure.
G230A03A-GAT
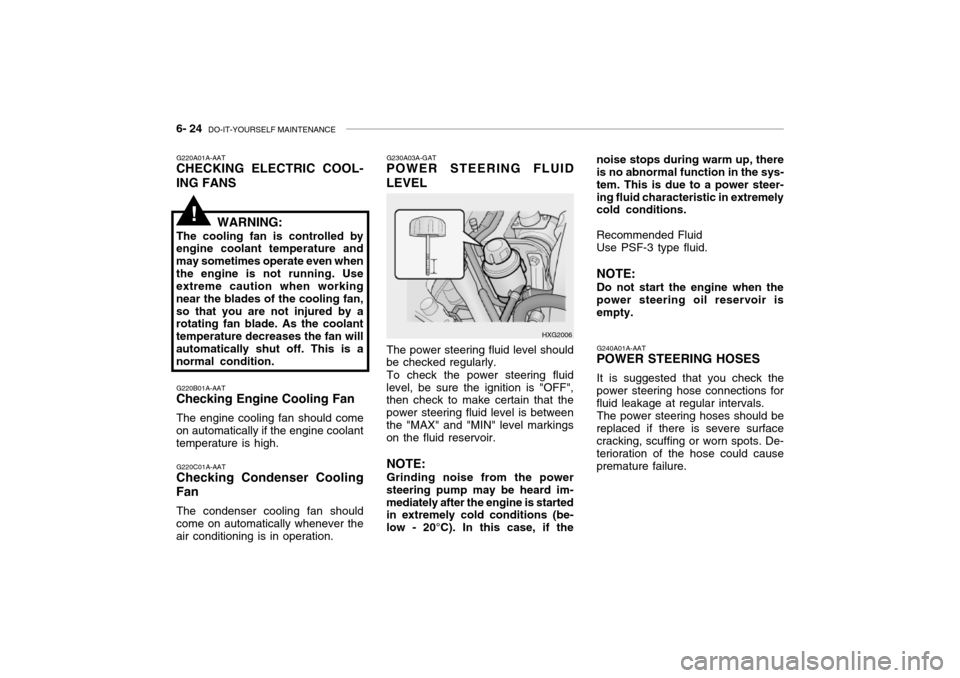
POWER STEERING FLUID LEVEL
HXG2006
The power steering fluid level should
be checked regularly.
To check the power steering fluid
level, be sure the ignition is "OFF", then check to make certain that the power steering fluid level is betweenthe "MAX" and "MIN" level markings on the fluid reservoir.
NOTE: Grinding noise from the power
steering pump may be heard im- mediately after the engine is started in extremely cold conditions (be- low - 20°C). In this case, if the noise stops during warm up, there is no abnormal function in the sys- tem. This is due to a power steer-ing fluid characteristic in extremely cold conditions. Recommended Fluid Use PSF-3 type fluid. NOTE: Do not start the engine when the power steering oil reservoir is empty.
G220A01A-AAT
CHECKING ELECTRIC COOL- ING FANS
WARNING:
The cooling fan is controlled by
engine coolant temperature and may sometimes operate even whenthe engine is not running. Use extreme caution when working near the blades of the cooling fan,so that you are not injured by a rotating fan blade. As the coolant temperature decreases the fan willautomatically shut off. This is a normal condition.
G220B01A-AAT
Checking Engine Cooling Fan
The engine cooling fan should come
on automatically if the engine coolanttemperature is high.
G220C01A-AAT
Checking Condenser Cooling Fan
The condenser cooling fan should
come on automatically whenever the air conditioning is in operation.
!
Page 202 of 230
DO-IT-YOURSELF MAINTENANCE 6- 25
G290A02L-GAT
HEADLIGHT AIMING ADJUST- MENT
HID Type (If installed)
WARNING:
If you need headlight aiming ad- justment, have your vehicle in- spected by your Hyundai Dealer. Don't attempt to replace or inspect the HID headlight bulb to prevent danger of an electric shock.
Vertical Aiming HorizontalAiming
Before performing aiming adjustment, make sure of the following.
1. Keep all tires inflated to the correct pressure.
2. Place the vehicle on level ground
and press the front bumper & rear bumper down several times. Place the vehicle at a distance of 3 m (118 in.) from the test wall.
3. See that the vehicle is unloaded (except for full levels of coolant,engine oil and fuel, and spare tire,jack, and tools). Have the driver or equivalent weight placed in driver's seat.
4. Clean the head light lenses and
turn on the headlights (low beam).
5. Open the hood.
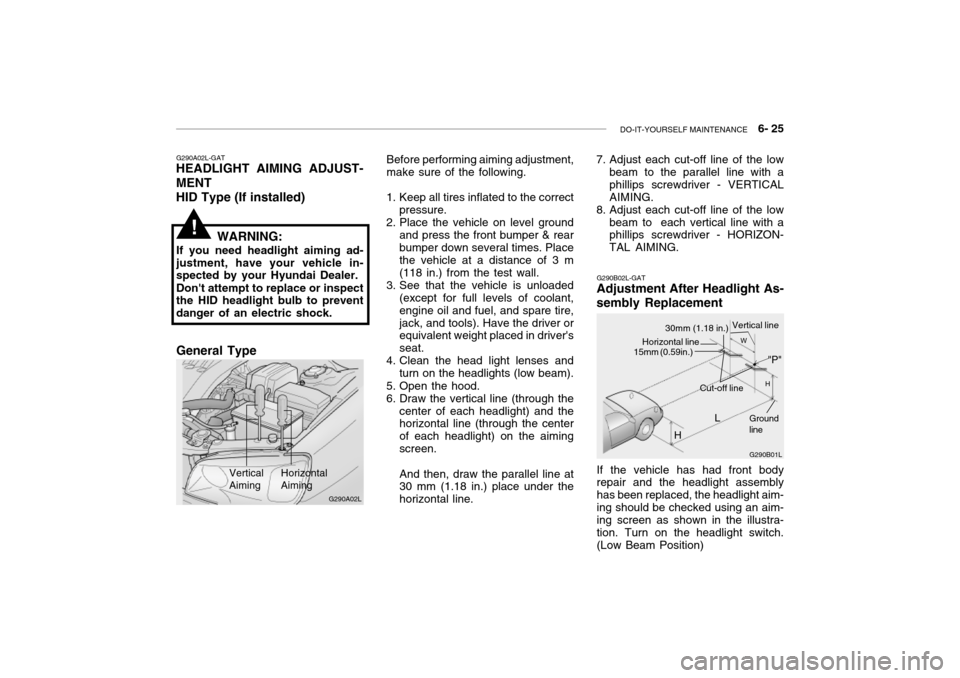
6. Draw the vertical line (through the center of each headlight) and the horizontal line (through the center of each headlight) on the aimingscreen. And then, draw the parallel line at 30 mm (1.18 in.) place under the horizontal line.
!
G290B02L-GAT
Adjustment After Headlight As- sembly Replacement
G290B01L
LW
H
H Cut-off line
Ground line
If the vehicle has had front body repair and the headlight assembly has been replaced, the headlight aim-ing should be checked using an aim- ing screen as shown in the illustra- tion. Turn on the headlight switch.(Low Beam Position)
"P"
Horizontal line15mm (0.59in.)
30mm (1.18 in.) Vertical line
7. Adjust each cut-off line of the low
beam to the parallel line with a phillips screwdriver - VERTICALAIMING.
8. Adjust each cut-off line of the low
beam to each vertical line with a phillips screwdriver - HORIZON- TAL AIMING.
G290A02L
General Type
Page 214 of 230

7- 2 EMISSION CONTROL SYSTEMS
H010A01A-GAT
EMISSION CONTROL SYSTEM (If Installed)
Your Hyundai is equipped with an
emission control system to meet all requirements of the Emission prohibi-tion rules of your province.
There are three emission control sys-
tems which are as follows.
1) Crankcase emission control sys-
tem
2) Evaporative emission control sys-
tem
3) Exhaust emission control system
In order to assure the proper function
of the emission control systems, it is recommended that you have your car inspected and maintained by an au-thorized Hyundai dealer in accordance with the maintenance schedule in this manual. H010B01A-AAT
1. Crankcase Emission Control
System
The positive crankcase ventilation
system is employed to prevent airpollution caused by blow-by gasesbeing emitted from the crankcase. This system supplies fresh air to the crankcase through the air intake hose.Inside the crankcase, the fresh air mixes with blow-by gases, which then pass through the PCV valve and intothe induction system.
H010C02Y-GAT
2. Evaporative Emission
Control System
The Evaporative Emission Control
System is designed to prevent fuel vapors from escaping into the atmo- sphere. Canister
While the engine is inoperative, fuel
vapors generated inside the fuel tank are absorbed and stored in the canis- ter. When the engine is running, the fuel vapors absorbed in the canisterare drawn into the induction system through the purge control solenoidvalve. Purge Control Solenoid Valve
The purge control solenoid valve is
controlled by the ECM; when the en- gine coolant temperature is low, and during idling, it closes, so that evapo- rated fuel is not taken into the surgetank. After engine warm-up, during ordinary driving, it opens so as to introduce evaporated fuel to the surgetank.
H010D01A-AAT
3. Exhaust Emission Control
System
The exhaust emission control system
is a highly effective system whichcontrols exhaust emission while main- taining good vehicle performance.
H010E01Y-GAT
EGR System
This system helps control nitrogen
oxides by recirculating a part of the exhaust gas into the engine, therebyreducing cylinder combustion tem- perature.
Page 224 of 230

9- 4 VEHICLE SPECIFICATIONS
Oil & Grease Standard
API SH or SAE 20W-40, 20W-50 (ABOVE -10 C)
SG ABOVE SAE 15W-40, 15W-50 (ABOVE -15 C) SAE 10W-30 (-25 C ~ 40 C) SAE 10W-40, 10W-50 (ABOVE -25 C) SAE 5W-20 *1, *2 (BELOW -10 C) SAE 5W-30 *1 (BELOW 10 C)SAE 5W-40 *1 (BELOW 20 C)
*1. Restricted to driving condition and dealing area *2. Not recommended for sustained high speed vehicle operation Normal driving conditionSevere driving condition HYUNDAI GENUINE PARTS MTF 75W/90 (API GL-4) DIAMOND ATF SP-III, SK ATF SP-IIIEthylene glycol, base for aluminum PSF-3 DOT 3, DOT 4 or Equivalent
J080A03L-GAT LUBRICATION CHART
Item
Engine Oil Engine oil consumption
Transaxle Manual Auto
Coolant Power steering gear Brakes and clutch fluidQ'ty (liter)
Drain and refill (With oil filter) 3.5 L / 3.0 L : 4.3 2.5 L : 4.5 MAX. 1L / 1500 Km MAX. 1L / 1000 Km 2.1 7.8 (2.5L), 8.5 (3.0L / 3.5L)9.5 (2.5L), 11.2 (3.0L / 3.5L) 1.0 As required