Page 81 of 270

The AUTO f unction only works to
lower the driver’s window. To raise
the window, you must push the
window switch up and hold it until
the window reaches the desired
position.Adjust the outside mirrors with the
adjustment switch on the lef t side of
the dashboard:Turn the ignition switch ON (II).
Move the selector switch to L
(driver’s side) or R (passenger’s
side). Push the appropriate edge of the
adjustment switch to move the
mirrorright,left,up,ordown.
When you f inish, move the
selector switch to the center (off)
position. This turns of f the
adjustment switch so you can’t
move a mirror out of position by
accidentally bumping the switch.
The MAIN switch controls power to
the passenger’s window. With this
switch of f , the passenger’s window
cannot be raised or lowered. The
MAIN switch does not af f ect the
driver’s window. Keep the MAIN
switch of f when you have a child in
the car so the child does not get
injured by operating the window
unintentionally.
1.
2.3.
4.
Power Windows, Mirrors
Inst rument s and Cont rols
Adjusting the Power Mirrors
78
A A
D
DJ
JUUS STTM
M E
EN
NT T S
SWWI ITT C
CH H
S
SE
EL
LEE C
CT TO
OR R S
SWWI ITT C
CH H
Page 82 of 270
To apply the parking brake, pull the
lever up f ully. To release it, pull up
slightly, push the button, and lower
the lever. The parking brake light on
the instrument panel should go out
when the parking brake is f ully
released (see page ).
Keeptheinsideandoutsidemirrors
clean and adjusted f or best visibility.
Be sure to adjust the mirrors bef ore
you start driving.
The inside mirror has day and night
positions. The night position reduces
glare f rom headlights behind you.
Flip the tab on the bottom edge of
the mirror to select the day or night
position.
Your car has a storage box under the
cargo compartment. To open the
storage box, pull the strap.
47
Inst rument s and Cont rols
Parking Brake
Mirrors
Storage Box
Mirrors, Parking Brake, Storage Box
79
P PA
A R
RKKIINNG G B
BRRAA K
KEE L
LEE V
V E
ER
R
T
T A
A B
B
S
STTR
RA A P
PDriving the car with the parking brake
applied can damage the rear brakes
and axles.
Page 83 of 270
Open the glove box by pulling the
bottom of the handle. Close it with a
f irm push. Lock or unlock the glove
box with the master key.Be caref ul when you are using the
beverage holder. A spilled liquid that
is very hot can scald you or your
passenger. Spilled liquids can also
damage the upholstery, carpeting,
and electrical components in the
interior.
Inst rument s and Cont rols
Glove Box, Beverage Holder
Beverage Holder
Glove Box
80
G GL LOOV VE
E B
BOOX X
An open glove box can cause
serious injury to your passenger
inacrash,evenifthe
passenger is wearing the seat
belt.
Always keep the glove box
closed while driving.
Page 84 of 270
This socket is intended to supply
power f or 12 volt DC accessories
that are rated 120 watts or less (10
amps).
It will not power an automotive type
cigarette lighter element.
To use the accessory power socket,
pull up the cover. The ignition switch
must be in ACCESSORY (I) or ON
(II).
Inst rument s and Cont rols
A ccessory Power Socket
81
A A C
CCCEES
SS SOOR RYY P
PO
OW WE ER
R S
SOOC CKKEET
T
Page 85 of 270
The interior light has a three-
position switch. In the OFF position,
the light does not come on. In the
center position, the interior light
comes on when you open either door.
In the ON position, the interior light
stays on continuously.The cargo area light has a two-
position switch. In the OFF (down)
position, the light does not come on.
In the ON (up) position, the light
comes on when you open the hatch.
Turn on the spotlight by pushing the
button next to each light. Push the
button again to turn it off. You can
use the spotlights at all times.
Inst rument s and Cont rols
Interior L ight
Spotlights
Cargo Area Light
Ceiling L ights
82
D D O
OO ORR A
AC
CTTI
IVV A
AT
TE
ED
D
Page 86 of 270

.............................................
Heating .84
...........
What Each Control Does . 84
.........
Temperature Control Dial . 84
..............................
ECON Button .84
..................
Recirculation Button . 84
Rear Window Def ogger ......................................
Button .84
..............................
Mode Buttons .85
..............
How to Use the System . 87
............
To Turn Everything Of f . 89
.................
Climate Control System . 90
.........
Fully-automatic Operation . 92
.........
Semi-automatic Operation . 93
..............................
ECON Button .93 ..................................
Audio System .98
...................
Operating the Radio . 99
.................
Adjusting the Sound . 102
Operating the Optional CD .................................
Changer .108
....................
Radio Frequencies . 112
........................
Radio Reception .112
.......
Protecting Compact Discs . 114
Caring f or the Cassette .....................................
Player .115
Comf ort and Convenience Features
Comf ort and Convenience Feat ures83
Page 87 of 270

This button controls the source of
the air going into the system. When
the indicator in this button is lit, air
from the car’s interior is sent
through the system again (Recircula-
tion mode). When the indicator is off,
air is brought in f rom outside the car
(Fresh Air mode).
Proper use of the Heating system
can make the interior comf ortable,
and keep the windows clear f or best
visibility.
This button turns the rear window
def ogger on and of f (see pagesand ).
Press the button to increase
the f an’s speed, which increases air
flow.
Press the button to decrease
the f an’s speed.
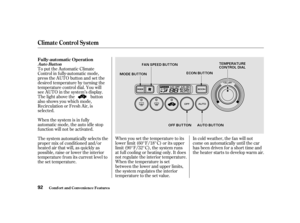
When this button is pressed, the
auto idle stop works only if the
outside temperature is above 41°F
(5°C). Turning this dial clockwise increases
the temperature of the air flow.
65 66
Comf ort and Convenience Feat ures
Recirculation ButtonRear Window Def ogger Button
What Each Control Does
Fan Control Buttons
ECON Button T emperature Control Dial
Heating
84
R RE
EC
CI IRRC CUUL LAA T
TI
IOON N
B
BU UT TT
TO
ON N E
E
C
CO ON N B
BUUT TT
TO
ON N
R
RE EA
A R
R W
WI INND DO
OW W
D
D E
EF
FOOG GGGEER
R B
BUUT TT
TO
ON N
M
M
O
ODDE
E B
BUUT TT
TO
ON N
F
FAA N
N C
COON NTTR
RO OL L B
BUUT TT
TO
ON NSS
T
T
E
EM
M P
PE
ER
RA A T
TU
UR REE
C
CO ON NTTR
RO OL L D
DI
IAA L
L
Page 88 of 270
Use the MODE buttons to select the
vents the air flows from. Some air
will f low f rom the dashboard corner
vents in all modes.Air flows from the center
and corner vents in the dashboard.
Air f low is divided between
the vents in the dashboard and the
f loor vents.
When you select or ,
the system automatically switches to
Fresh Air mode.When mode is selected, the
auto stop function will not activate.
Air f lows f rom the f loor
vents.
Air f low is divided between
the f loor vents and the def roster
vents at the base of the windshield.
Air f lows f rom the def roster
vents at the base of the windshield.
Comf ort and Convenience Feat ures
Mode Buttons
Heating
85