2002 HONDA CIVIC PGM-FI System
[x] Cancel search: PGM-FI SystemPage 233 of 1139

Fuel and Emissions Systems
System Descriptions (cont'd)
PGM-FI System
The Programmed Fuel Injection (PGM-Fl) system is a
sequential multiport fuel injection system.
Air Conditioning {A/C) Compressor Glutch Relay
When the ECfM receives a demand for cooling from the
Ay'C system, it delays the compressor from being
energized, and enriches the mixture to assure smooth
transition to the AVC mode.
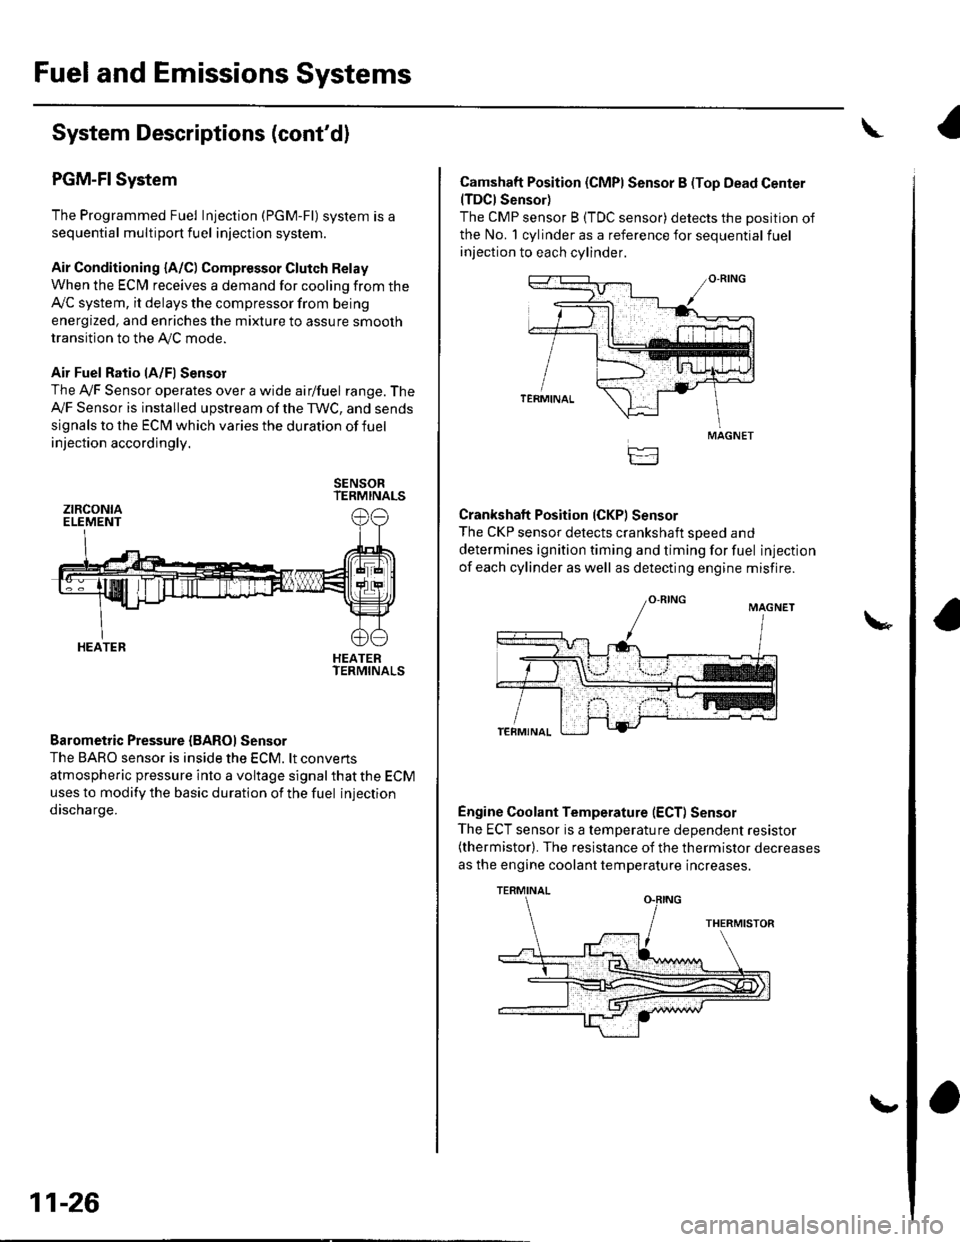
Air Fuel Ratio lA/Fl Sensor
The Ay'F Sensor operates over a wide airlfuel range. The
Ay'F Sensor is installed upstream of the TWC, and sends
signals to the ECM which varies the duration of fuel
injection accordingly.
SENSORTERMINALS
HEATERTERMINALS
Barometric Pressure {BAROI Sensor
The BARO sensor is inside the ECM. lt convens
atmospheric pressure into a voltage signal that the ECM
uses to modify the basic duration of the fuel injection
discharge.
ztRcoNtaELEMENT
HEATER
11-26
\,
Camshaft Position (CMPI Sensor B (Top Dead Center(TDCI Sensor)
The CMP sensor B (TDC sensor) detects the position of
the No. 1 cylinder as a reference for sequential fuel
injection to each cylinder.
Crankshaft Position (CKPI Sensor
The CKP sensor detects crankshaft soeed and
determines ignition timing and timing for fuel injection
of each cylinder as well as detecting engine misfire.
Engine Coolant Temperature (ECT) Sensor
The ECT sensor is a temperature dependent resistor(thermistor). The resistance of the thermistor decreases
as the engine coolant temperature increases.
MAGNET
TERMINAL
Page 239 of 1139

Fuel and Emissions Systems
(
{
System Descriptions (cont'd)
ldle Control System
When the engine is cold, the Ay'C compressor is on, the
transmission is in gear, the brake pedal is pressed. thepower steering load is high, or the alternator is
charging, the ECIM controls current to the ldle Air
Control (lAC) valve to maintain the correct idle speed.
Refer to the System Diagram to see the functional
layout of the system.
Brake Pedal Position Switch
The brake pedal position switch signals the ECM when
the brake pedal is oressed.
Electrical Power Steering (EPS) Senser
The EPS sensor signals the ECM when the power
steering load is high.
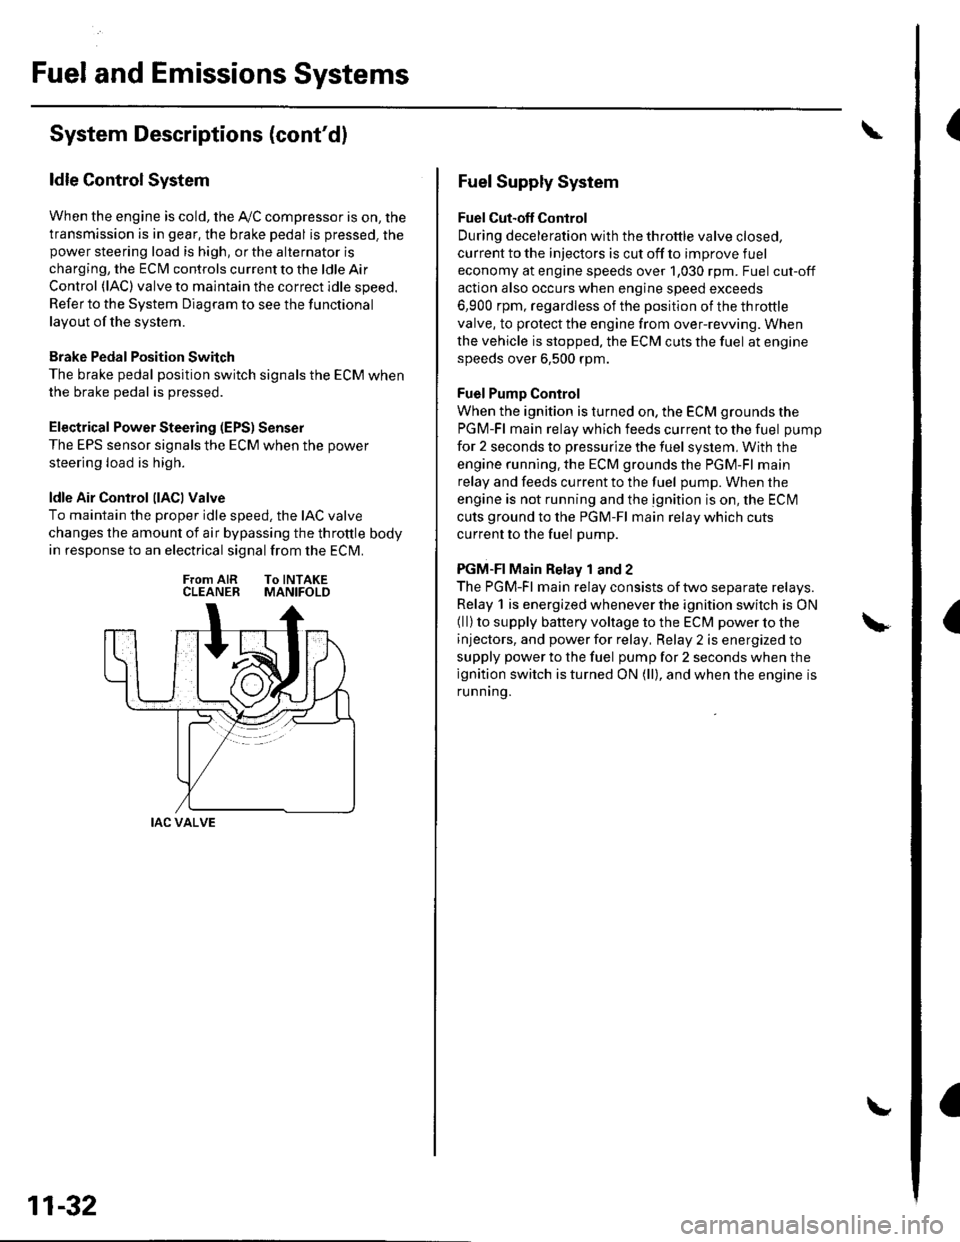
ldle Air Control llACl Valve
To maintain the proper idle speed, the IAC valve
changes the amount of air bypassing the throttle body
in response to an electrical signal from the ECM.
From AIR To INTAKECLEANER MANIFOLD
IAC VALVE
11-32
Fuel Supply System
Fuel Cut-off Control
During deceleration with the throttle valve closed,
current to the injectors is cut off to improve fuel
economy at engine speeds over 1,030 rpm. Fuel cut-off
action also occurs when engine speed exceeds
6,900 rpm, regardless of the position of the throttle
valve, to protect the engine from over-rewing. When
the vehicle is stopped. the ECM cuts the fuel at engine
speeds over 6,500 rpm.
Fuel Pump Control
When the ignition is turned on, the ECM grounds the
PGM-Fl main relay which feeds current to the fuel pump
for 2 seconds to pressurize the fuel system, With the
engine running. the ECM grounds the PGM-Fl main
relay and feeds current to the fuel pump. When the
engine is not running and the ignition is on, the ECI\4
cuts ground to the PGM-Fl main relay which cuts
current to the fuel pump.
PGM-FI Main Relay 1 and 2
The PGM-Fl main relay consists of two separate relays.
Relay 1 is energized whenever the ignition switch is ON(ll) to supply battery voltage to the ECM power to the
injectors, and power for relay, Relay 2 is energized to
supply power to the fuel pump for 2 seconds when the
ignition switch is turned ON (ll), and when the engine is
runnrng.
Page 256 of 1139
![HONDA CIVIC 2002 7.G Workshop Manual PGM-FI System
Component Location Index
CAMSHAFT POS]TION {CMP) SENSOR B(TOP DEAD CENTER (TDC}SENSORITroubleshootina. oaoe 1 1-95Replacement, p;ge 1-1.1 14
ELECTRICAL LOADDETECTOR {ELDITroubleshooting, HONDA CIVIC 2002 7.G Workshop Manual PGM-FI System
Component Location Index
CAMSHAFT POS]TION {CMP) SENSOR B(TOP DEAD CENTER (TDC}SENSORITroubleshootina. oaoe 1 1-95Replacement, p;ge 1-1.1 14
ELECTRICAL LOADDETECTOR {ELDITroubleshooting,](/manual-img/13/5744/w960_5744-255.png)
PGM-FI System
Component Location Index
CAMSHAFT POS]TION {CMP) SENSOR B(TOP DEAD CENTER (TDC}SENSORITroubleshootina. oaoe 1 1-95Replacement, p;ge 1-1.1 14
ELECTRICAL LOADDETECTOR {ELDITroubleshooting,page 1'l -92
INTAKE AIR TEMPERATURE{IATI SENSORTroubleshooting,page 'l'l-55
Replacement, page 11-'l 15
f- \
rl
KNOCK SENSORTroubleshooting, page 1 1-77Beplacement, page 11 115
ENGINE COOLANT TEMPERATURE(ECTI SENSORTroubleshooting, page 1 1-57Replacement, page 11 114
MANIFOLD ABSOLUTE PRESSURE(MAP) SENSORTroubleshooting, page 1 1-52
THROTTLE POSITIONITP} SENSORTroubleshooting, page 11-60CRANKSHAFT POSITIONICKPISENSORTroubleshooting, page'l 1-78Beplacement, page 1 1-'l 16
AIR FUEL RATIO {A/F)SENSOR ISENSOR 1}Trorrbleshooting, page 1 1-84Replacement, page 11- 1 13
{cont'd)
ii'- r'1
.I11 ---:,I''.!,i(..,.?:fir-J-
.....,..:--.
11-49
Page 259 of 1139

PGM-FI System
(
(
(
DTC Troubleshooting
DTC P0107: MAP Sensor Circuit Low Voltage
1. Turn the ignition switch ON (lli.
2. Check the MAP with the scan tool.
ls about 101 kPa (760 mmHg,30 in.Hg)or 2.9 V
indicated?
YES Intermittent failu re, system is OK at this time.
Check for poor connections or loose terminals at
the MAP sensor and at the ECM.I
NO-Go to step 3.
3. Turn the ignition switch OFF.
4. Disconnect the MAP sensor 3P connector.
5. Turn the ignition switch ON (lll.
6. lvleasure voltage between MAP sensor 3P
conneclor terminals No. 1 and No. 3.
1.
sGl{GRN/WHTI
Wire s de of femaleterminais
ls there about 5 V?
YES Go to step 8.
NO-Go to step 7.
Measure voltage between EClvl connector
terminals 41 1 and 42'1.
ECM CONNECTOR A 13'IP}
MAP SENSOR 3P CONNECTOF
vccr{YEL/BED)
sGr{GRN/WHT}
11-52
Wire side of female terminals
\
8.
ls there about 5 V?
YES-Repair open in the wire between the Eclvl(A21)and the MAP sensor.l
NO Update the ECM if it does not have the latest
software, or substitule a known-good ECM, then
recheck (see page 'l 1-6). lf the symptom/indication
goes away with a known-good ECfvl, replace the
original ECM.I
Check the MAP with the scan tool.
ls 2 kPa (15 mmHg,0.6 in.Hg) ot less or 0 V
ind icated?
YES-Go to step 9.
NO Replace the lvlAP sensor.l
Turn the ignition switch OFF.
Disconnect ECM connector A (31P).
Check for continuity between MAP sensor
connector terminal No. 2 and body ground.
MAP SENSON 3P CONNECTOA
ls therc continuity?
YES-Repair short in the wire between the ECM(A19) and the MAP sensor.l
NO Update the ECM if it does not have the latest
software, or substitute a known-good ECM, then
recheck (see page 11-6). lf the symptom/indication
goes away with a known-good ECM, replace the
original ECM.I
9.
'10.
11.
\
Page 261 of 1139

PGM-FI System
a
DTC Troubleshooting (cont'dl
DTC Pl128: MAP Sensor Signal Lower Than
Expected
1. Turn the ignition switch ON (ll).
2. Check the MAP with the scan tool.
ls 54.1 kPa(406mmHg, 16.0in.Hg), 1.6 V, or
higher indicated?
YES- Intermittent failure. system is OK at this
time.I
NO Replace the MAP sensor.l
11-54
\
\
DTC Pl129: MAP Sensor Signal Higher Than
Expected
1. Start the engine. Hold the engine at 3,000 rpm with
no load (in neutral) until the radiator fan comes on,
then Iet it idle.
2. Check the MAP with the scan toot.
ls 36.9 kPa (277 mmHg, 10.9 in.Hg), 1.1 V , or less
indicated?
YES- lntermittent failure, system is OK at this
time.l
NO Replace the MAP sensor.l
\
Page 263 of 1139

PGM-FI System
I
{
(
DTC Troubleshooting (cont'dl
DTC P0113: IAT Sensor Circuit High Voltage
1. Turn the ignition switch ON (ll).
2. Check the IAT with the scan tool.
ls 4'F (-20'C) or less (or L-Limit in Honda
mode ot PGM Tester) or 5 V indicated?
3.
4.
YES-Go to step 3.
NO Intermitent failure, system is OK at this time.
Check for poor connections or loose terminals at
the IAT sensor and at the ECM.I
Turn the ignition switch OFF.
Disconnect the IAT sensor 2P connector.
Connect IAT sensor 2P connector terminals No. 1
and No. 2 with a jumper wire.
IAT SENSOR 2P CONNECTOR
rJ-- :---
l'lLl-'_-l--_----r--_
sG2 I rAT{GRN/YEL) I IRED/YEL)
L]JUMPER WIRE
Wire side of female terminals
6. Turn the ignition switch ON {ll).
11-56
\
\
7. Check the IAT with the scan tool.
ls - 4"F ( 20'C) or less (or L-Limit in Honda
mode ot PGM Tester) or 5 V indicated?
YES Go to step 8.
NO - Replace the IAT sensor.l
8. Turn the ignition switch OFF.
9. Remove the jumper wire.
10. Connect ECM connector terminals A10 and 817
with a jumper wire.
ECM CONNECTORS
A (31 P)B {24 P)
Wire side of female terminals
Turn the ignition switch ON (ll).
Check the IAT with the scan tool.
ls - 4"F ( 20"C) or less (or L-Limit in Honda
mode of PGM Tester) or 5 V indicated?
YES Update the ECM if it does not have the latest
software, or substitute a known-good ECI\4 then
recheck (see page 11-6). lf the symptom/indicationgoes away with a known-good ECM. replace the
original ECM. !
NO Repair open in the wire between the ECM(A10, 817) and the IAT sensor.I
\"
11.
12.
JUMPER WIRE
Page 265 of 1139

PGM-FISystem
(
(
(
DTC Troubleshooting (cont'dl
DTC P0117: ECT Sensor Circuit Low Voltage
1. Turn the ignition switch ON (ll).
2. Check the ECT with the scan tool.
ls 150'C (302'F)or higher (ot H-Limit in Honda
mode of PGM Tester) or 0 V indicated?
YES Go to step 3.
NO Intermittent failure, system is OK at this time.
Check for poor connections or loose terminals at
the ECT sensor and at the ECM. t
3. Disconnect the ECT sensor 2P connector.
4. Check the ECT with the scan tool.
ls 150'C (302"F)or higher (ot H-Limit in Honda
mode ot PGM Tester) or 0 V indicated?
YES-Go to step 5.
NO Replace the ECT sensor. !
5. Turn the ignition switch OFF.
6. Disconnect ECM connector B (24P).
11-58
\
7. Check for continuity between the ECT sensor 2P
connector terminal No. 1 and bodv oround.
ECT SENSOR 2P CONNECTOR
Wire side of female terminals
ls there continuity?
YES-Repair short in the wire between the ECM(B8) and the ECT sensor.l
NO-Update the ECM if it does not have the latest
software,or substitute a known-good ECM, then
recheck {see page 11-6). lf the symptom/indication
goes away with a known-good EClvl, replace the
original ECM.I
Page 267 of 1139

PGM-FI System
DTC Troubleshooting (cont'dl
DTC P0122: TP Sensor Circuit Low Voltage
1. Turn the ignition switch oN (111.
2. Check the throttle position with the scan tool.
ls there about 10./. or 0.5 V when the thrcttle is
fully closed and about 90% or 4.5 V when the
throttle is fully opened?
YES Intermittent failure, system is OK at this time.
Check for poor connections or loose terminals at
the TP sensor and at the ECM. t
NO Go to step 3.
3. Turn the ignition switch OFF,
4. Disconnect the TP sensor 3P connector.
5. Turn the ignition switch ON (ll).
6. Measure voltage between the TP sensor 3P
connector terminals No. 1 and No. 3.
TP SENSOR 3P CONNECTOR
Wire side of female terminals
ls there about 5 V?
YES-Go to step 7.
NO Go to step 14.
Turn the ignition switch OFF.1.
11-60
8. At the sensor side, measure resistance between the
TP sensor 3P connector terminals No. 1 and No. 2
with the throttle fully closed.
TP SENSOR 3P CONNECTOR
Terminal side of male terminals
Is there about 0.5 0.9 kQ ?
YES Go to step 9.
NO Replace the throttle body (the TP sensor is not
available separately). I
Measure resistance between the TP sensor 3P
connector terminals No. 2 and No. 3 with the
throttle fully closed.
TP SENSOR 3P CONNECTOB
Terminal side of male terminals
ls there about 4.5k{l ?
YES Go to step 10.
NO Replace the throttle body (the TP sensor is not
available separately). I
10. Disconnect ECM connector A (31P).
9.\