2002 HONDA CIVIC multiplex control system
[x] Cancel search: multiplex control systemPage 57 of 1139

Gharging System
Charging Circuit Troubleshooting
lf the charging system indicator does not come on or
does not go off, or the battery is dead or low, test these
items in the order listed below:
Battery (see page 22-50)
Charging system indicator
Alternator and regulator circuit
Alternator control system
Charging System Indicator Test
1. Turn the ignition switch ON {ll).
Does the chatging system indicator come on?
YES Go to step 2.
NO Go to step 3.
2. Start the engine.
Does the charging system indicator go off?
YES-Charging system indicator circuit is OK. Go
to the Alternator and Regulator circuit Test. t
NO-Go to step 3.
3. Turn the ignition switch OFF.
4. Troubleshoot the multiplex control system (see
page 22 172).
ls the multiplex control system OK?
YES Go to step 5.
NO Check the multiplex control system as
indicated by the diagnostic trouble code (DTC) (see
step 8 on page 22-172).1
5. Disconnect the engine wire harness 6P connector
from the starter sub harness 6P connector.
4-22
\"4
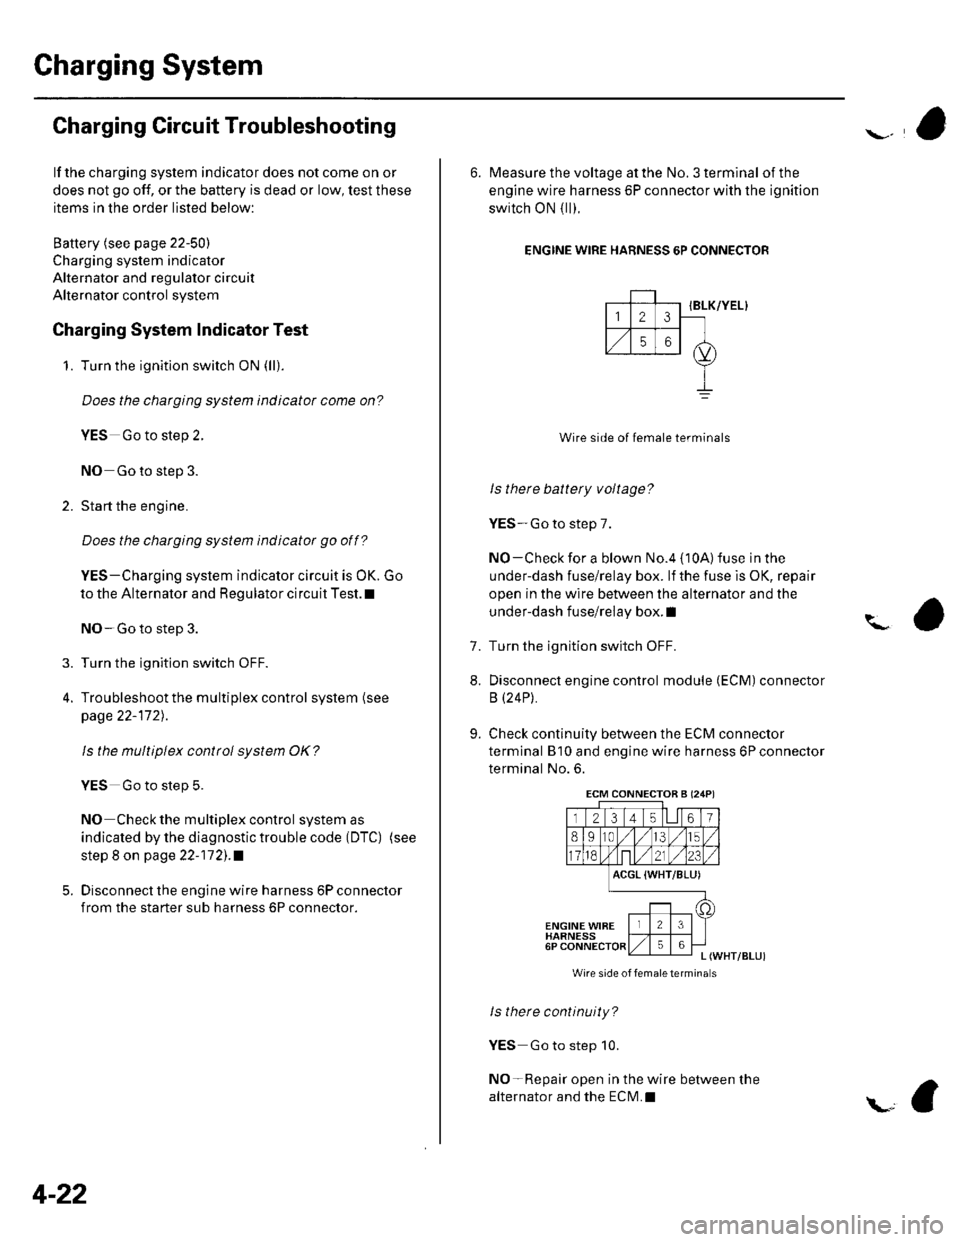
6. Measure the voltage at the No. 3 terminal of the
engine wire harness 6P connector with the ignition
switch ON { ll).
ENGINE WIRE HARNESS 6P CONNECTOR
IBLK/YEL}
Wire side of female terminals
ls there battery voltage?
YES-Go to step 7.
NO-Check for a blown No.4 {10A) fuse in the
under-dash fuse/relay box. lf the fuse is OK, repair
open in the wire between the alternator and the
under-dash fuse/relay box. I
Turn the ignition switch OFF.
Disconnect engine control module (ECM) connector
B (24P).
Check continuity between the ECM connector
terminal B'10 and engine wire harness 6P connector
terminal No. 6.
?
7.
8.
9.
ACGL {WHT/BLU)
ENGINE WIBEHARNESS6PL (WHT/BLUI
Wire side of femaletermina s
ls there continuity?
YES Go to step 10.
NO-Repair open in the wire between the
alternator and the ECN4.I
ECM CONNECTOB A (24P)
Page 649 of 1139

Brake System Indicator Gircuit Troubleshooting
Brake system indicator does not come on
'1. Discon nect the m ultiplex contro I unit l3Pconnector
and the ABS control unit 31P connector.
2. Check for continuity between the ABS control unit
3l P connector terminal No,21 and bodyground.
ABS CONTROL UNIT 31P CONNECTOR
Wire side of female terminals
ls there continuity?
YES Repair short to body ground in the wire
between the multiplex control unit and the ABS
control unit.l
NO Go to multiplex control system
trou bleshooting lsee page 22''172).a
Brake system indicator does not go off
1. Turn the ignition switch ON {ll).
2. Release the parking brake.
Does the brake system indicatot go ofl after
several seconds?
YES The system is OK at this time.l
NO Go to step 3.
3. Check the brake fluid level.
ls the level OK?
YES Go to step 4.
NO Refill the brake fluid, and recheck.l
4. Check the ABS indicator.
Does the ABS indicator stay on?
YES Read the ABS DTC (see step 1 on page 19-32).
and do the applicable troubleshooting for the DTC
NO Go to step 5.
5. Turn the ignition switch OFF.
6. Disconnect the ABS control unit3lPconnector.
7. Connect the ABS control unit 31P connector
terminal No. 21 and body ground with a jumper
ABS CONTROL UNIT 31P CONNECTOR
(cont'd )
Wire srde of lemale lerminals
19-55
Page 650 of 1139

ABS Components
8.
9.
10.
11.
12.
13.
Brake System Indicator Gircuit Troubleshooting (cont'd)
Turn the ignititon switch ON (ll).
Check the brake system indicator.
Does the brake system indicatot go off?
YES-Replace the ABS modulator-control unit.l
NO-Go to step 10.
Turn the ignition switch OFF.
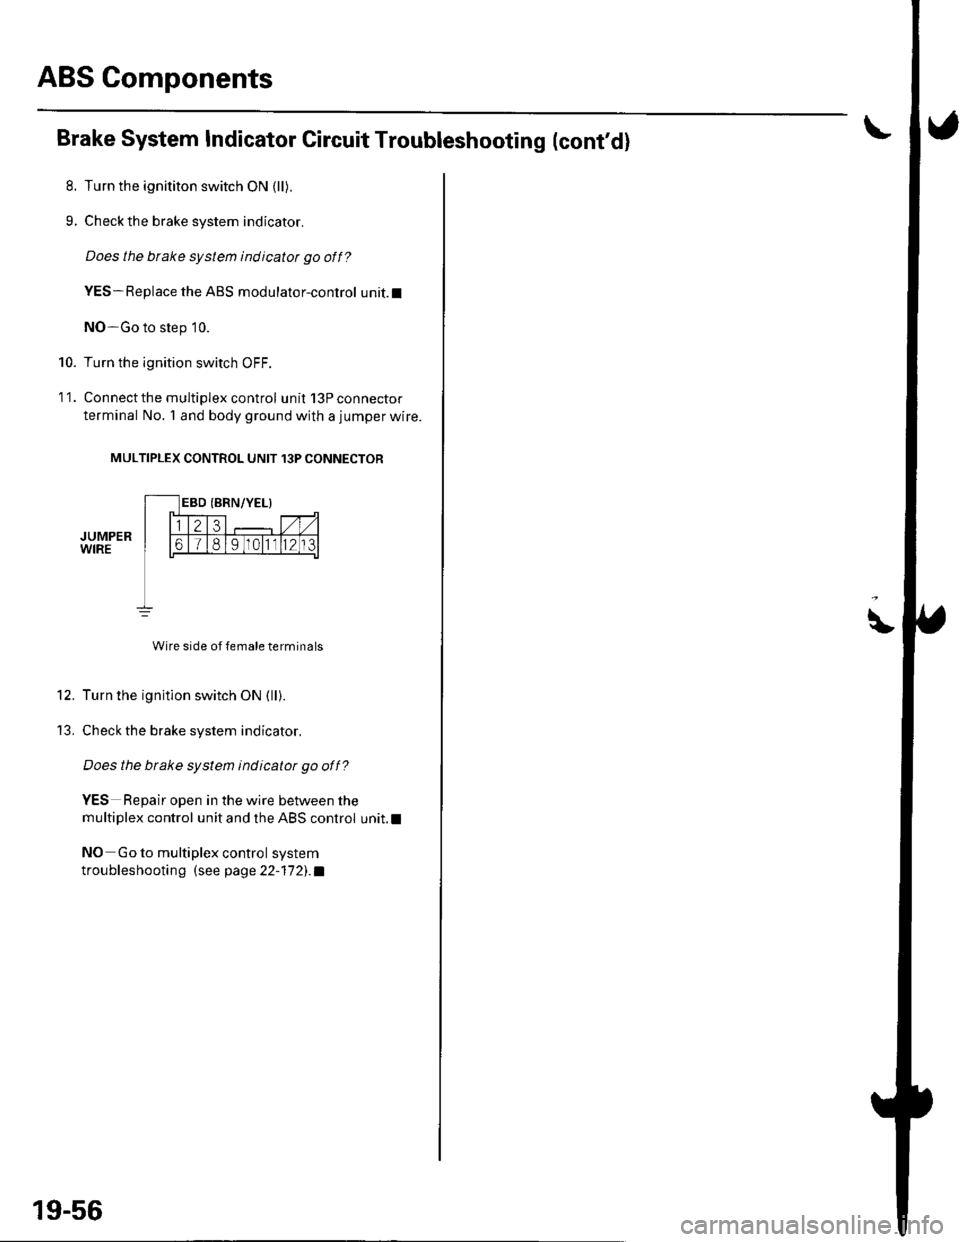
Connect the multiplex control unit 13P connector
terminal No. 'l and body ground with a jumper wire.
MULTIPLEX CONTROL UNIT 13P CONNECTOR
JUMPERWIRE
Wire side of female terminals
Turn the ignition switch ON (ll).
Check the brake system indicator.
Does the btake system indicatot go off?
YES Repair open in the wire between the
multiplex control unit and the ABS control unit.l
NO Go to multiplex control system
troubleshootin g (see page 22-17 2). a
19-56
\
Page 804 of 1139

8. Connect the No.4 terminal ofheatercontrol
connector A (14P) to body ground with a jumper
wire,
HEATER CONTROL PANEL CONNECTOR A I14P}
BLU
23456
78Ir0lx1112l3t4
JUMPER WIBE
Wire side of female terminals
Does the A/C system come on?
YES Replace the heater control panel.!
NO Refer to the multiplex control system (see
page 22-168).1
Using the Backprobe Set, connect the No. 9
terminal of under-dash fuse/relay box connector
F (12P) to body ground with a jumper wire.
UNOER.DASH FUSE/RELAY BOX CONNECTOR F {12P}
9.
25
61B g lrotll2
BLU/WHT
JUMPERWIRE
Wire side of female terminals
Does the NC system come on?
YES Go to step 10.
NO- Refer to the multiplex control system (see
page 22-168).1
NOTE: Check for multiplex codes in mode '1. Follow
the troubleshooting {or any codes found. lf no
codes are found, subsititute a known-9ood
multiplex control unit and a ECM one at a time.
Disconnect the Ay'C pressure switch 2P connector
and under-dash fuse/relay box connector F { 12P).
10.
'13.
21-33
11. Check for continuity between the No. 2 terminal of
the A,/C pressure switch 2P connector and the No. 9
terminal of under-dash fuse relav box connector
F t12Pt.
A/C PRESSURE SWITCH 2PCONNECTORWire side of female terminals
UNDER.OASH FUSE/RELAY BOX CONNECTOR F (12P)
Wire side of fenale lerrrinal'
ls there continuity?
YES Go to step 12.
NO Repair open in the wire between the
under-dash fuse/relay box and the A,,/C pressure
switch.I
Check for continuity between the No. 1 and No. 2
terminals of the A,/C pressure switch.
12.
A/C PRESSURE SWITCH
ls there continuity?
YES Repair open in the wire between the heater
control panel and the A,/C pressure switch.l
NO Go to step 13.
check for proper Ay'C system pressure.
ls the pressure within specitications?
YES Replace the AilC pressure switch.l
NO Repair the AilC pressure problem.I
Page 832 of 1139

Power WindowsComponent Location Index ..........
circuit Diagram . .. ............... .........:.::::.::::.:Master Switch Input Test ...........................Master Switch TestDriver's Window Motor Test .....................
Passenger's Window Switch lnput Test ...Passenger's Window Switch Test .............
Passenger's Window Motor Test ..............
lMaster Switch Replacement ......................
Passenger's Window SwitchReplacement
Wipers/WashersComponent Location Index .......................
Circuit DiagramRear Window Wiper Intermiftent
Control Unit Input Test ...........................Wiper/Washer SwitchTesVReplacementControl Unit Input Test ...............................Wiper Motor Test
Washer Motor TestWasher Fluid Level Switch TesV
Replacement (Canadal ..........................
Windshield Wiper Motor Replacement ....
Rear Window Wiper MotorReplacementWasher Reservoir Replacement ................
Washer Tubes Beplacement ......................
Accessory Power SocketCircuit Diagram ......... 22-149
Accessory Power Socket
TesVReplacement ................................... 22-1 49
Keyless/Power Door Lock System
Component Location Index ....................... 22-150
Circuit Diagram ......... 22-151Keyless Receiver Unit InputTest ............... 22-153
Control Unit Input Test ............................... 22-155
Door LockActuatorTest .........,.......,..,.,..... 22-158Hatch LockActuatorTest ........................... 22-159
Door Lock Knob Switch Test ...................... 22-160
Door Lock Switch Test ................................ 22-160
Transmitter Test ....... 22-161
Transmitter Programming ......................... 22-161
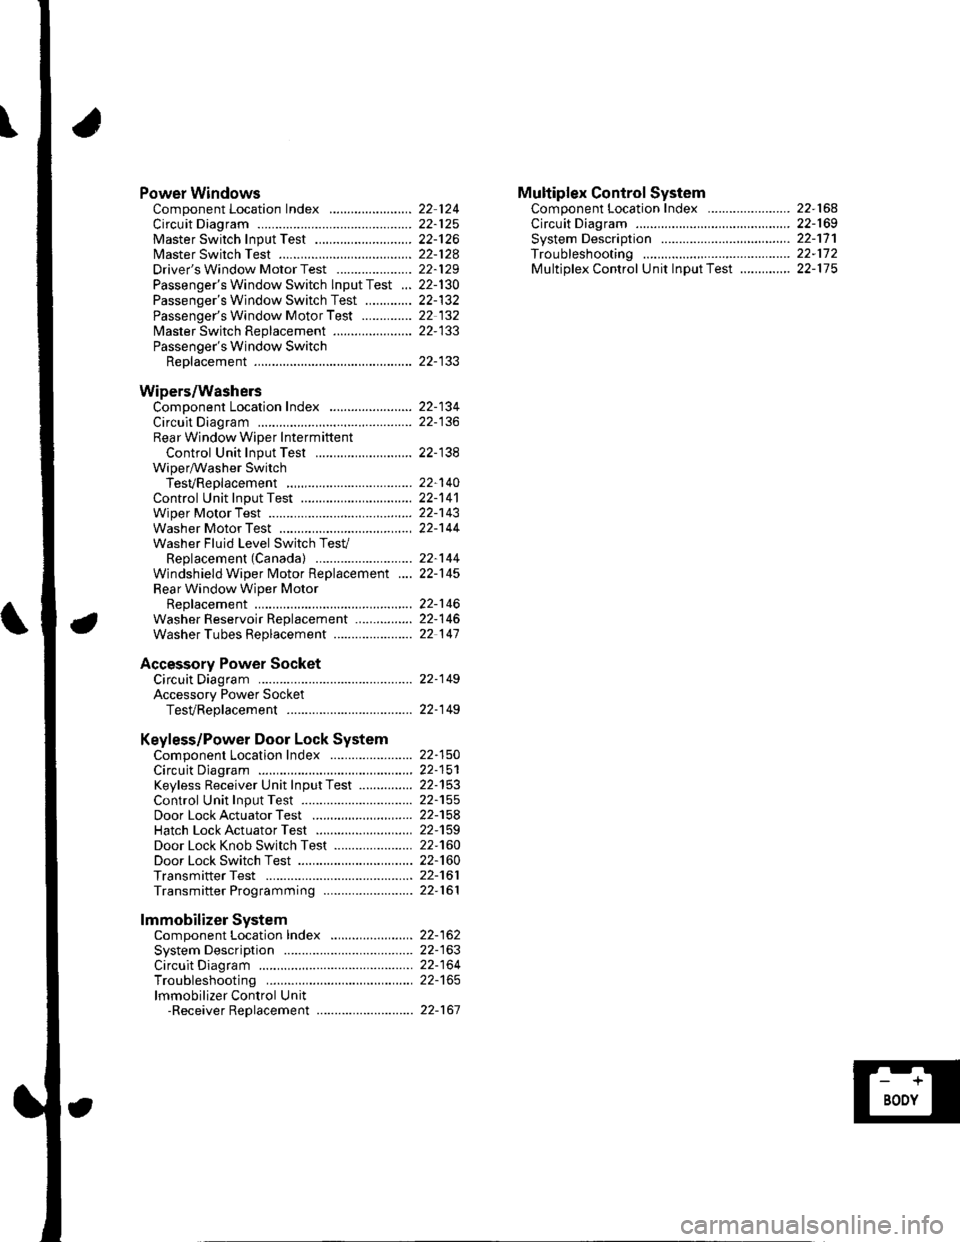
Multiplex Control SystemComponent Location Index ...........
circuit Diagram ...... ........................::.:..:.::.:
Svstem DescriDtionTroubleshootingMultiolex Control Unit InDut Test .............
22 12422-12522-12622-12822-129
22- t30
22-13222 13222-133
22-133
22-134
22-138
22-14022-14122-14322-144
22-14422-145
22-14622-14622 147
22,16422-16922-17'l22,11222-175
lmmobilizer Systemcomponent Location Index ...........
System Description ....... ............. ..:..:..:.:...
Circuit DiagramTroubleshootinglmmobilizer Control Unit-Receiver Replacement ...........................
22-16222-16322-164
22-167
Page 924 of 1139

I
5. With the connectors stilldisconnected, make these input tests at the connector'
. lf anv test indicates a problem, find and correct the cause, then recheck the system. lf all the inpul tests prove OK, go to step 6.
6.Reconnect the connectors to the under dash fuse/relaV box, and make these input tests at the appropriate connectors on the under-dash
fuse/relay box.
.lfanytestindicatesaproblem,findandcorrectthecause,thenrecheckthesystem..lfalltheinputtestsproveOK,themultiplexcontrolunitmustbefaulty.Replacetheunder'dashfuse/relaYboxassemblY
CavitvWireTest conditionTest: Desired resultPossible cquse il result is not obtained
K28LU/ORNlJnder allconditionsCheck for continuity between the K2terminal and the keyless receiverunit 5P connector No. 2 terminal:There should be continuitv.
An open in the wire
o7GRN/REDCejling light switch inmiddle position.Attach to ground:Ceiling light(s)should come on.Blown No. 3 (7.5A) fuse in the under hood
Blown bulbFaulty ceiling lightAn ooen in the wire
X8WHT/BLKUnder allconditionsAttach to ground:lgnition key light should come on.Elown No.3 (7.5A)fuse in the under hoodfuse/relay boxFaulty ignition key light (LED)
An ooen in the wire
CavitvWireTest conditionTest: Desired resultPosq!!!c sq!!ej1!.9!!!!j €d
P18REDHatch openCheck for voltage to ground:There should be 1 V or less.Poor ground (G552)
Fauhy hatch latch switchAn open inthewire
Hatch closedCheck for voltage to ground:There should be 5 v or more.Faulty hatch latch switchShortto oround
Q3GRNDriver's door openCheck for voltage to ground:There should be 1 V or less.Faulty drlver's door switchAn oDen in the wire
Driver's door closedCheck for voltage to ground:Thar. shoul.l he 5 V or more.Faulty driver's door switch
o4LT GRN/BED
RED^vHT
Passenger's doorCheck for voltage to ground:There should be 1 V or less.
' Faulty passenger's door switch' An onen inthewire
Passenger's doorcroseoCheckfor voltage to ground:There should be 5 Vor more.
. Faulty passenger's door switch. Shor o oround
X5lgnition key insertedinto the ignitionCheck for voltage to ground:There should be 1 V or less.Poor ground (G401)
Faulty ignition key switchAn ooen in the wire
lgnition key removedfrom the ignitionCheck for voltage to ground:There should be 5 V or more.Faulty ignition key switchShort to ground
Y8YEUREDDriver's door lockknob switch lockedCheck for voltage to ground:There should be 1 V or less.Poor ground {G501)Faulty driver's door lock knob switchAn ooen in the wire
Driver's door lockkn6h cwirch Inl6cke.lCheck for voltage to ground:There should be 5 V or more.Faulty driver's door lock knob switchShort to oround
22-93
Page 972 of 1139

Control Unit Input Test
l.Before testing, troubleshoot the multiplex control system lsee page 22-jj2).
Remove the dashboard lower cover,
Disconnect the under-dash fuse/relay box connectors B, G, J, X and y
NOTE: All connectors are wire side of female terminals.
UNDER-DASH FUSE/RELAY BOXCONNECTOR B I6PIUNDER.DASH FUSE/RELAY BOXCONNECTOR G {1OP)
2.
3.
UNDER-DASH FUSE/RELAY BOXCONNECTOR J {8PI
l-,1 - llTtlF_j-JF-#
141516 7l8l
WHT/BLU
\
l-,1 - l-rl€ll
lslrlzlol
\BLU/RED
UNDER.DASH FUSE/RELAY BOXCONNECTOR X I8PI
4. Inspect the connector and socket terminals to be sure they are all making good contact.
. lf the terminals are bent, loose or corroded, repairthem as necessary, and recheckthe system.. lf the terminals are OK, goto step 5.
(cont'd)
BLU/WHT
BLU/BLK
22-141
Page 973 of 1139

Wipers/Washers
Control Unit Input Test (cont'dl
5. Reconnect the connectors, and make these input tests at the connector.
.lfanytestindicatesaproblem,findandcorrectthecause,thenrecheckthesystem.
.lfalltheinputtestsproveOK,themultiplexcontrol unit must be faulty. Replace the under-dash fuse/relay box
assembly.
CavityWireTest conditionTest: Desired resultPossible cause if result is not obtained
J4BLKU nder all
conditlons
Check for voltage to ground: . Poor ground (G501)
There should be 1V or less. . AnoDeninthewire
Y6BLKU nder all
conditions
Check for voltage to ground: . Poor ground (G502)
There should be 1 V or less. . An oDen in the wire
BIWHTiBLUlgnition switch ON
{ll) and washer
switch ON
Check for voltage to ground:
There should be battery
vortage.
Blown No. 20 (20A) fuse in the
under-dash fuse/relay box
Faulty wiper/washer switch
An open in the wire
E'0BLU/REDlgnition switch ON
(ll) and wiper
switch OFF (wiper
motor stopped)
Check for voltage to ground:
There should be battery
voltage.
Blown No. 20 (20A) fuse in the
under-dash fuse/relay box
Faulty wiper/washer switch
Faulty windshield wiper motor
An open in the wire
G7BLUA/VHTlgnition switch ON(ll) and wipers in
park position
Check for voltage to ground:
There should be battery
voltage.
Blown No.20 (20A)fuse in the
under-dash fuse/relay box
Faulty windshield wiper motor
An ooen in the wire
x1BLU/BLKlgnition switch ON(ll) and wiper
switch in INT
Check for voltage to ground:
There should be battery
voltage.
Blown No.20 (20A)fuse in the
under-dash fuse/relay box
Faulty wiper/washer switch
An oDen in the wire
\J
\J
L
22-142
J